


Easy Built in Cabinet
6 Materials
$125
3 Days
Easy
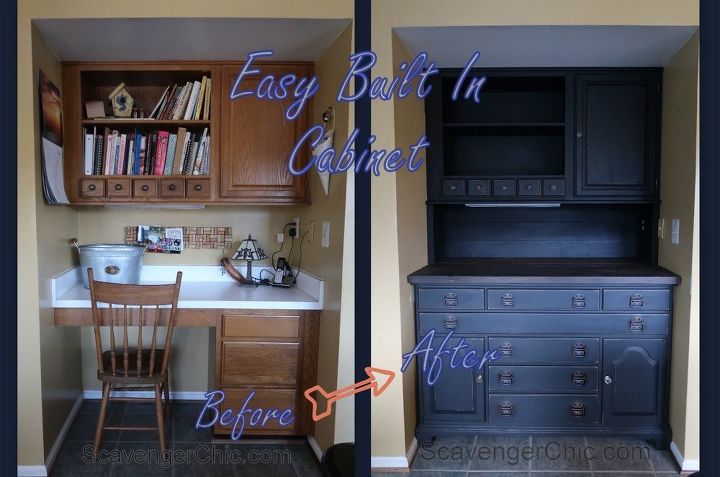
We’ve lived in our current house 25 years and this is still the original builder grade oak cabinet complete with laminate countertop. We stained the cabinets and we got new countertops in the rest of the kitchen years ago but the plan was always to replace this desk with something else.
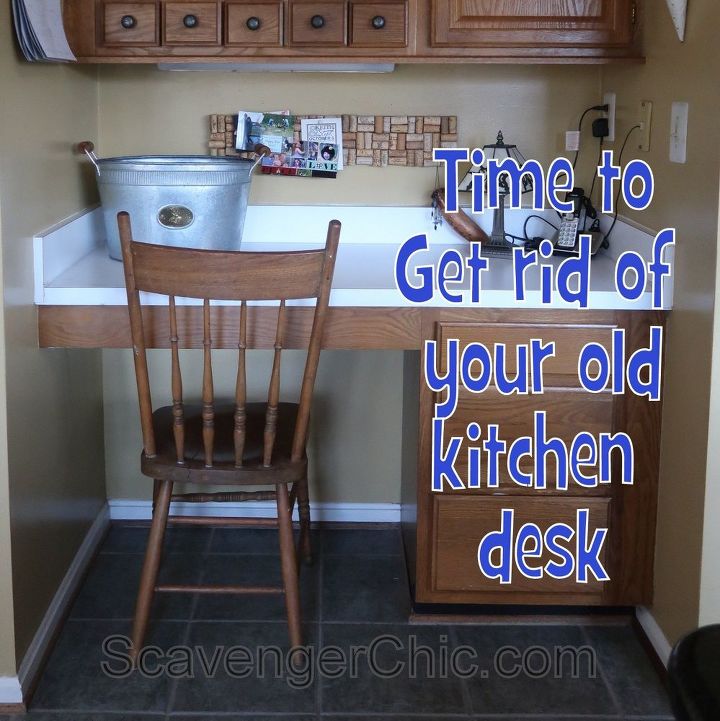
Normally, this space is a catchall, for the mail and papers that don’t have a home (I cleaned it up for the photo). For parties, this is where the drinks are served. It’s where the list for the grocery store is written, but I have never once sat down and used this space as a desk.
Years ago we set out to find some kind of cabinet that we could use in place of the desk. We absolutely fell in love with an antique apothecary cabinet , but the cost, $900, and the lack of usable storage had us continuing the search.
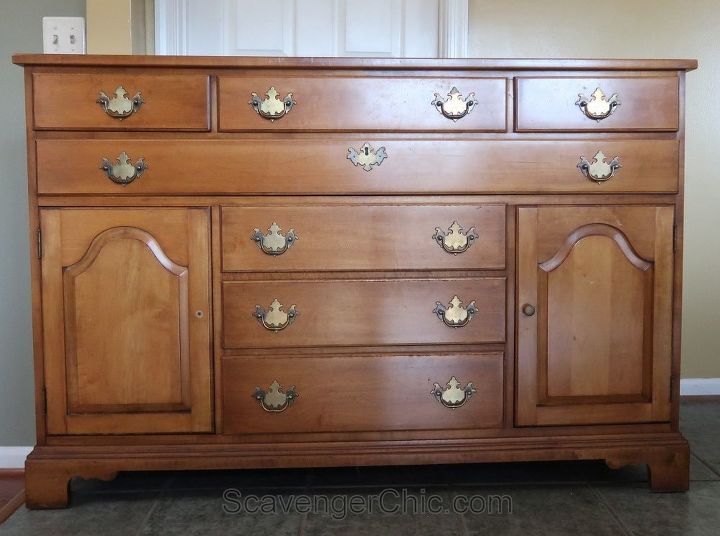
So I was over the moon ecstatic when this buffet came up on an online auction site. It was absolutely perfect. I knew I had to have it.
I didn’t want to start bidding too early so to jack up the price but I jumped in the bidding in the last 5 minutes. When I began to bid, the price was just $20. Five minutes later, I had won the bid but I ended up paying $86. Stop bidding against me, do you know how perfect this piece is?
I would have preferred the $20, but this buffet was mine. I will not be outbid! Just look at all that storage!
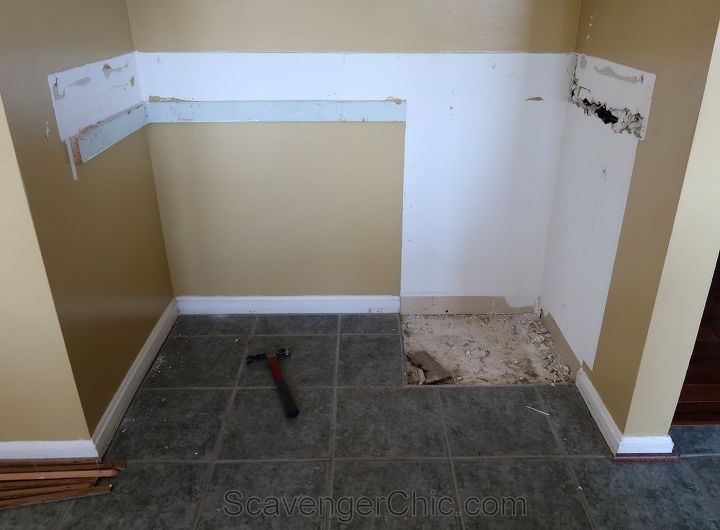
First up, removing all the quarter round and trim from around the baseboards and tearing out the old desk, countertop and ledger board.
Slide the new buffet into place. See how perfect this is.
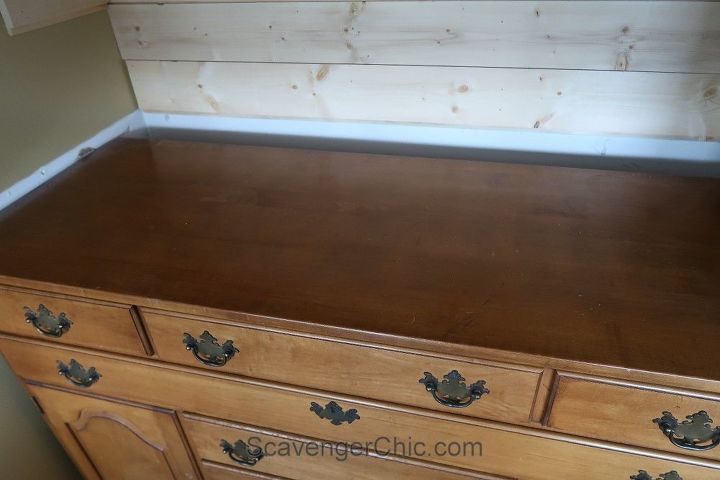
I’m leaving the buffet pulled out from the wall about 5 inches. The current top is really slick and shiny and I want a wider, more substantial counter top. A new countertop will also cover the gap in the back.
Home Depot is now selling shiplap and it makes a great backing for my new built in cabinet.
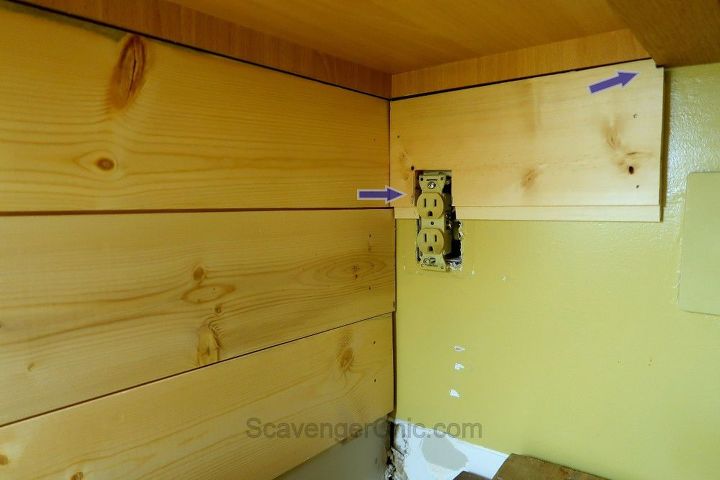
Cut around any corners or outlets to fit.
While I did three layers of shiplap in the back, I’m only doing one on the sides until I get my counter top installed. Use finish nails to attach.
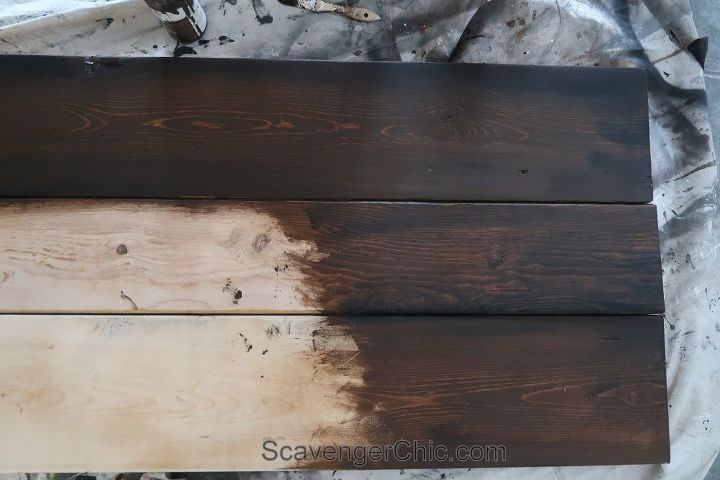
For the countertop I went to the garage where I have a stash of wood I stole from my son’s backyard after his house makeover. Two 2×10’s and one 1×8 make the perfect width for my new countertop.
Cut to fit, sand and use pocket hole screws and glue to attach.
This is just one coat of vintage wax painted on and the excess wiped off.
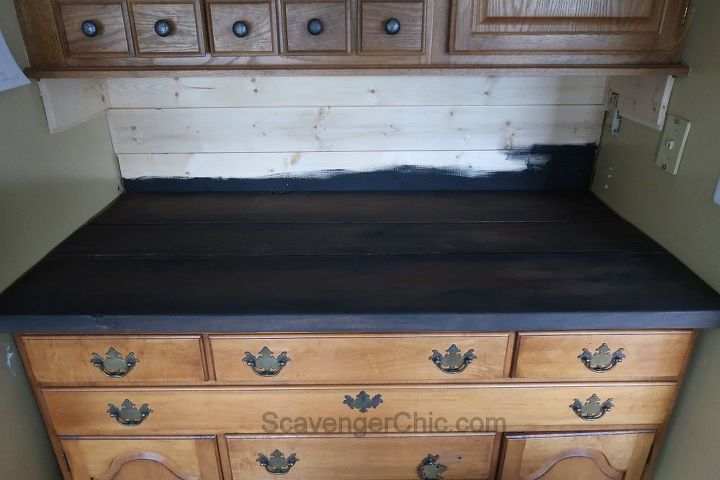
Before I installed the new wood counter, I painted the lower edge of the shiplap with black chalk paint so I didn’t have to worry about getting any paint on the new counter top.
Finish the counter top with a final coat of clear wax. Use finish nails to attach to the buffet.
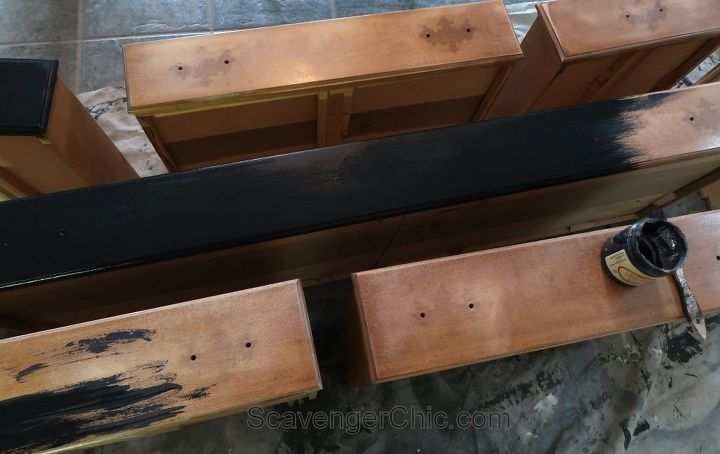
All the cabinetry was finished with black chalk paint, slightly sanded edges then finished with a clear wax. If your wood is super slick, hit it with a sander before painting.
This was a 2 part post only because I had lots of pictures. Hope you get a chance to stop by to see all the finishes and lots more step by step pictures.
Resources for this project:
See all materials


Any price and availability information displayed on [relevant Amazon Site(s), as applicable] at the time of purchase will apply to the purchase of this product.
Hometalk may collect a small share of sales from the links on this page.More info

Want more details about this and other DIY projects? Check out my blog post!
Comments
Join the conversation
2 of 37 comments
-
Great job! I love the look!
-
Perfect. Don't get no better than that. Nice job kid.
10 attagirl's!


Frequently asked questions
Have a question about this project?
Lovely! Why did they put desks in kitchens? Never made sense to me. Your new hutch looks divine!