


Fluted Side Table

We all know that doweling on furniture pieces is all the rage. I have wanted a piece like this for myself for a long time. Finally, I decided to make one for myself.
Follow along with me and I will show you have I created this simple look.
Materials needed
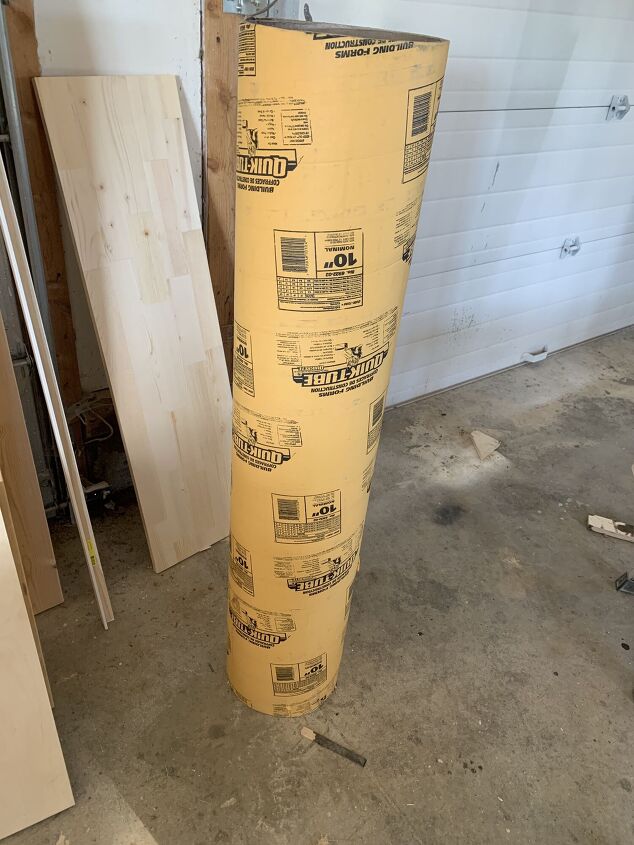
- 10” round cardboard form for concrete. I found mine at Home Depot.
- 1.5” half round dowels. I used maple. If you want a cheaper option you could use Fir.
- construciton adhesive
- spray paint , white
- MDF 1”
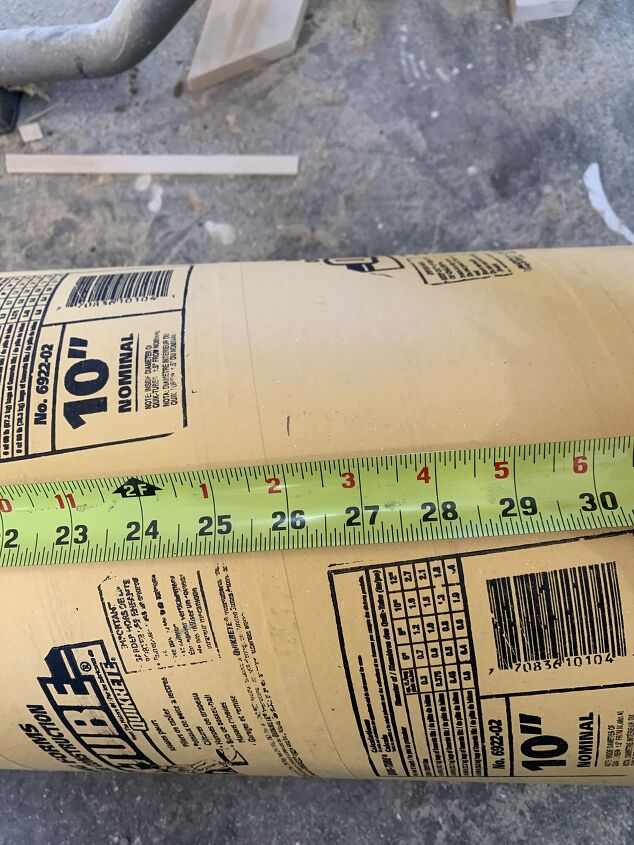
I wanted the base to be 26” tall so I marked it and used my table saw to cut it to length. Use the method you feel most comfortable using to cut this. A jig saw or circular saw would work as well.
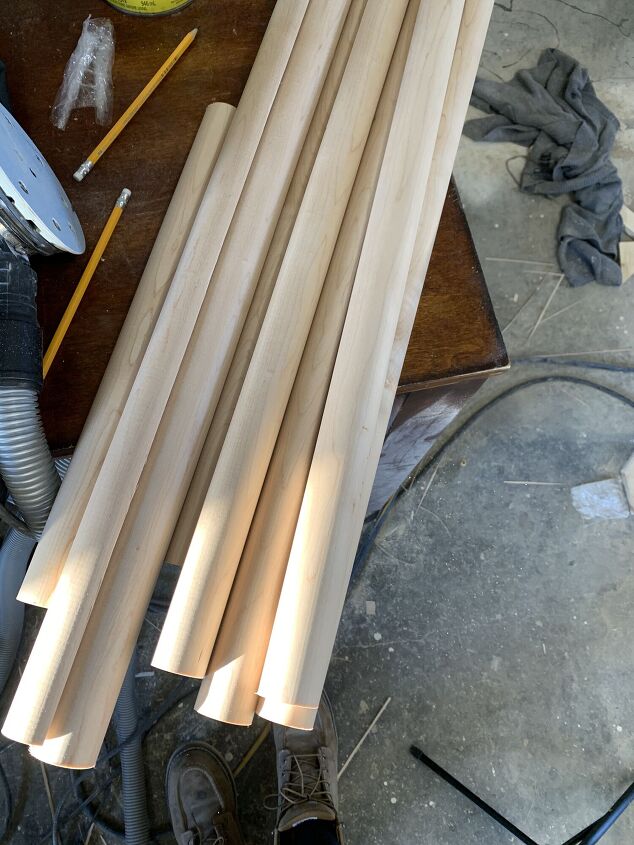
I then cut my half rounds at 26.5”. I decided to cut the pieces a bit longer than the cardboard tubing. I did this because it wouldn’t matter so much if the cut I made on the tube wasn’t perfectly straight.
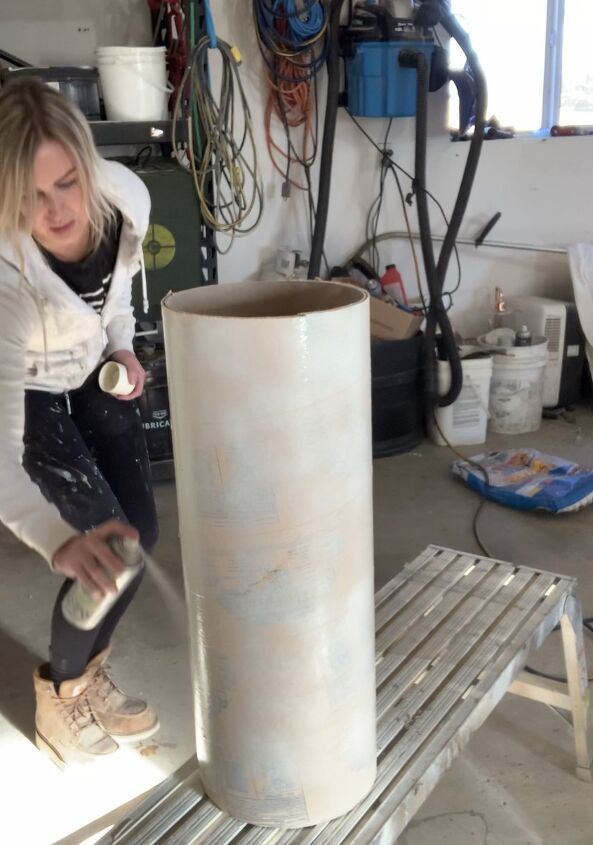
I decided to spray paint the base before I glued on the doweling. This way if there was so small spacing between the dowels when they were out on you wouldn’t see orange in between them.
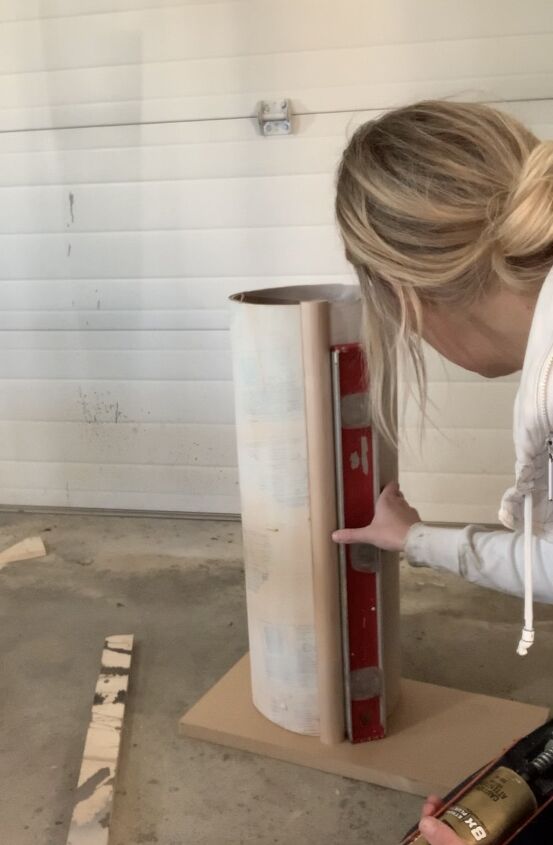
I applied PL construction adhesive to the back of the doweling and pressed each dowel on. Make sure to check for level, especially for the first dowel. If you don’t you will more then likely get to the last one and realize how crooked they all are.

Continue doing this until the entire tube is covered.
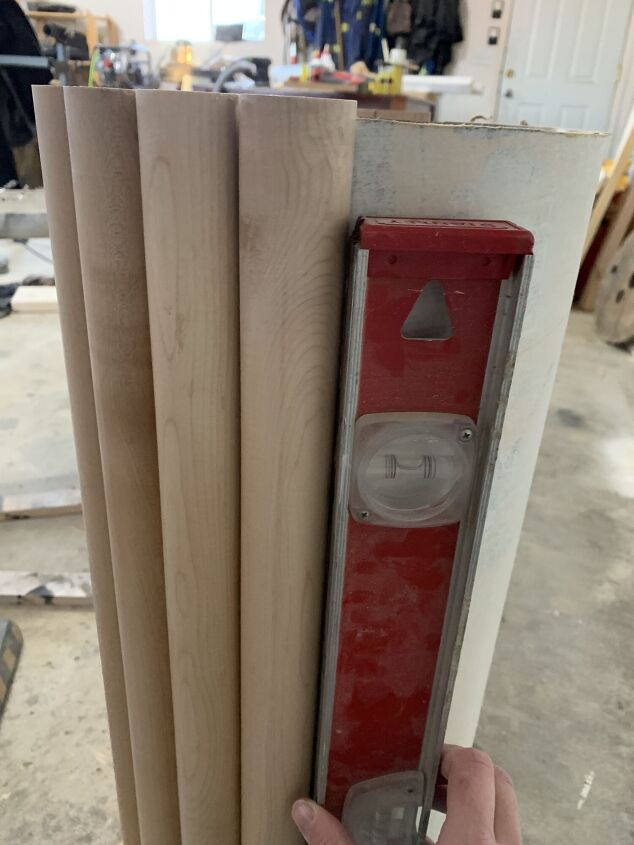
*Be sure to check for level once in a while .

I cut out a 16” circle in the MDF using a jigsaw.
I primed it and then spray painted the top with a flat white. After that was dry I used a spray clear coat to help protect it.
I used A fast cure CA glue to adhere the top to the base.
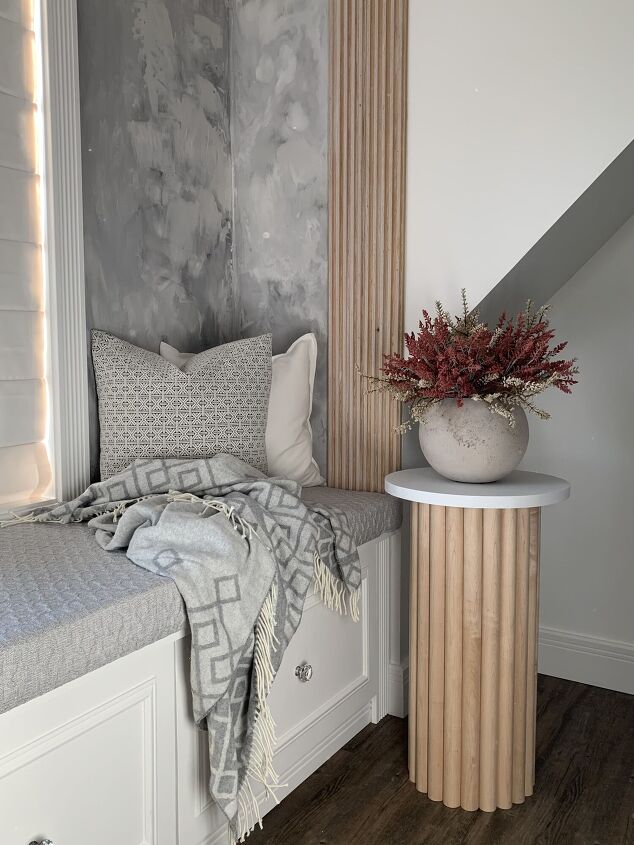
And there you have it. Your very own fluted side table.
I absolutely love the look of this. It is perfect for holding my cup of coffee in the mornings while I relax on my window bench before I start my day.
Be sure to follow along with me on here, as well as Instagram where you can check out my highlights for a full video on how I did this.
cannot wait for our next DIY together.
X
Amber
Resources for this project:
See all materials


Comments
Join the conversation
-
Love it. Great job.👍️♥️
-
Very nice, did you get lucky that they met at the end? Or did you have play with the spacing?


Frequently asked questions
Have a question about this project?
We’re did you buy the dowels?