


Folding Coat Hook

I've been wanting to make this folding coat hook design for a while, it's an easy build and in it's simplest form can be completed in a day.These two are made using pine but you could a range of wood and perhaps it would last longer than pine.
I have a YouTube video showing the process as well as a Skillshare class showing how to carve this particular font in much more detail where only bench or straight chisels are needed.
Tools :
- Wood Saw (general crosscut, ryoba, table saw, bandsaw etc.)
- Coping Saw
- Drill (hand or power)
- 1cm Drill Bit
- Square, Pencil and Rule
- Clamps
- Hand Plane or Sandpaper (or Sander, thicknesser etc.)
- Optional Bench chisels to carve the letters and a mallet

Here's a basic plan on how to make the hook and the measurements I used, it's a rather simple design and can be made with limited tools.
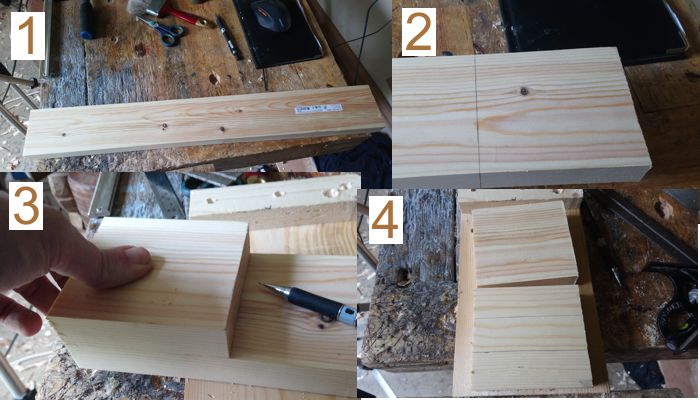
I took the piece of wood and cut two pieces off to the dimensions shown in the plans.
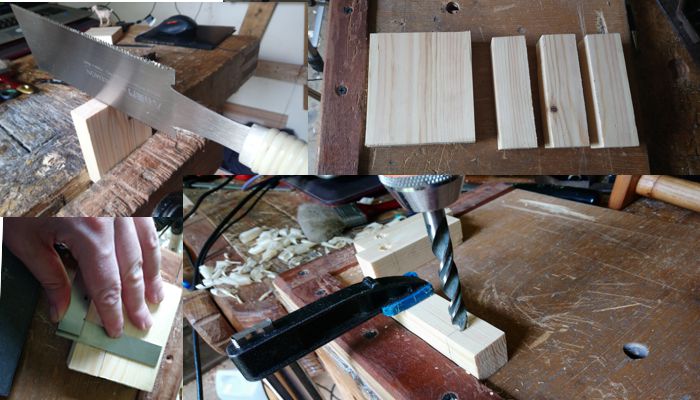
I held the three pieces next to each other and lined them up, then I used a square to draw across all three. I followed that line around to the inside faces of each piece.
Taking the 1cm bit I drilled a hole all the way through the centre of the middle piece (the hook) and about 1.5cm deep into each of the outside pieces. I then cut a piece of wood 5cm long and 1.5cm X 1.5cm (just above the desired 1cm diameter) and shaved it down a little with my knife before hitting it through the dowel plate. You dont need a dowel plate you could just whittle the piece down or buy a piece of pre made dowel from a hardware store.
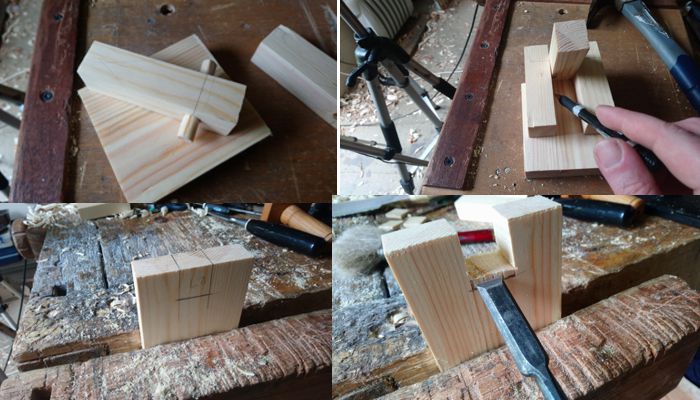
The dowel should go through the central piece with and equal amount protruding from each side, it doesn't need to be glued in but you can glue it if you want. It might be a good idea also to sand around the ends a bit so they don't catch onto the other holes.
You can then insert the dowel into the two neighbouring pieces. After that I laid these pieces on top of the other piece of wood and pointed the hook upwards so I could get a pencil in there to mark the position of the space that needed to be cut out. This cut out will allow the hook to not only bend out but will determine at what angle the hook stops. So when doing this piece, consider what angle you want the hook at before cutting.
I cut down this piece with a saw and then cut the piece out with a coping saw. I cleaned it up with a chisel though that's not necessary as it wont really be seen.
For the glue up I clamped the pieces together tightly at the hook joint and applied glue to the other two pieces to be glued to the back board. I left the hook partially up during the glue up to stop any glue getting on the hook.

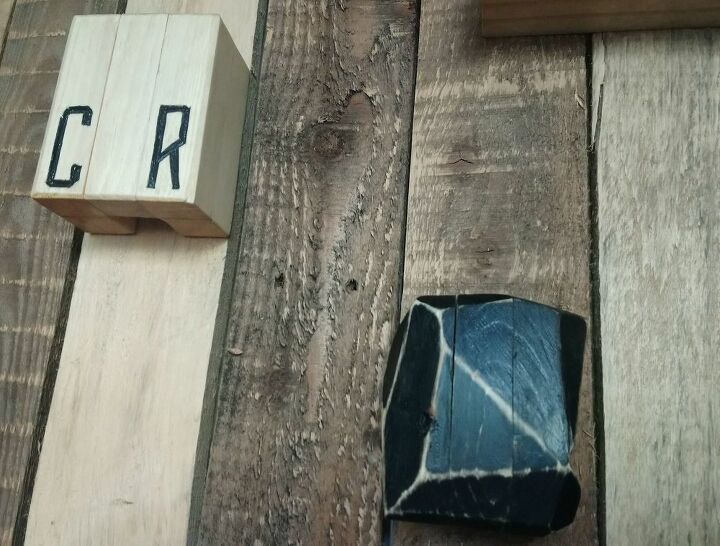
I then decided to carve my initials with this particular font that requires no gouges or curved chisels. I have a Skillshare class showing how to carve this font with ordinary bench chisels that you may already have or that are cheap to purchase. You can have a look at the class here - How to Carve Letters into Wood
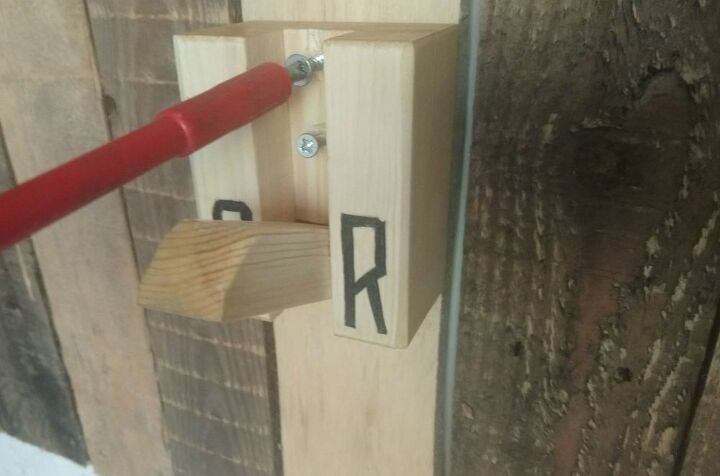
I attached the hook to a wooden wall with two screws. One screw might work but then it would give the hook the ability to swing and twist and maybe not be solid enough.
I made an additional hook too, with a slightly different design. You could really add your own kind of flair and colours and even extra items to this if you wished. Its a very customisable kind of build.
Thank you very much for having a look at this tutorial, I appreciate it.


Frequently asked questions
Have a question about this project?