


How to Build A Bookcase to Fit Your Space -HandmadeFurniture
8 Materials
$40.00
8 Hours
Medium
Back in January, while the rest of the world was cleaning, organizing, and purging. Closets, cabinets, kid's rooms, and basements. I had one thing on my mind- to get rid of all the scrap lumber hiding throughout the house.
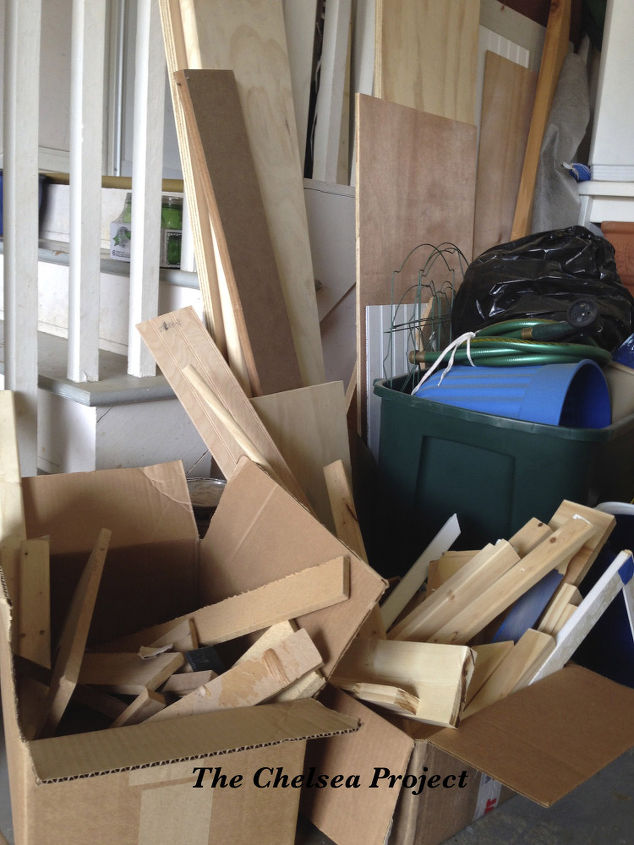
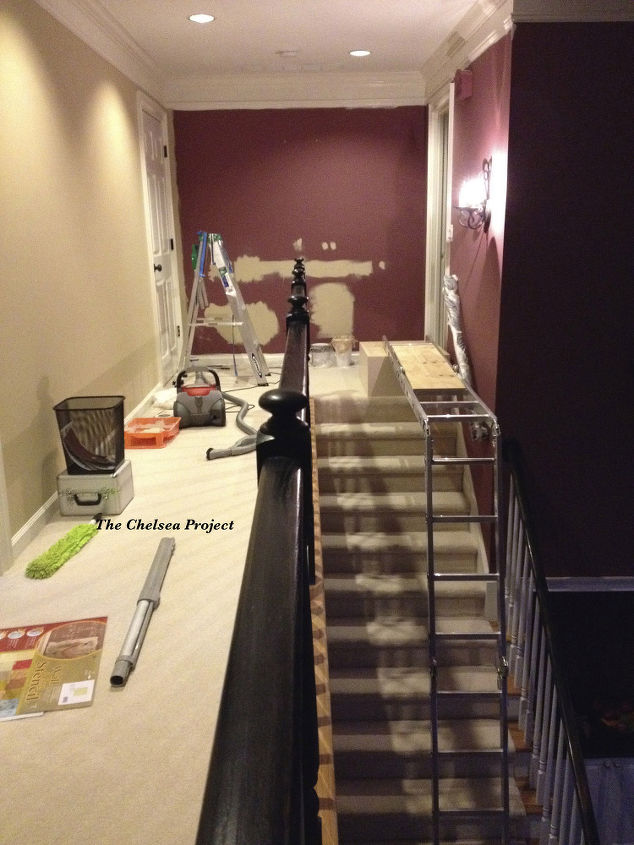
Honestly, I don't know where it came from, but over the years it had multiplied like guppies...behind doors, under beds, and in tight-fitting crevices. Nearly every room had a little stash, and now I was determined that it had to go. ALL of it, and the sooner the better. One day, during my lumber purging rant I noticed that the hall I was painting was empty, and well...DULL. And, after it was painted, it was STILL going to be empty, and well...DULL.
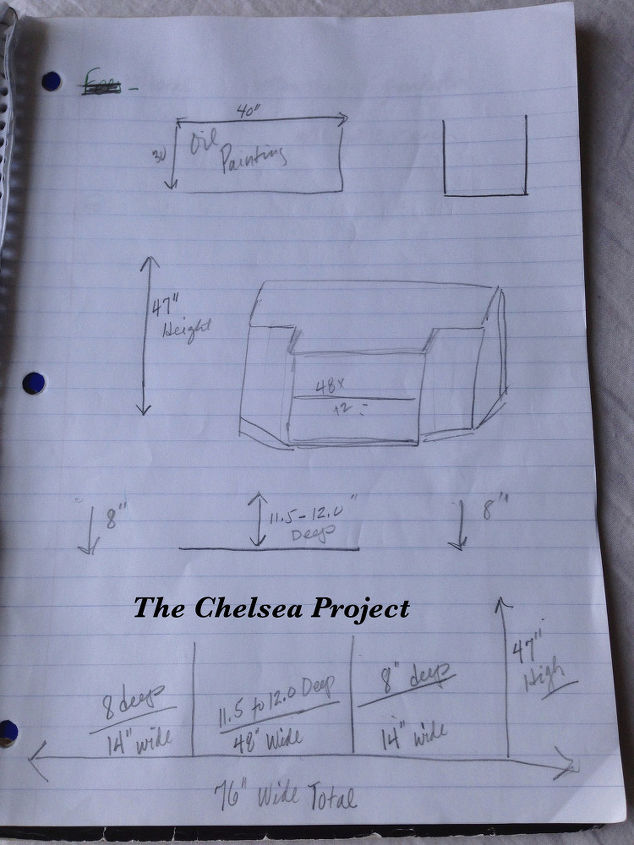
The idea that this spot and all of that scrap lumber was a marriage made in heaven sounded crazy, but it didn't stop me from hoping I could work this out. That somehow where this particular mess was concerned I'd become the decorating cupid of the century. So, I got busy making one of my fancy, high-tech drawings to determine what size would fit and if I had enough lumber.
Turns out I had enough to build several bookcases, but huuuum...that's another story. Since it was so cold, I just figured out what size the pieces needed to be, hauled the lumber to the home improvement center, and came home with the pieces ready to assemble. I did have to make multiple trips, but that's ok.
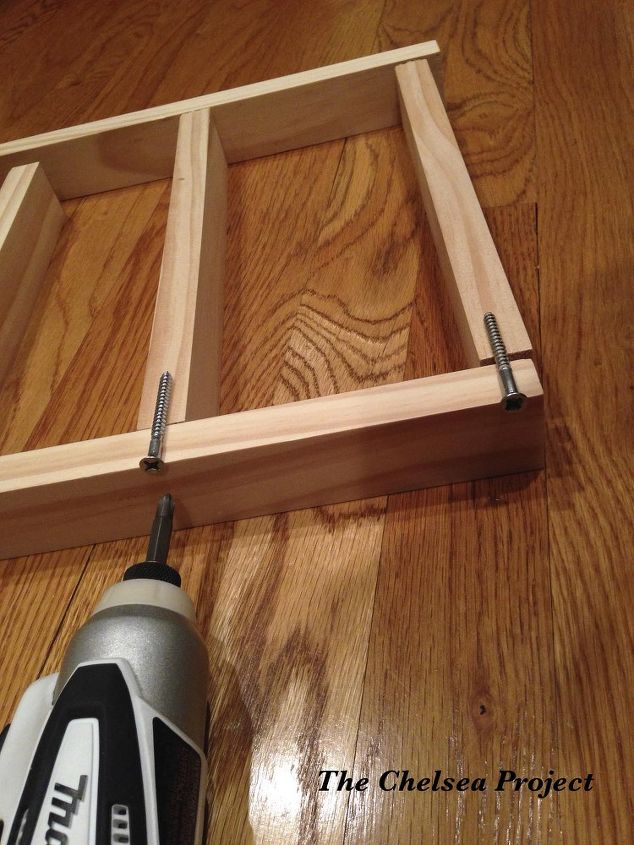
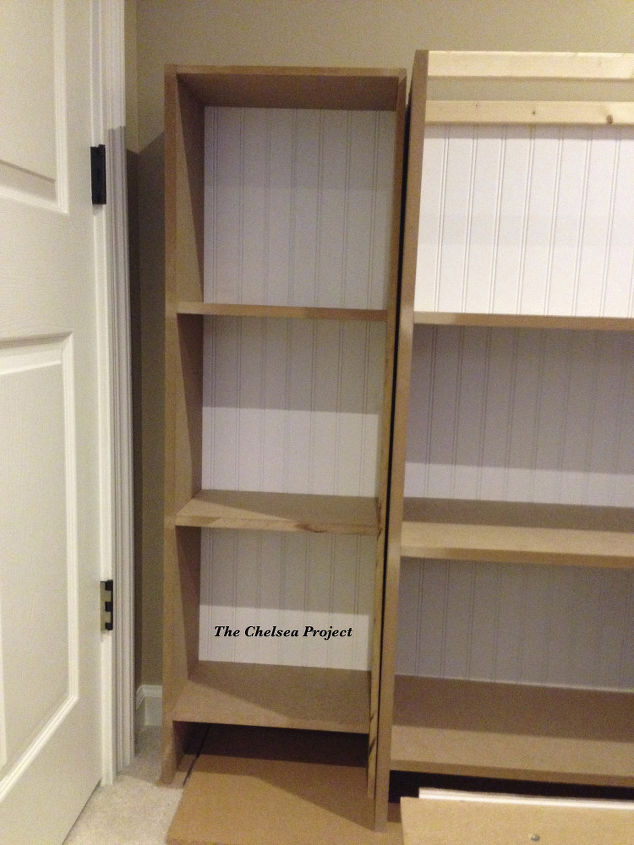
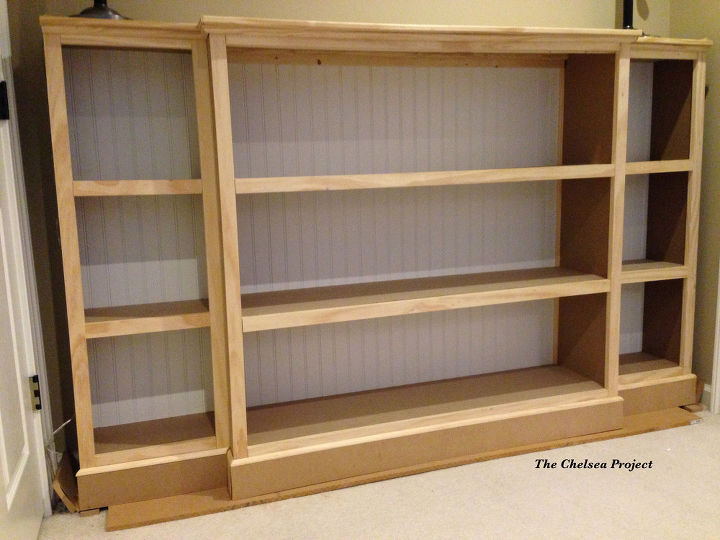
The center piece was 48 inches wide by 12 inches deep with the sides and three shelves, like the simulated picture above. This frame had no top or molding. The left and right sections were made the exact same way only smaller at 14 inches wide and 8 inches deep. Each frame could have been finished as an individual bookcase, but were attached to make one single frame in this project.
After the sections were attached, a solid top was cut and screwed into each of the sections. Then three different kinds of molding (all total 86.75 linear feet) were glued...yes glued...into place.
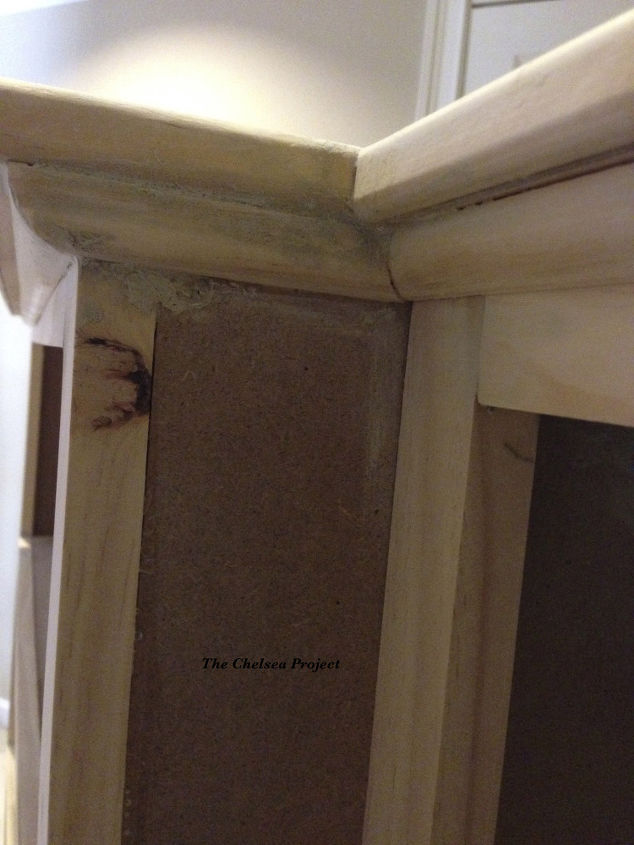
After the glue was completely dry, wood filler was added to every nook and cranny. The picture below shows how the unit looks before the wood filler is applied and features a sample spot with the gritty wood filler. It looks rough, but it surely does do the job.
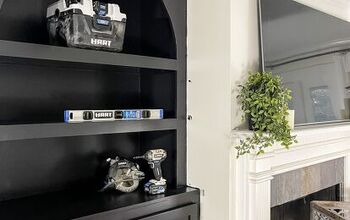
After the wood filler is dry, it is sanded smooth and painted. I gave the entire piece (except for the back panels) a coat of Zinsser 123 and two coats of diluted Behr semi-gloss. The back pieces were painted using a dark gray chalk paint. And, after allowing for a two-week cure time, accessories were added. Here's how it looks now.
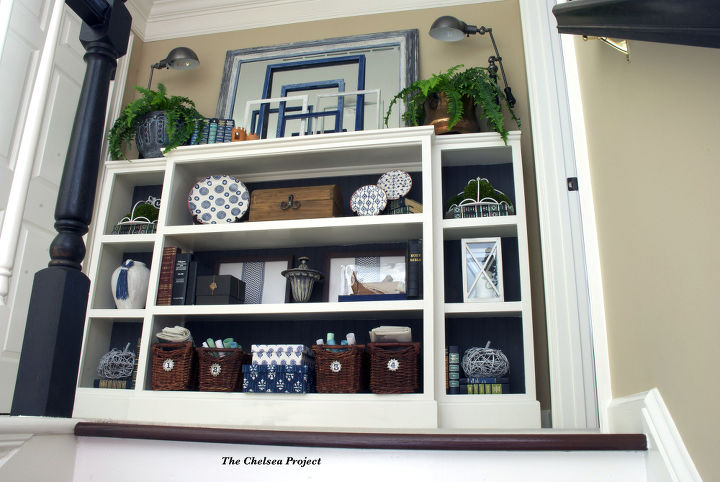
Not bad for a pile of scrap lumber, left over paint, and upcycled accessories.
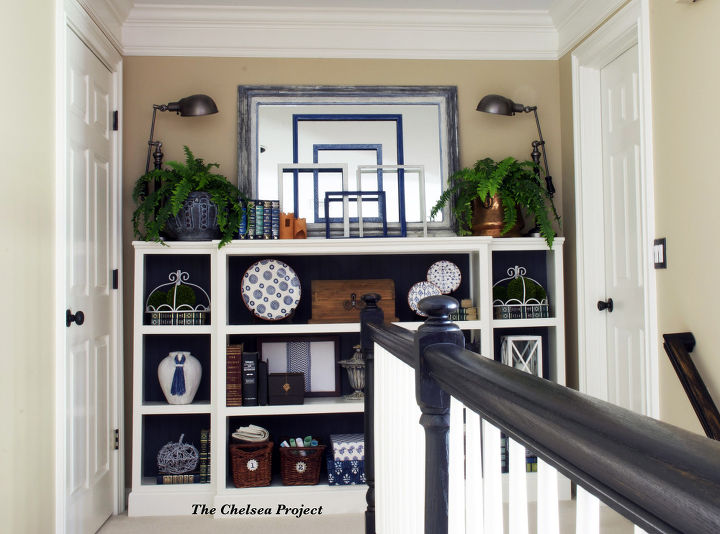
And it fits the space beautifully. I'm so thrilled. :-) A closer look at the plans and the inspiration behind this piece are available at http://thechelseaprojectblog.wordpress.com or via direct URL at the link below It's always a pleasure to have you stop in for a visit.

Want more details about this and other DIY projects? Check out my blog post!
Comments
Join the conversation
2 of 209 comments
-
What a fantastic job you did! Amazing! Kudos to you! I am going to try making one for a large wall that I have in my family room. Thank you for the inspiratio. Love it!
-
So beautiful love love it. I wish I had a space like that to do the same thing. Blessings


Frequently asked questions
Have a question about this project?
Can you come help me do one??? Lol. This is awesome.
I see the floor is carpeted ( or at least it looks like it ) Did you install over the carpet or bring the carpet up to the front edge of the bookcase?
I love the look of the old fashioned built ins in homes. I have done several(or should i say a carpenter). Curious why you did not build it all the way to the side walls and anchor it in. Just a nook of dust collection to clean?