


How to Make a Barn Wood Coat Rack

Follow these simple steps to make a barn wood coat rack for your home. I recently gave our front entryway a makeover. Updating our traditional foyer to a modern farmhouse style. And I just LOVE the outcome of our new space!!
For more simple and budget-friendly DIY project ideas, be sure to follow us on HomeTalk and visit our blog!
The first thing I did was change the classic demi round table and replaced it with a cozy and casual bench. Then the mirror that hung above that traditional table was also swapped out with something a bit more fun…a row of hooks!
I searched for the perfect coat rack for the foyer makeover but nothing seemed just right. So I figured why not make one! I had already made a farmhouse coat rack for my son Jake’s room so I knew it would be a super easy DIY. But I wanted to do something a little different this time.
Instead of creating the look of barn wood with different stain colors, I thought it would be great to use an actual piece of reclaimed wood.
Where Do I Buy Barn Wood?
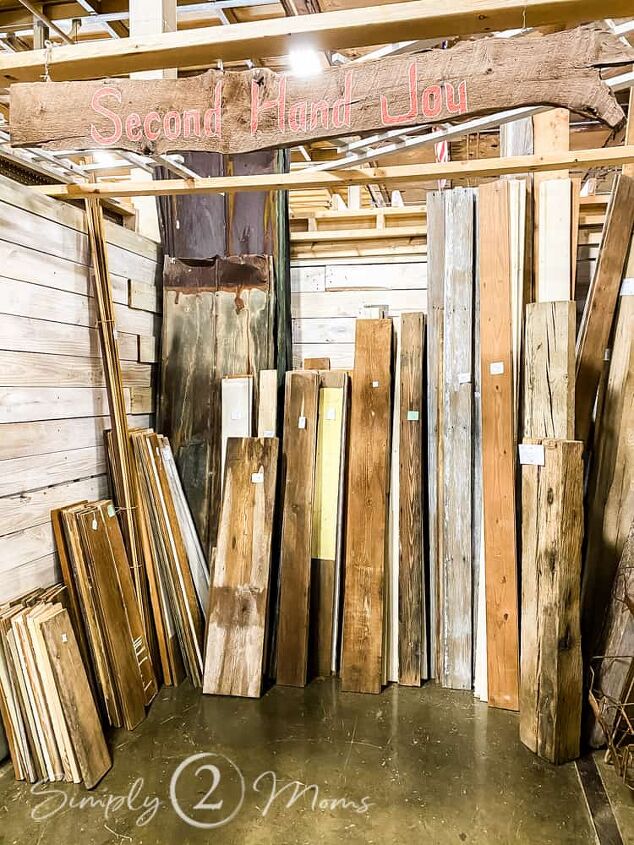
You can find reclaimed barn wood at salvage yards, reclaimed wood lumber yards, demolition sites, Facebook marketplace, other local online selling sites, or even antique stores.
I found my barn wood at our local antique store for only $8!!! Well worth the price to just walk in and pick out a piece of reclaimed wood for my project without having to pull apart pallets and remove nails. Also, I was able to get the exact size I wanted in both length and width. The piece of barn wood I used is 75″ long by 7 1/2″ wide.
What Hooks Should I Use on a Barn Wood Coat Rack?
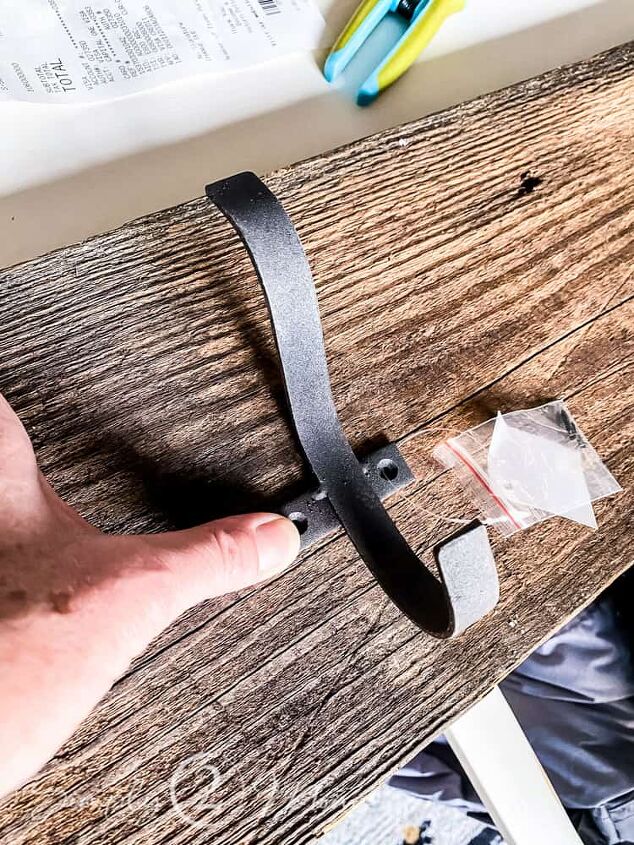
I wanted black metal farmhouse-style hooks for my coat rack but it was a little hard to find a style I loved in the correct size. Because of the width of the reclaimed wood, I needed hooks that were a bit longer.
I had ordered a few options from Amazon but they weren’t quite right.
Finally, I found an affordable option at Hobby Lobby and when I held them against the barn wood the hooks were the perfect shape and size!
Let’s Make a Barn Wood Coat Rack
1. Measure and Mark Spacing for Hooks

The first thing I did was lay out all the metal hooks on my reclaimed barn wood. This helped me visualize the spacing and how many hooks I wanted to install for my coat rack.
Although I had bought 7 hooks I decided to only use 5 of them. The spacing between each hook and on both ends of the board looked best with only 5 hooks.
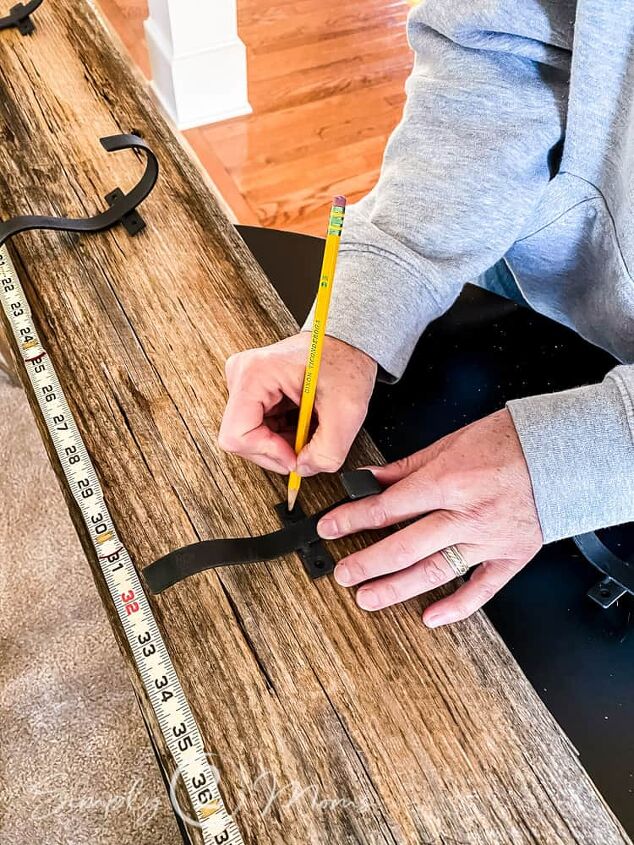
After measuring the distance I wanted between each hook I used a pencil to mark the screw holes for the hooks. It would have been easier to just install the hooks on the board at this point but I like to make things more difficult.
No just kidding…I wanted to try to hide the big screws (or anchors if I couldn’t find a stud) that would secure the coat rack to the wall behind the hooks if possible. So hanging the reclaimed barn wood to the wall before securing the hooks to the board was the way to go for this project.
2. Predrill Holes in Barn Wood
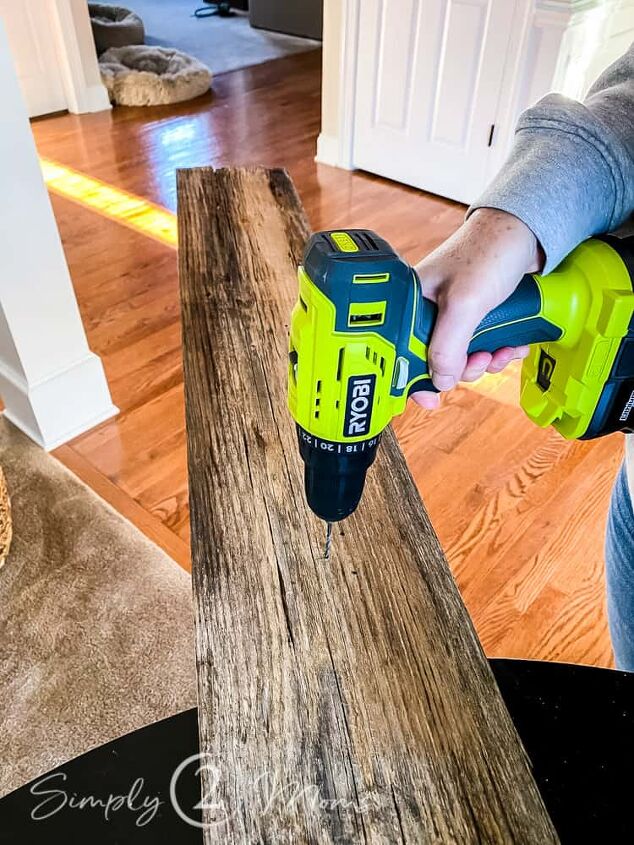
Once the barn wood was marked for the hooks I then predrilled holes for the long screws that I would be using to attach the coat rack to the wall. This was especially important to prevent splitting since the wood was old and already worn in areas.
3. Attach Reclaimed Barn Wood to Wall
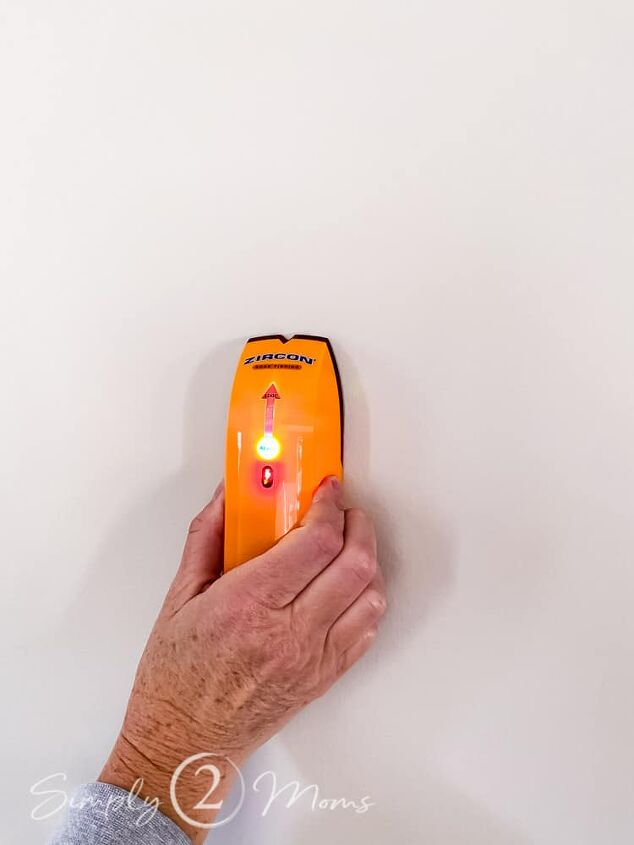
Do you have a stud finder? Handy little tool isn’t it? Using my stud finder I was able to attach the barn wood to the wall with long screws into a stud for a more secure hold.
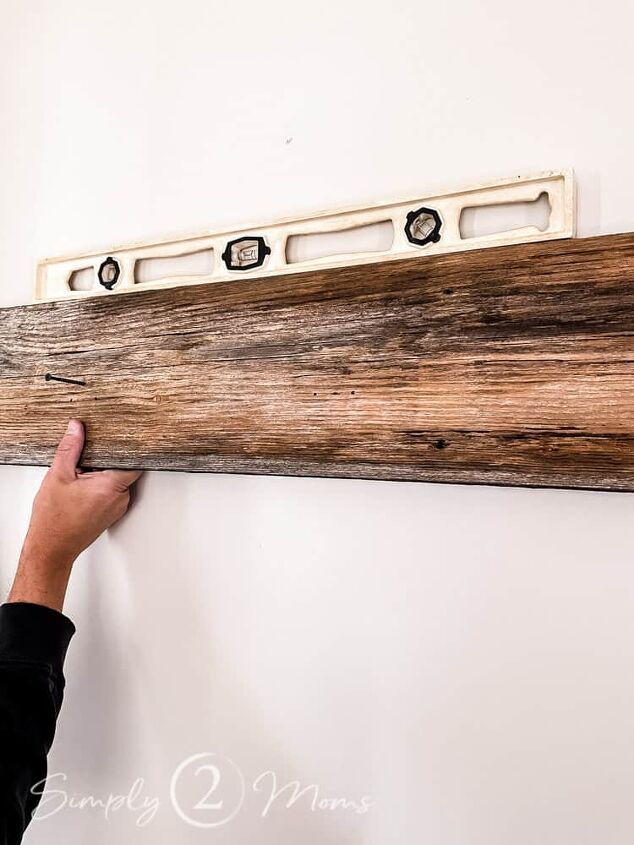
Once I located a stud Chris helped me hang the barn wood since it was pretty heavy and long. Too big for one person to do on their own.
We used a level to be sure the reclaimed wood was straight on the wall.
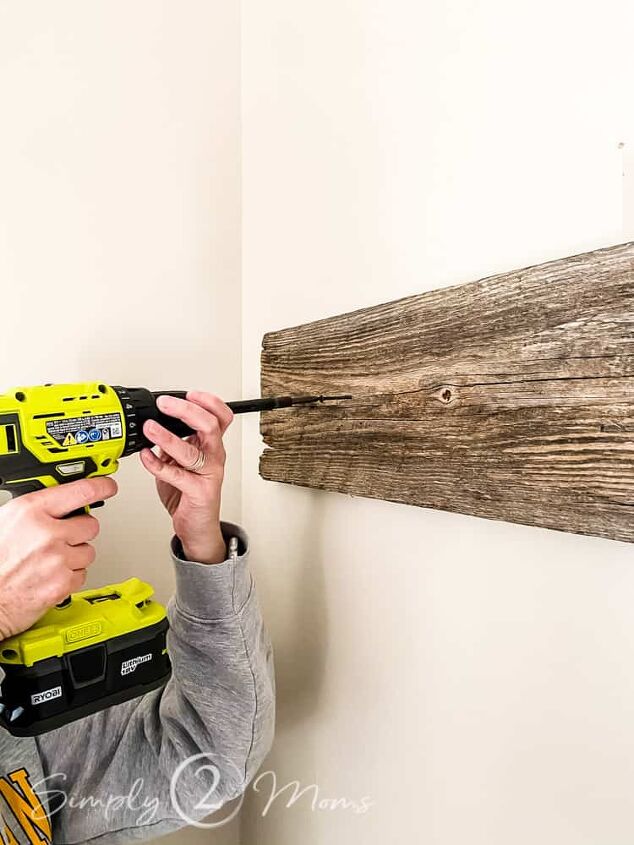
I secured the reclaimed barn wood to the front entryway wall with my power drill/driver making sure I went through the barn wood and into a stud behind the drywall. Having the right tools made this project so easy to do.
4. Fasten Metal Hooks to Reclaimed Wood
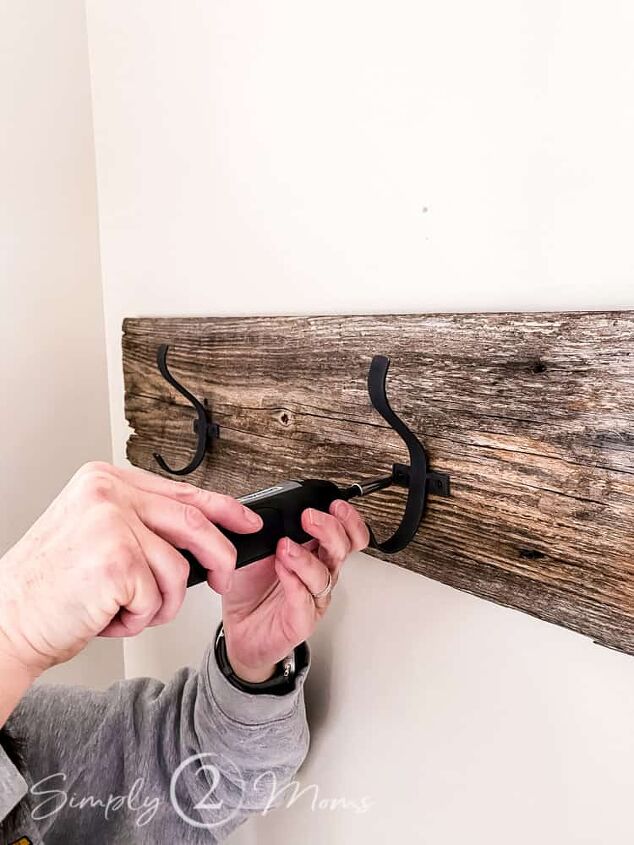
After I had the long barn wood piece securely attached to the wall I was able to install the metal hooks in the spots that I had previously marked. Using my cordless screwdriver made super quick work of fastening the 5 hooks to the reclaimed wood creating a row of hooks.
How I Styled My DIY Barn Wood Coat Rack
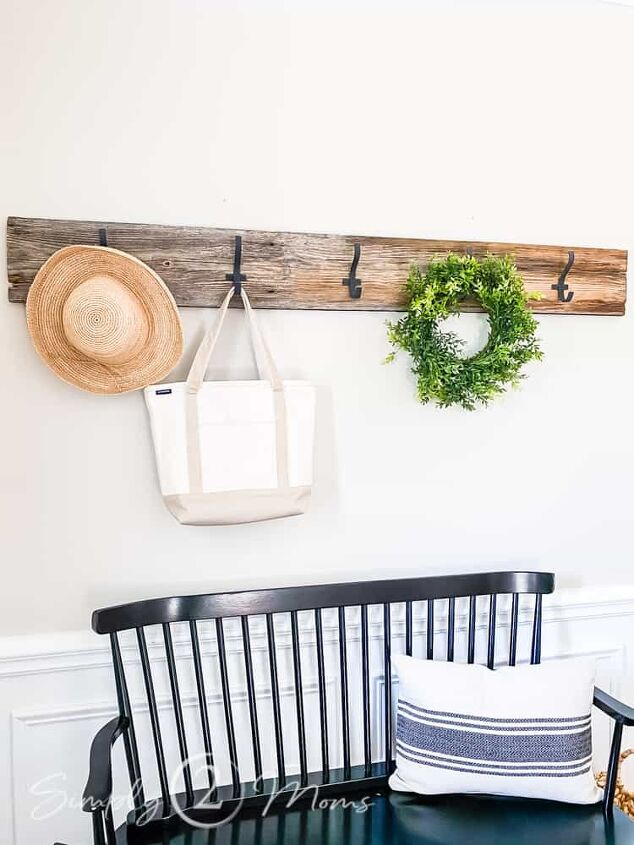
I just love how my DIY barn wood coat rack transformed my foyer from traditional to cozy & casual. Since it’s almost summer I styled my row of hooks with a cute straw hat and canvas tote bag. And because you always need greenery in every space I hung a small wreath on another hook.
Want to see the rest of my front entryway makeover reveal? Head to the blog check it out!
If you have any questions or suggestions leave a comment!


Frequently asked questions
Have a question about this project?