


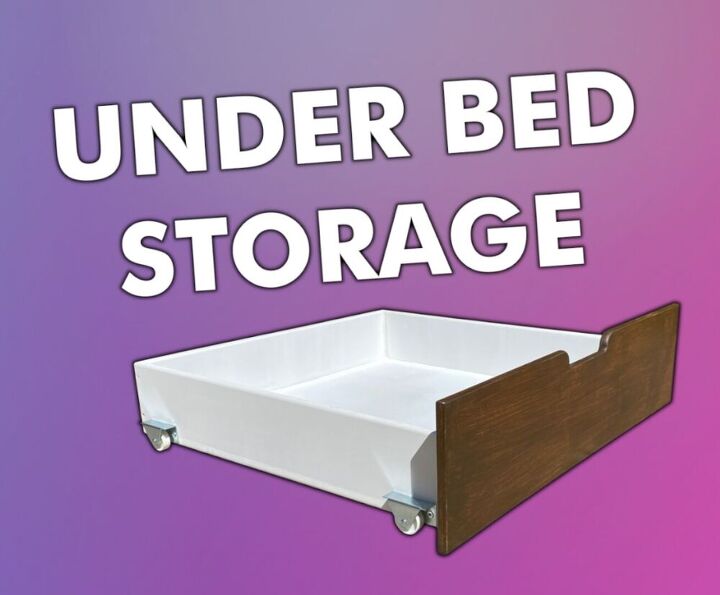
How To Make Under Bed Drawers
Here is how to make some DIY drawers for under your bed! I went with really simple construction for these under bed drawers with wheels. I hope it inspires you to make some for yourself. class="step-title fs20">Full How To
If you if you would like to watch my how to video for this project, here it is :) Measure Your Bed Space
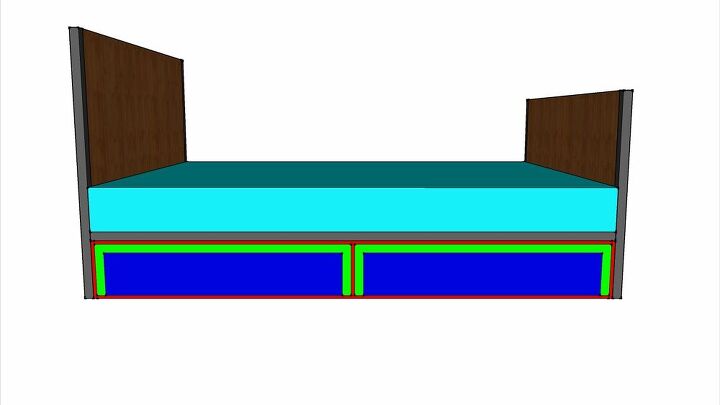
Before you make any cuts you'll first need to measure the space under your bed. This is so you can determine how big your drawers need to be. Measure the height from the floor to underneath the bed rail. Also measure the space between the headboard and foot board legs. This will give you the area you have to work with.You will need to allow a clearance gap for the drawers so I went with a 12mm gap on the left and right as well as on the top (in red). Because the wheels need some clearance too, I allowed a space of 10mm on the bottom as well as a 12mm space in the middle to allow clearance between the 2 drawers (in red).This will leave you with 2 areas (in green). These are how big your drawer fronts will be. We can now work backward to figure out the size of the drawers. I allowed a 30mm space left and right and 30mm from the top too. This leaves an area (in blue) that represents the Width and the Height of the draw body itself.The last measurement to get is how deep the drawers need to be. If you have a double bed, you may want to have drawers on both sides so make sure you account for 2 drawers deep.Cut The Pieces
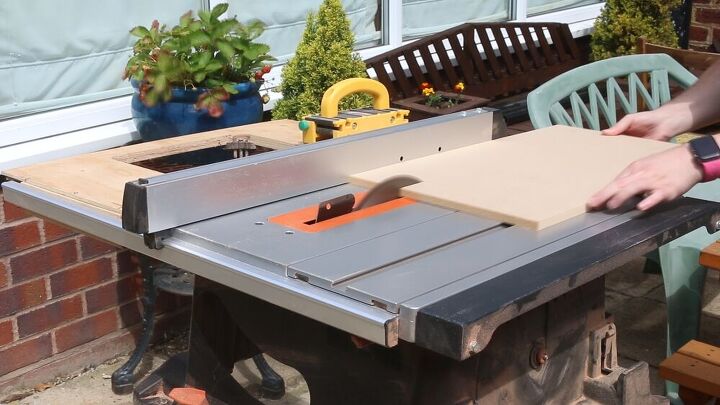
With the measurements sorted its time to cut all the parts you need. To cut the 12mm MDF to width I used my table saw. If you don't have a table saw you could use a circular saw and a straight edge or even ask your local DIY store if they have a cutting service. They will ask for a cutting list so make sure you have a clear one for them to follow.The pieces can then be cut to length at the mitre saw. Again, this could be done with a handsaw if you don't have a mitre saw.Pieces You Need
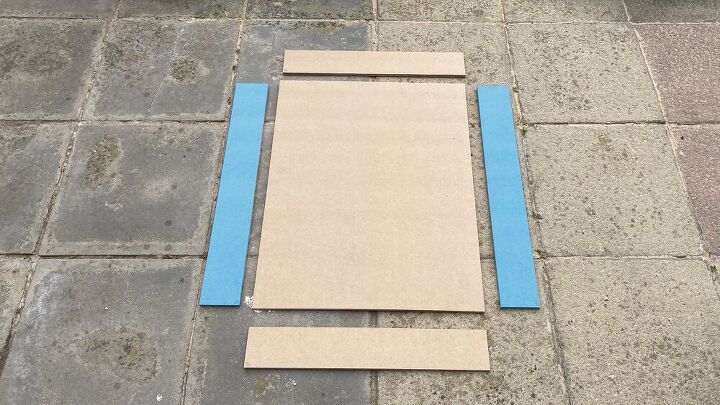
For each drawer you will need a bottom (the full size of the drawer) 2 sides for the front and back (in blue)Pieces You Need
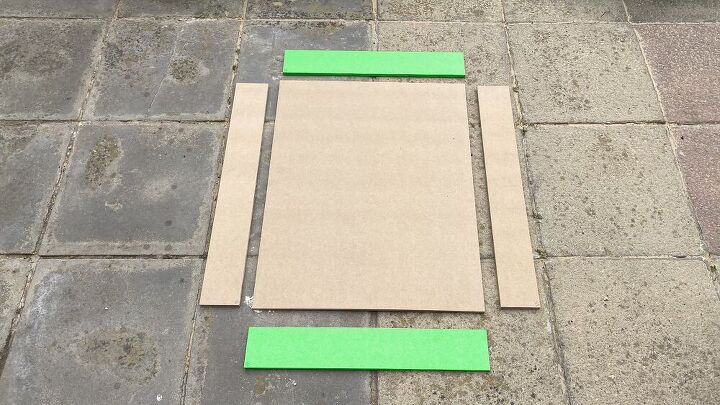
and 2 sides for the left and right (in green) as well as a drawer front.The Layout
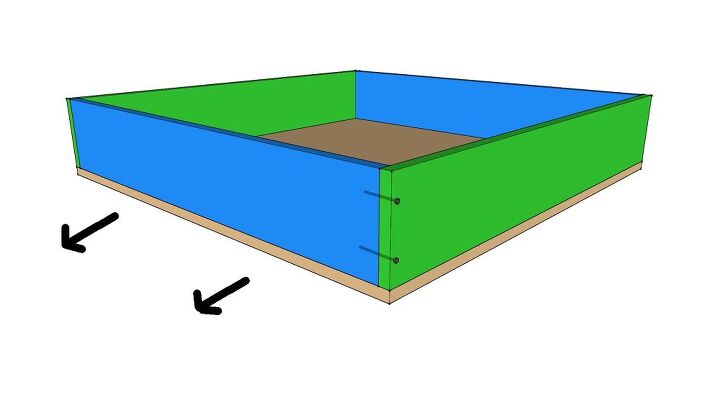
The layout for the construction is much better if you have the front and back side pieces (in blue) sit inside of the left and right side pieces (in green). This way, when you're pulling on the drawer, you're much less likely to weaken the joint over time because you're pulling sideways on the screws rather than pulling them directly out of the holes.Construct The Drawer Body
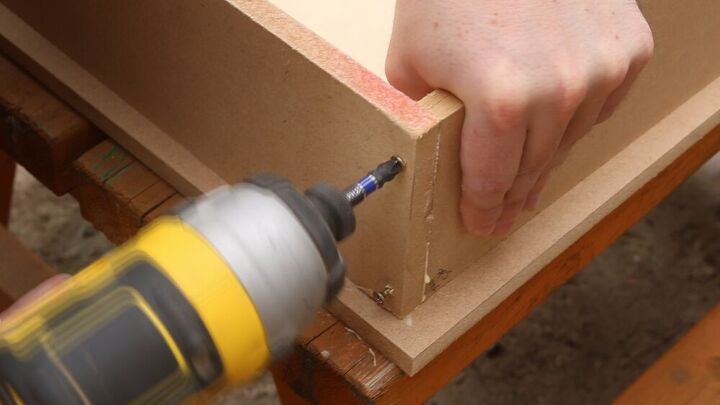
To fit the pieces together, sit a front and side piece on the base to the drawer. Make sure they're flush together then drill 2 thin pilot holes through the side piece and into the edge of the front piece. Apply some wood glue and then secure the pieces together with 2 screws. Do the same for the other 4 corners so you have an outer frame put together.Construct The Drawer Body
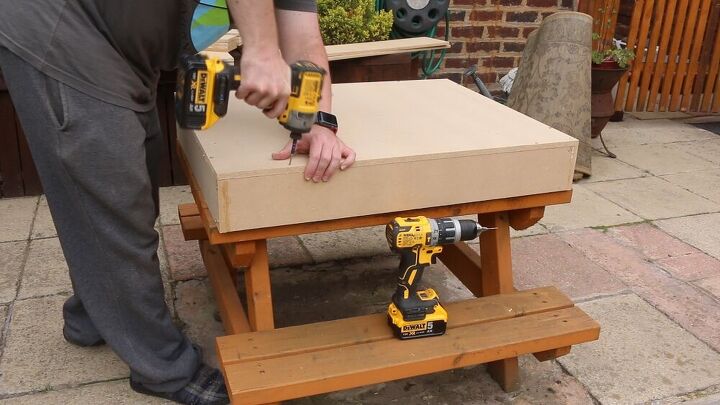
You can now flip it over and secure the bottom to the drawer in place. This time apply the wood glue and make sure the bottom is flush all the way around. Drill pilot holes and secure with screws. I used 2 screws on each of the 4 sides. Now you have the drawer body together you could leave it like this but its much better to increase the strength of the joints with wooden dowels.Add Dowels
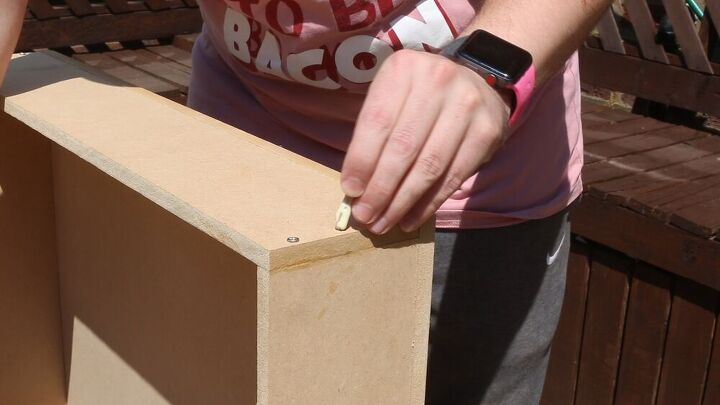
Because we're using 6mm wooden dowels, use a 6mm drill bit to drill a hole in between the 2 screws that are already in place in each corner. Add some wood glue to the wooden dowel, fit it into the hole and then hammer it flush to the surface.At this stage you can make sure all the screws are tightened slightly below the surface too. Do the same for the bottom of the drawer too. I added 2 wooden dowels to each of the 4 sides.Clean Up The MDF
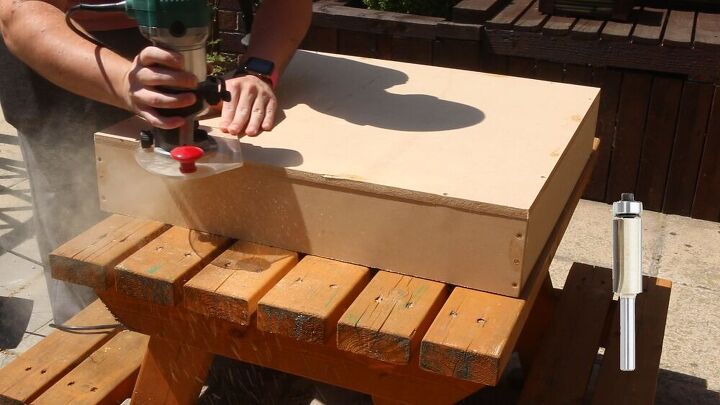
Now its time to clean up the drawers a little. I first used a flush trim bit in the router to flush up the bottom to match the sides. This really could be done by sanding too though. I then used a round over bit in the router to remove all the sharp edges, again, sanding could be used instead but it would just take longer.Drawer Pulls
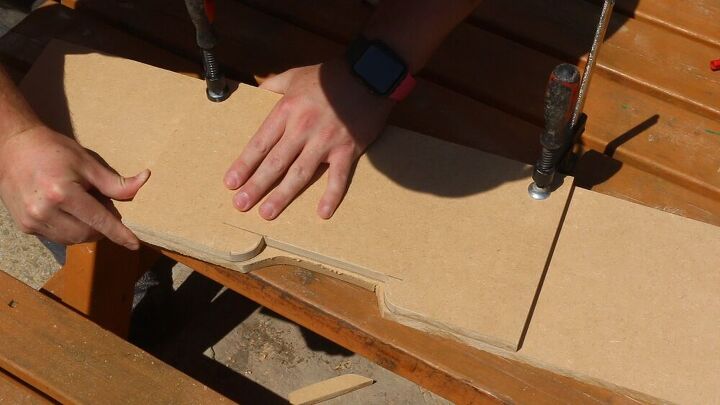
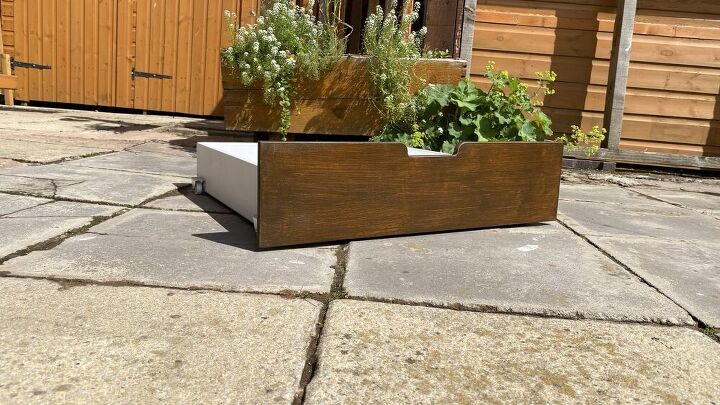
For the drawers I wanted to cut out some drawer pulls. You may want to add drawer handles onto yours though. I used the bandsaw to cut out a template, you could use a jigsaw to do this instead though. I then used that template, centred on the drawer front to mark up the drawer pulls. A jigsaw helps to remove the bulk material but you could use it to make the cut entirely.I opted to use the flush trim router bit again. This time it followed the template which I clamped in place, giving me an exact cut that I can repeat on the other drawer fronts. The roundover bit removes the sharp edges but again, sanding by hand would work too.Paint

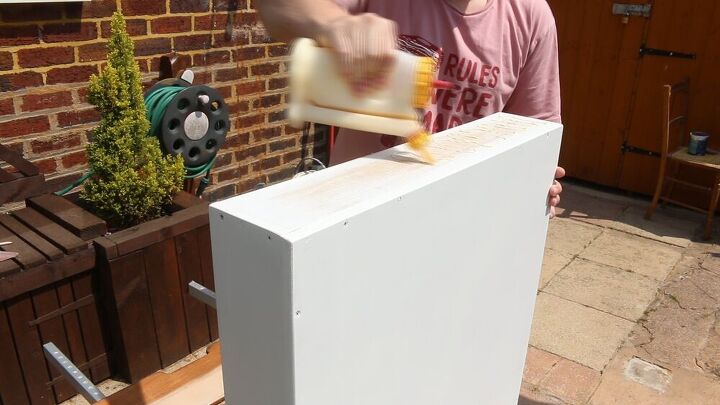
Now its time for paint. Take my advice an don't waste your money on MDF sealer. It never works as good as the label suggest so I recommend using Egg Shell wood paint instead. It works great on MDF. I applied 1 coat with a foam roller, let it dry fully, gave it a light sanding by hand and then applied a second coat. You can go with any colour you like for this.For the drawer fronts I followed the theme for some Grufallo beds I'm making but you could use a finish to match your decor.Glue On The Drawer Fronts
Before gluing the fronts onto the bases I first sanded some of the paint away from the mating surfaces. This will allow the glue to adhere better. Clamp The Drawer Front

With the drawer front centred and flush to the bottom I applied clamps to hold it all together while the glue dried.Add The Wheels
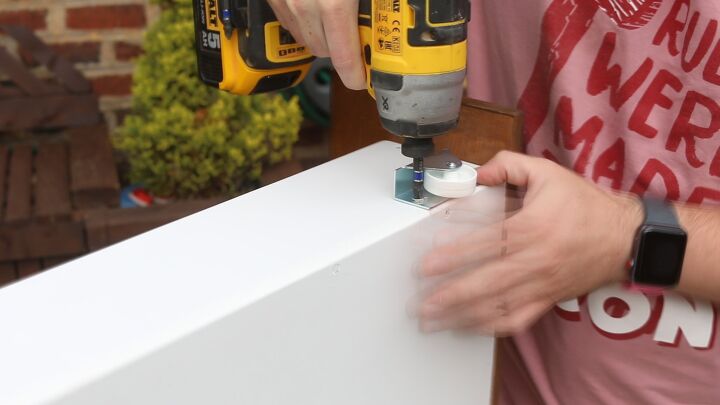
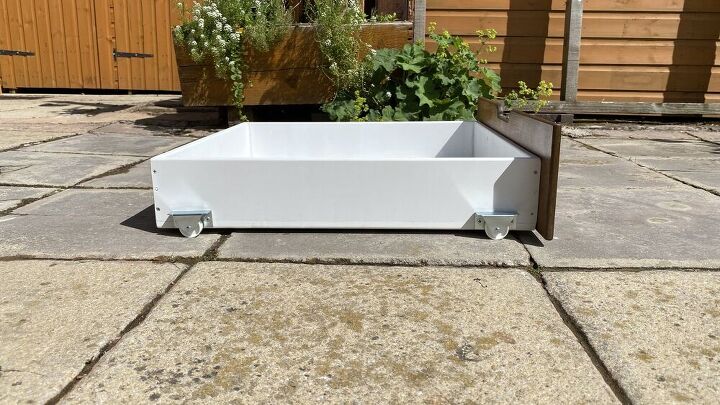
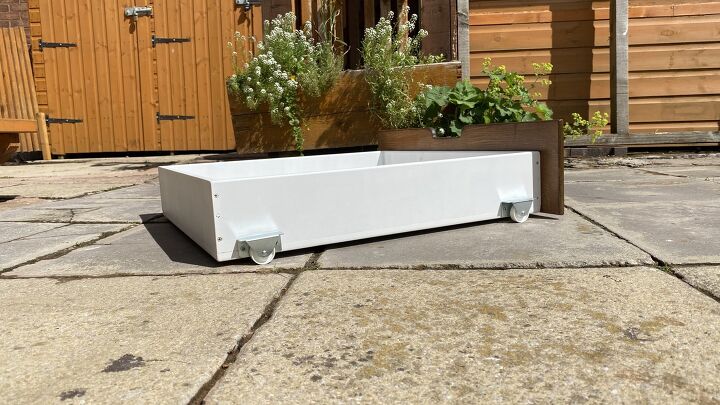
The last step is to add the wheels. Each drawer gets 4 wheels, 2 on both sides. I added the wheels flush to the bottom and set in from the front and back by about 25mm. A short screw through the holes in the wheels secures them in place. 2 screws per wheel.Done!
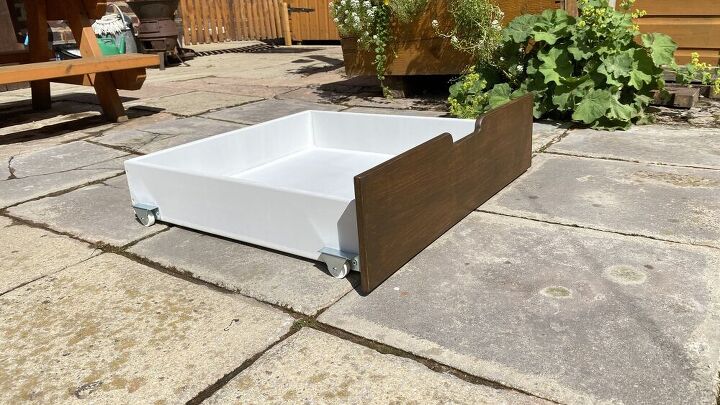
That's the drawers done! Time to use them to hide all your rubbish under the bed.
Resources for this project:
See all materials


Frequently asked questions
Have a question about this project?