


How to Paint Both Older and New Cabinets

If your home has stained cabinets or even brand new unfinished cabinets, painting them yourself can be very intimidating.
I'm giving my laundry room a makeover and I have existing stained cabinets and decided to add more storage with a new unfinished cabinet. I wanted to paint both of them but have never painted cabinets before.
So, I started researching paint and techniques online. There are SO MANY opinions and ways to paint cabinets and products to use. Overwhelmed, I went to the store and started looking at what was available and within my budget. This post shares what products I used on my cabinets and my personal opinions.
There is a ton of information out there, so find what works best for your needs and budget.
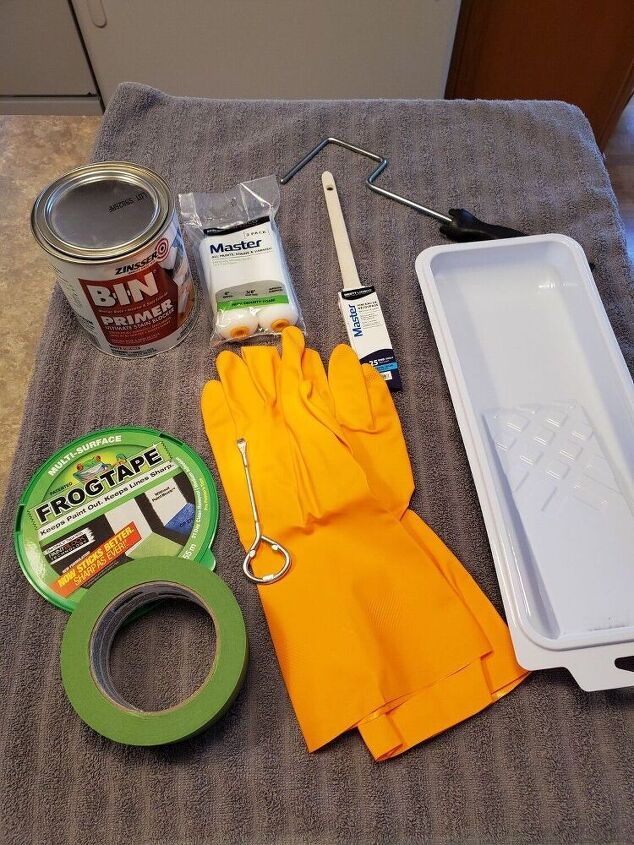
MATERIAL LIST:
For PREP AND PRIMER--
- TSP Substitute spray
- BIN Shellac based primer (In my research this is the best primer to use on stained cabinets where you need to block the stain from bleed through)
- Frog Tape (Painter's tape)
- Rubber gloves
- Painter's pan and disposable liners
- 4 inch roller
- High Density 4" foam roller 3/8" nap
- 1" nylon/polyester brush
- Solo cups (4 per door depending on size of door)
- Drop cloths &/or old towels
- Screwdriver or drill
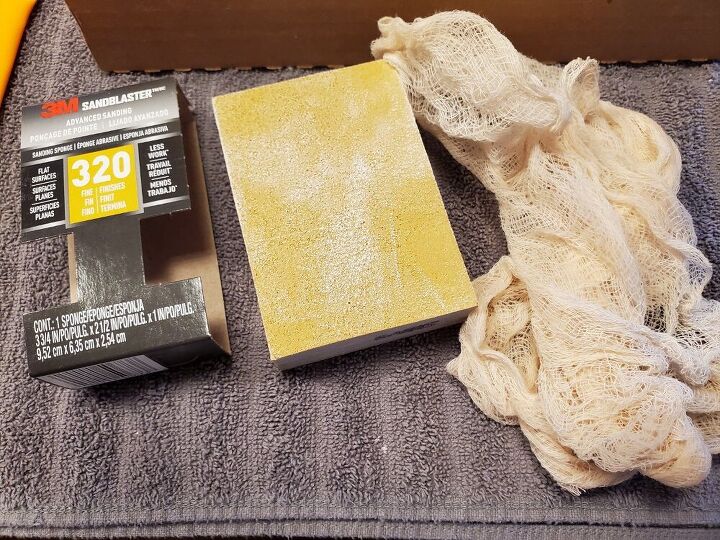
- 3M 320 sanding block
- Tack cloth
*NOTE*
The MATERIAL LIST for PAINT & FINISHING will be listed later in the post. Please read whole post for all the materials I used. 😊

These are the stained cabinets I had in my laundry room.
I started by cleaning my old cabinets with a TSP substitute. Follow the directions on the bottle. I wore my rubber gloves for added protection.
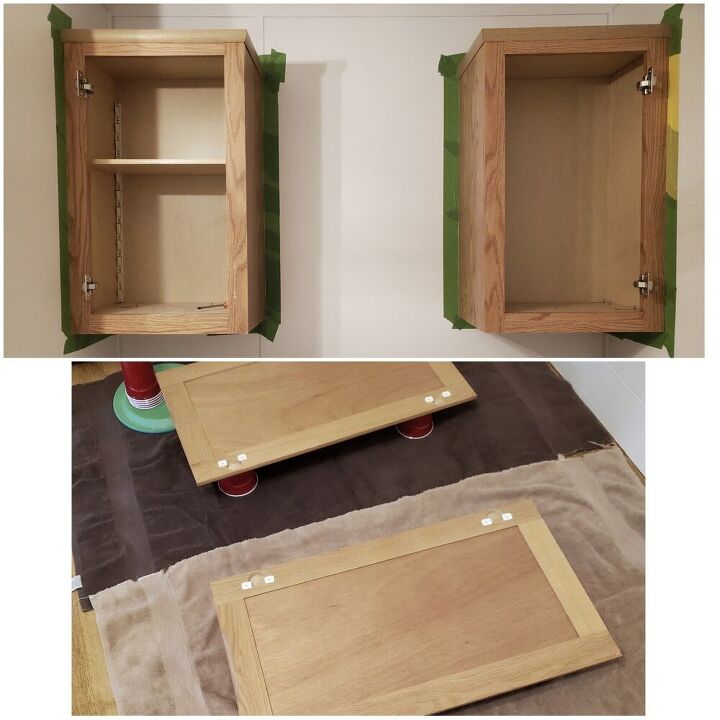
Once my cabinet boxes and doors were clean, rinsed and dry I used Frog Tape (My choice for painters tape) to tape off the walls around the cabinets.
Make sure you clean and tape off under your cabinet boxes if you plan to paint the undersides.
I placed down old towels and solo cups to prop up my doors and have a stable base for painting.
I used a screw driver to remove my doors. In the photos you'll notice I left the hinge part on the box. My doors close nicely and I didn't want to chance messing with that so taking the screws out of the door was the easiest for me.
*TIP* Place your screws in the cabinet they come from so you dont loose them.
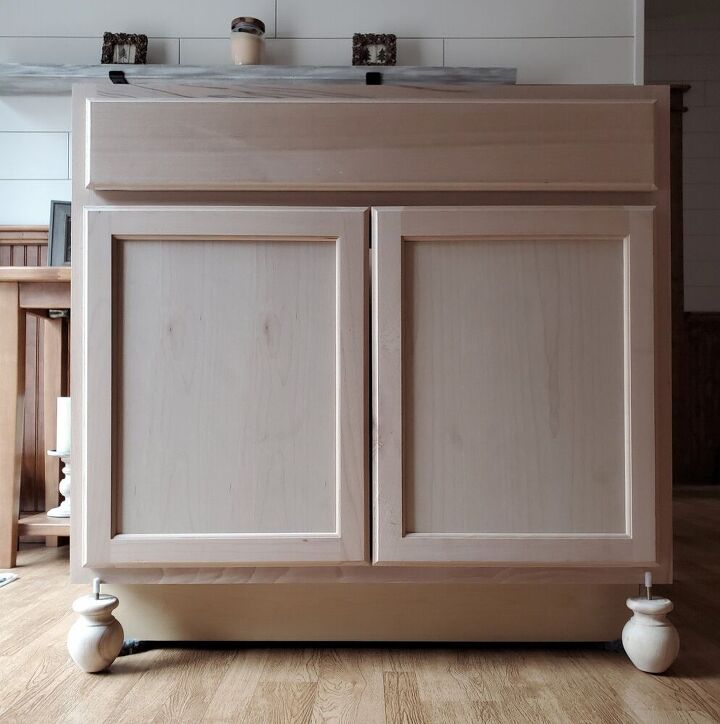
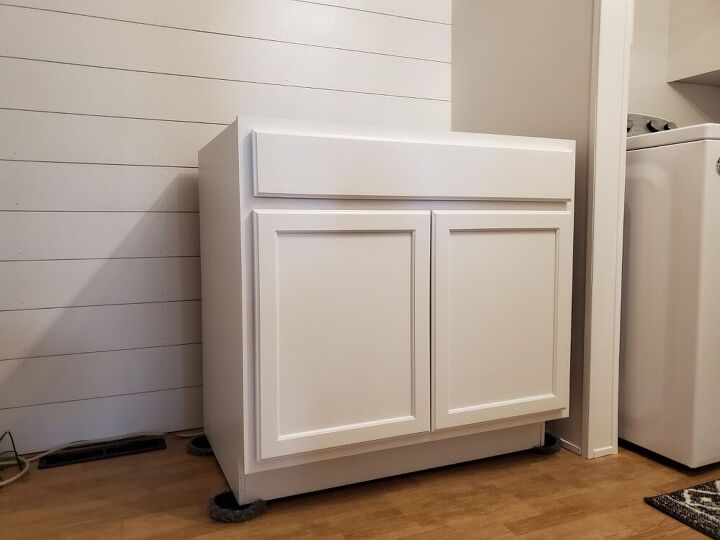
This is the new unfinished beech cabinet I picked up at Home Depot.
I did NOT clean this cabinet or doors with anything. I was careful when removing it from its packaging to limit oils from my hands. It is also smooth so no sanding is necessary of the new cabinet.
As I did with the older cabinets, I removed the hinges from the doors only.
I can't stress this enough...
Take your time and follow the primer instructions.
The BIN Shellac based primer states that you do NOT need to sand or degloss your cabinet. It is best used in light coats.
Don't freak out after the first and second coat. They are light, patchy and awful looking. The 3rd light coat covered my stained cabinets well. The new cabinet did not need 3 coats, but I had the primer out and had extra in my roller pan so I used it.
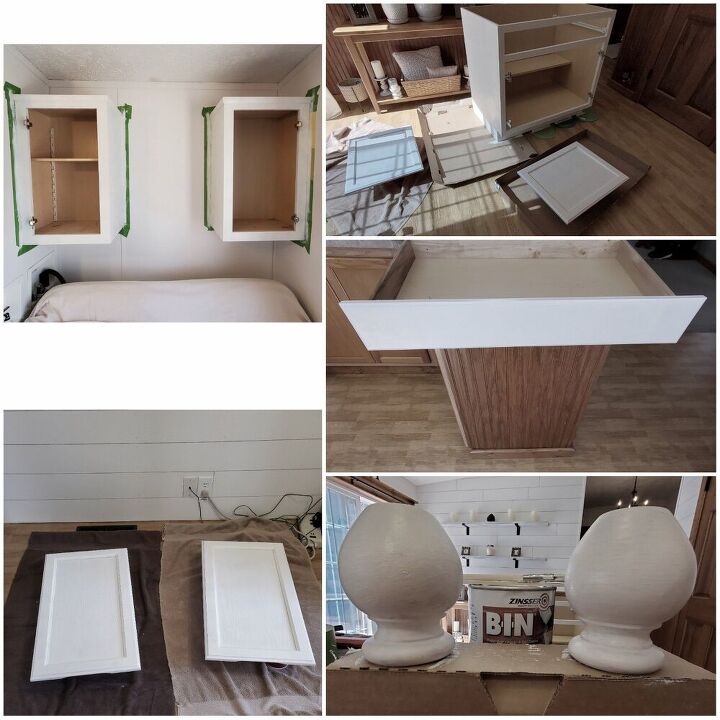
This is what 3 light coats of the BIN primer looks like. Everything is covered well. I was very happy with them.
I allowed my cabinets to dry overnight before painting.
They felt a little rough so before painting, I used a 320 grit sanding block to smooth everything out. Then I uused tack cloth to clean up all the sanding dust before painting.
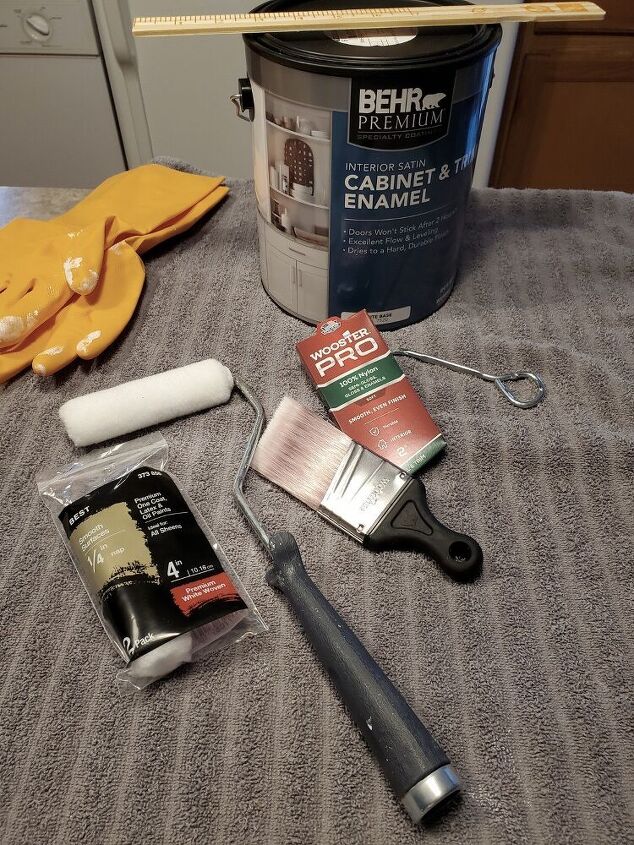
PAINTING MATERIAL LIST:
- Behr Cabinet & Trim enamel paint
- Wooster Pro 100% Nylon brush
- 1/4" nap roller
- Paint pan
- Disposable pan liner
*NOTE* I chose Behr cabinet & trim enamel paint for a few reasons...
I always use Behr paint on my walls and love the results. After talking to the paint associate at Home Depot I felt confident it would work for my needs and the cost! The cost fit my budget easily.
I wanted to try the Benjamin Moore Advance paint but it was not available near me.
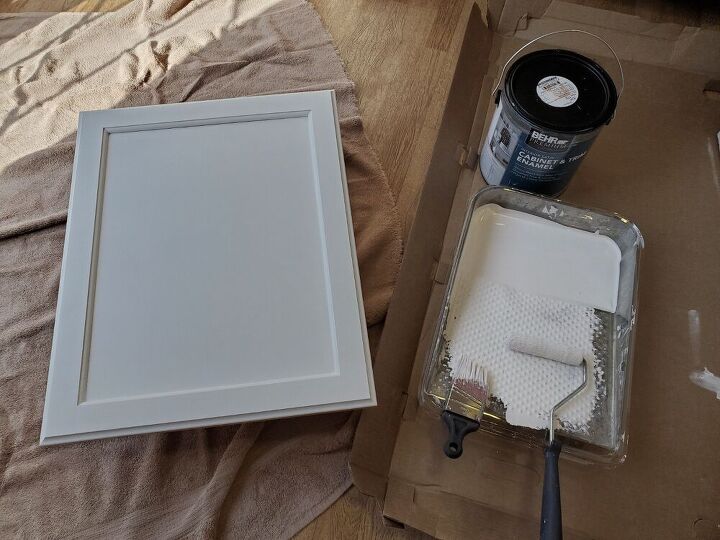
When painting (primer and cabinet enamel) I start using a brush on all the areas that I can't use a mini roller on. I always cut in first and then roll second. This goes for the cabinet boxes and doors/drawers.
AGAIN...follow the instructions on the paint you choose. My paint recommends 2 light coats using the recommended brush and roller listed above. This particular enamel paint is dry to touch in 1 hour and recommends ready in 2 hours. So, after one hour I would flip my doors and give the other side a light coat of paint. Then flipped it again in an hour and gave the first side it's 2nd coat.
I gave all cabinet boxes, drawer and the doors 2 coats of the cabinet enamel.
*NOTE* I painted my cabinets in a white hue. The paint can states that if your color choice is darker you may need more coats to achieve the full color and possibly require a longer dry time.
After 24 hours I reattached the doors to the cabinet boxes...
...and placed the drawer back in.
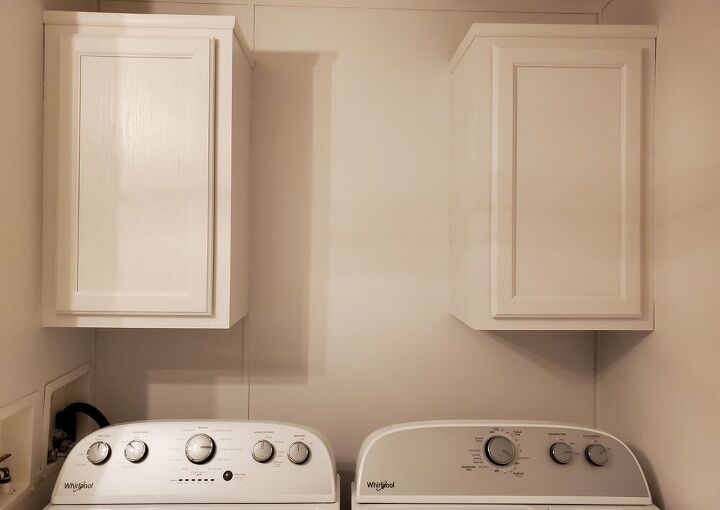
I am thrilled with the finish. They are smooth and beautiful.
*NOTE* You can see the wood grain in my old stained oak doors but the beech doors are smooth with no grain. I personally love the look of the wood grain. If you do not like that look, you could choose to fill in your doors with wood filler.
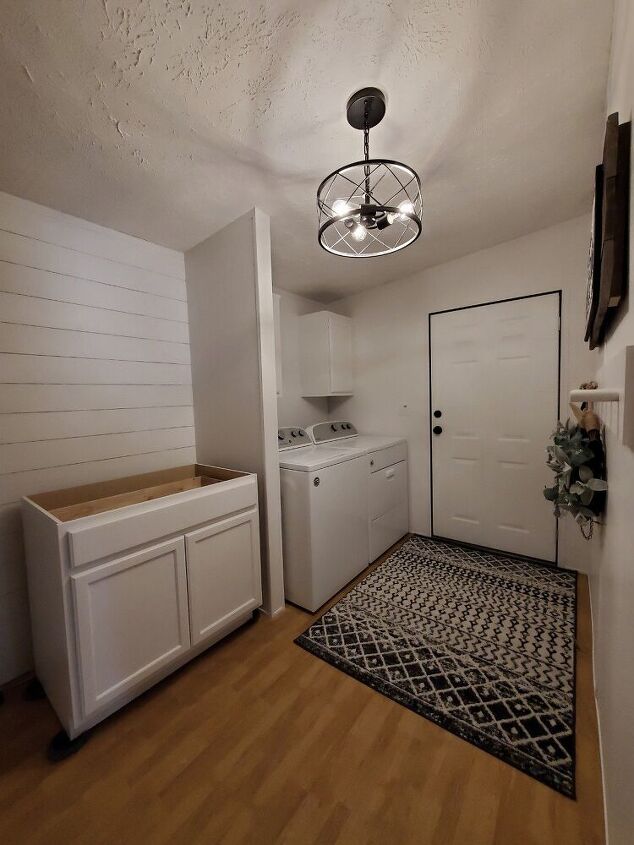
Here is the whole laundry room with the cabinets back together and the new cabinet set in place. I think it looks amazing and am thrilled with the finish this primer and paint gave me!
Now I can't wait to prime and paint more of my old stained cabinets and trim. 😊
Resources for this project:
See all materials


Comments
Join the conversation
-
Lots of great tips. Super tutorial. A lot of Hometalkers have painted their cabinets and posted here. Everyone has their own technique and products they love. I use a green Scotchbrite pad to roughen the surface for paint. Then prime with Kilz primer (it's what I've used for decades). The grain on raw wood will get raised so going over with the green pad to smooth it out. Not needed on finished cabinets. Then I use latex paint for the final finish. Enamel is a personal choice. Three coats of a water based polyurethane to seal the finish. Cabinet manufacturers use a clear polyester finish to seal the final finish.
-
Wow, great job - turned out fabulous!


Frequently asked questions
Have a question about this project?