


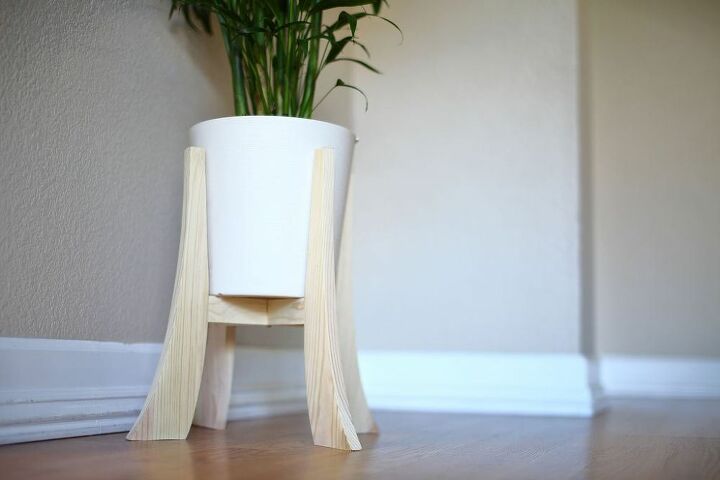
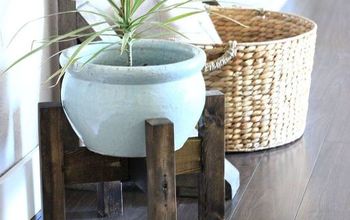
Indoor Plant Stand

Awesome and charming DIY indoor plant stand to refresh your room. This project took me less than an hour to make and cost less than $10. The plant stand could be customized to match your pot size by changing the support length.
For more info and to download PDF template please visit our website TheDIYPlan.
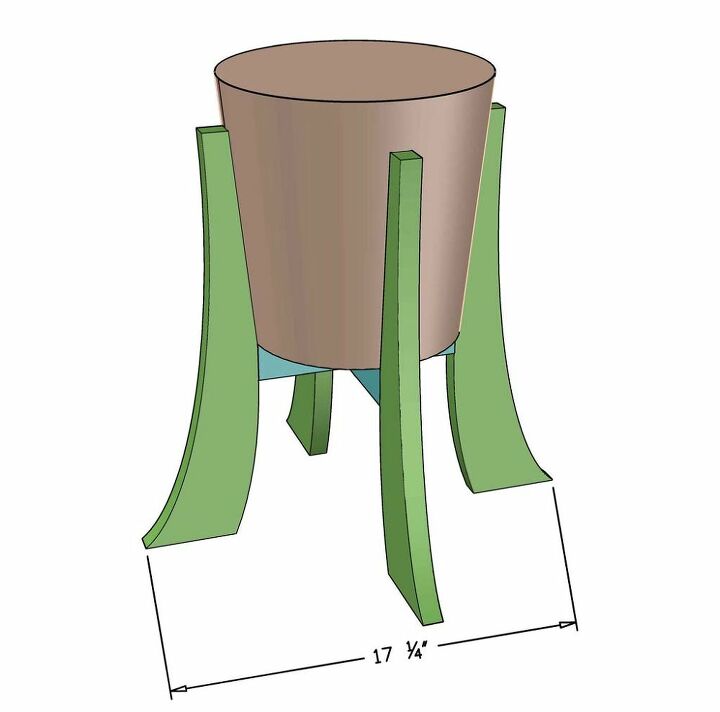

Cut List
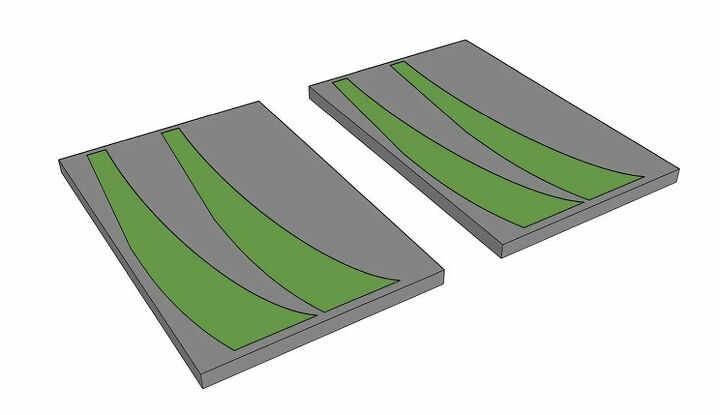
Step-1 Print Template and Glue on Wood
Take 1x10 board and cut two sections of 17” long. Print out the template provided in the PDF on 11x17 paper. Glue the template on wood using paper glue.
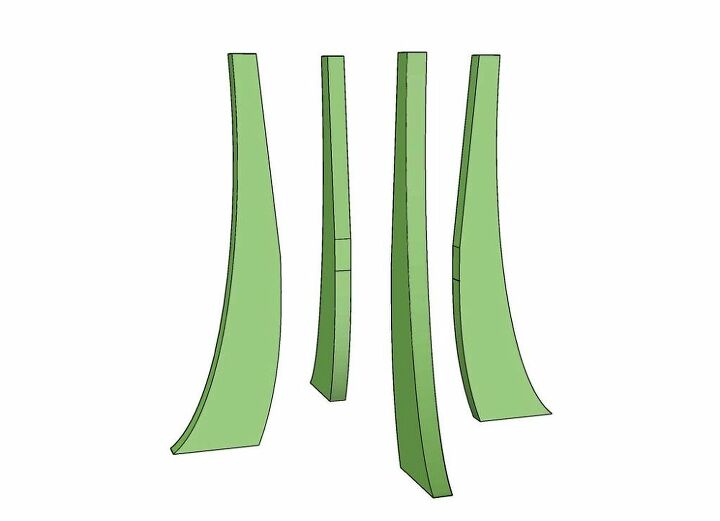
Step-2 Cut Out Legs
Using band saw, cut out the legs following the outline of the template.
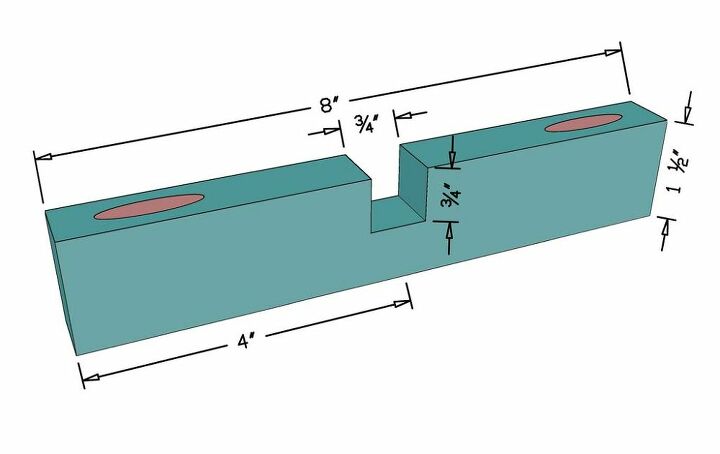
Step-3 Cut Support for the Pot
From the remaining scrap wood using Miter Saw cut 8" x 1 1/2" support that will hold legs together. Cut out 3/4" wide by 3/4" deep notch in the center of that support. Make two of these support. Using a Kreg Jig Mini, drill one pocket hole on top and bottom on each side of the support.

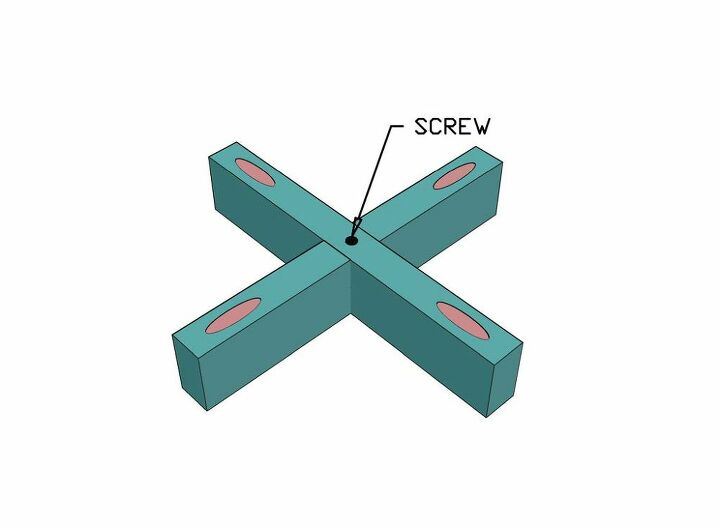
Step-4 Glue Supports Together
Glue both of the pieces together using Wood Glue and screw in one screw in the middle to keep it in place.
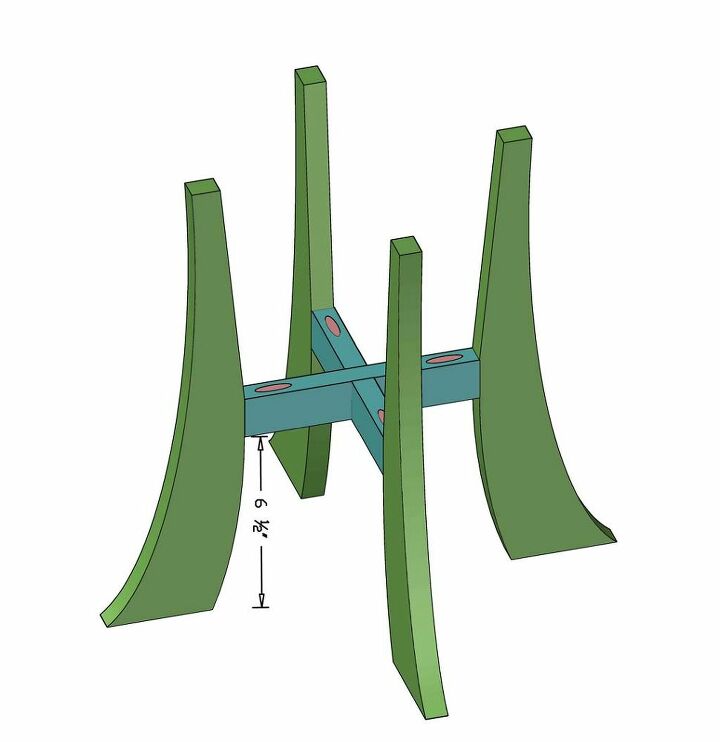
Step-5 Attach All Pieces Together
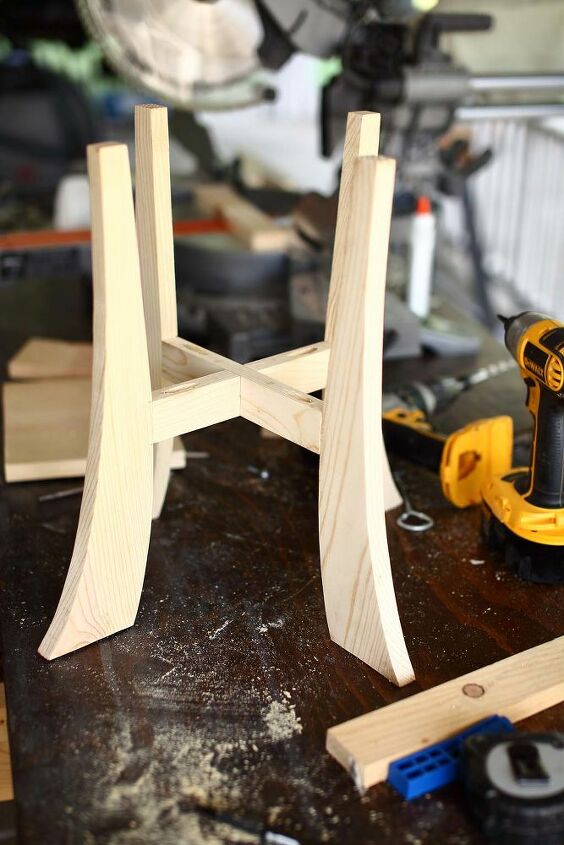
To attach all legs evenly, mark 6 1/2" from the bottom of each leg. Align bottom of the support with the mark and attach it using Wood Glue and 1 1/4" Pocket hole screws. Use a small Kreg Jig drill bit to screw in the pocket hole screws. You're done with the indoor plant stand.
Comments
Join the conversation
-
Nice looking plant stand. Great share.


Frequently asked questions
Have a question about this project?
What size pot will this hold?