


Halloween Pumpkin Bench - Pallet Upcycle!
by
Lisa Goersch
Medium
I wanted to make a Halloween bench suitable for a photo op at work. Something secure, original, inspired by the holiday and CHEAP. There wasn’t a budget for the project, upcycling pallets was the way to go!
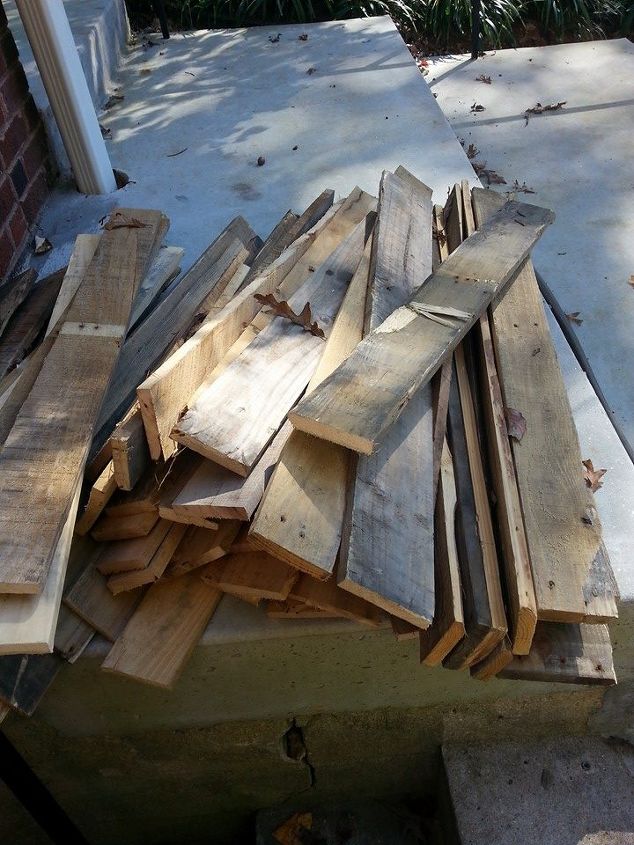
The pile of dismantled pallets.
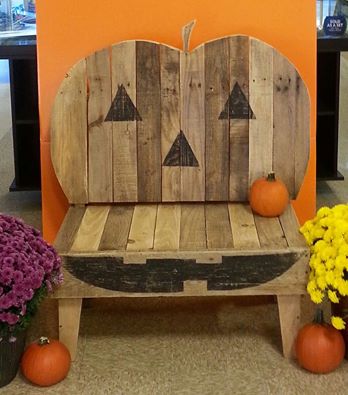
This was done on a (bat) wing and a prayer. The bones of the project are the legs, frame and back. A couple of design choices were insetting the seat pieces so there was no end grain visible and the angle on the front legs to lift the bench visually. For comfort, I chose to angle the back a bit.
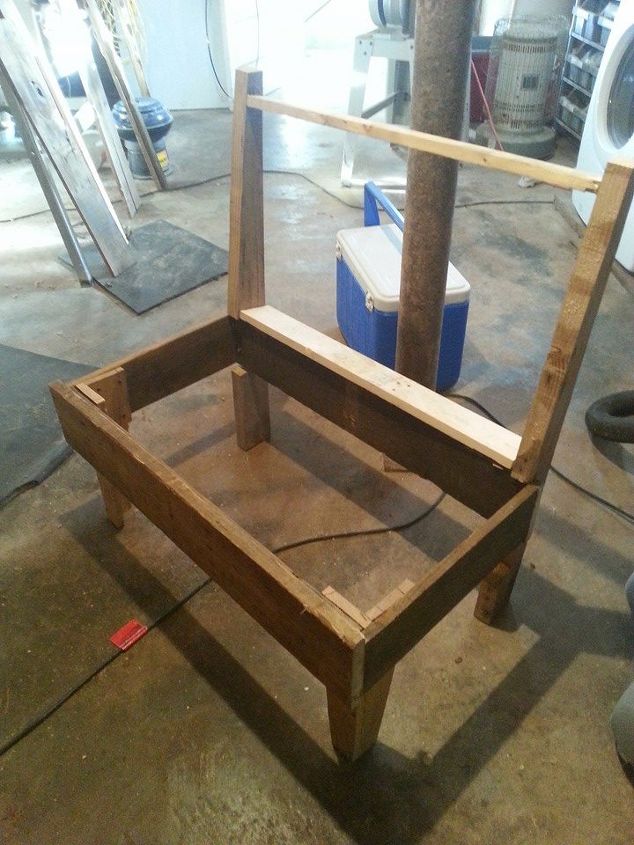
The bones.
Placing the boards was the fun part of the project. It was important to have a wide board on the ends of the bench back to get the correct curve for the pumpkin. After placing the boards, I free handed the pumpkin shape and cut it of out using a jig saw.
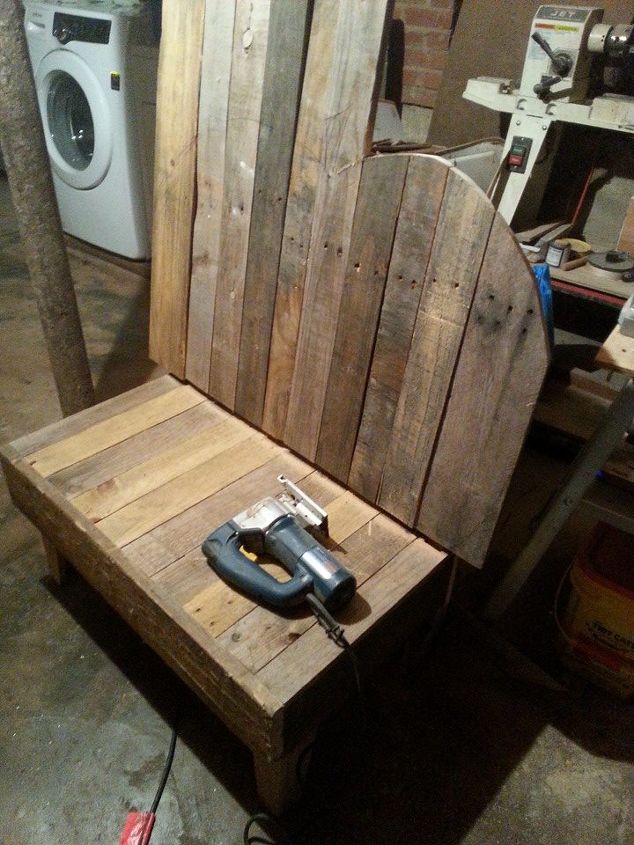
In process.
I cut it in place to make sure I had a smooth edge to the pumpkin.
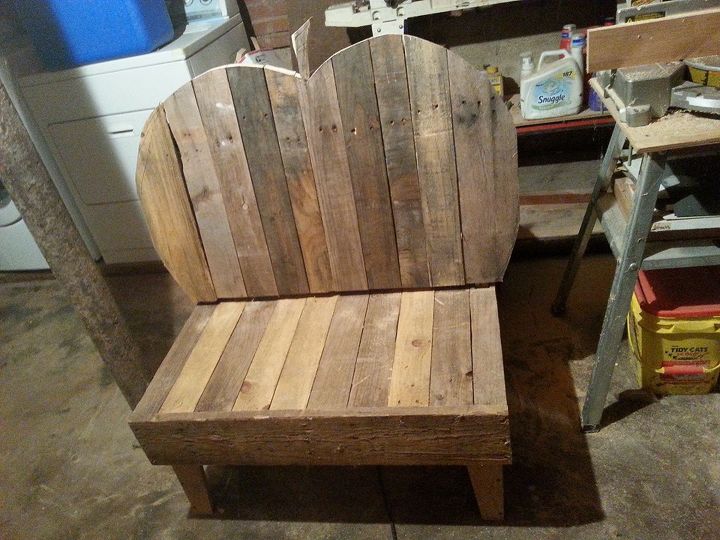
The shape.
I loved the natural color of the wood and the variations in tone, it helped sell the "pumpkin" feel.
After sanding and painting.
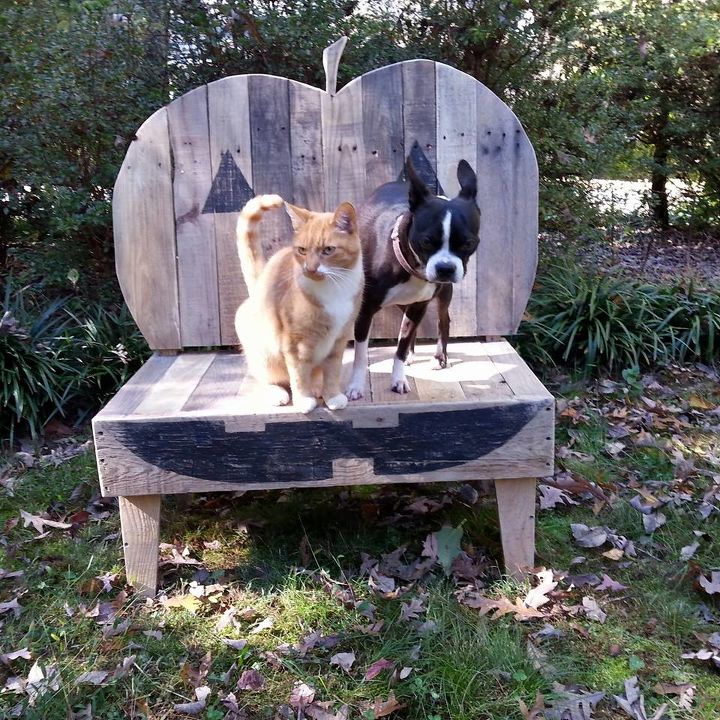
Sanding and painting were the next step. Again, all free handed to give it a rustic look. The most difficult part of the project was keeping the cat off the bench! After painting the features with black acrylic, I sanded it again to distress the painting and add character.
In action!
The bench was all screwed and glued with waterproof glue making it suitable for outdoor use. Everything I used was left over from other projects. The total cost? $0.
Comments
Join the conversation
2 of 34 comments
-
Great
-
Love it❤


Frequently asked questions
Have a question about this project?