


Potting Bench

I have always wanted a cute potting bench.
When we decided to toss out our old picnic table my husband suggested that we make one from the boards from our old picnic table and the posts off our old deck, we recently remodeled.
That was perfect for me because I like the idea of it looking old and well used.
So, this project was free for us to build. You can also use new treated wood and make a bench to fit your space.
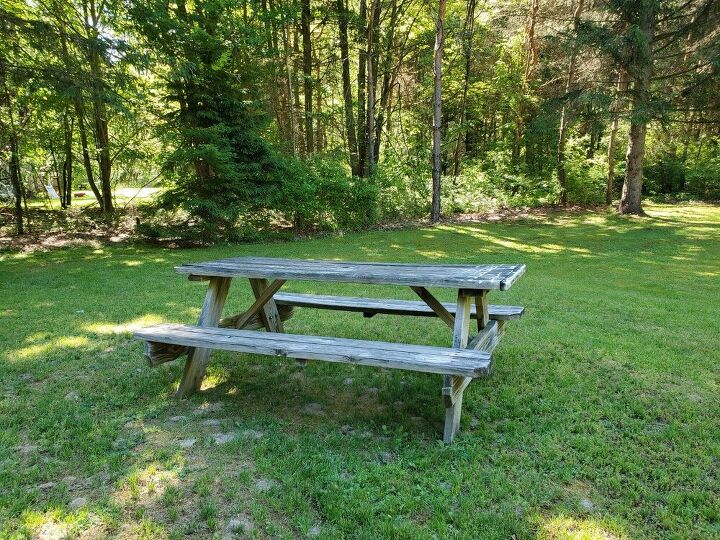
I started with this old picnic table. I took it apart piece by piece so that I would have full boards to work with.
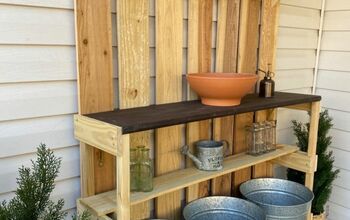
The overall size of this potting bench is 50"W x 18 1/2"D x 57 1/4" T
If you need to purchase material, here is what you'll need...
- 2x6 Treated Boards (41' total)
- 2x4 Treated Boards (4' total)
- 4x4 Treated Post (12' total)
- Decking Board (8' total)
- Deck screws
TOOLS NEEDED:
- Saw
- Impact drill
- Clamps
- Square
- Tape Measurer
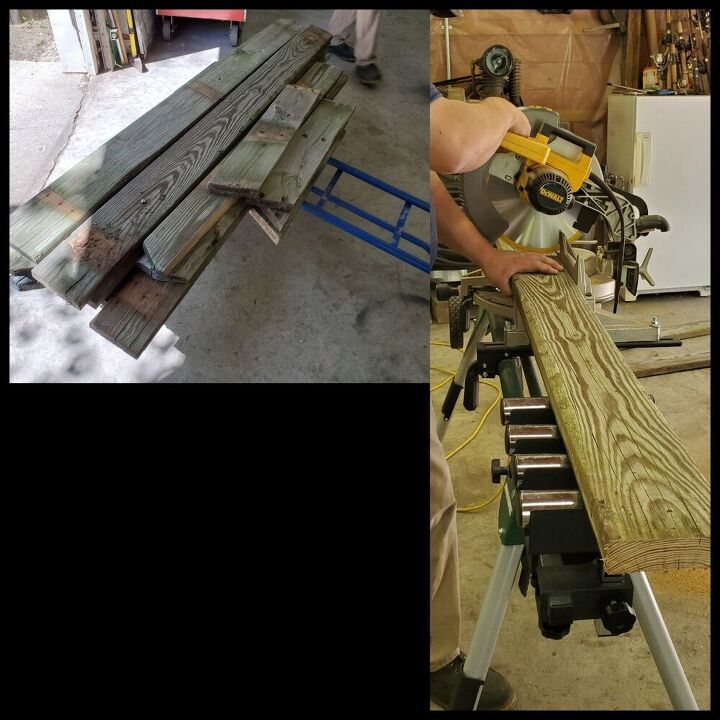
Start by cutting the 2x6 boards to 46 inches. You will need 4 boards at that length. These pieces will make the front and back pieces of the bench.
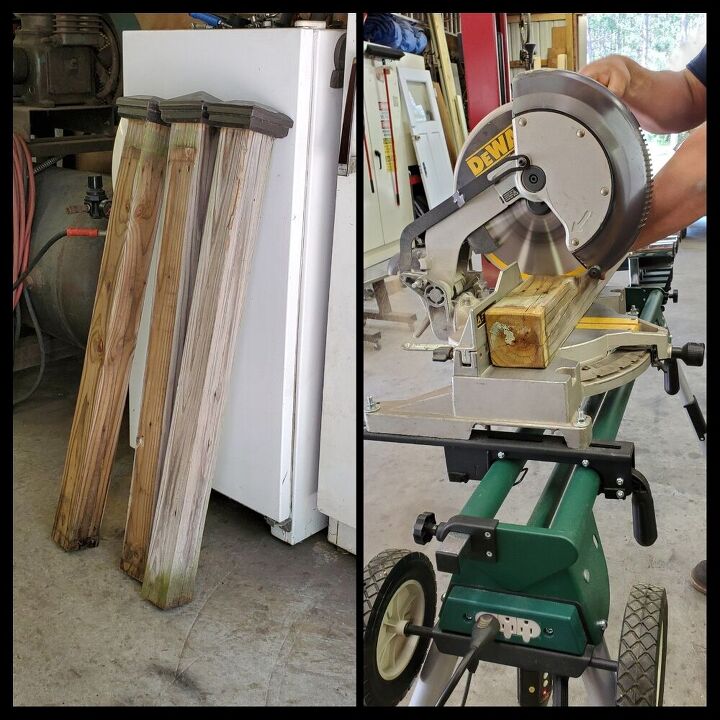
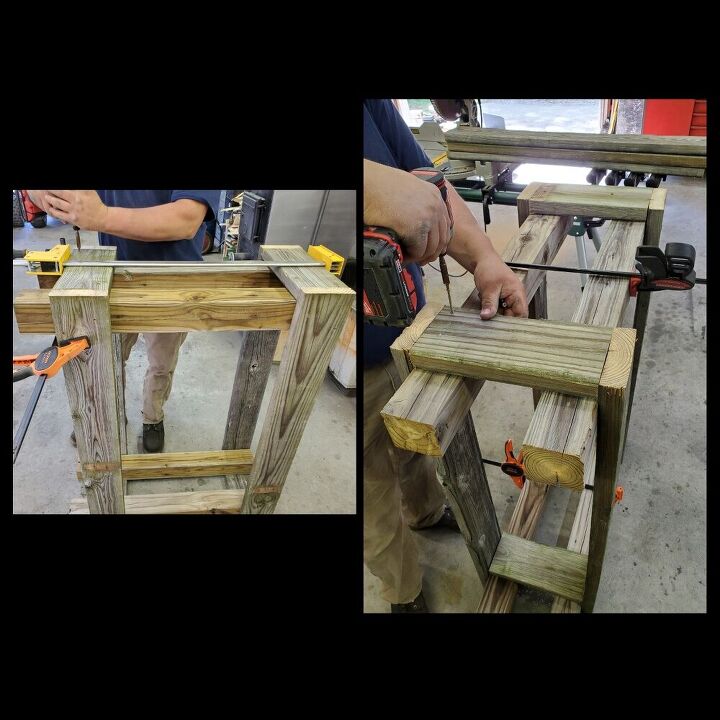
Take your 4x4 posts and cut them to 34.5" long...or the desired height you want for your bench.
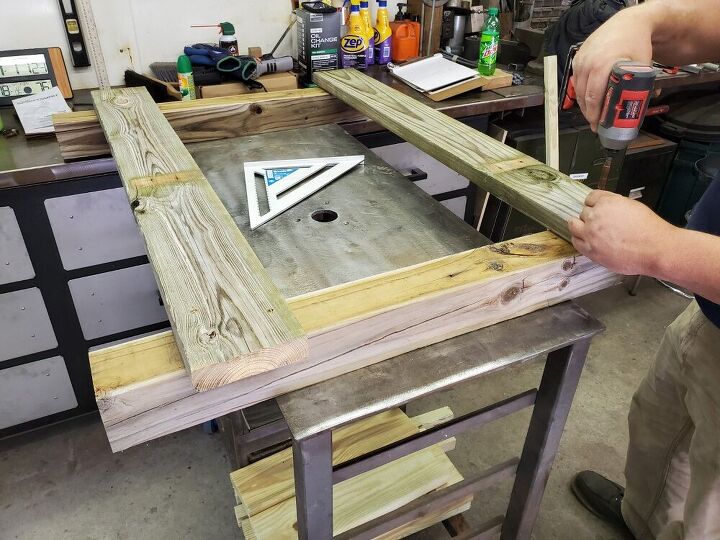
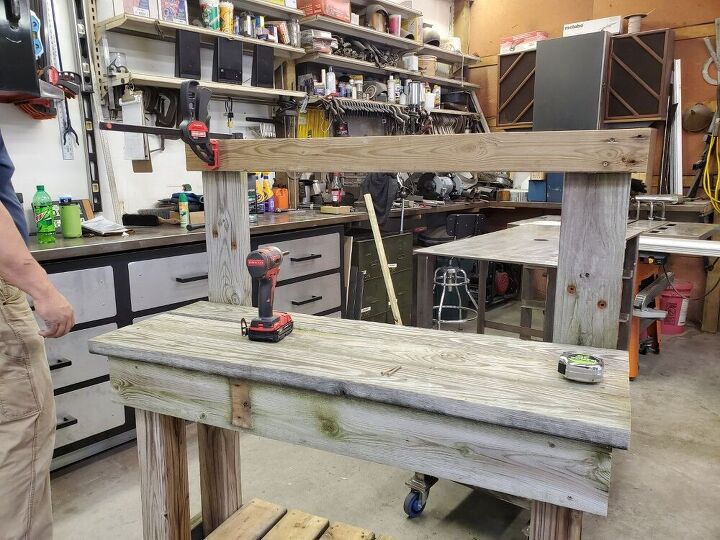
After your posts and boards are cut down, you'll make two sections like pictured. These will become the front and back of the bench.
We attached one board at the top of the posts and the bottom board 5 inches from the bottom.
Make sure you overhang your boards 1 1/2 inches to accommodate the side boards (added in the next step).
Now that your two front and back panels are made, we will connect them.
The area were I want to use my potting bench is narrow so the side boards are cut into 12 1/2 inches. If you have a larger area adjust these measurements to fit your needs.
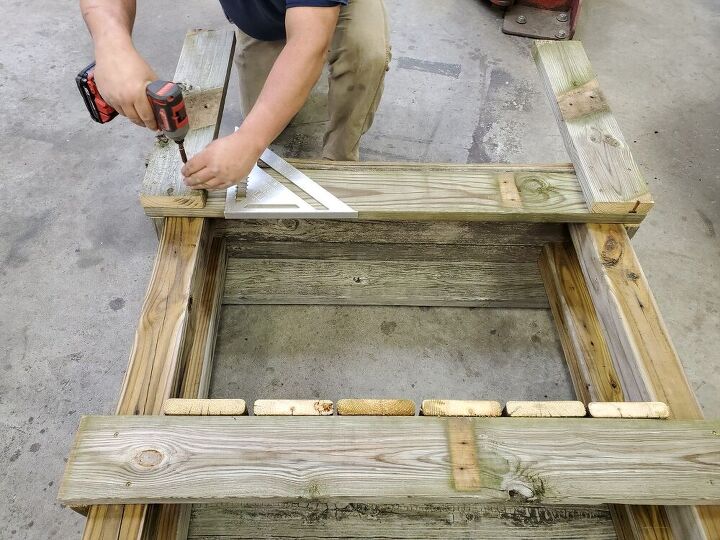
Since we are using wood from the old picnic table we used clamps to make our boards square and straight. If you use new wood you may not need to use clamps.
We connected our 12 1/2 inch boards to the sides where we left the overhang. As you can see this makes the frame complete on the outside of the legs.
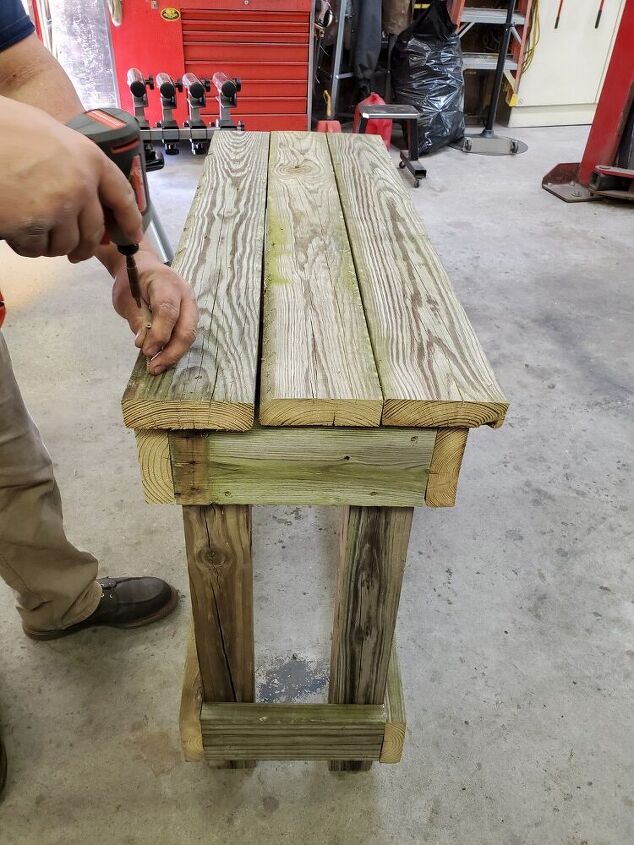
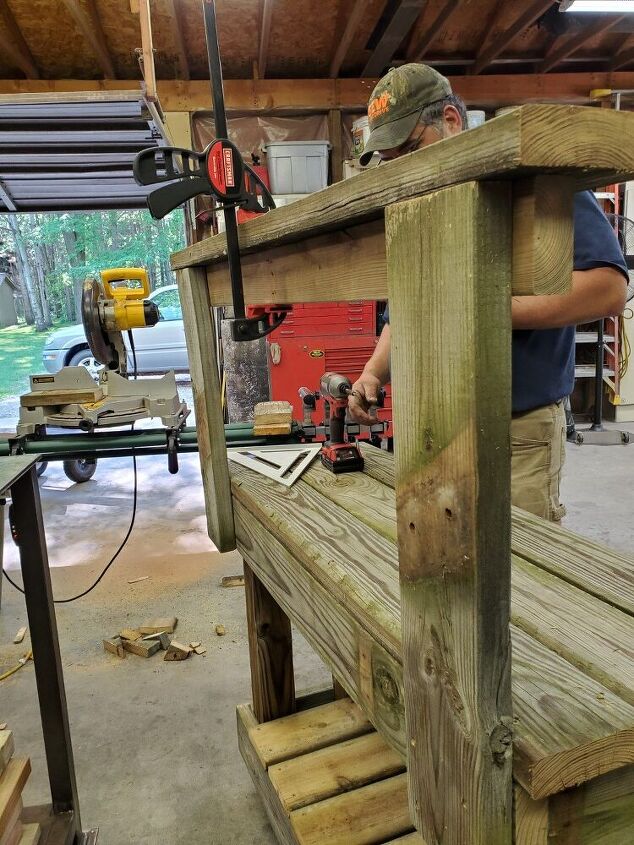
Now that the bench construction is done we can add the top and shelves.
We decided to use 3- 2x6 boards to create our top. They are 48" long. We attached our top boards to have an overhang on the sides and front but made sure to have the back of the "counter top" flush with the back of the bench.
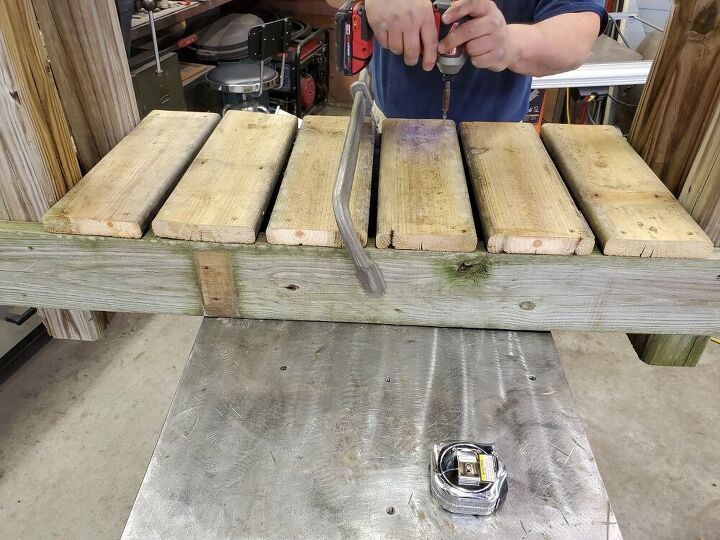
After the top is screwed on we added 6 deck boards to create a bottom shelf. Ours are cut to 15 3/4".
Again, because we are using older wood we are using a clamp to straighten our boards. By screwing the deck boards to the horizontal support it will keep the support board straight.
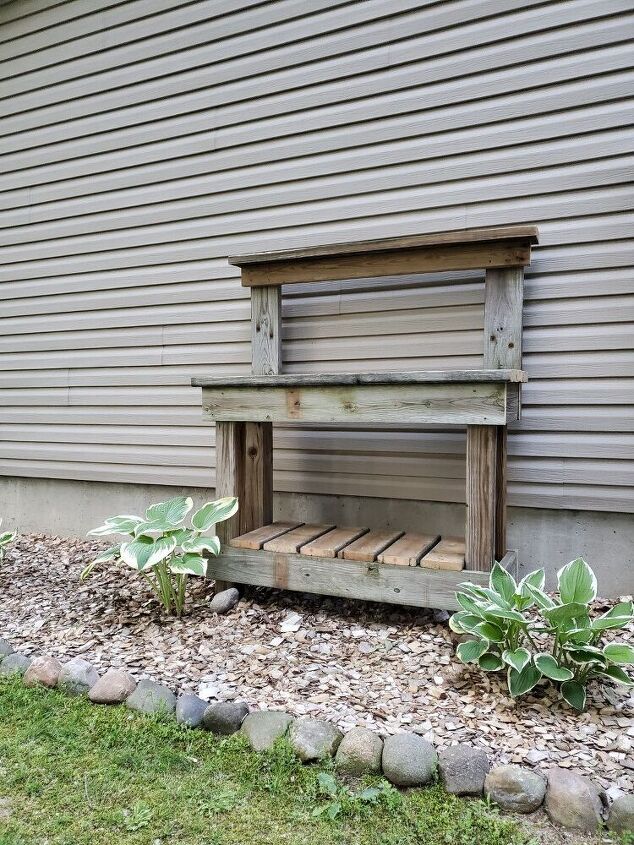
Once the bottom shelf is attached we flipped the bench onto the ground and put the front of the bench on the floor.
We then attached 2- 2x6 boards cut at 25 3/4" to the back of the bench. These will create upright supports for a top shelf.
We then took a 2x4 cut at 48 inches for the horizontal shelf support. This board is cut at the same size as our bench top. So if you use a different measurement for the size bench you want, then be sure you cut this support board to the size you need.
Lastly add the top shelf board.
I wanted a longer top shelf and wanted there to be a stepped look so we cut our top shelf at 50 inches so it would be an inch wider than the support board.
Here it is, and I LOVE IT!!!
It looks old, weathered and awesome!
Now it's ready for pots, gardening tools, flowers, plants and anything you want!
I hope this bench will inspire you like it has me.
Get outside and grow something!!
Resources for this project:
See all materials


Comments
Join the conversation
-
Love this.. thank you for sharing.. going to try and do this


Frequently asked questions
Have a question about this project?