


Sculpted Reclaimed Wood and Steel Bench

by
Sean Rubino
4 Materials
$200
15 Hours
Advanced
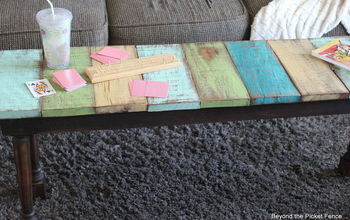
I had a bunch of 2x4 material sitting around the shop and the yard from removing an old trellis after I moved into my house. After a quick internet browse for inspiration I knew I wanted to use the material for a laminated bench seat. I didn't want a plain rectangle seat though so I took the project to another level by sculpting the seat and the edges for a smooth and comfortable seating experience.
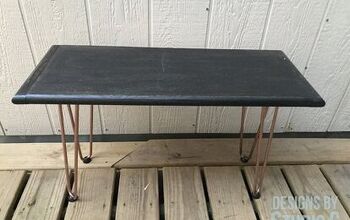
The base was made from steel square tubing and finished with an acid treatment causing the surface to take on an aged look. Then the steel was all sealed in with a water based finish.
The base was made from steel square tubing and finished with an acid treatment causing the surface to take on an aged look. Then the steel was all sealed in with a water based finish.
{
"id": "3647725",
"alt": "",
"title": "",
"video_link": "https://www.youtube.com/embed/IthacPI1EUk",
"youtube_video_id": "IthacPI1EUk"
}
{
"width": 634,
"height": 357,
"showRelated": true
}
Here is the YouTube video I made as an overview of the building process. Use it as a guide along with these instructions or just as entertainment.
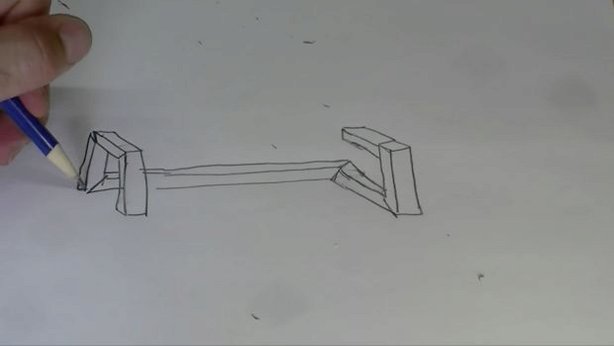
I always start my projects with a rough sketch. I draw the base, refine the shape, and continue until I have a style I am happy with. Then the top was drawn and the overall style and part began to take shape.
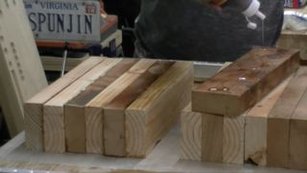
I begin with the bench seat. The amount of 2x4 material is what will dictate the size of my bench as that is the limiting factor in my materials. I cut the 2x4s into 13.5" lengths at the miter saw. Be sure to calm your parts to the saw table to prevent them from catching and kicking back. Chances are if you are using reclaimed 2x4 material the boards are very warped. More on this in the next step.
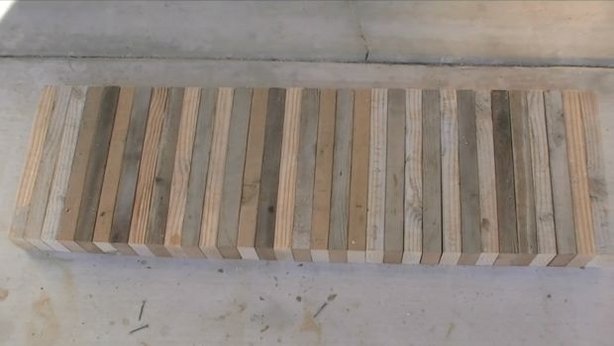
Arrange and set all the boards on edge. Lightly dampen the glue surface with water if you decide to use Polyurethane Glue, such as Gorilla Glue. If you use TiteBond 3 that is not necessary but thinning the glue with a little water wouldn't hurt as this is a long glue up and you don't want the glue to set up before you apply the clamping pressure.
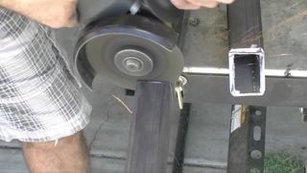
I used square steel tubing for the base. All the joints were cut at 45 degree angles where the 90 bends met. Mark these locations clearly and in accordance with the initial sketch. It can be tricky so triple or quadruple check to be certain you are cutting the proper angle on the correct face of each piece.
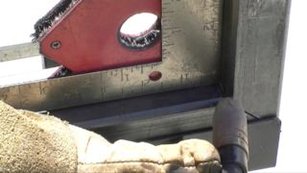
Place the base parts on a flat surface and make spacers to hold the leg parts apart and square during welding. Parts move during the welding process. Mark the pieces that will be joined together and be sure the joint line up. If they don't, take the time to clean these now with a grinder.
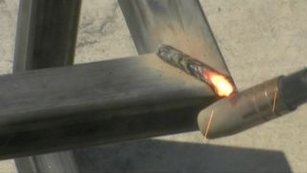
Start by tack welding all the leg joints being sure the parts remain spaced and square. Once all the leg miters have been tack welded at each corner, then run the final weld over the tack welds to fix the leg joints. Chip the slag and brush the welds to clean them up. Do this for both U-shaped leg assemblies. Then attach the long bottom stretcher to join the legs. The last main pieces for the base are the bench supports. I only used one 1" angle iron in the middle of the two legs at the top to attach the bench. Two would be ideal for a bit more strength and balance. Be sure to weld these flush to the top. You could also attach small angle brackets to use lag bolts to screw into the under side of the bench seat. Finally, cut some small square pieces of steel to cap the open ends of the two vertical leg pieces. Tack the corners, chip and brush the slag, then run (weld) your final beads.
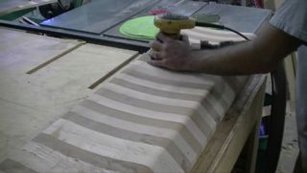
Remove the clamps from the laminated bench seat. Gorilla Glue is nice in the sense that the excess foam squeeze out scrapes away easily with a putty knife or paint scraper. Then, using a belt sander with a 60-80 grit sanding belt, run the sander side to side at a constant pace to prevent sanding too deep in one spot. These sanders are aggressive and will quickly remove material so be careful. Do this to both the faces of the lamination.
{
"id": "3647749",
"alt": "",
"title": "",
"video_link": "https://www.youtube.com/embed/nfbMciR9XwI",
"youtube_video_id": "nfbMciR9XwI"
}
{
"width": 634,
"height": 357,
"showRelated": true
}
Please, wear eye protection, protective clothing, and have a neutralizer (baking soda) ready during this process. You are about to deal with a corrosive acid. To make the patina solution, fill a pump sprayer with 1 gallon of water and in a small plastic container (I used a pint or quart yogurt container) add 5 oz of muriatic acid. Strip a 12-15 inch length of 12-14 AWG copper wire, coil it around a dower rod (or pencil), and fully submerge it in the acid. Add a little more acid if it needs to cover the copper wire. After 5-7 days the solution should be dark green and the copper wire should be fully dissolved. Then pour the solution into the pump sprayer filled with water. Always add the acid to the water. This will make a pretty copper green liquid.
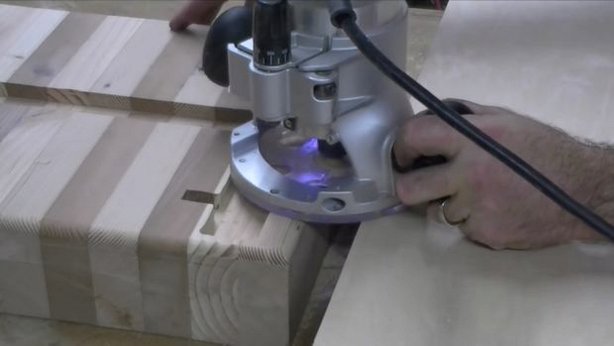
I didn't like the height of the bench and I though it looked a little too clunky sitting on top of the steel base. I placed the steel base upside down on the seat, centered it, and traced the outline with a pencil. I used a router with a straight bit to rout a channel for the base to set into. Keep in mind the direction that the bit is spinning (clockwise) and do not make climb cuts (direction of the spinning bit). The bit could catch the wood and get way from you causing damage to the work piece or worse, yourself. This gave the top a bit more of a sleek look and lowered the sitting height to the depth of the routed channel.

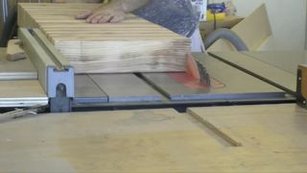
This is where it starts to get fun and take on the shape you want. I marked a line 2.5" down from the top edge across the front edge and sides of the seat. The back remains square for now. Then connected approximately a 45 degree line from the top to the line drawn on the front ends. Tilt the table saw blade to 45 degrees and move the fence to cut at the line. With the bench seat face down on the table saw make the cut to remove the long triangular strip from the seat. Use a miter gauge to push the seat through the blade to make the end cuts. If the blade didn't cut cleanly or there was material left then use a block plane to clean the cut to the surface.
With 60 grit paper in a random orbit sander begin smoothing out the seat profile. This take a long time, go through the grits up to 220. Use pencil marks to guide your progress. Scribble on the surface and sand until the scribbles are gone then move to the next grit and repeat. Finally, using the router with the same round over bit installed profile the top corner. Be careful not to gouge the seat by rocking the router.
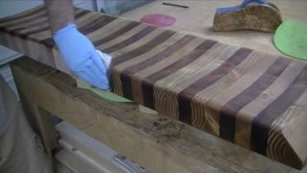
I chose Dark Walnut Danish Oil to color the seat. I like how the dark oil soaked into the softer grain of the douglas fir. To apply the oil simply pour some on the surface and rub it in with a cotton cloth. Wait 15 minutes for it to absorb and wipe off the excess. It is that simple. Now wait 24 hours for it to cure and apply the finish of your choice.
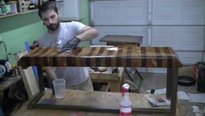
I like to start with a glossy oil based polyurethane, such as Minwax wipe on polyurethane. I then pour some into a secondary container, thin it with an equal part of mineral spirits, then wipe it on with a clean lint free cotton cloth. The advantage of glossy finish is that when it dries it will show EVERY blemish in the finish. Dust, lint, fuzz, whatever, it will show. That is good because you now know where to touch up with a high grit sandpaper. Also, the gloss finish has no flatteners in it so the surface of the wood has a clarity that will be unmatched if you use a semigloss or satin finish. I use 400 grit wet/dry sandpaper and a spray bottle of water. Lightly rub the blemished surface. It usually takes one pass at this time. Then wipe the lint off the surface with a damp cloth, and continue with the glossy finish. It repeat this process 14 times only with a 3000 grit pad moistened with glossy finish instead of 400 grit paper. I do it this much because the finish is diluted to 50% strength. So that is really only 7 coats. The final coats (15-16) are a satin polyurethane. I wipe these on full strength with a light touch up between with a 3000 grit sanding pad.
Comments
Join the conversation
2 comments
-
Wow, so awesome you made that look so easy.


Frequently asked questions
Have a question about this project?