


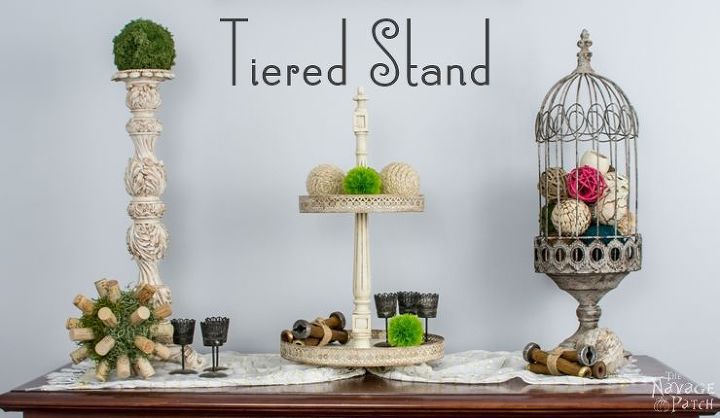
Tiered Stand
$6
Easy
I've been on the hunt for a tiered stand for quite some time now. I found many different styles online, but the ones I liked were a bit pricey - story of my life! As it wasn't a "need" but just a "want," I couldn't justify spending $80-90 on a tiered stand. Time to make one myself!
I searched on Google, Pinterest and Hometalk to find a tutorial for the type I wanted, but I had no luck. Generally all tutorials were using round or square cake pans (or bowls) and a spindle cut in two or three depending on how many tiers you wanted. A little glue or a couple of screws, and you are done. They are indeed all beautiful if you are looking for a real farmhouse decor. But our house is nothing close to a farmhouse, so anything like that would stick out like a sore thumb. The ones I like and that would match our house decor are more like the Victorian style which have ornate metal around the rims.
*Affiliate links used in this post*
A couple days later, convinced that there were no tutorials for the type I wanted, I decided not to waste any more time on searching, but get on with the work and make it as I go. I grabbed 2 plates from the kitchen and went to Greg's basement workshop.
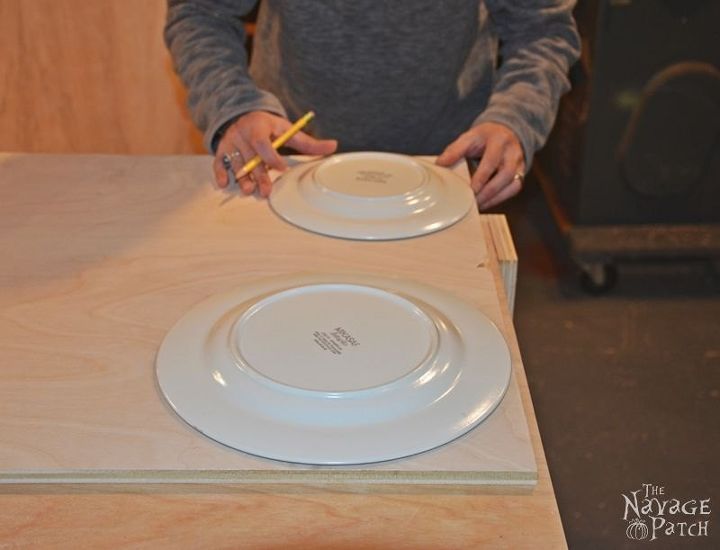
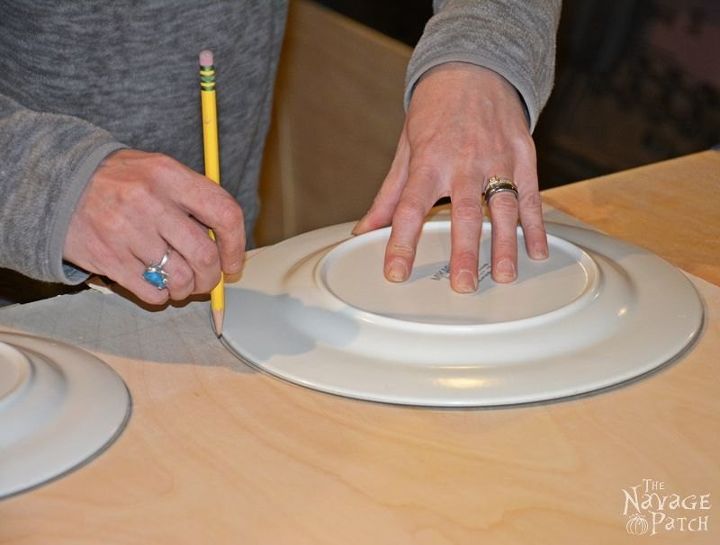
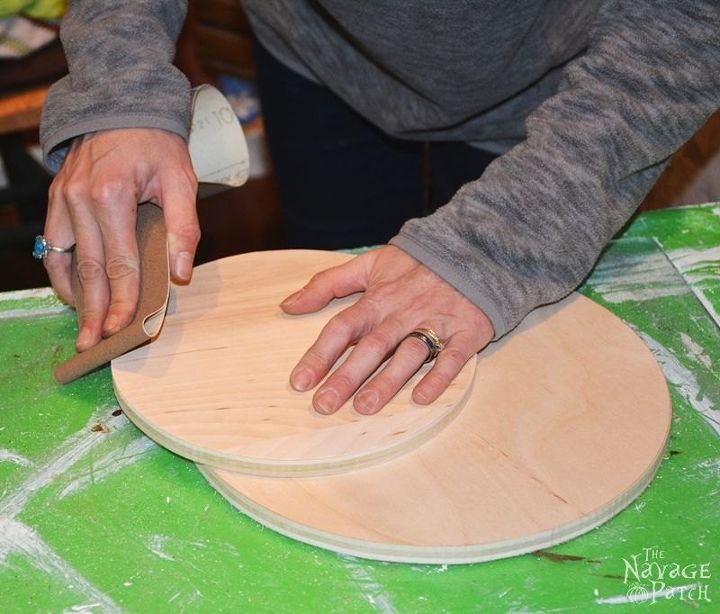
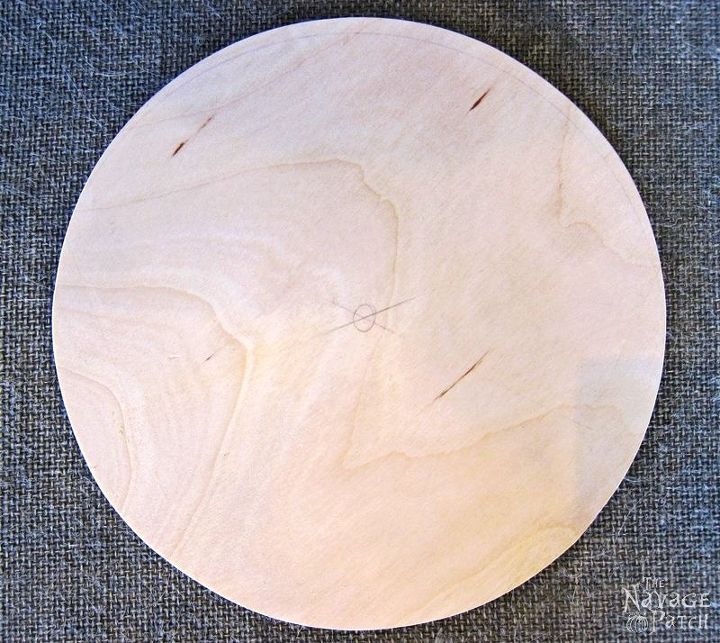
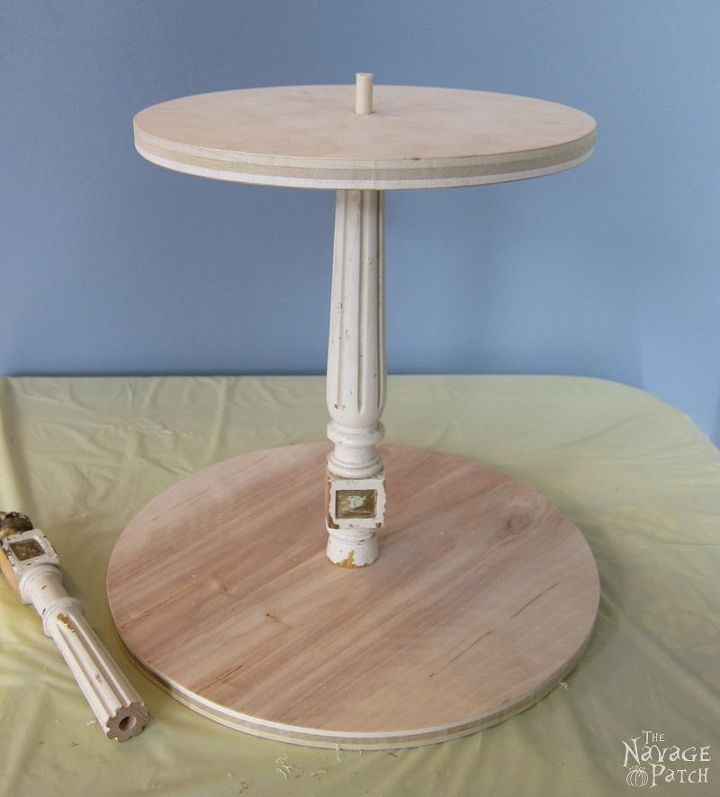
Using the plates as forms, I drew 2 circles on a piece of 1/2 inch plywood. These were going to be the platforms.
Once I was done drawing, I asked Greg's help to cut the wooden circles for me. First he cut the plywood in to a manageable size, then he cut the circles out using the band saw. While he was at it, he also cut the spindle I was planning to use into 2 pieces.
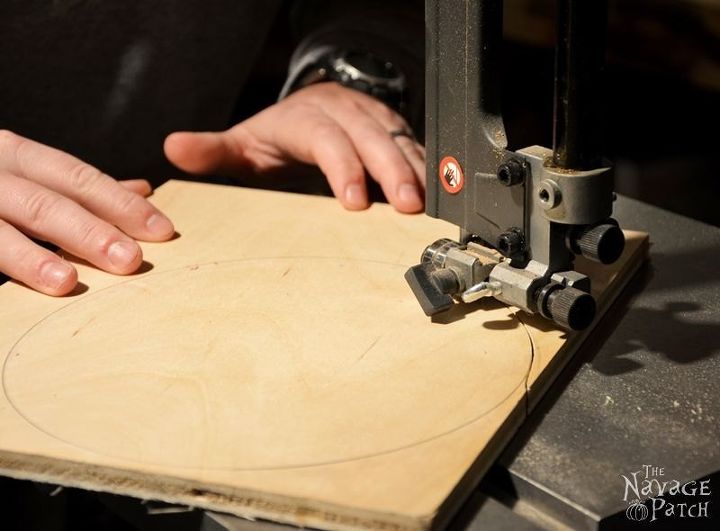
Once both platforms were cut, I sanded the sides to avoid getting splinters in my hands while working on them.
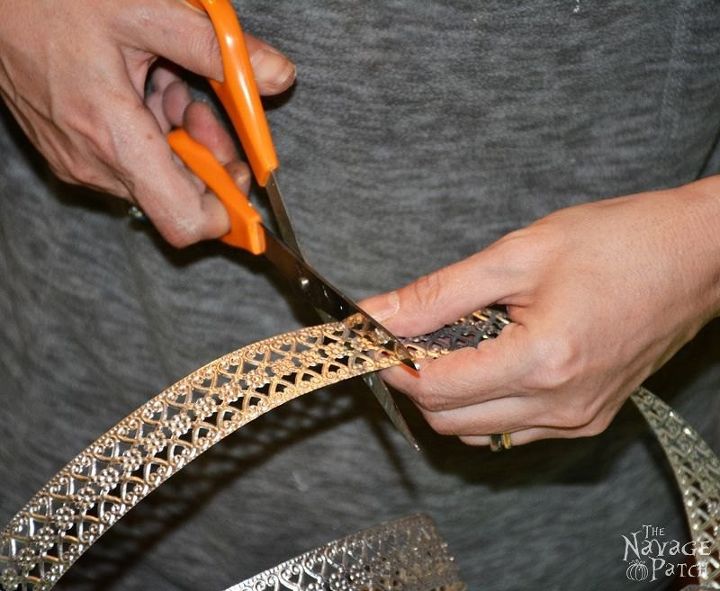
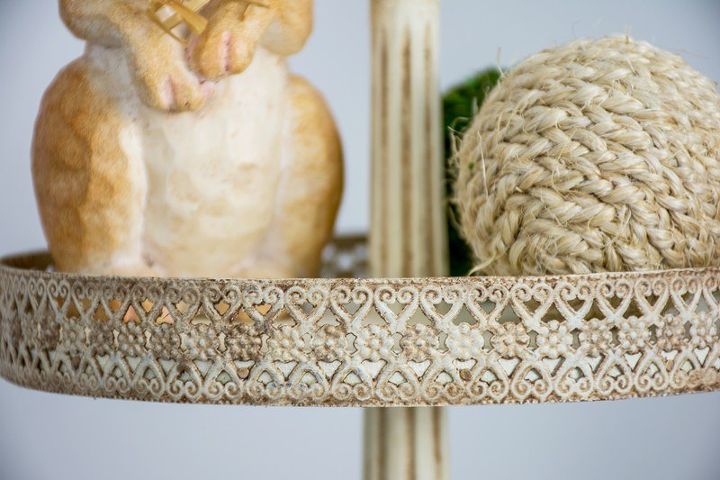
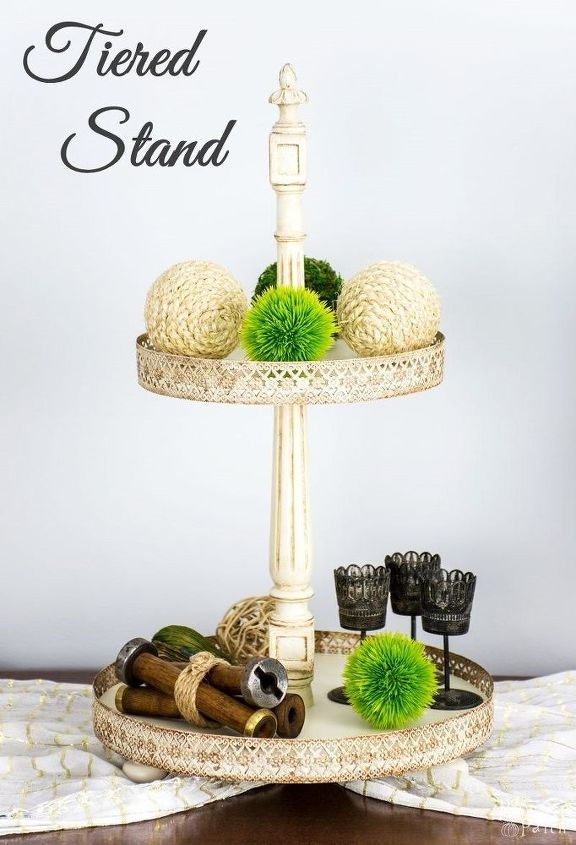
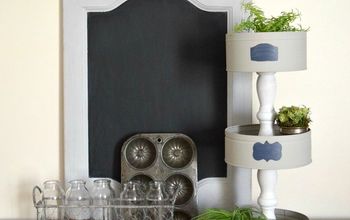
All the tiered stands I liked had ornate metal sides. To create the same look, I bought this decorative metal strip in Hobby Lobby's floral section for $6. If you don't have a Hobby Lobby nearby, you can find the similar ones on Amazon.
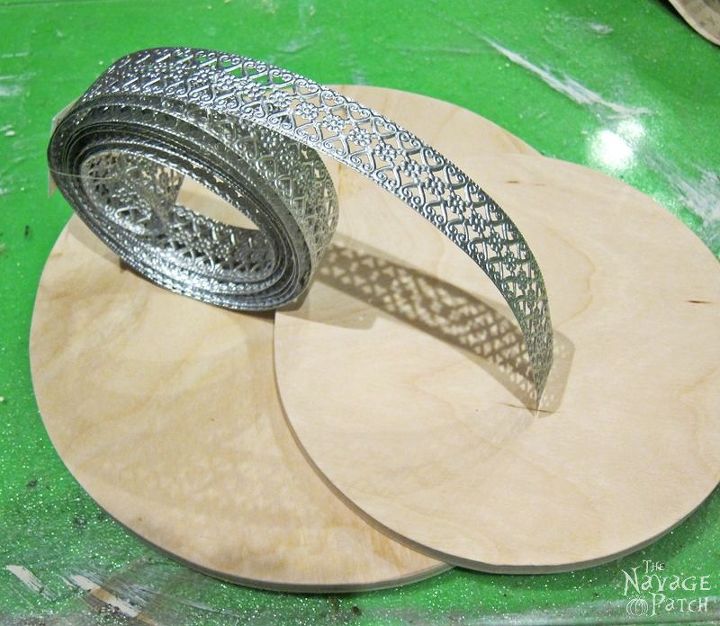
These decorative metal strips turned out to be the perfect material for my intended purpose, and they were so easy to work with - thin enough to cut with scissors or bend into any shape you like but strong enough to form a nice boundary for the platforms.
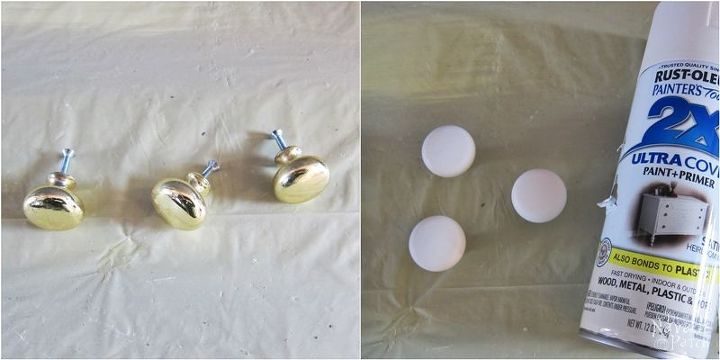
One by one, I primed them with spray paint, then I brush-painted with my homemade chalk paint in white color. While waiting for the paint to dry, I marked the center point of the platforms in preparation for the initial assembly. You can find the tutorial for How to Find the Center of a Circle on our blog.
Now everything was ready for creating the main body: The bottom tier was a no brainer - I attached the spindle to the bottom platform with a screw and some wood glue.
Phew!.. No wonder why I asked Greg's help with this doweled connection. Even trying to explain the whole process is like a nightmare for me, let alone doing it! I hope the pictures are speaking for themselves. Anyway, once all the tiers were put together, it was time to paint. Using my homemade chalk paint, I gave it 2 coats of paint. For my homemade chalk paint recipe please visit our blog.
Once the paint dried and cured for a day, I glued them to the bottom of the tiered stand with E6000 glue.
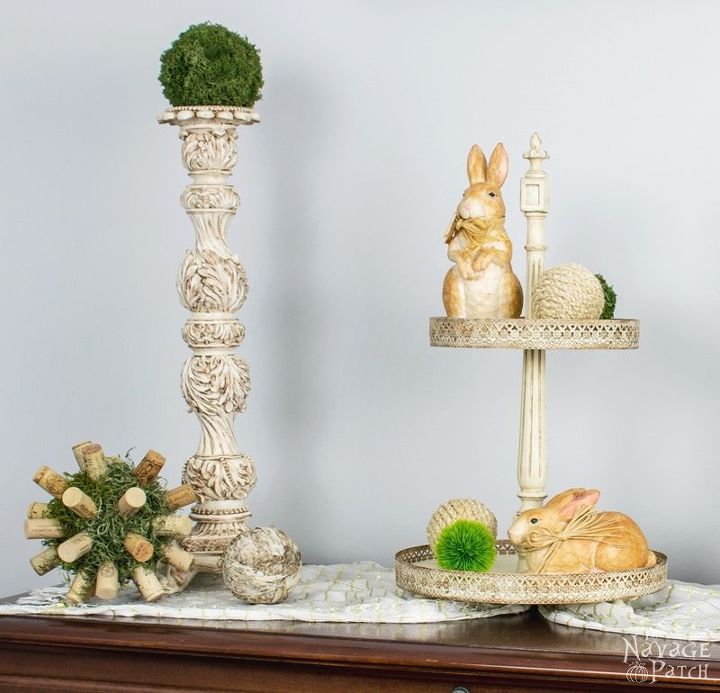
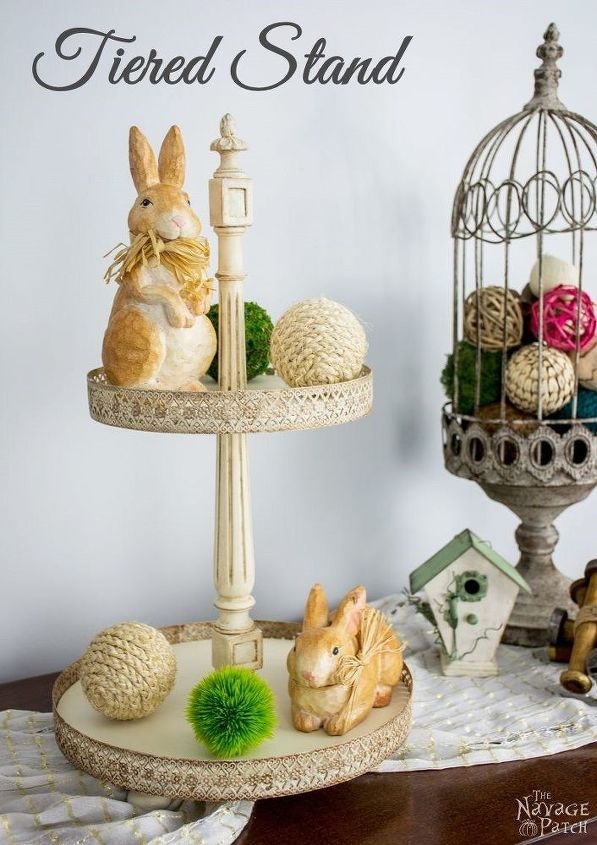
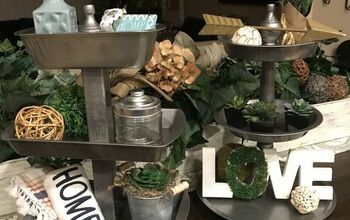
Finally I have a tiered stand to decorate!
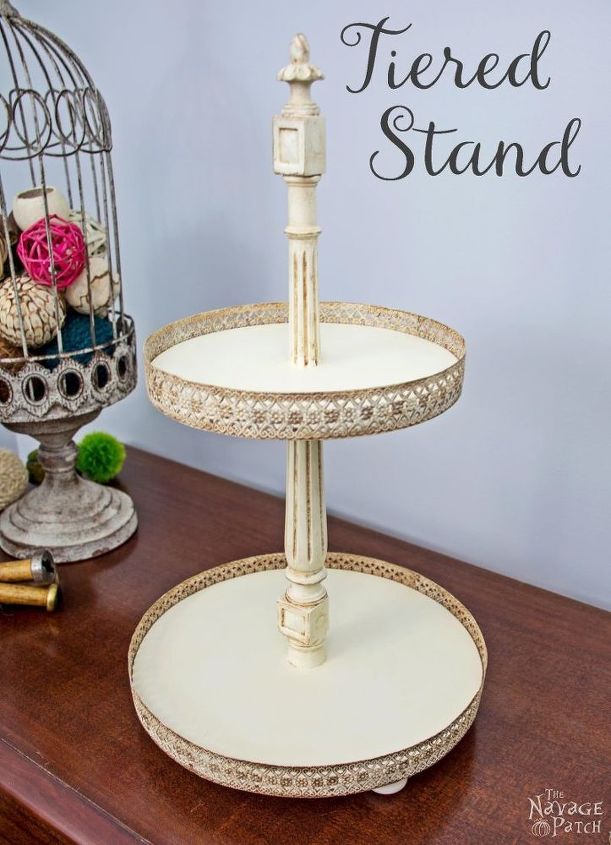
Not bad at all for a homemade one and a great way put those old spindles and discarded drawer knobs in use.
As we had the wood and paint in hand, my expense for this little beauty was only $6.00, which I spent on the metal strip. Considering they are sold for $80-90 (minimum) at several online stores, I think it was well worth my time.
I really am pleased with the way it turned out. Doesn't it look pretty with the bunnies in it?
You can find all the details of this project on our blog post.

Want more details about this and other DIY projects? Check out my blog post!
Comments
Join the conversation
2 of 189 comments
-
what a fab idea, thanks for sharing it
-
I love it. I'm in the UK and its virtually impossible to buy some of the things I see you all using, I want to make something similar...the one I liked on Amazon cost £56... thank you.


Frequently asked questions
Have a question about this project?
Where were the bunnies purchased?