


Why I Rebuilt My Potting Bench....

I built my pallet potting bench exactly 6 years ago on July 1st! You can read all about that process here. About 10 days ago, I rebuilt it! What?! So soon?! If you are like me, you've seen old, worn potting benches that have survived for many years. Well....I wasn't that lucky with this one.
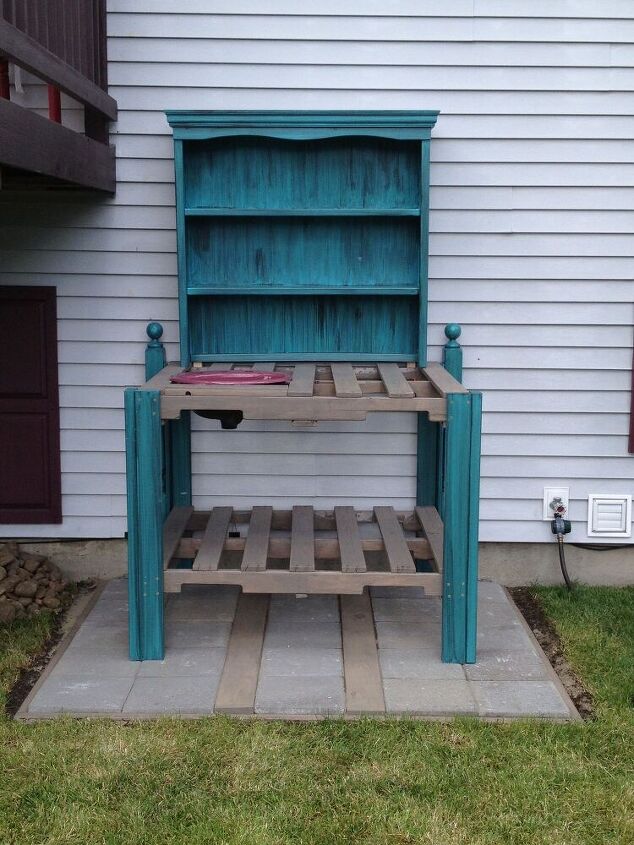
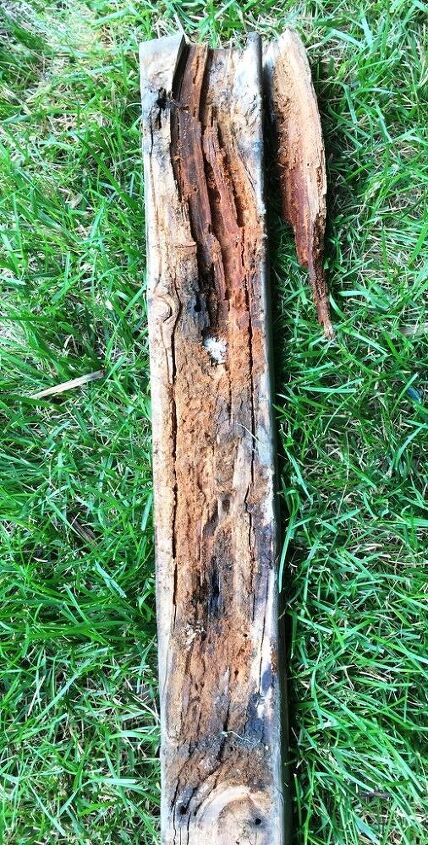
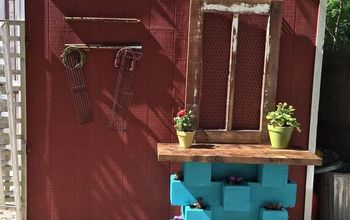
See how pretty she is?! I found the shelving unit for this bench at a thrift store and it fit perfectly on the top shelf at the back. Unfortunately, it only lasted a couple of years before the weather destroyed it. After taking down the shelving unit, we placed our old fence gate behind the bench. I really liked it there!The rest of the bench was holding up well; but last year, I noticed that the stain on the pallets had worn and needed attention. Did I give it attention last year? No. So, this year, I decided I'd sand and stain the pallets but when I got ready to do so, I saw that the wood was in really sad shape. Between Mother Nature and the Carpenter ants that we have around here, the pallets were no longer solid. The legs, however, were still in great shape, so I decided to rebuild it.
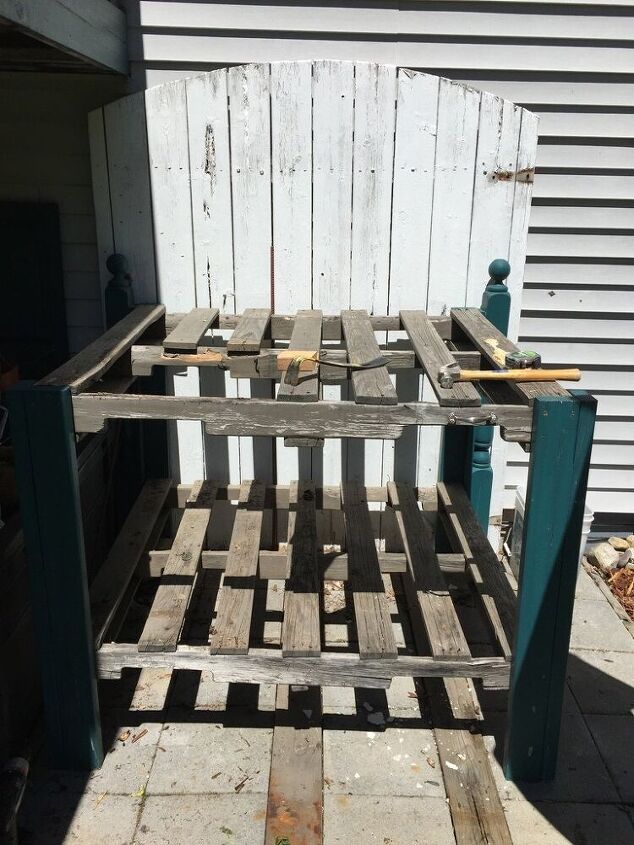
As you can see in this picture, the pallet would had weathered poorly.Since I was going to be doing the work by myself, I figured it would be easiest to remove the pallets piece by piece and rebuild as I went. The first step I took in removing the pallets was to take off the top 1" x 4" boards. These were nailed together so I used a hammer and crowbar to pry them loose from the cross supports.
As I was removing the 1" x 4" boards, I was able to see the condition of the six 2" x 4" crossbars. A couple of the crossbars splintered as I was removing the top boards, the ones that didn't splinter also showed damage.
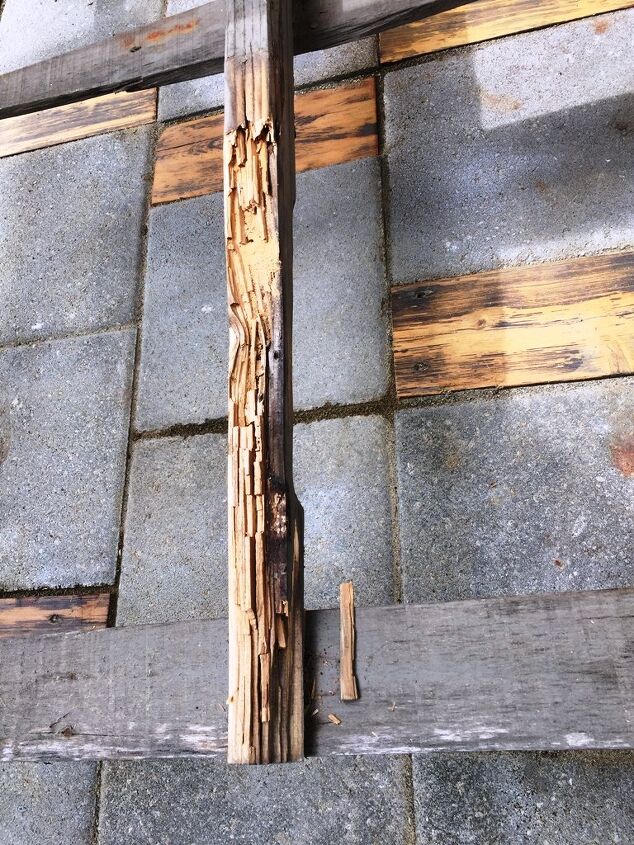
This board shows Carpenter ant damage was one of the boards holding up the sink.
Because I made the decision not to start from scratch on the bench, I needed to figure out how I could stabilize the structure while removing the pallet boards. I decided to buy some 1" x 4" boards and attach them under the crossbars to give those more strength. To help prevent damage from the Carpenter ants & Mother Nature, I applied two coats of primer then two coats of exterior paint to the 1" x 4" boards. I used the Valspar paint I bought a couple of years ago.
Once the paint was dry, I cut the 1" x 4" boards to length and installed them with screws. I placed one board under each of the 6 pallet 1" x 4" crossbars, 3 on the top of the bench and 3 on the shelf below. Then, I installed 2 additional supports on top and 2 on the shelf for added strength.
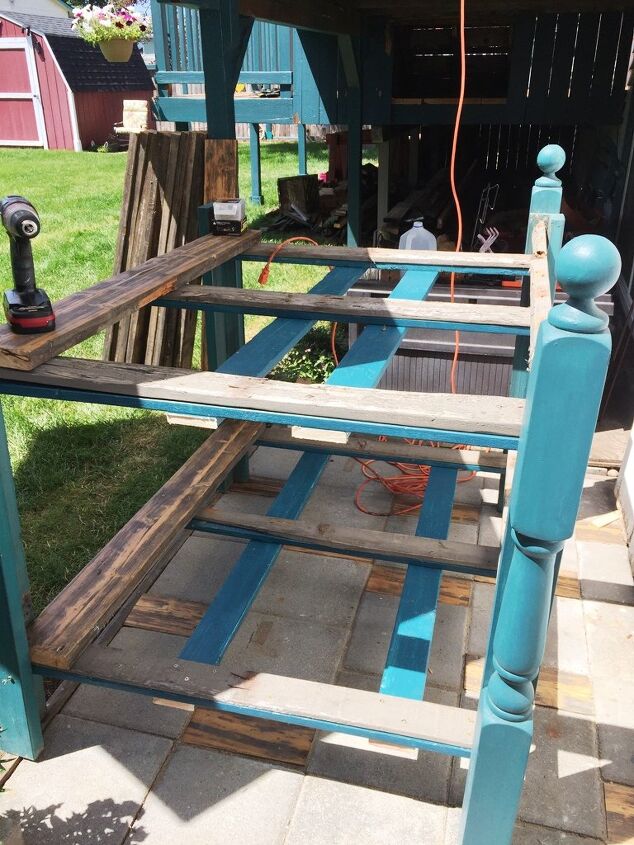
With the supporting boards installed, it was time to remove the 2" x 4" crossbars. I started with the front of the bench. When we built the potting bench, we screwed the legs to these boards so my first step was to remove those screws from the front legs of the bench. After the screws were removed, using my crowbar and hammer, I was able to pry up the two crossbars. These boards were nailed to the supporting boards and the nails were rusty so it took quite a bit of effort to remove them. After the front 2" x 4" boards were removed, I moved onto the center boards. These were also a struggle to remove.
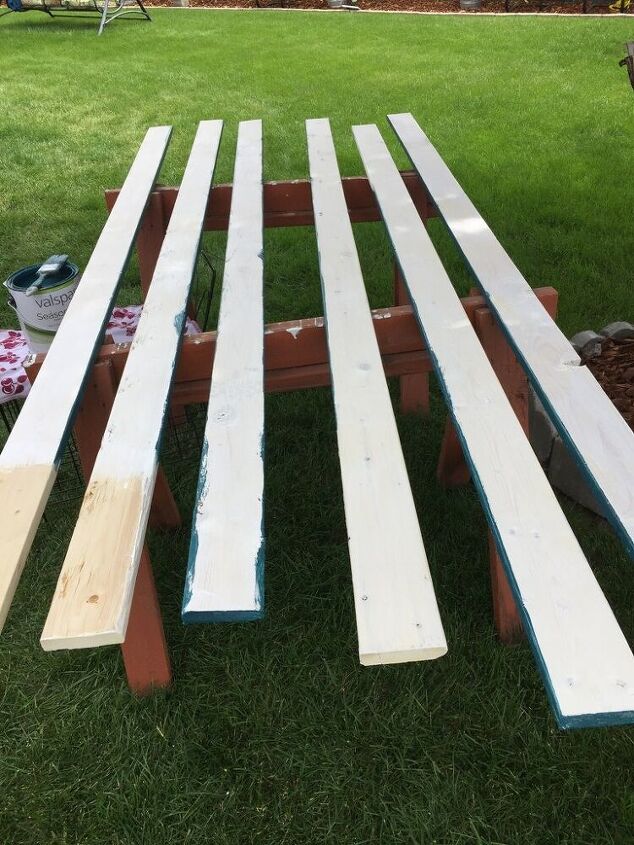
Once I had those boards removed, I decided to move onto cutting the boards that would be used to replace the pallets. We are having our deck fixed and part of that process has been to have all the floorboards replaced. While we are happy that the deck will be more stable, I had already sanded and stained the floor on the upper deck; this is the wood I decided to use on the potting bench.

The width of the bench is 48" so I cut 12 boards at that length, 7 for the shelf and 5 for the top. Since I was going to reuse the sink, I needed to make room for it to sit and would need to cut 2 smaller boards for that area.
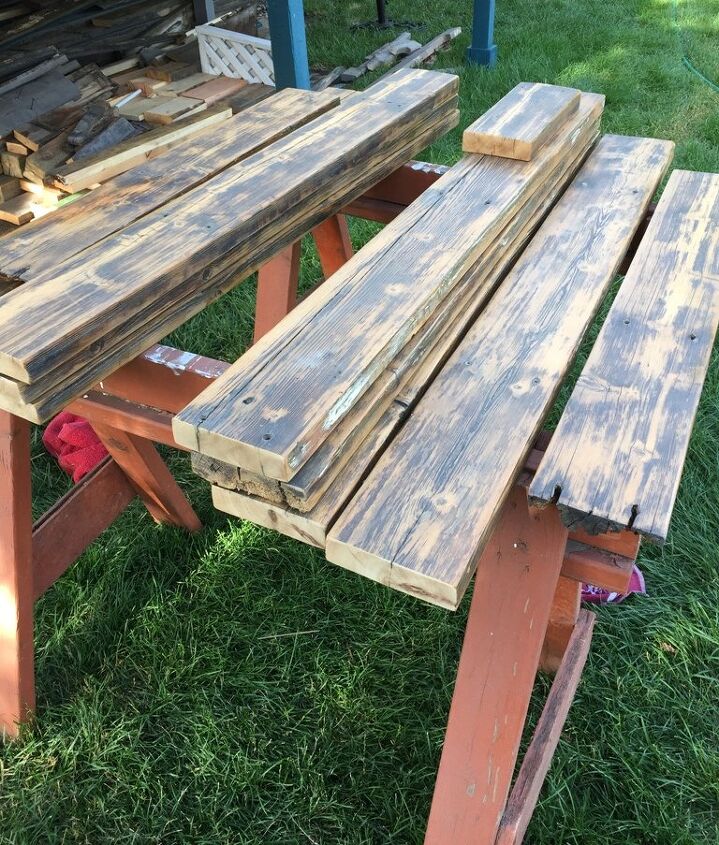
Once all the pieces were cut, I lightly sanded the ends and edges then applied stain to the edges before installing the boards.
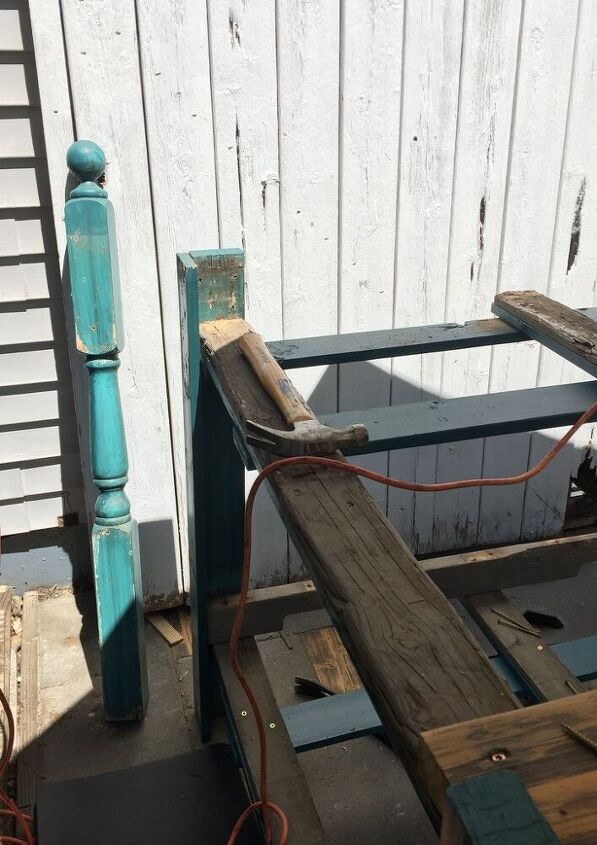
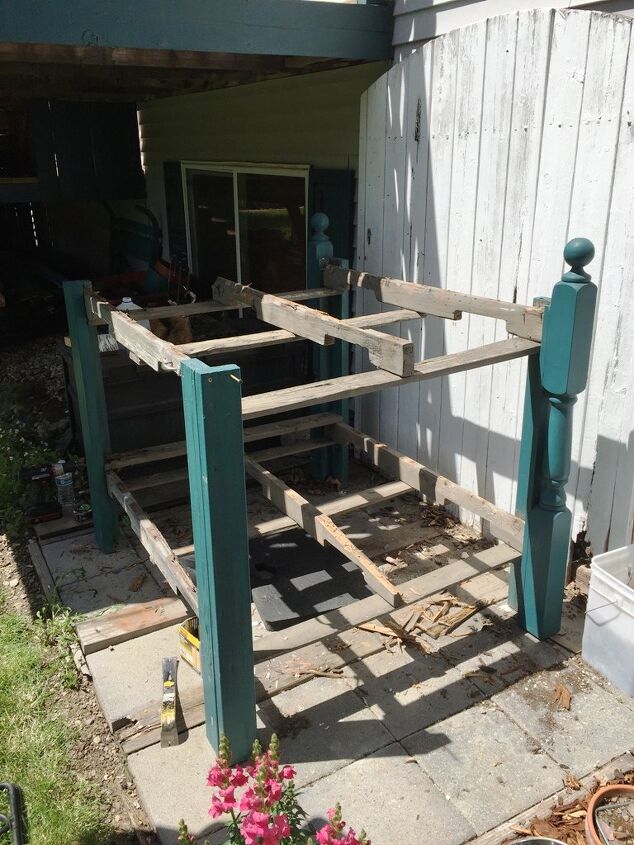
The next day, it was time to tackle those last two 2" x 4" cross boards. Since we had screwed the legs to them, I needed to remove the posts that were connected to the back legs to get to the screws. After removing the screws, I grabbed my hammer and crowbar again and started on the top board. It just did NOT want to budge.
Then, it dawned on me that I owned an oscillating tool that might work to cut the nails on these last two 2" x 4"s! I went into the garage to get it, attached the blade that would cut metal, and headed back to the bench. Boy was I thrilled that I was able to cut 9 of the 12 nails!!! I don't know why I didn't think of this tool earlier! It sure made the removal of those two boards much easier than the first 4!
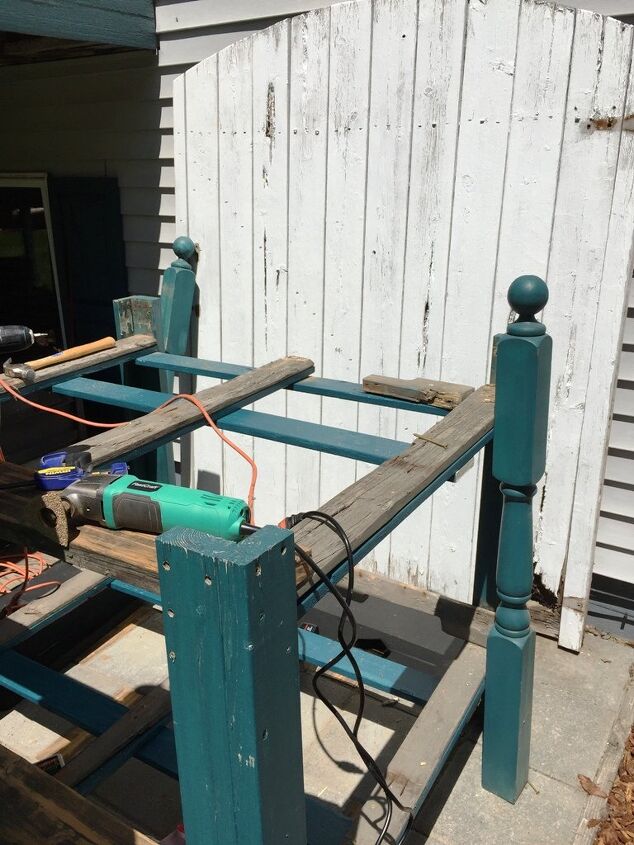
With all the 2" x 4" boards removed, I reattached the posts. I then sanded and stained the 6 remaining pallet boards to protect them from the weather and ants.
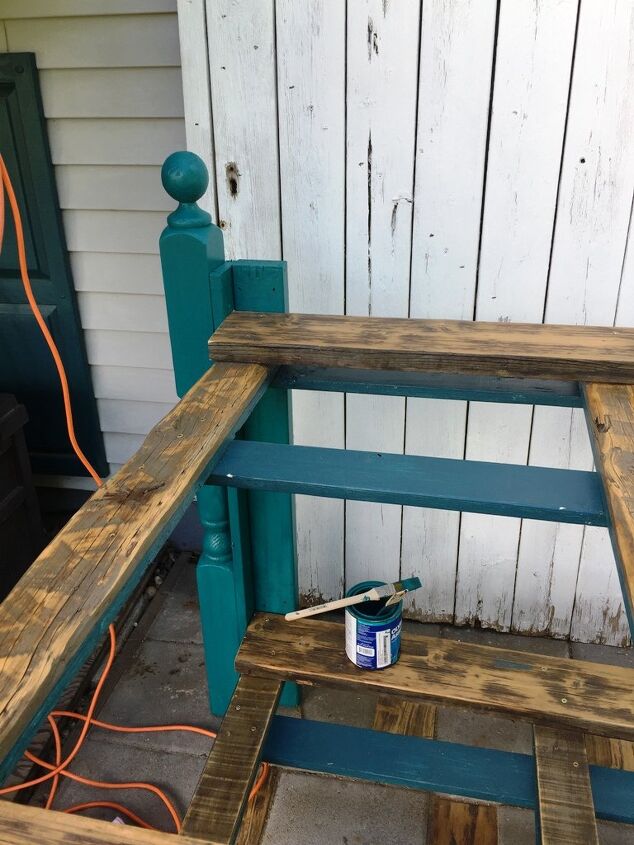
The next step in this project was to paint the legs. I was surprised that the interior paint I had used 6 years ago was still in good shape but since I wanted to freshen it up, I decided to paint anyway. I used a bright accent teal and applied two coats with a 1" angled brush.
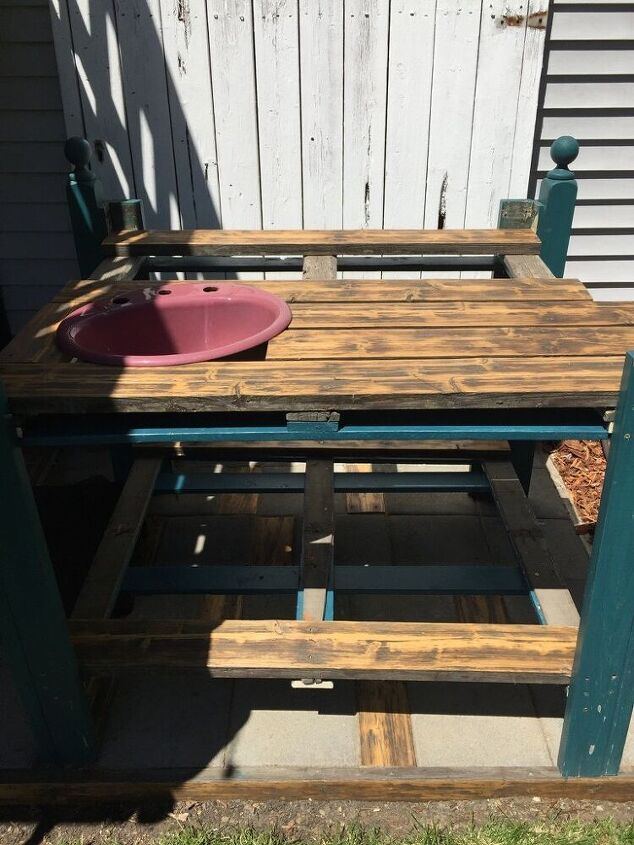
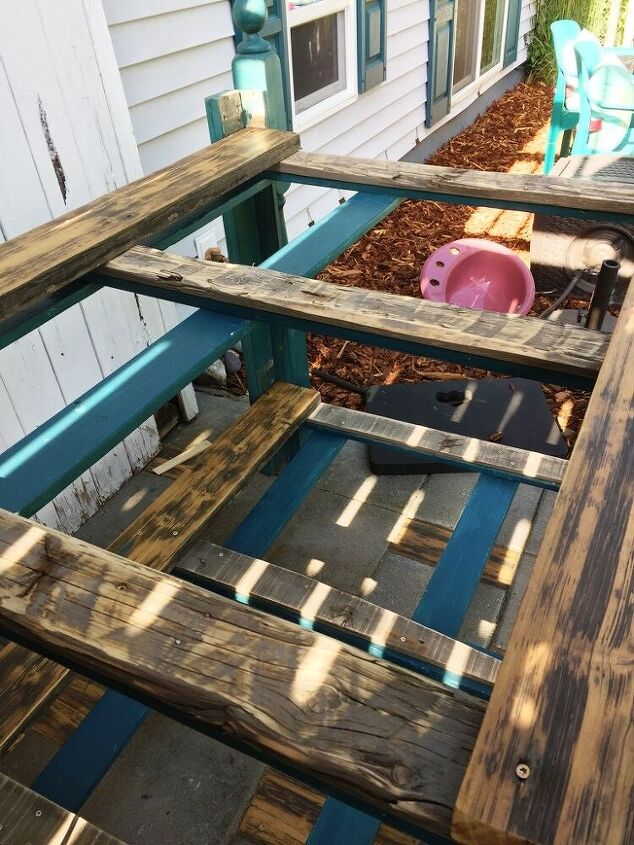
I began installing the 'new' wood to the bench with one at the front and back on both the top and shelf. I used 2 1/2" star headed screws for the new wood. With those 4 pieces installed, I did a dry-fit for where the sink would sit. The sink is cast iron so I wanted to make sure it was well-supported by the surrounding boards.Once I had the sink positioned where I wanted it, it was time to figure out how to cut the 4 boards so they would sit under the lip of the sink. There would be two boards under the right lip of the sink, one under the left and one under the back.The 1st board under the right lip needed trimming so it would fit more snugly against the sink. I decided that an angle cut would work and did that with the skill saw. When the cut was made, I set the board under the lip of the sink and measured how long the board needed to be & then cut it to fit. The next board that would be under the right lip just needed cut to length.
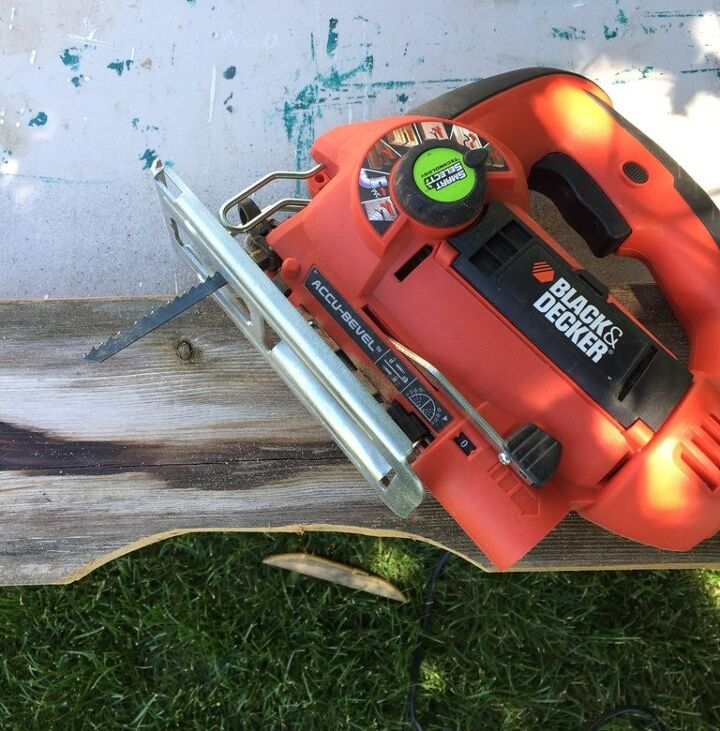
The board holding up the back lip needed notched so I used my jigsaw to make that cut. That left the board that would hold the left lip of the sink. After measuring the space, I used the skill saw to cut the length.
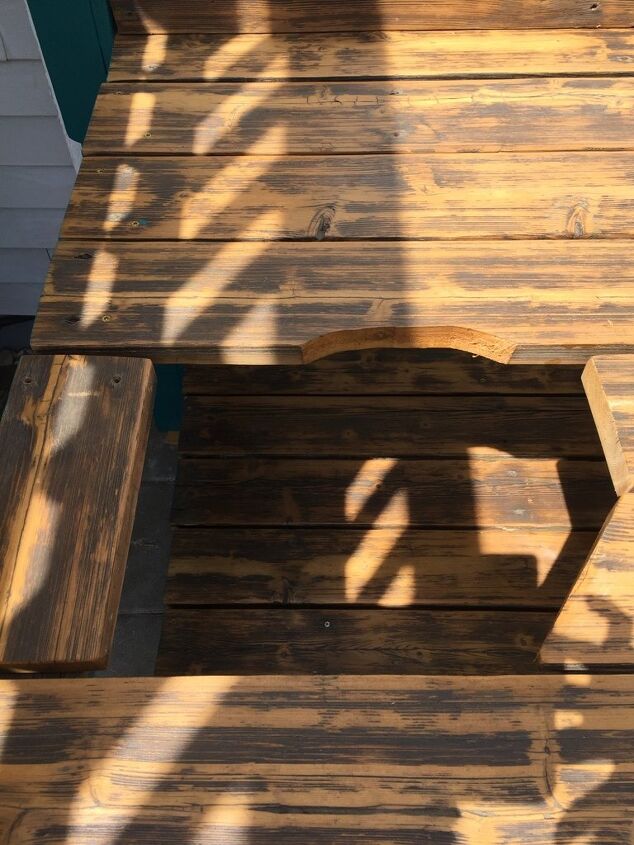
With the boards cut, it was time to secure them to the supporting boards. This part of the project went really quickly! Once again, I used 2 1/2" screws for this step. When installing the boards, I left a space between them to allow water and soil to fall through when the bench was being used to pot plants.
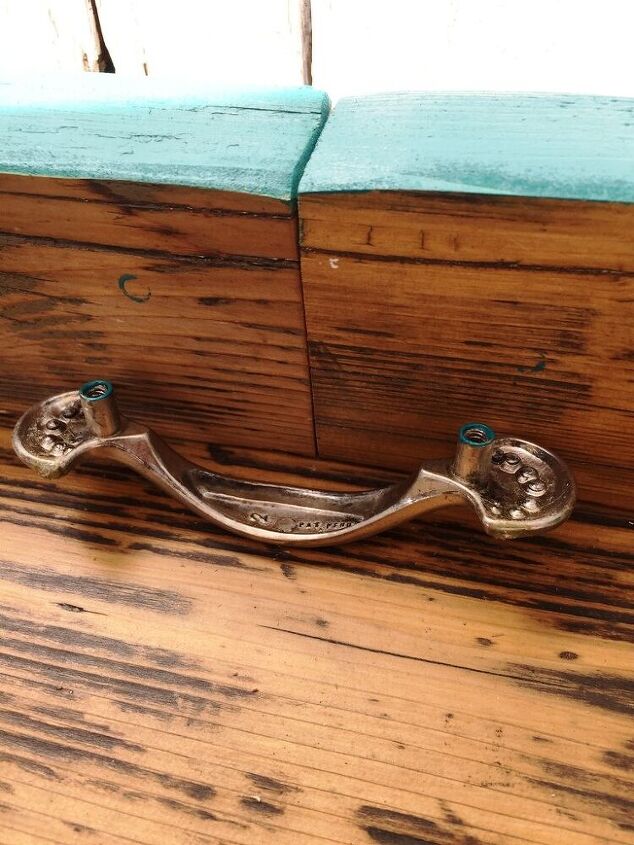
Since I removed the 2" x 4" boards, the new top sits lower than the legs so I added a board along the back edge. This board is in two pieces and came from a board that broke down the middle when it was being removed from the deck. I sanded the edges and painted them with the teal exterior paint then attached them to the back legs with 2" screws. I then added a handle to hold the two pieces together. To mark where I needed to drill for the screws, I applied a bit of paint to the handle then set it on the boards.
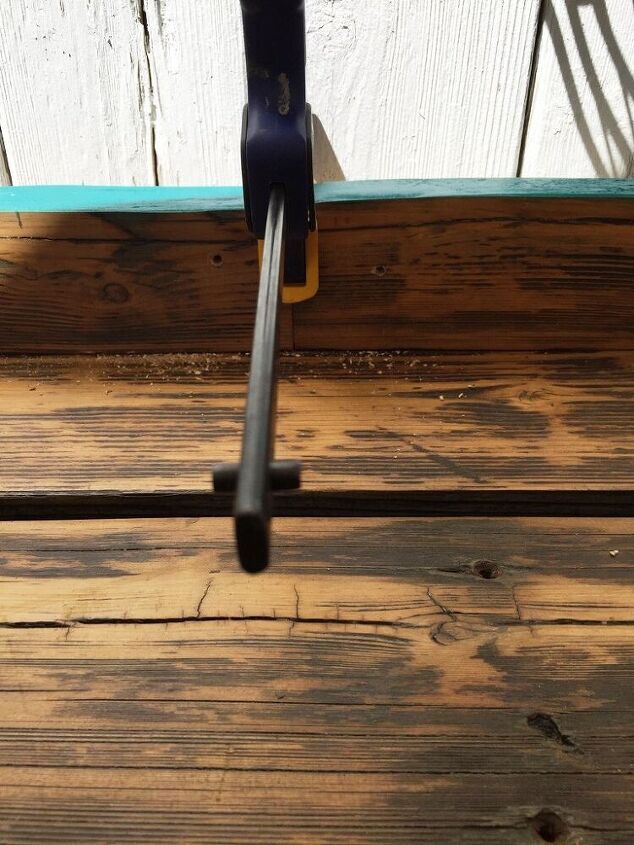
To hold the boards in place while drilling, I used a clamp. What I didn't pay attention to when marking the spot was to make sure it was level, which it's not. Good news, the screw holes that I drilled were in the right place. I'm just pretending that I meant to have it crooked.
Using trim I had on hand, I applied two coats of paint then using screws, attached one piece to the front of the bench on the top, and one on the bottom. The trim covers the supporting boards.

I also painted the ends of the new boards with the teal paint.
I cannot believe that I was actually able to rebuild this bench without starting from scratch. Yes, I could have removed the legs and started fresh but that seemed like way too much work! Since I had all the tools on hand, leftover paint from other projects & wood from the deck floor, the only cost to rebuild this bench was the screws ($10) & the 1" x 4" boards ($21). That is unless you count the blood, sweat & tears I spent removing those stubborn 2" x 4"s!!!
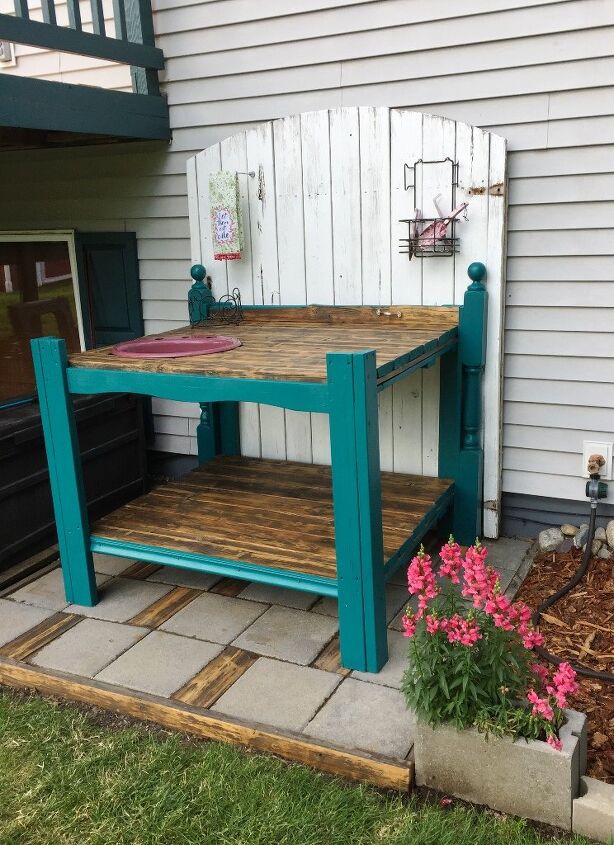
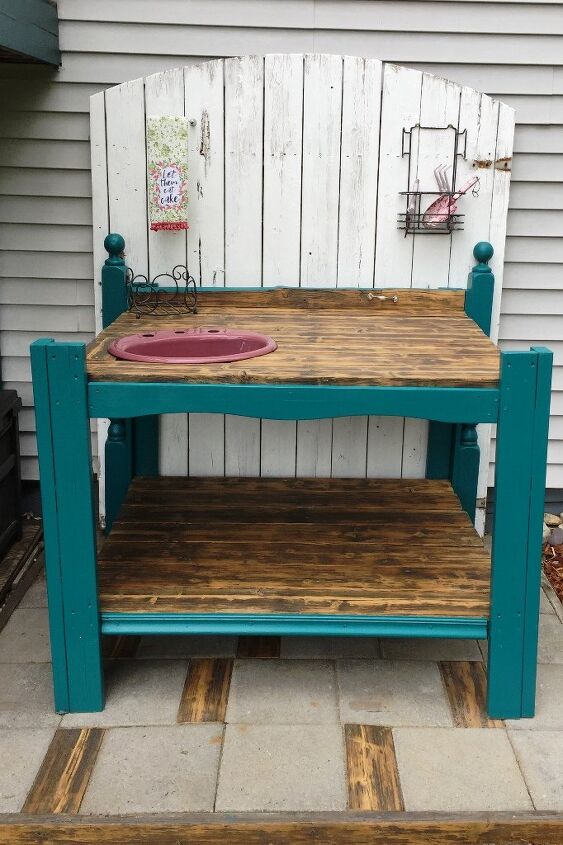
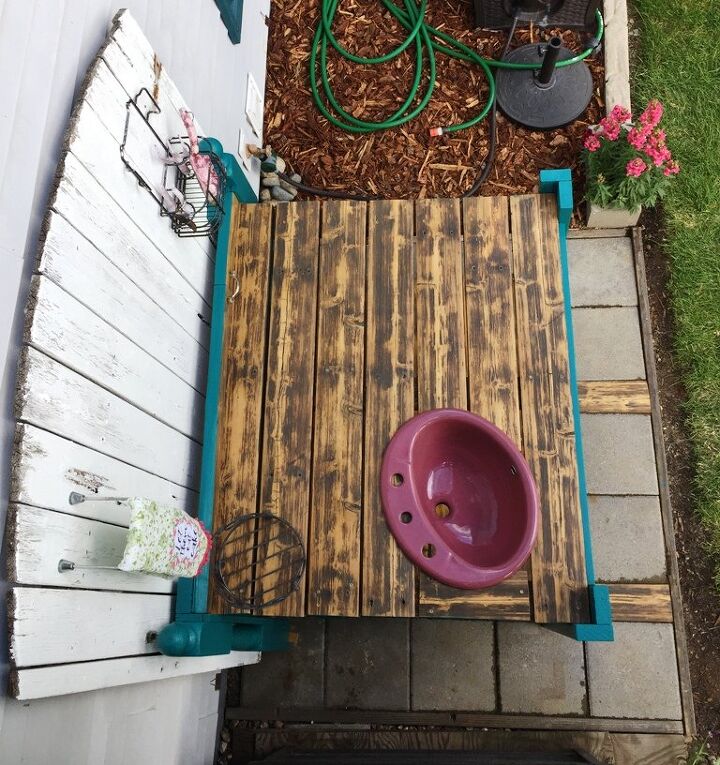
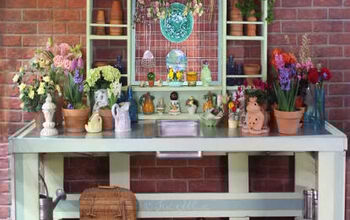
We are thrilled with the new look and I have no doubt that it will last for many years!
Comments
Join the conversation
-
That was a great save. It looks great.


Frequently asked questions
Have a question about this project?