


How to Make Stacked Stones at Home

Stacked stones can get costly, I love the look of it and I think it would make for an awesome feature wall or at an entrance. They are versital and be used indoors and outdoors projects. In this post I will cover the steps to making your own stacked stones.
Materials Used:
Cement All: https://homedepot.sjv.io/Qv7VY
Stacked Stone "Cement Molds": https://amzn.to/2lECzRs
Gloves: https://homedepot.sjv.io/5DoOn
Dust Mask: https://amzn.to/2l9FW2u
Drill: https://homedepot.sjv.io/qGWxb
Cement mixer Mixer (Mixing tool): https://homedepot.sjv.io/a973j
Set Control “Cement Curing slowing down”
Water 5 quarts “Per bag or a 4 to 1 mix”
Cement trowel
Step 1: Getting Started
Before taking on a large project, I would recommend trying out some samples first to get a feel for the process of making faux stones. As I mentioned in the video, just about any cement mix could work for these. If you want to produce this fast, I will recommend a fast setting cement-like Rapid set. Rapid set is a more expensive option, but I have had excellent results. That’s a decision you have to make, how long are you willing to wait.
The “ Cement All Mix” I used, cures with an off white look to it, I think this makes it easier to aim for the color tones you may want. Whereas, other cement will cure with a gray look.
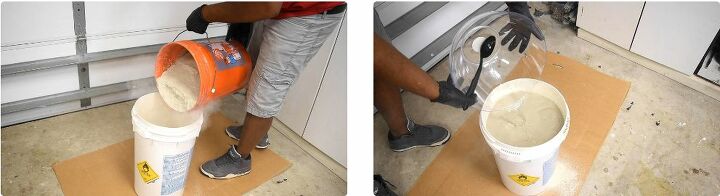
I emptied a bag of cement mix into a bucket, then add water. To slow down the working time of the fast setting cement, I added a pack set control to the water before pouring it into the cement mix.
Note: When working with Rapid Set, it’s essential to mix good, so I would recommend mixing in a 5-gallon bucket. With other cement, you can use a mixing tub.
Step 2: Mixing the cement
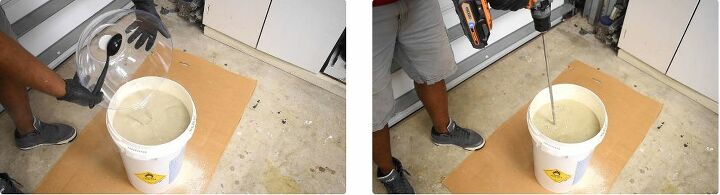
After pouring the water into the mix, use a mixing tool when working with the “ Cement All“. For other cement mixes, a shovel is fine. Mix the cement thoroughly, scrape the walls of the bucket and the bottom. You can use a corded or cordless drill for this, just set the speed to one for a slower RPM.
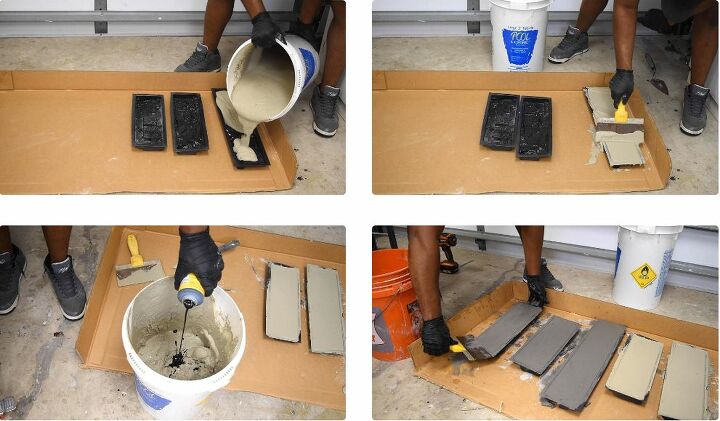
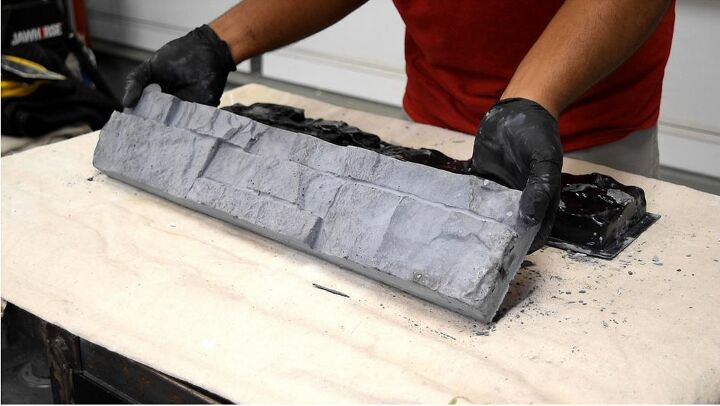
Step 3: Pouring cement into the molds
Now, it’s time to pour the mix into the cement molds, I found that it was less messy to add a small amount of concrete at a time, rather than pouring it out the bucket. Next, level the cement to the lip of the mold to leave a flat surface. Make sure you are working on a flat surface.
Note: Vibrate the mold to release trapped bubbles. You can do this by lightly lifting and dropping it on the work surface; this will also self-level it.
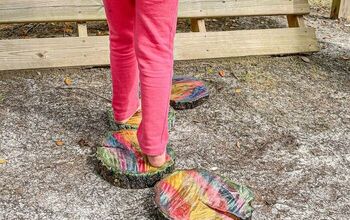
I also experimented with color here are a few options.
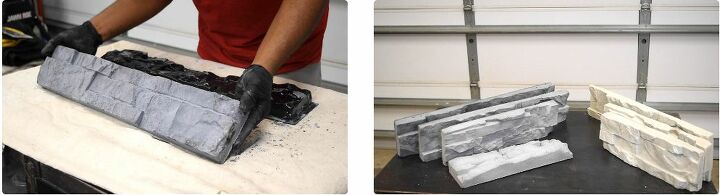
Step 4: Popping the cement mold
If you want to try the “Cement All mix” as the chemicals work to cure the concrete, it will generate some heat after about 15 minutes or so. You can water it down to keep cool. With other cement mix this is not necessary. The Cement All seem to be high maintenance, but I think it is growing on me.
After about 35 minutes I heard the concrete separating from the molds, so if you hear some crackling noise, it’s nothing to worry about. I removed the mold around the 40-minute mark, I also continued to spray it down with water in a bottle.
Step 5: Done
I think working with these Stacked Stone molds could open up a world opportunity. Experiment with different colors and different cement to find out which one makes sense for you.
Here are some other models of cement molds that can make awesome faux stones.
Flagstone: https://amzn.to/2lHTNgM
Stone mold: https://amzn.to/2lI3POZ
Comments
Join the conversation
-
Ah Glen, your projects always carry the torch for those of us who don’t like farmhouse style. Nicely done!
-
If you aren’t a pro at making stacked stones, Idk who is!


Frequently asked questions
Have a question about this project?