


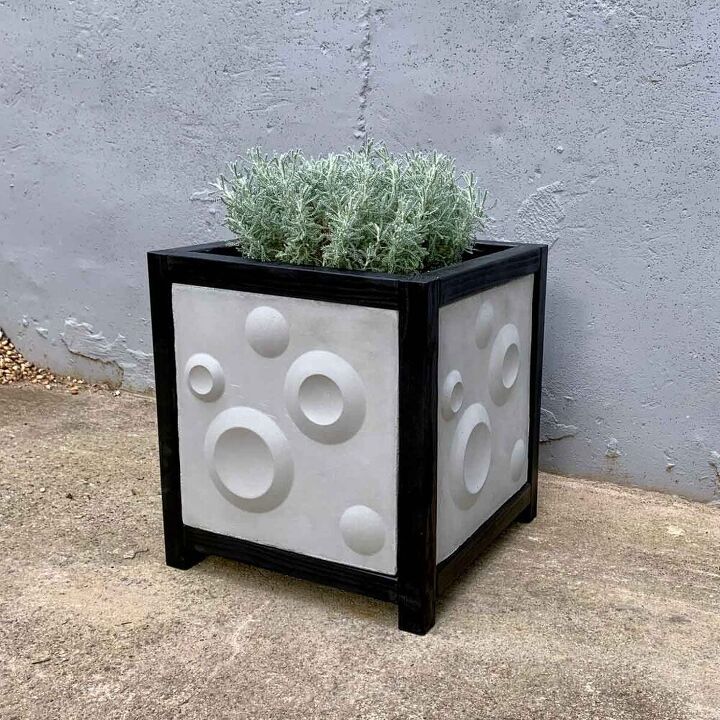
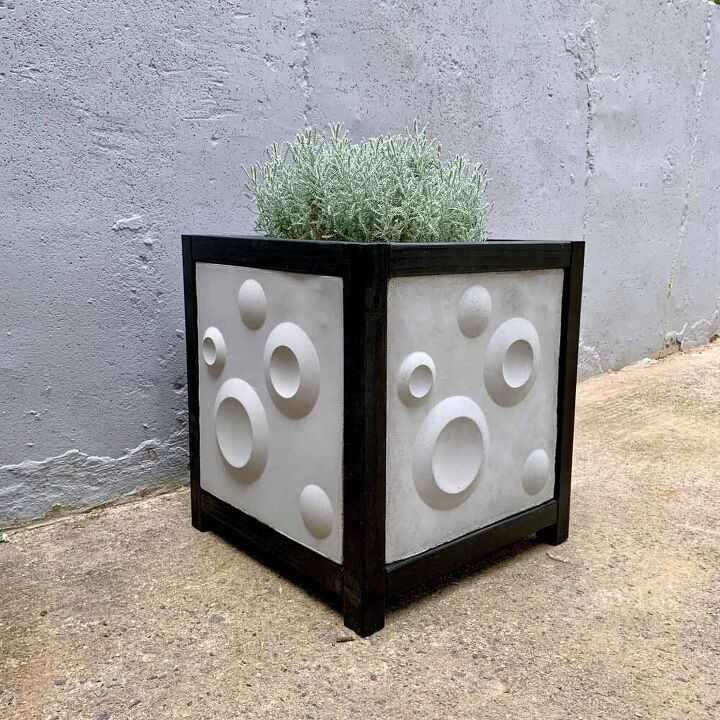
A Planter Box Made With Handmade 3D Cement Tiles
This 3D cement tile planter box idea came to me thanks to Handyman’s Daughter - https://www.thehandymansdaughter.com/diy-modern-outdoor-planter-box/. She made this awesome wood planter using 3D plastic tiles.
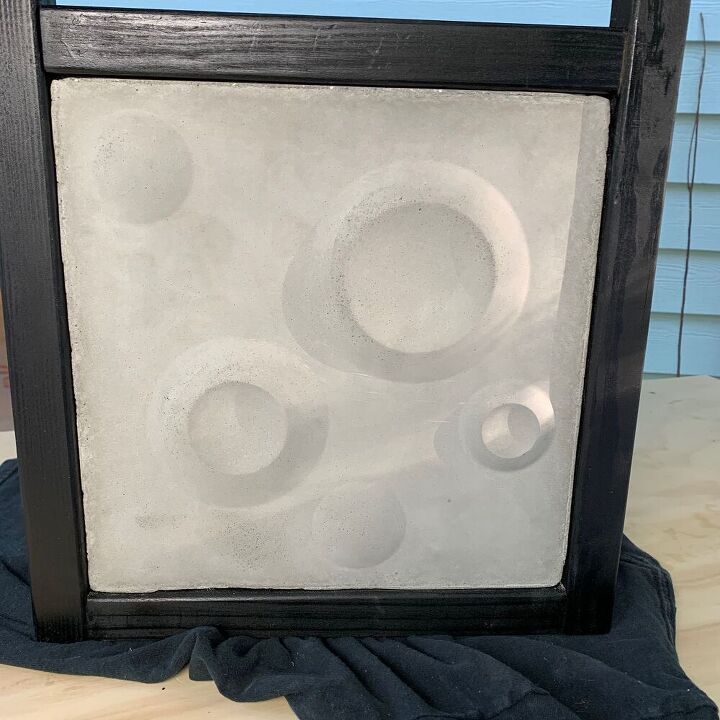
The 3D wall panels are so perfect to use as a cement mold, you’d think they were made for this. And what’s really nice is that they come in different designs. This was a particularly challenging project because I don’t have much experience working with wood. And these PVC panels are really cheap!
Important Tutorial Notes
I made this planter to act as a decorative box so I could just insert a plant a that’s in a plastic potting container. This cement tile planter box is pretty heavy and you don’t want to have to move it around too much. Using a plant insert is much easier if I need to move it, or need to replace the plant (not all my plants thrive). 😉
You can plant this planter box, I would just suggest that you follow the same steps but at the end, line the inside of the box with landscape fabric.
…..
I made each tile one at a time because I had only ordered one wall panel. These aren’t sold in the store so until I could see and touch it in person I didn’t want to commit to buying more. I knew making these would be a four day process, but I was okay with that- or so I thought.
After having made these, I strongly recommend purchasing 2 wall panels so you can make 2 at a time and be done in two days. Another issue with only having one tile was that with each casting, my panel became more scratched and dinged up. My first two tiles were beautiful, smooth and unmarred, but by the time I got to the second two, they were a bit scuffed up.
The tutorial photos only show one form for a single tile. However, I have written the steps for my recommended two at a time. There were some PVC tiles, like my retro circles, that were less than $3. So depending on which pattern/design tile you choose, in my opinion (now), two at a time would have been worth it.
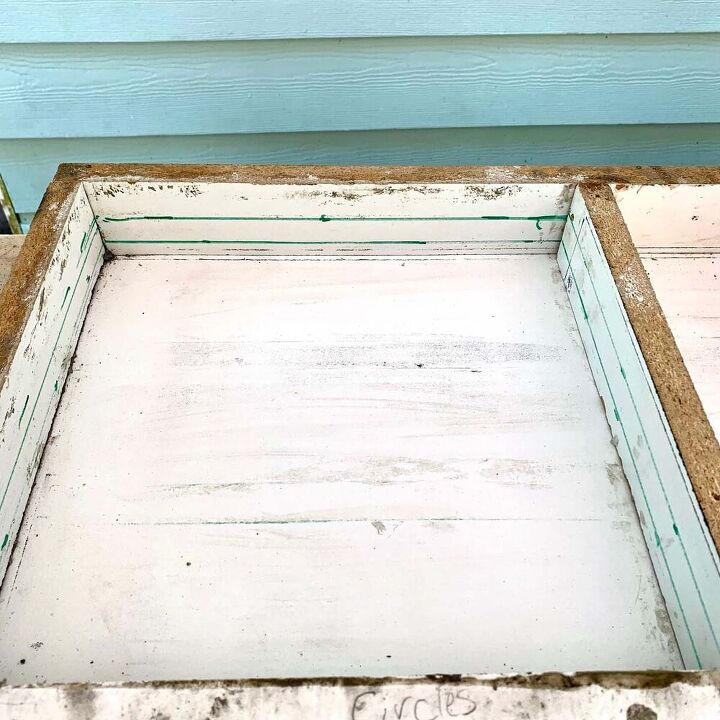
You’ll also notice that my photos show a used melamine form that I had leftover from another project. I used that, but adapted it to this tutorial. So ignore the extra space, marker lines and the two different colored caulk lines that you see. I just made do with what materials I had on hand.
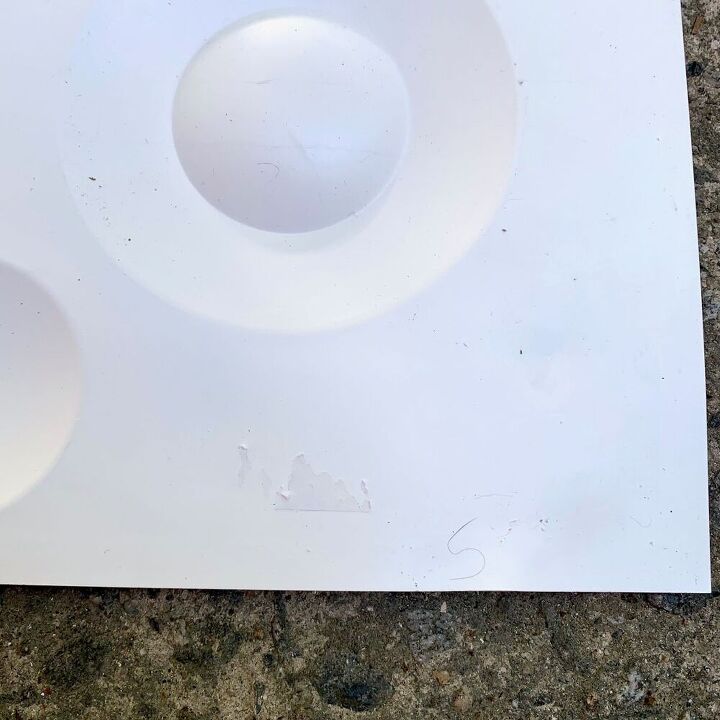
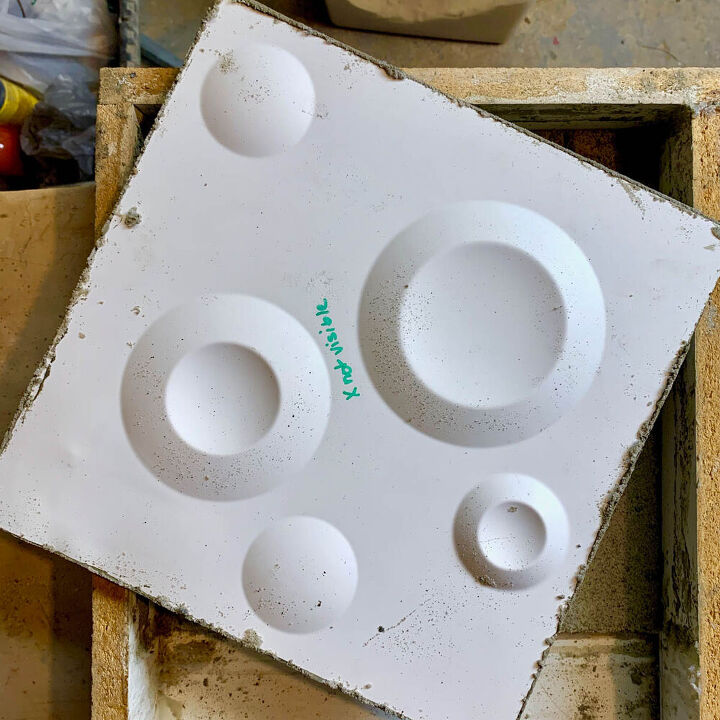
Unfortunately, this panel came with a sticker on the back, which is the side we are using for the mold. If yours has this sticker as well, then you’ll need to remove it because we don’t want an imprint of the sticker on the tile. Use a sponge or a rag to first wet the label with water to soften it.
Once it is soft, take the citrus adhesive remover or baby/mineral oil and rub off the label. Be gentle with it, so that you don’t bend the panel. Make sure all the adhesive has come off and then wash it with mild soap and water.
Take a sharpie and on the side that you removed the adhesive (the backside) and write a note to yourself saying “this side shouldn’t be visible”. It’s very easy to mistakenly place the tile in the mold backward and end up with a reverse casting.
**If you love cement crafts projects then you may want to check out my article on how tested 6 different types of concrete and cement mixes. There, you can also get my Free Pocket Guide to Cement and Concrete Mixes.** 
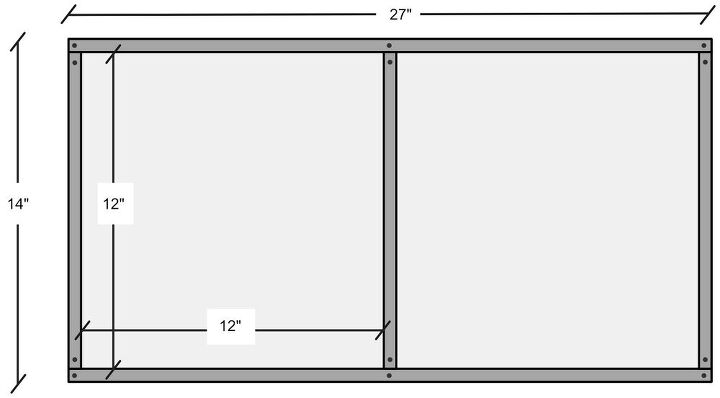
The panel is 11 ⅞ x 11 ⅞” so we need to create a form that fits two of these. We are making the forms 12” to allow for some wiggle room so we can get the panel in and out when we are working on leveling it in Step 3.
Using a jig saw or table saw, create the base for the mold by cutting your melamine board to 27 x 14”.
If you use the same 3D panel design as my retro circles, then your sides will be 1 ¼” high. If you have a different design, then adjust the height accordingly.
Take the measurement for the extruded portion and add ¾” to it, that will give you the height needed for your sides.
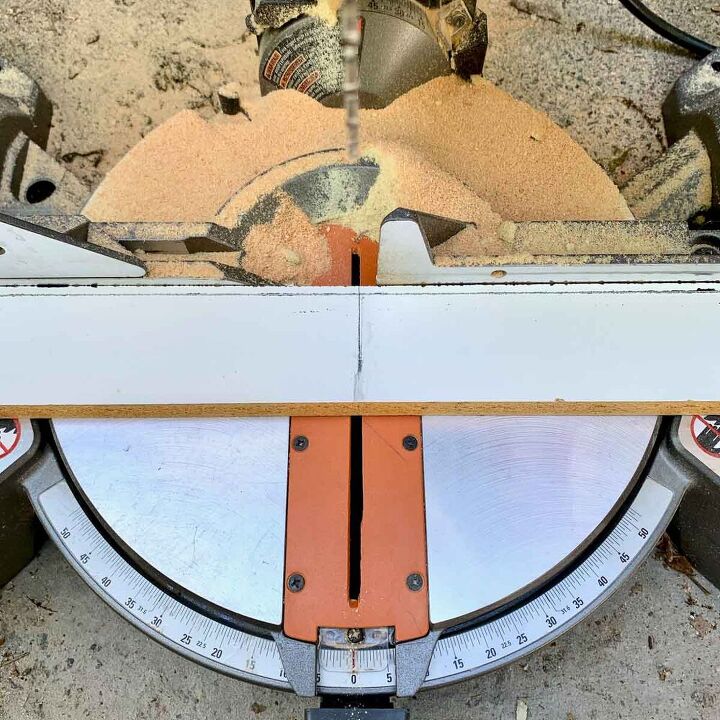
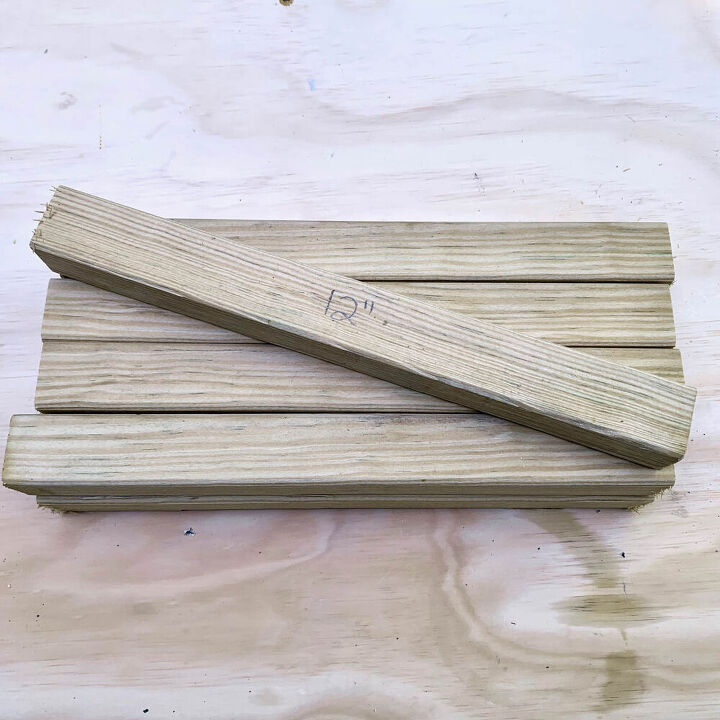
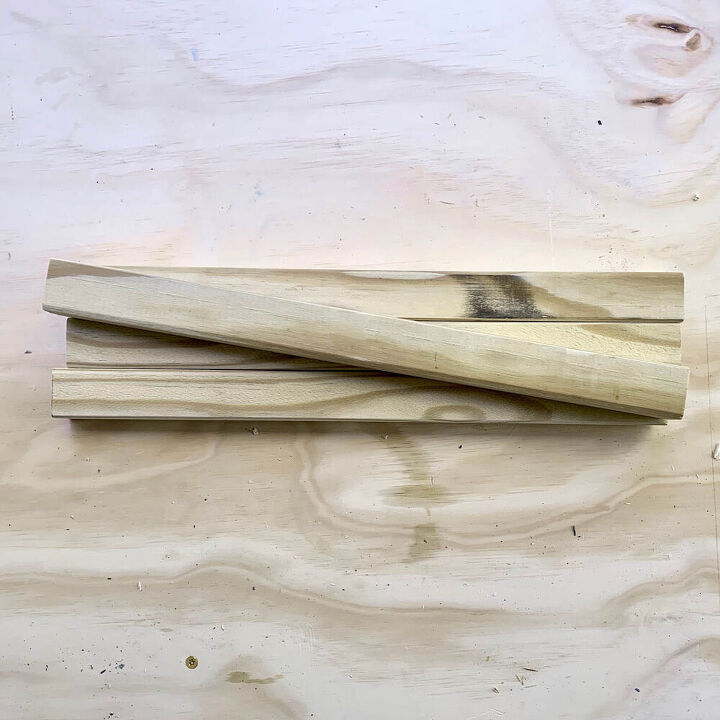
Then with a jigsaw or table saw, cut the length of the sides from the leftover melamine. You will want 2 pieces 39” long (the length of the 12” and 27” sides together). Now use a hacksaw or miter saw, to trim the lengths- two pieces at 12” and two pieces at 27”.
Next, screw the sides onto the melamine base as shown in the illustration above. Use the squaring tool to ensure that your mold is square. Mine wasn’t square enough which caused my tiles to not be square- making fitting them into the frame a bit trickier.
The inside edges need to be caulked where they meet the base to prevent sand from getting underneath, but your longest side that is closest will be the side getting removed when you demold. Because of that, the caulk will also be removed and then replaced after the first set of tiles are demolded.
So for this removable piece only, apply lubricant to the melamine (oil, vaseline or paste wax) in those inside edges, then add the caulk to all the inside edges for both molds.
**For another cool large planter project, check out my Large Cement Fabric Draped Flower Pot . **
The sand will serve as a leveler for the panel and will help keep the non-extruding parts of the panel from bending down once the weight of the wet cement is on top. If you don’t support those parts, you’ll have a tile with flares everywhere and it will be misshaped.
Measure and mark a line ½” up from the base on all inside sides of both forms. It will be easier if you mark a whole line across the sides, this is where you will stop the sand.
My form sides were higher than yours so I had to add an extra line at ¾” to mark my stopping point for the cement, in order to keep the tile at ¾” thick. You don’t need that line because the top of the sides is your stopping point.
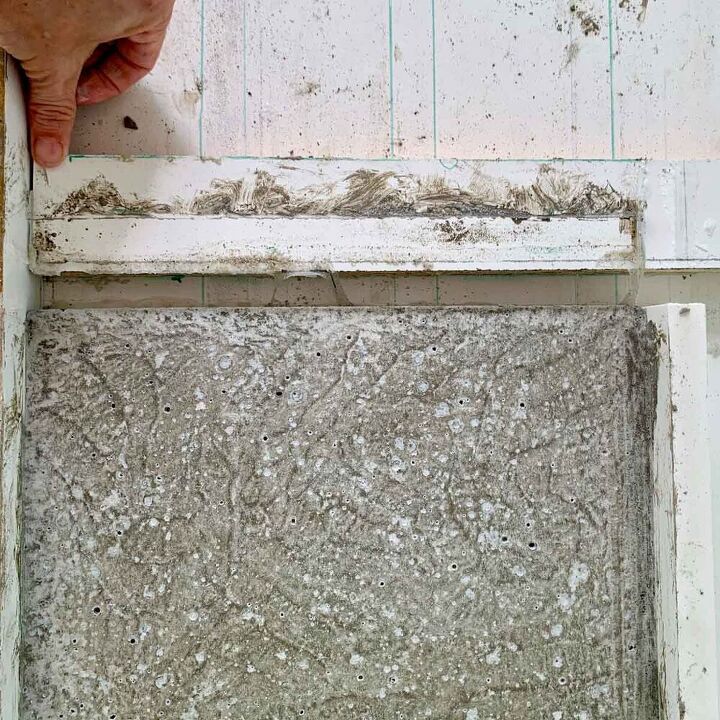
Once your caulk is dry enough that sand won’t stick to it, add the sand to just below the ½” mark in both forms. The extruding part will be facing the base and should be pretty much touching it. The sand will fill the gaps in between the extrusions and support the panel.
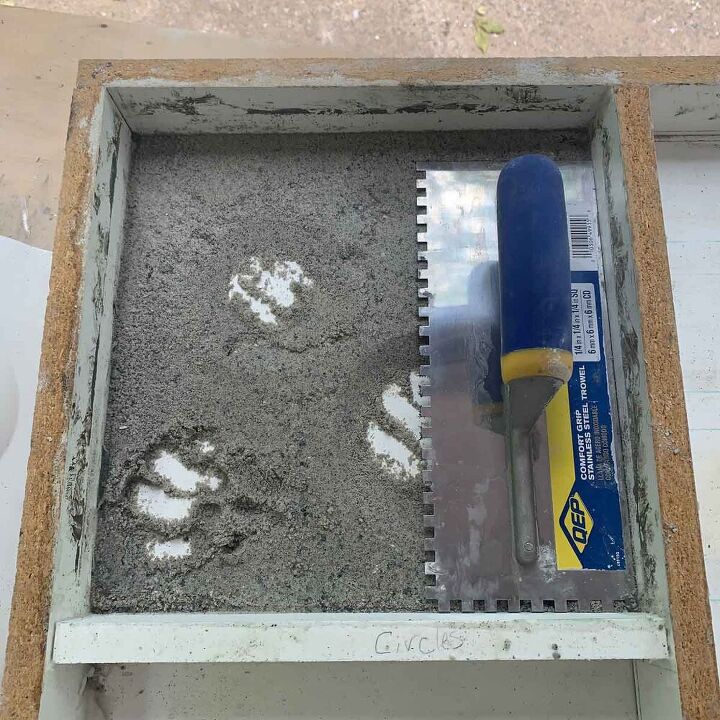
Use the trowel to get the sand fairly level and then take the 3D panel (make sure the side you wrote on is face down) and press it into the sand. Wiggle it back and forth to get the sand to mold itself around the panel.
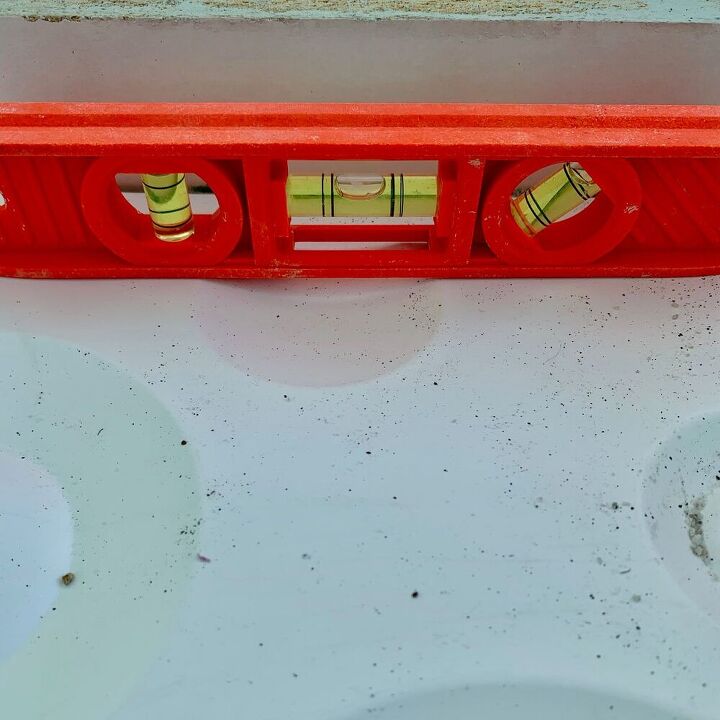
Check to see that it is level- it’s the outside edges you need to be most concerned about. This took several reworkings for me to get everything level. If it’s not level, lift up the panel (you may need to use the edge of the trowel or a screwdriver to get it out) and you should see the indentations from the panel.
Take out and/or add sand where it’s needed and try again. For each tile you set, you’ll get a little faster at this. Once it is level, move on to leveling the second tile.

Start by combining the cement and sand at a 2:1 ratio. You will only mix enough for one tile at a time. Altogether, for each tile, you will mix about 5 cups of sand with 2 ½ cups of cement and water.
However, I recommend mixing ½ of the cement and until there are no lumps, then add the second half and mix it and combine. This will help keep the cement smooth.
The consistency you are going for formed, but soft. I ended up adding a little more water to my mix than what you see in the photo above, which was a touch too thick. It should flow freely from your bowl when you pour it in- kind of a big soft, wet blob that is thicker than a thick milkshake.
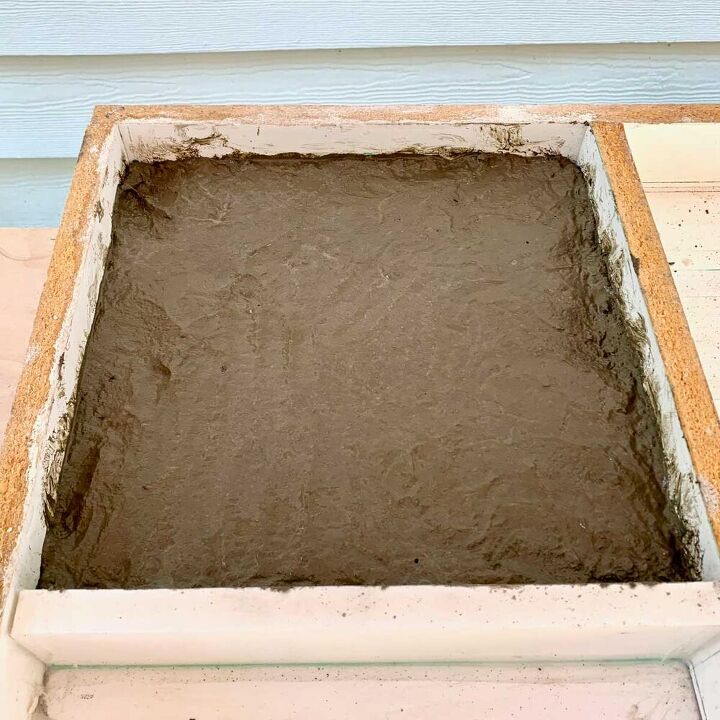
Pour the cement into the first form. Then just lightly spread it, but don’t level it yet. Instead, move on to making the cement mixture for the second form.
Once you’ve poured the second form, go ahead and level them both. Use the trowel to help with this. Lift the form and tap it on the work surface to help level the cement.
Check that both tiles are level (important) and then vibrate the molds to release air bubbles. To do this, I found it easiest to shake and tap the form on the work surface- like you did to level it. I did this for about 20-30 seconds, but then rechecked that the cement was still level at all points.
Now let the tiles cure for 20-24 hours.
To demold the cement tile, just unscrew the long side closest to you (the way I made my form, it was the short side seen in the photo). Then peel it back by pulling it toward you. It should bend back easily. This will give you enough access to lift and remove the tiles.
Hint: You may need to apply pressure away from the tile on one of the adjoining sides to let them free themselves, but then the tiles should lift right up.
Next, peel the 3D panel off of the tiles. Each of my tiles had a little cement that overhung the top of the panel. If yours do the same, use a putty knife or a chisel to gently push the cement away from the panel. Once the cement is off, the panels should lift off easily.
Remove the caulk from the side you bent back and re-screw the side to the base. Now reapply a fresh bead along that inside edge, which you don’t need to lubricate this time.
Repeat the leveling with the sand, the casting and demolding steps.
Your edges are probably a little sharp, so use the sanding sponge to sand the edges.
Note: My cement tile planter box frame was made out of wood marked as 2×2 but was actually 1 ¼”. 2×2’s normally come in actual 1 ½” x 1 ½”. I have adjusted the tutorial to fit true 1 ½” boards because that size will work better with the tiles.
*Before making the cuts, first confirm that your tiles came out to 12 x 12” and are square (measure them from the back and check with the squaring tool). If they are slightly larger or not exactly square, then make the lengths 12 ⅛” for the A and B pieces.
If you are wondering why we aren’t making the floor concrete, it’s because I didn’t want the planter to be any heavier than it had to be. A wood floor makes it much easier to move around.
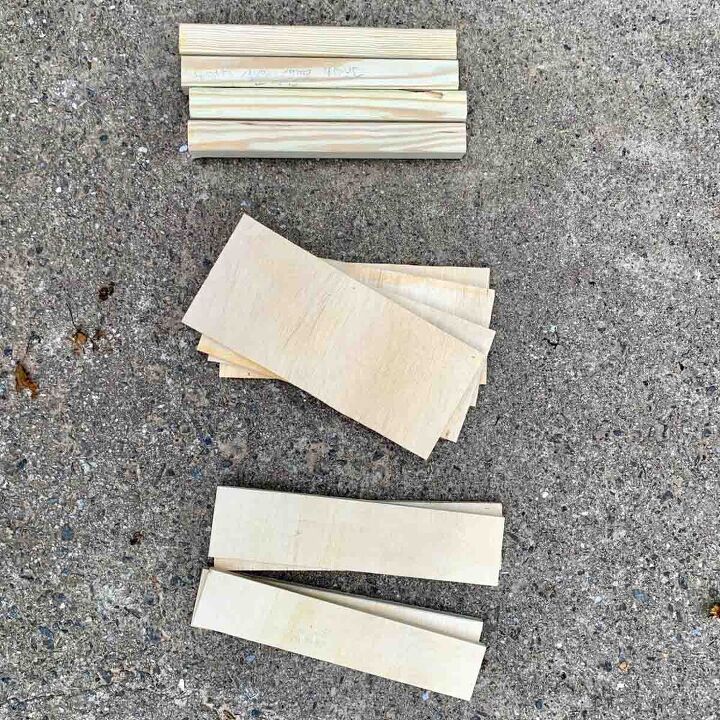
Make the following cuts:
2×2″ select wood boards -pine or cedar (actual size 1 ½”):
*A: (4) 12” – bottom frame
*B: (4) 12” – top frame
C: (4) 15 ¾” – legs
D: (4) 12” – inner tile supports
¼” Plywood:
*E: (2) 2 ¾” x 13” –floor planks (make these 13 ¼” if your frame pieces are 12 ⅛”)
F: (4) 6 x 12” – tile backers

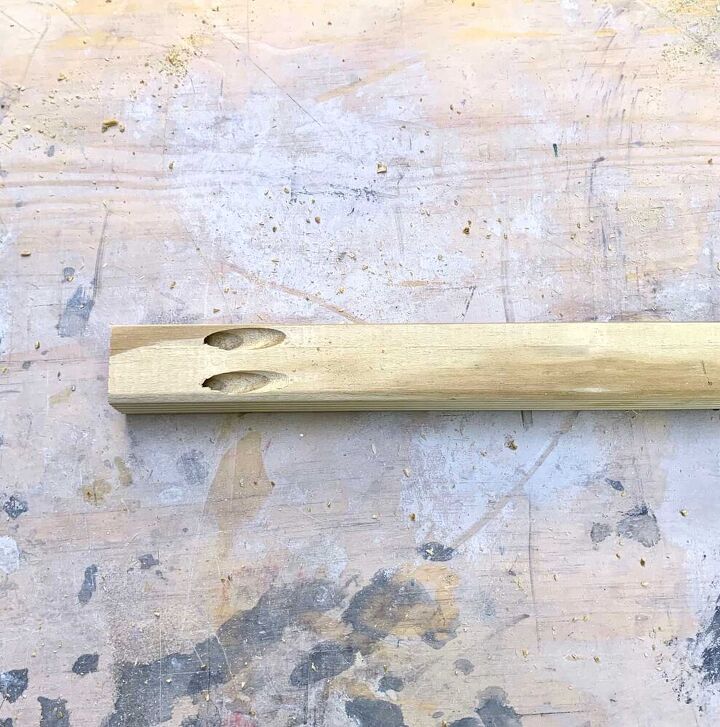
On one side of each frame piece (A and B), use a Kreg jig to make pocket holes at both ends.

I pre-sanded the initial frame pieces A-C, and then lightly sanded again after the frame was assembled. For the pre-sanding I used an orbital sander with grit, then a very quick repeat with I didn’t sand the other pieces since they wouldn’t be seen.
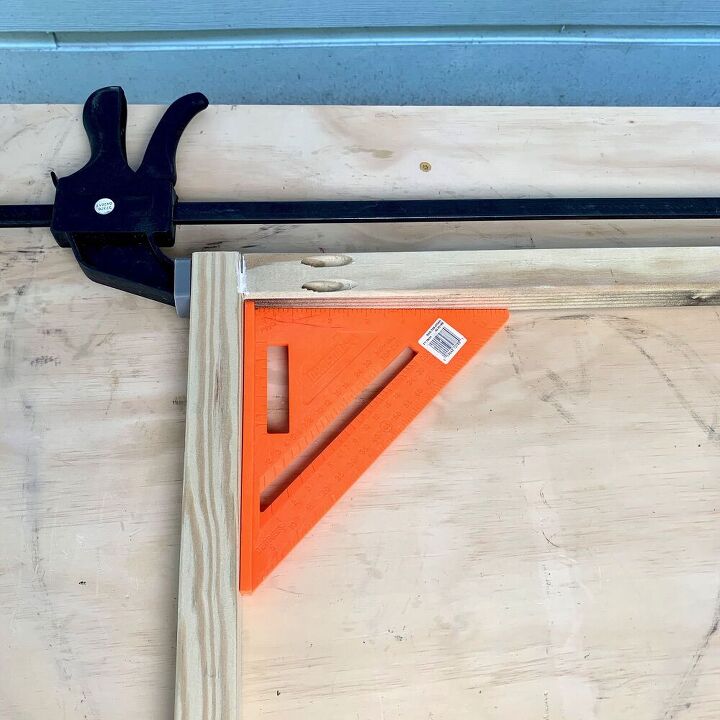
You will fasten the top frame pieces (B) to the top of the legs.
These will be flush with each other. Square up the leg and frame piece where the pocket holes meet. Use a sliding clamp and wood glue to glue the frame end.
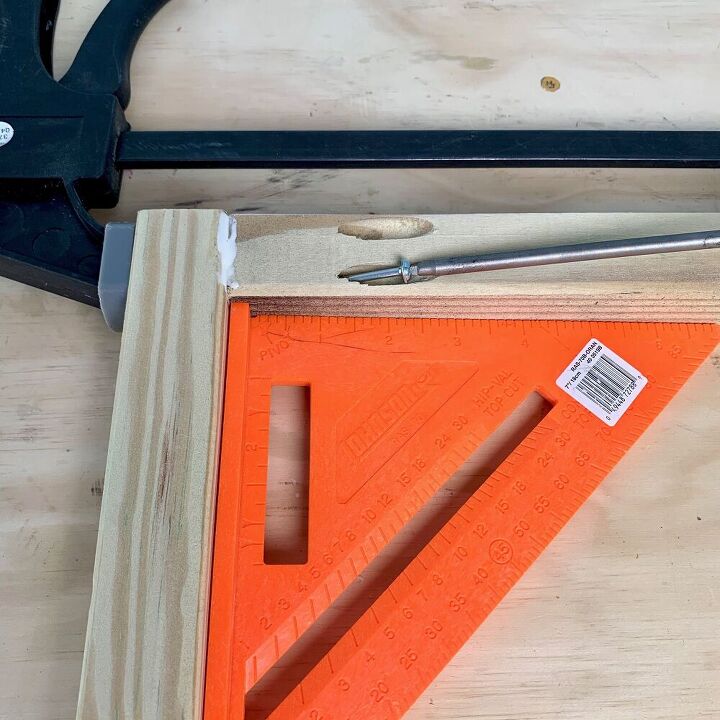
Then screw in the pocket screws. Repeat this for the remaining top pieces.
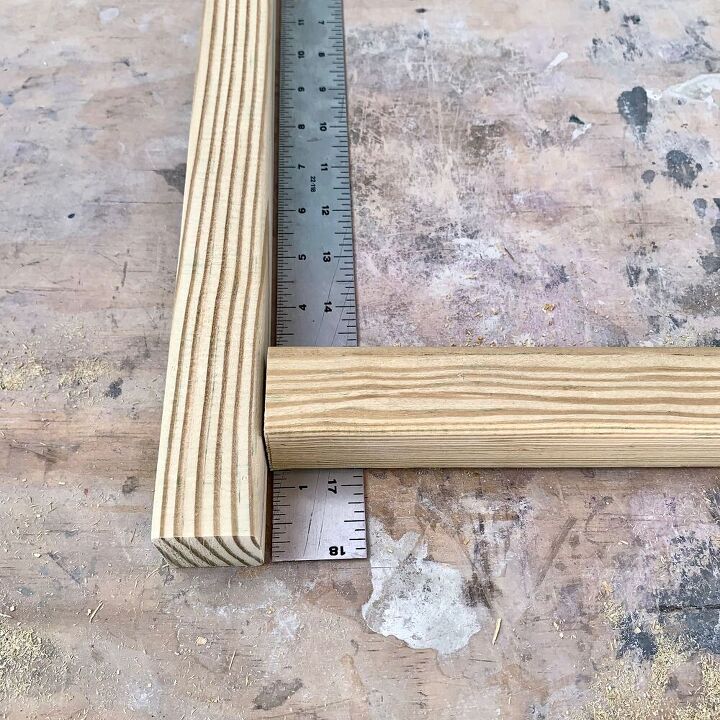
Now mark 1 ¼” from the bottom/open end of the leg (foot). And line up the four pieces for the bottom frame (A), with the legs (C) at the pocket holes so they meet at the 1 ¼” line.
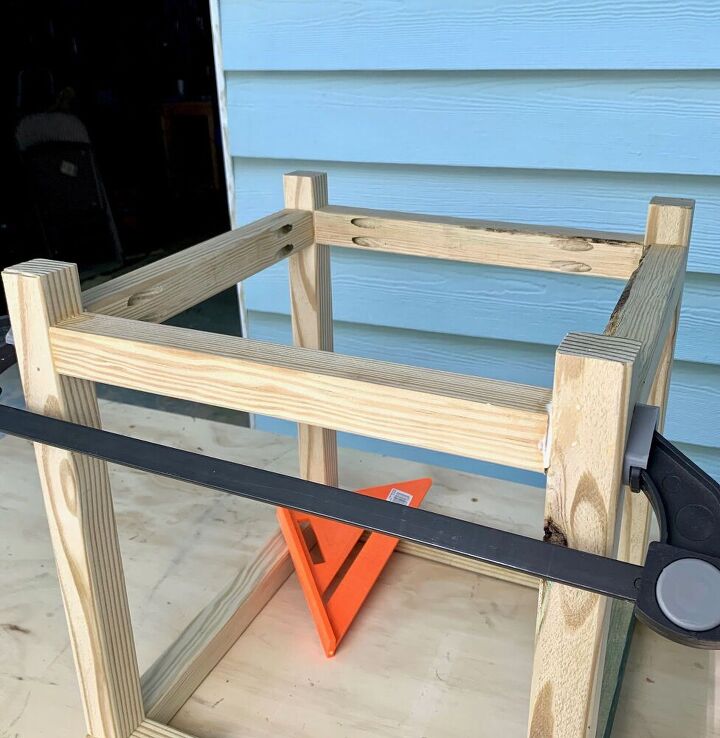
Next, apply wood glue to each end and clamp the pieces together. Then screw in the pocket screws. Do the same for the rest of the bottom frame and leg pieces.
Your frame is assembled, now you can check that the tiles fit the frame. You may have some sides of the frame that are slightly off and make a better fit for certain tiles. Since my tiles weren’t completely square, to begin with, I had to spend a fair amount of time figuring out which tiles fit best where.
I also had two tiles that required sanding to fit properly. Hopefully, yours are square and this will be a quick test fit. Note: Be aware of which direction you want each tile to face- I marked each of mine on the back to keep it straight, along with the corresponding frame side.
Be very careful that if the tiles slip out of the frames while dry-fitting, that you have left enough worktop space in front of it that the tile lands on the worktop and doesn’t fall on the floor and break like mine did (see photo in Step 8).

I painted the actual frame once assembled and then painted the floor, inside tile supports and backers separately. I did this so that there wouldn’t be any exposed raw wood.

I painted the actual frame once assembled and then painted the floor, inside tile supports and backers separately. I did this so that there wouldn’t be any exposed raw wood.
Use the spray paint and paint the frame and additional pieces- per the manufacturer’s instructions. If you use the 2X touch paint then you can spray on a second coat after an hour.
Wait 24 hours until the paint is completely dry before finishing the assembly and adding the tile. If you don’t wait, you will likely get paint marks on your tiles while affixing them to the frame. You don’t need to wait to add the floor, this can be done after an hour or two.
Place the 2 ¾” plywood floor pieces, evenly spaced on the bottom and leave little gaps for drainage. Use wood glue to glue them to the frame bottom and then nail them to the frame bottom with a brad nail gun.
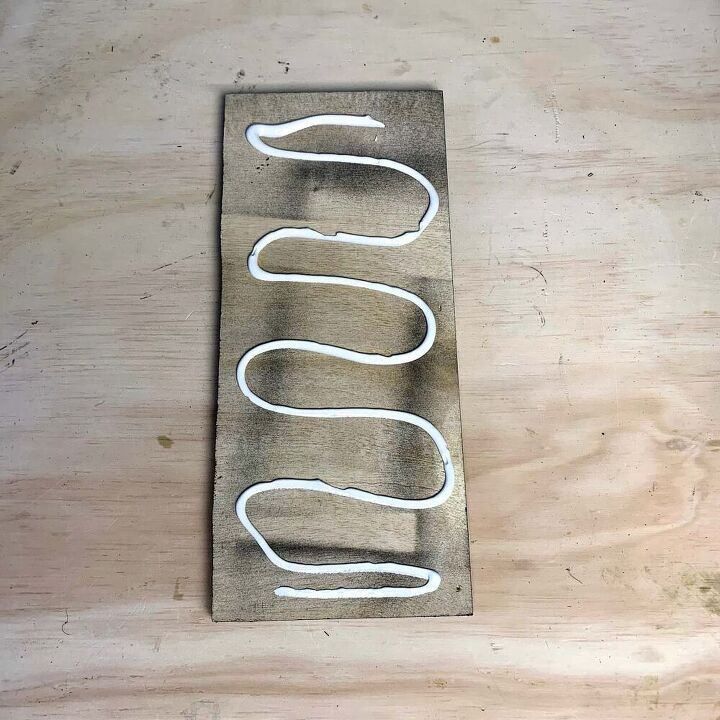
Each tile will get glued to the 4” backer. The backer will then be fastened to the inside corner tile support pieces. So lay each tile on your worktop facedown and then add a bead of glue across and up and down the board and clamp it to the tile.
The setting time for this construction adhesive is supposed to be 10 minutes, but it took longer for my tiles. I did this late at night and when I checked about an hour later, they still didn’t seem dry enough, so I waited until the next day.
In the meantime, you can take the remaining 2×2’s and drill pilot holes for where the screws will go. I have made your inside corner supports slightly taller than mine, so you will be able to screw them in at the top frame as well as two on each side, where they meet the tile backer.
Note: I made the corner supports short instead of flush with the top of the frame because I didn’t want them to be seen from outside.

Go ahead and place these corner supports on the floor and in each corner. Now screw them in at the top only for now, where they meet the top frame.
You are doing this before you set your tiles in place because the tile corner supports will be somewhat secured and will make it safer for when you place the tiles inside the frames.
Note: I made a huge mistake of not doing this first which caused my tile to slip and slide off the workbench onto the driveway and smash to pieces.
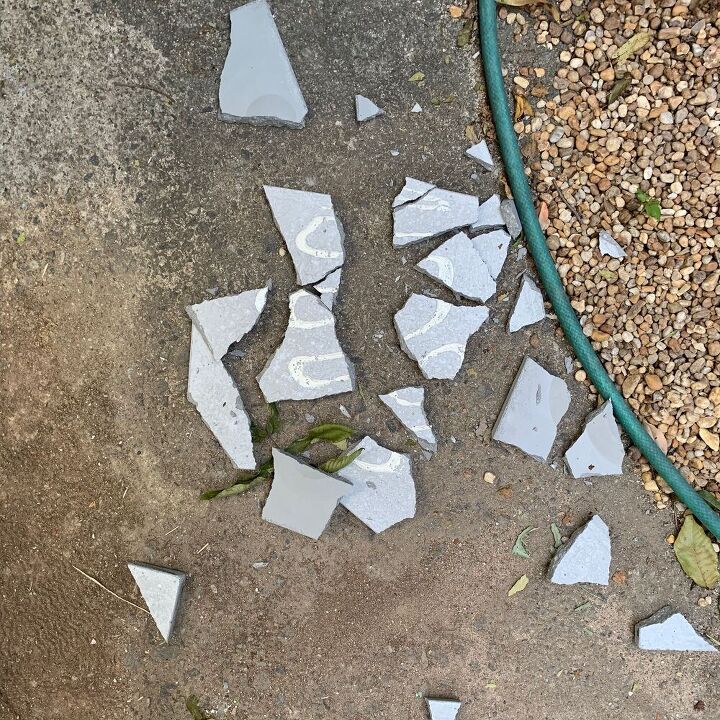
Yep, it was bad. Be very cautious while you do this and be conscious of allowing enough room in front of you on the worktop that if your tile slips out, the top will catch it.
Once the construction adhesive is dry, you can place your tiles inside the frames. The tiles should be flush with the front of the frames so that the 3D portion is what protrudes past the frame. This seemed easier doing it upside down.
Start with the first tile and once you have it positioned properly, screw the two corner supports behind it to the backer.
Next, position the tile that will go on the direct opposite side. This way all four of your corner supports will be fairly secured when you place the two remaining tiles. Now screw the supports into the backers of those two tiles.
Repeat for the remaining tiles and corner supports.
Resources for this project:
See all materials


Comments
Join the conversation
-
Thank you!
-
Just beautiful!! I can't believe we can actually make these ourselves! They look very high end and expensive! Thank you for sharing!!


Frequently asked questions
Have a question about this project?
Where do you get the molds at