


DIY Foiled Terracotta Pots
- Cricut Crafts
- Home Decor
- Kid Friendly Crafts
Have you every gone into the store, seen something you liked and bought it just because you liked it? You had no idea what you wanted to do with it. It didn’t even match any of your decor. But it just called to you… So you answered the call and put it in your cart and bought it.
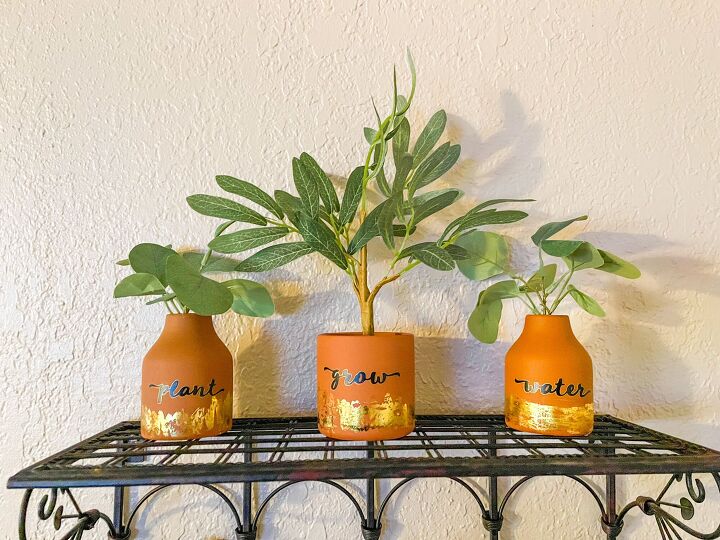
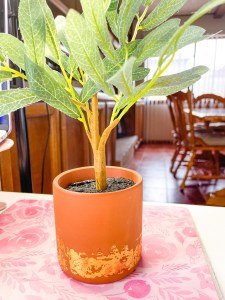
Of course you have! Most crafters do it on a regular basis. Well, that was me a couple of months ago. I walked into Target and spotted these really cute terracotta pots with faux greenery already in them. I loved them and knew I could use them to decorate at some point.
Pinterest was one of the first places I started looking for ideas. A few things were interesting. But I didn’t do anything with them right away. Like we all do so often, I pinned them on my home decor board and kind of forgot about them.
More recently, as I was sizing up my new living room area, I came across the fake plants again. This time, though, I knew what I wanted to do with them. My friend, Megan from Lovebird Heartworks had done a really neat foiled pot project on one of our Craft Around the Gram events. I thought something similar would be perfect for these pots.
This is a super simple project! You really only need 3 items: the pot, some foil transfer, and some adhesive. The fun comes in choosing the foil that’s right for your taste. For my pots, I chose a gold foil. I already had it here at home, which made it an obvious choice.
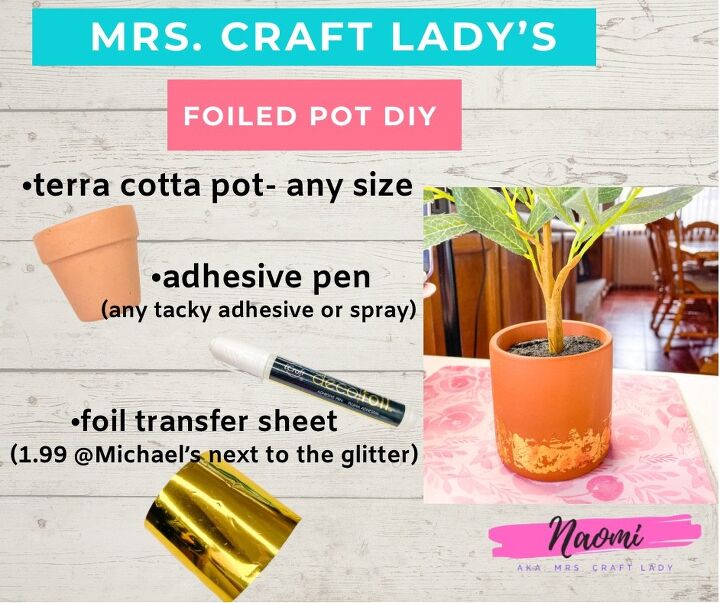
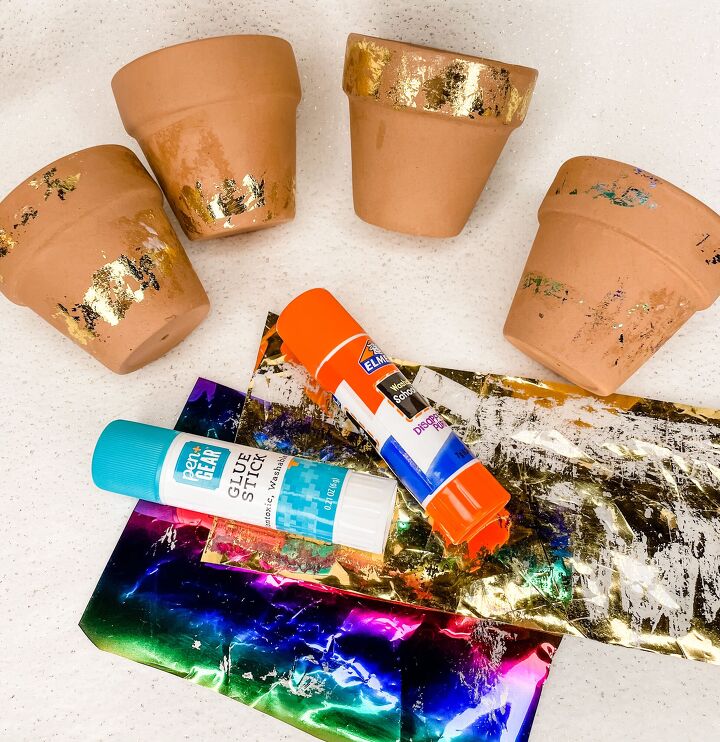
When it comes the foil, though, you’ll need a foil that transfers with adhesive. I tried a foil from We R Memory keepers that is meant for use with their heat tool. Craft fail. The Cricut foil sheets worked a bit better. Another choice that seemed to work well for some of my VIP craft group are the Recollection foil transfer sheets from Michael’s. They are inexpensive and come in a variety of color choices.
But I had the best success with iCraft Deco Foil. They are foil transfer sheets that are for fabric and paper. Originally, I bought them to use with my laser printer and laminator to foil cards. It worked beautifully and so I decided to try them with this project. I had great coverage and was able to get a lot of use from the strips I cut.
As for glue, the tackier the better. I used the iCraft Deco Foil adhesive pen. It was a little pricey, but it worked really well. A spray adhesive will also work. The key is keeping the glue from running and letting it get tacky enough for the foil to stick. But I’ll let you in on a little secret…
Since I craft with my kids, I always have “kid supplies” handy. I want them to experience the joy of crafting and creating without me experiencing the “not my expensive supplies” feeling. Scissors, glitter, markers, you name it. They have their own supplies. That includes glue. So not really knowing what to expect, I had my girls pull out their little craft glue sticks they use for their school work. Guess what?!!!! They worked perfectly! So there’s another option for you.
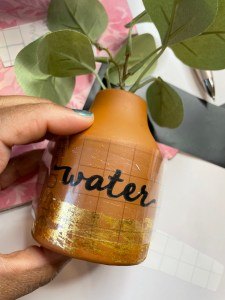
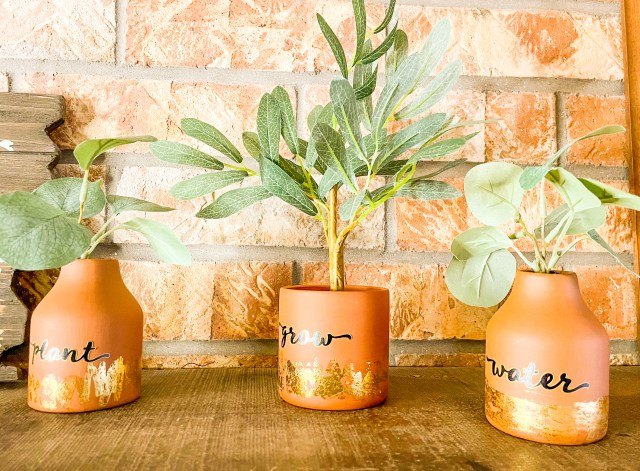
What else can you add? I decided to add vinyl decals to my terracotta pots. The words “plant”, “water”, and “grow” seemed very fitting for the set. I created an SVG with an outline to use. Megan painted her pot first and it looked great. What about adding some bling? Or maybe you can foil the bottom and glitter the rim or vice versa… Whatever you can imagine can be done.
Let’s get into it. I’ll share with you how I created my foiled pots.

-
Scissors -
adhesive pen or glue stick -
bone folder, scraper, or used gift card -
scrap vinyl optional
- 1 foil transfer sheet
- terracotta pot, any size
-
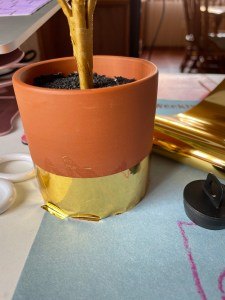
Remove labels from the pots using heat or alcohol -
Apply glue to the pot. Be careful not to add too much. Glue should not be clumpy. -
Place foil over glue, with the shiny side facing you. The dull side will be against the pot and glue.
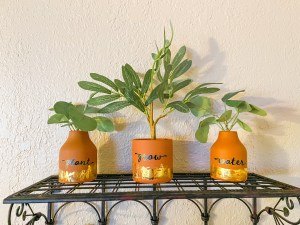
It’s that easy! You can use different colors of foil. How about using larger or smaller pots? The possibilities really are endless. What will you create? Like Megan says, “FOIL ALL THE THINGS!”
If you make this project or something similar, I’d love to see. Tag me on social media or send me an email. I am EJsFunCrafting on all platforms.
- Log in
- Entries feed
- Comments feed
- WordPress.org


Frequently asked questions
Have a question about this project?