


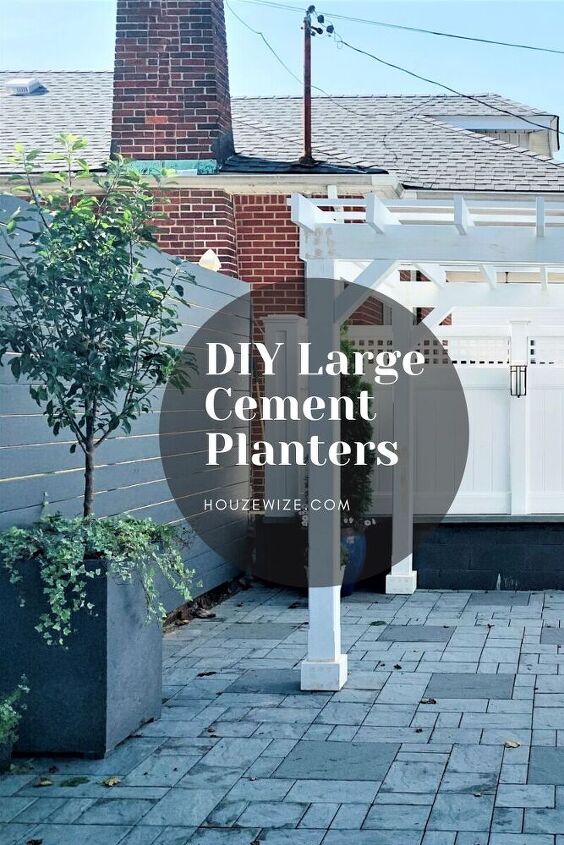
DIY Large Cement Planters-How to Make It in One Weekend
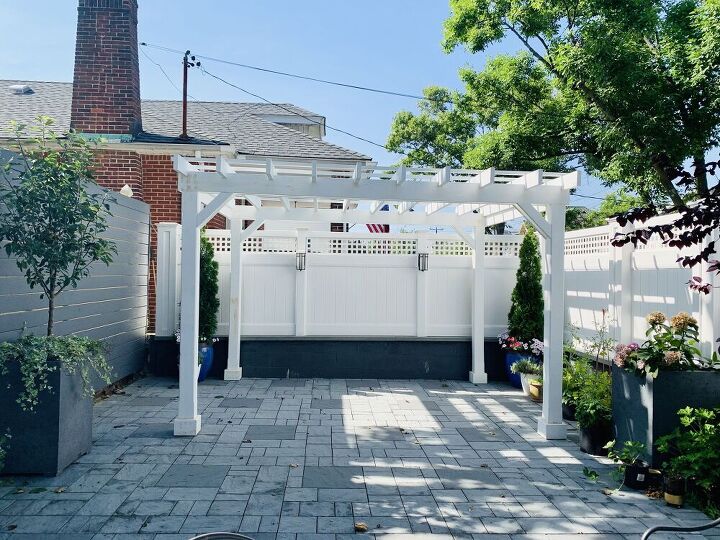
Hi there! We have been working tirelessly on our backyard to create our outdoor oasis. There’s a lot of design planning and diy projects going on for this makeover. We have been making great strides and can’t wait to show you the progress. You can see where we started and how we built our pergola in my previous posts. Today, I want to share with you our DIY large cement planters that my husband built using plywood and cement.
My inspiration came from these enormous planters from a terrace space designed by New York designer Gunn Landscape architects.
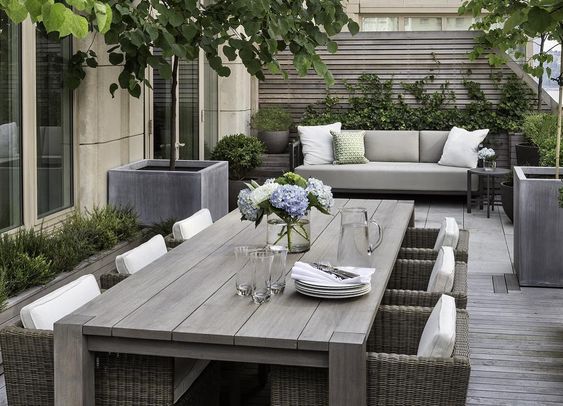
I loved the way the two large pots flank the sides of the small patio. This layout from the inspiration yard was similar to ours, so it was a perfect jumping off point for this makeover.Also, l wanted to add trees to soften our space and to make it feel cozy. Since our backyard is fully paved we didn’t have any dirt areas to plant trees except for a small section along the fence. These planters gave us an opportunity to incorporate a couple of tall trees.So, I went perusing the internet endlessly to purchase planters with the right look and size for the space. Many of the ones I found was too small or resin pots, that just wouldn’t do. I pitched the idea to my husband and lo and behold he volunteered to diy the cement planters without questioning my sanity. I say go for it!At first, we were contemplating which materials to use for our diy planters. We were considering either wood or cement. However, I was concerned with making such a large planter with wood, not sure how durable it will be for a lengthy period of time. So, we decided to build it with concrete… its strong, durable, easy to work with and will get similar feel as the inspiration planters!

Here is how we did it…Supply list for our 24″W X 24″DX 32″H Planter
- 6 – 80 lb bags of Quikrete concrete mix
- Trowel
- Water
- 3/4″ Plywood
- Circular saw
- Rubber mallet
- screws
- Duck tape
- 2″ pvc pipe – cut to 4″ height
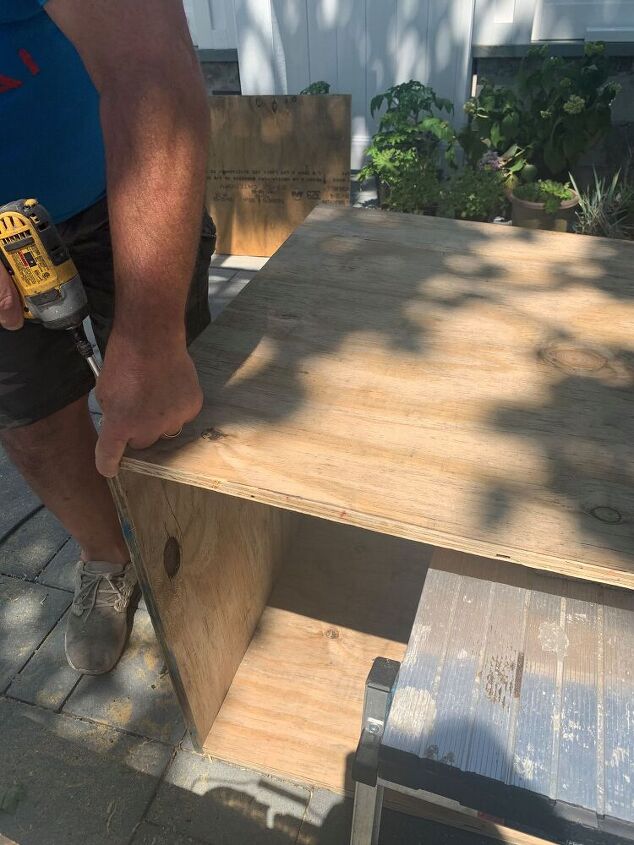
DirectionsFirst, built two boxes, one 24″ X 32″ square box and one 22″ X 30″ square box by cutting out the plywood to desired sizes.For the larger plywood box, cut 4-24″ X 32″ panels and 24″ X 24″ for the bottom of the box.
For the smaller plywood box, cut out 4 – 22″ X 32″ panels and then cut each of them into half, 11″ X 32″. This will make it easier to remove the interior pieces after the cement sets. Finally, cut 22″ X 22″ for the bottom of the smaller box.
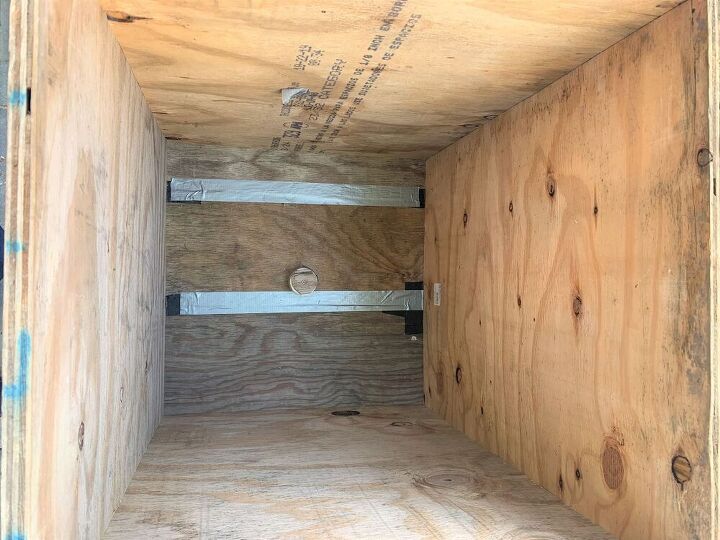
Drill 2″ hole on the bottom of the large box and put the pvc pipe through. This will create the drainage for the planter. The PVC pipe should be 2″ above the base of the box. Cover the top of the pvc pipe so that cement doesn’t get inside.

Put the smaller box inside the large box and space evenly. Make sure the edges are equal in size all around.

We cut out 2″ blocks and screwed to the edges to ensure equal space all around.
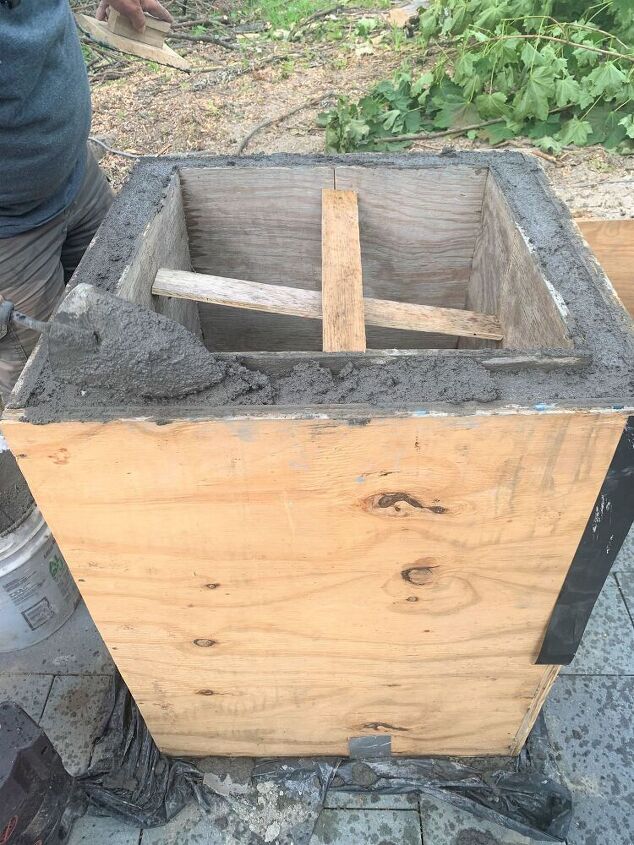
After completing the two plywood boxes, we are ready to start forming the cement planter.Mix the cement according to the directions on the bag, mix till you have a peanut butter consistency. Don’t add too much water, this can cause cracks while the cement is drying.Now, you are ready to pour the cement. Pour 2″ layer of cement in the large box. This is the bottom of your cement planter.
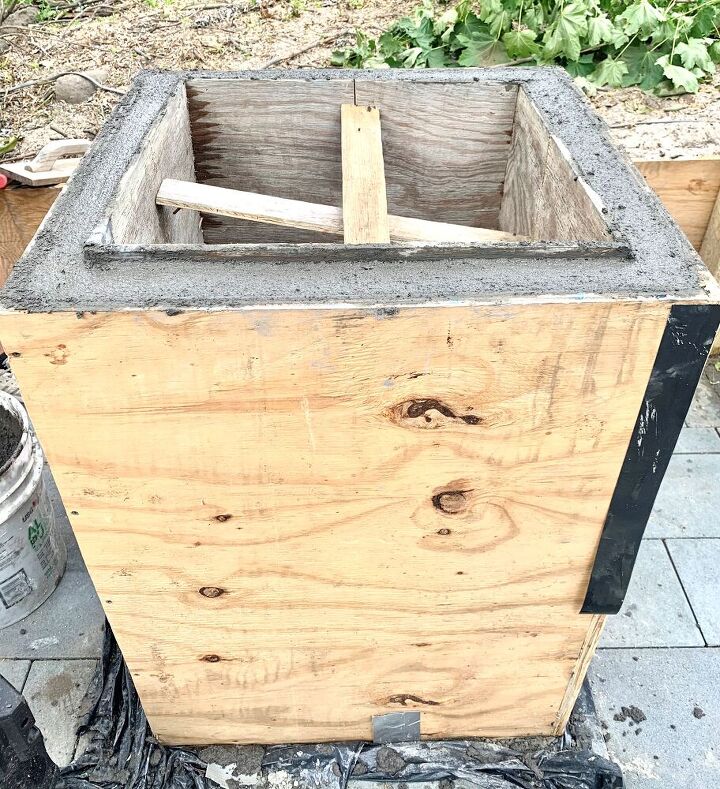
Continue tapping all around the box, this will break up the bubbles and gaps in the cement. More vigorous tapping will cause less holes in the cement.
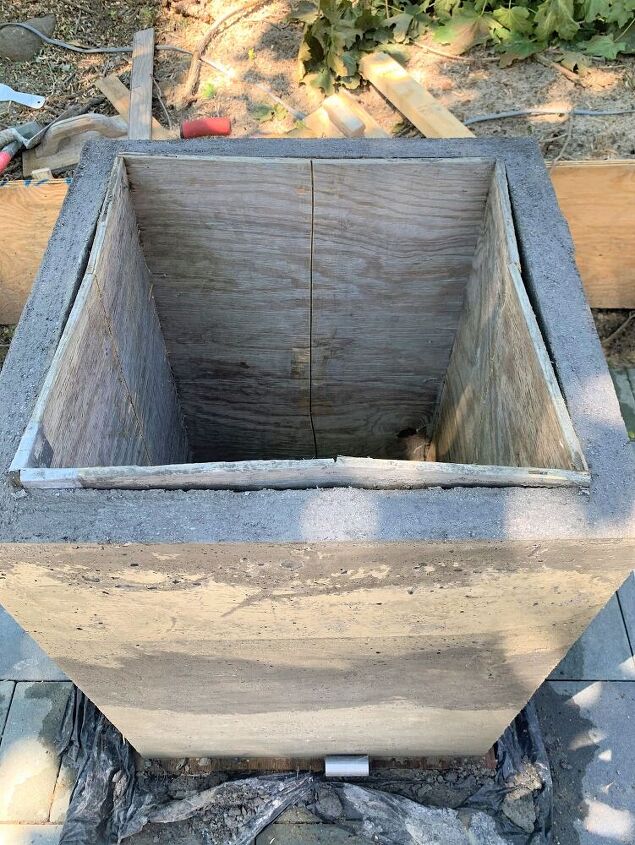
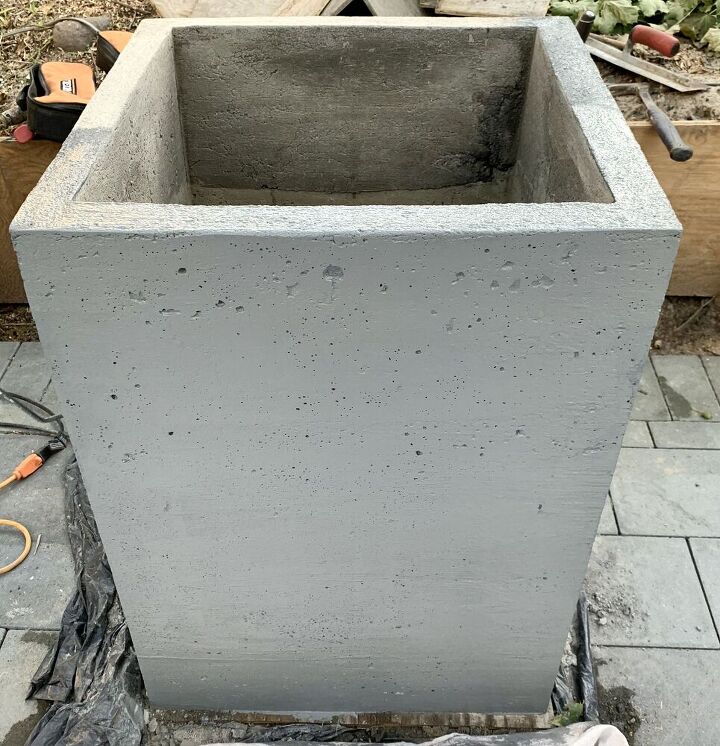
We let it dry for 2 days, it will take some time to fully cure. Once the cement is completely dried, we started to remove the plywood forms to reveal the planter. The outer pieces screwed off very easily. However, the inside was a bit more difficult. We had to use a flat screwdriver and the mallet to pry the plywood.
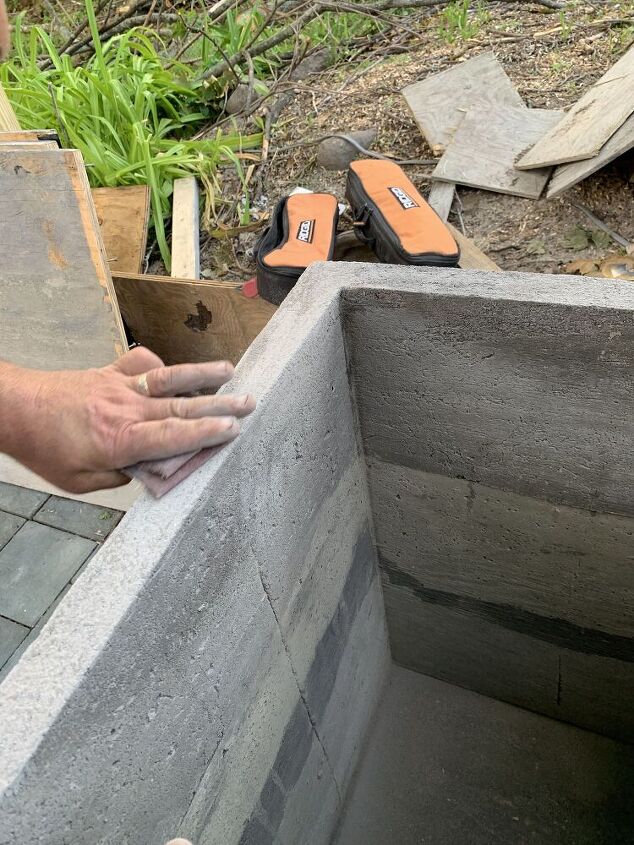
Afterwards, sand the edges and any rough area you want to smoothen.
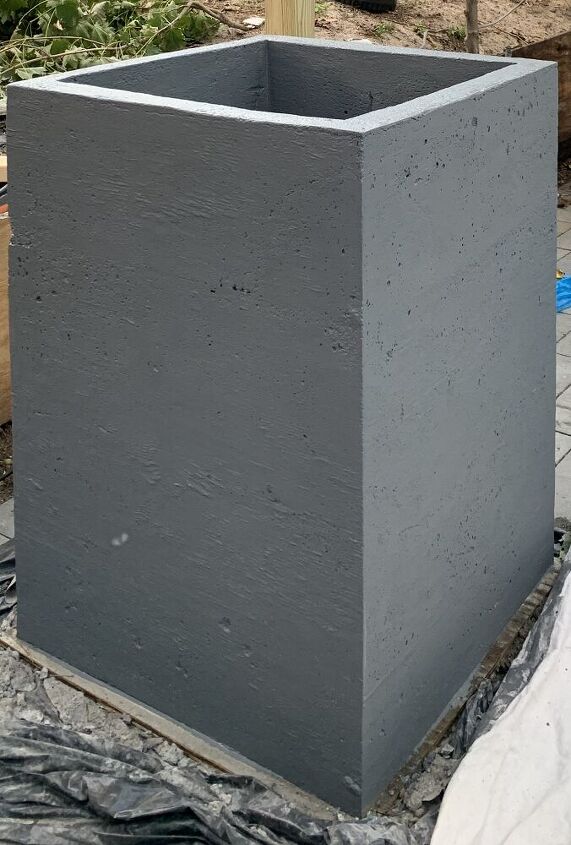
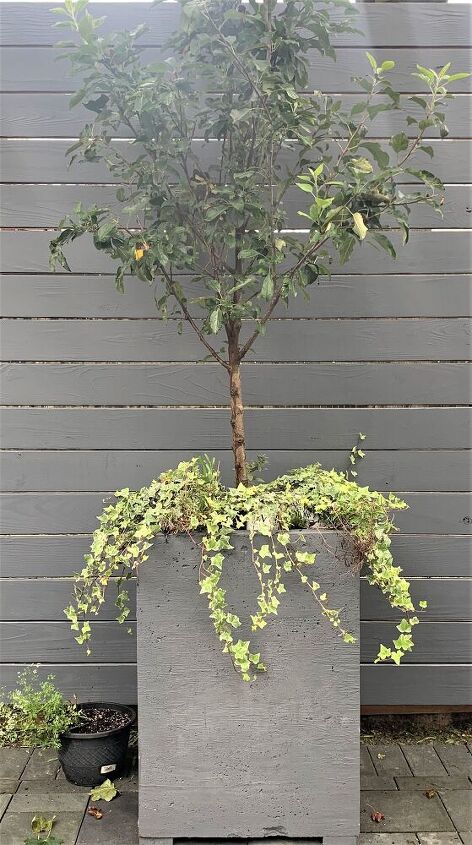
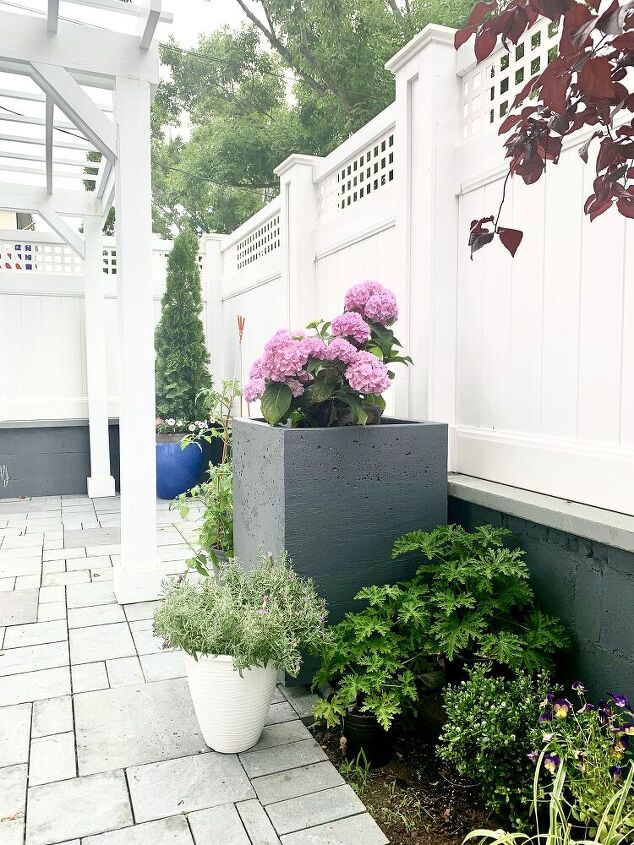
There were some holes that didn’t break up from the tapping, but at the end I really like them. I felt it added to the character of the planter. We painted it with Valspar Cement stain and sealer.
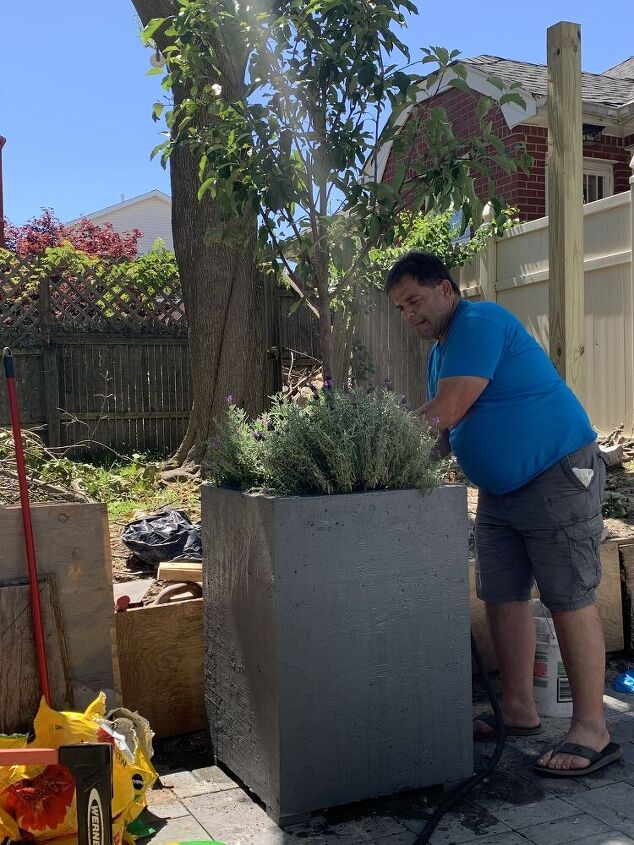
Time to plant… We had purchased a dwarf apple tree to plant in one pot. Eventually, I’ll plant a fig tree in the second planter. For now, I planted a hydrangea bush till I get a fig tree. The planters are so big that it may be able to hold both the hydrangea plant and the fig tree.
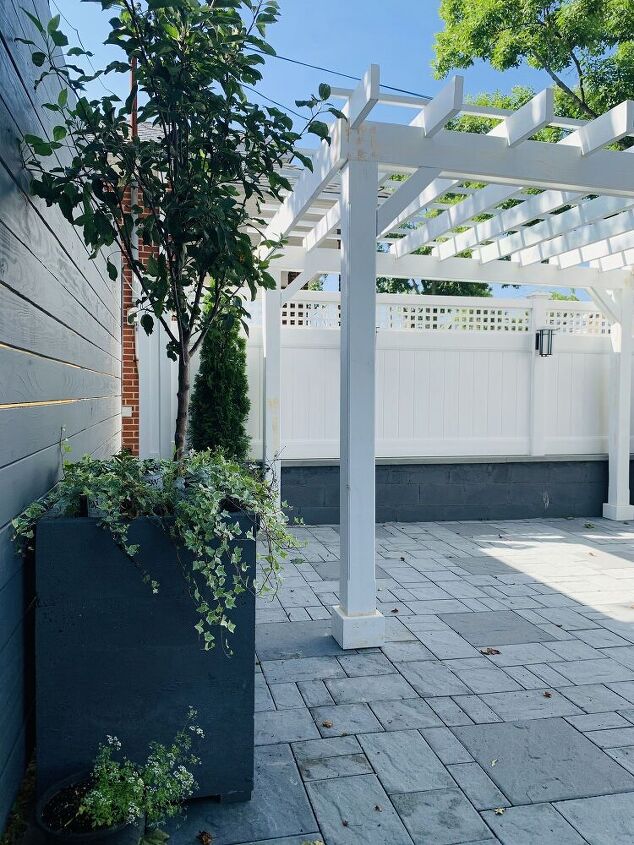
There you have it, our extremely large DIY cement planters! I am obsessed at the way they turned out. With a bit of DIY enthusiasm, you would really enjoy experimenting with concrete. You can create different shapes and sizes and color. Also, you don’t need to create such large planters as we did, you can create any size you need for your space. If you have some patience and a DIY enthusiasm, you’ll love making these concrete planters and will want to experiment with different shapes and sizes, or fun painting them.You can check out more of diy cement projects


Comments
Join the conversation
-
I have an old rain barrel cut in half for planters and i have thought about using cement on them for round ones.
-
I love this, its beautiful


Frequently asked questions
Have a question about this project?
Are the number of bags of cement per-planter, or is that the total number of bags for both planters?
Great job! Just what I was looking for!
Curious about placement of the drain holes. It sounded like you used 4 but they were not in photos.
what did you rest tge finished pots on? It looks like something on either side but they must be stone or composite material. This also leads back to tge drain hole placement question.
You mentioned that Valspar Cement Stain and Sealer was used. Do you know what color was the stain ? Also was it semi-solid or solid stain ?