


DIY Old-World Concrete Garden Trough

I love anything that has an “old-world” look, and I’ve always admired the ancient-looking concrete water troughs that I’ve seen around Europe. Many of them have been converted into garden art or planters that grace the gardens and town squares of quaint villages.
But, around here, concrete troughs usually have three significant disadvantages: They are hard to find, they’re expensive, and they are very heavy. So today, I’m sharing how I recently made my very own “old-world,” lightweight(ish) concrete trough.
Start With A Styrofoam Box
This project is not my brainchild. I found the method years ago in a magazine – most likely Better Homes and Gardens or Martha Stewart Living. What I loved about it was that these concrete-wrapped Styrofoam planters were lighter than similar planters made entirely out of concrete. And it seemed like a great way to repurpose a Styrofoam container.
Back when I first came across the magazine article, I tried the method using a small rectangular Styrofoam box. After many years, that smaller concrete planter is still holding up very well (although it’s actually too small to be of any practical use and has been relegated to the no-man’s-land behind the garage).
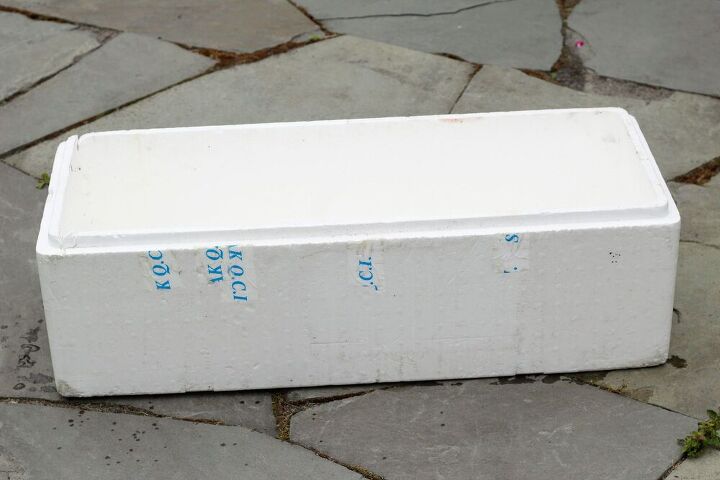
For this recent project, though, I used a much larger Styrofoam shipping box that had been taking up space in our basement for some time. I’d been saving it because, measuring at 32″ X 13″ X 10″, it was just the right size to serve as the inner core for a small concrete trough.
Best faux cement planter!
But it was significantly larger than any of the examples I remembered seeing in the magazine article. Would the method from the magazine work on such a large piece of Styrofoam? I was going to find out. The first step was to clean my Styrofoam container and pull off the strips of tape stuck to it.
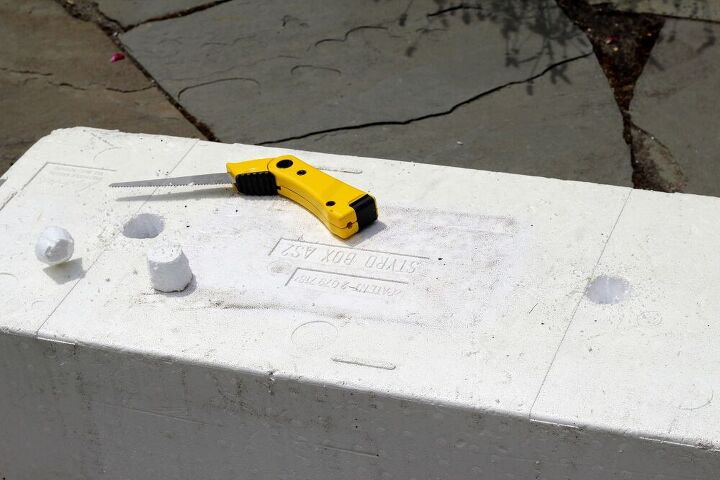
Making Drain Holes
Since this cement trough would be used as a planter, I needed to put a couple of drain holes in the bottom.
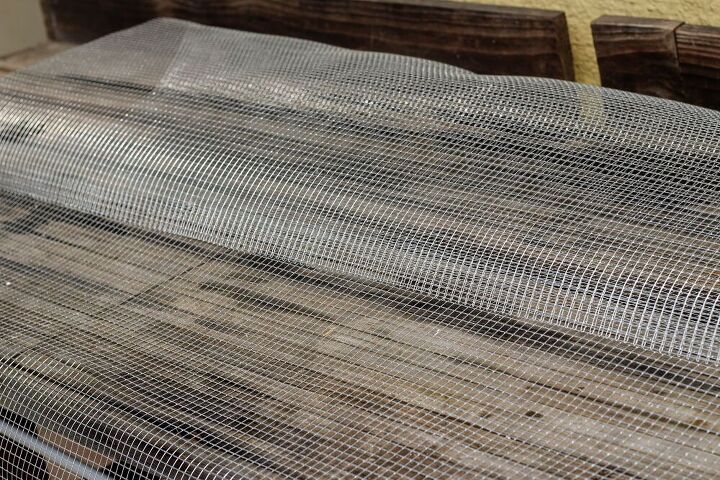
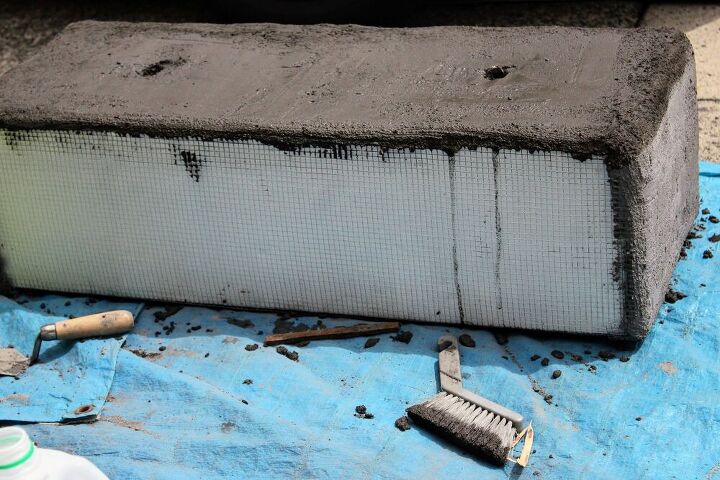
Wrapping The Styrofoam Box With Mesh
The next part was the hardest and most unpleasant part: Wrapping the Styrofoam box with wire mesh. (If you take on this project, wear thick gloves and long sleeves, and expect to get scratched by the mesh anyway.)
I used galvanized, 23-gauge wire mesh (also known as hardware cloth) with 1/4 inch squares.
Wearing heavy work gloves and long sleeves, I cut it to the sizes I needed with tin snips,

And then formed it as tightly as I could against the box, at times pounding it lightly into place with a rubber mallet,
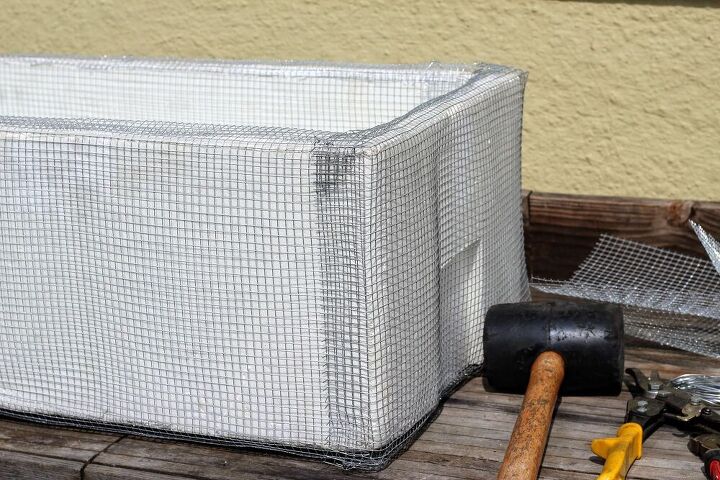
And sometimes using a little wire to loop through and hold two adjoining sections together.
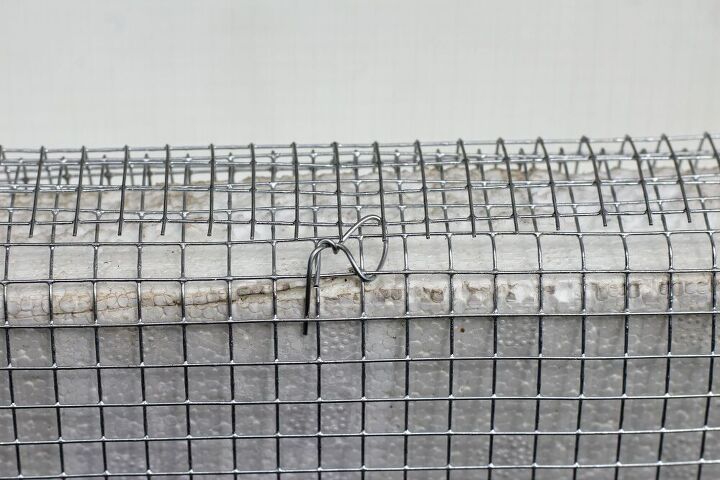
I did my best to make sure that any sharp edges were pointing inward. I covered the entire box with wire mesh, lining the inside walls with it as well.
This all took a lot of time and, despite all my precautions, the wire did bite me a few times.
Covering The Wire Mesh With Concrete
I don’t remember exactly which concrete mix the magazine article recommended. I chose to use Quikrete Sand/Topping Mix. It’s actually meant to be used as a base for laying pavers or patching steps and walkways. What I like about is that, when mixed with water, it has a smooth consistency. It is for projects that will be under two inches (but not less than a half-inch) thick. (For projects under one inch thick, it’s recommended to replace some of the mixing water with Quikrete Concrete Acrylic Fortifier.)
Wearing gloves, eye protection, and a dust mask, I just mixed small batches by hand (more on that below).
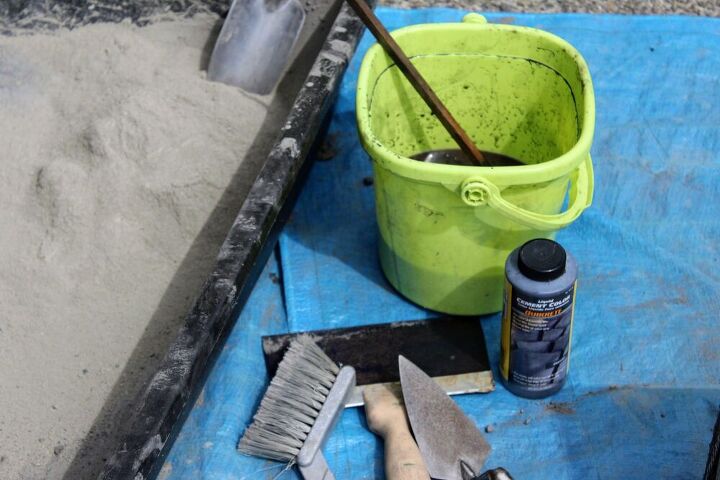
I wanted the trough to have a bit of an old-world patina, so I stirred a few drops of the Charcoal Quikrete Liquid Cement Color into the water that I used to mix the concrete.
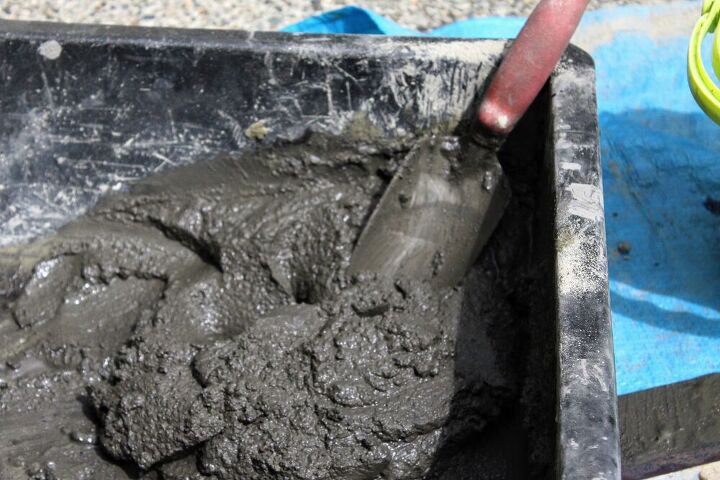
The mixture looked darker when it was moist.
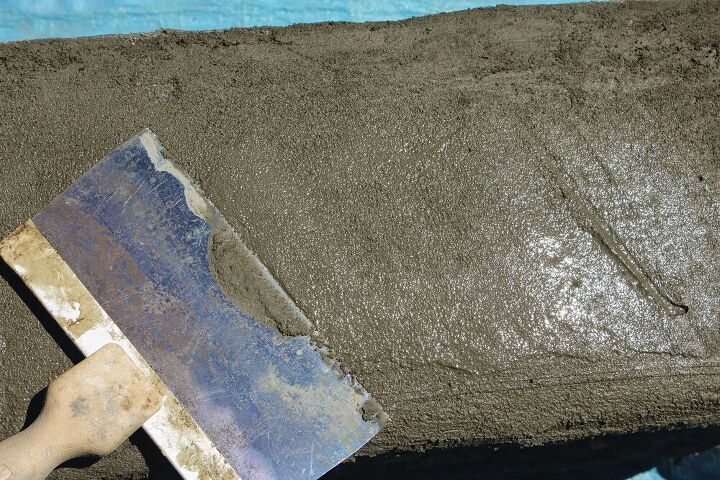
I applied it to the Styrofoam box with a trowel, making sure to press it firmly through the wire mesh and then cover the mesh completely. I smoothed it as much as I could with the trowel.
Then I used a small whisk broom to level the concrete.

I followed that up by smoothing the concrete with a large drywall knife (because it’s what I had on hand), and it worked well.
But I was not going for perfection. I wanted it to look a little rustic and handmade.
When working on the bottom, I made sure not to clog the drain holes with concrete.
So why did I need to work in small batches? Because the topping mix that I used can only successfully be applied to horizontal surfaces. So, I could only do two “sides” at a time: Whichever two sides were sitting horizontally. And then that needed to sit in place and dry before I could reposition the trough to work on two more sides.
Needless to say, this project took me a few days to complete although, once I had my stride, it was only about a half hour of active time each day. I covered the entire box, inside and out, with concrete.
At times, the project got messy and seemed to be spiraling out of control.
I was wondering if it would even hold up.
But it all worked out in the end.
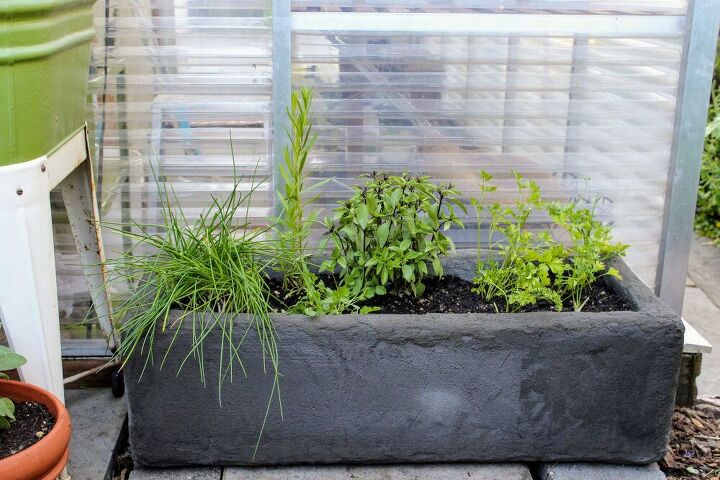
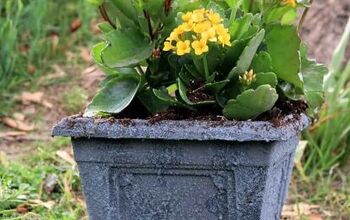
The Result
My husband and I leveled a new spot for the trough in the small herb garden behind our greenhouse.
And then my husband moved the trough into the area we’d prepared. He was able to pick up and carry the trough to its new location by himself. Had it been a solid concrete trough, there is no way he could have done that.
Once in place, we found we still needed to do a little work to the area. I was able to tip the trough on its end to get it out of the way and then muscle it back into place by myself.
It’s not super lightweight, but it is lighter than it looks.
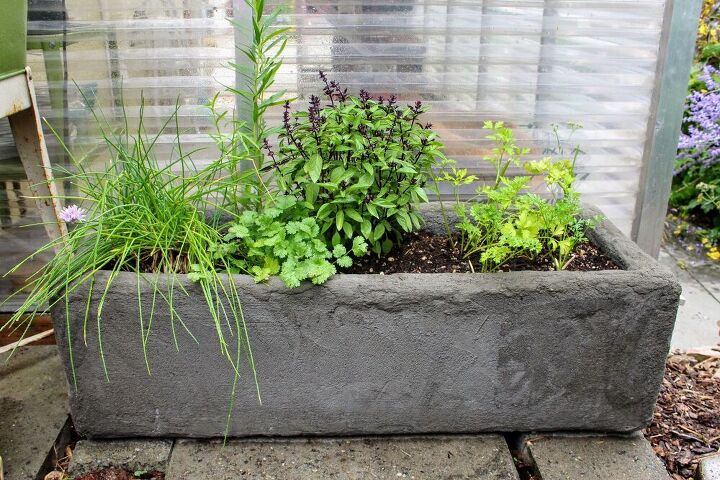
My cement work is not perfect, and the color isn’t completely consistent. But, to me, these quirks give it a bit of character.
I am hoping that it develops even more of an old-world patina over time.
How long will this trough hold up? Only time will tell. I will count myself lucky if it lasts as long as the first, much smaller piece that I made using this technique.
The good news is that, a few days after setting the trough in place, my husband stood on the rim of the trough to reach something on the top of the greenhouse.
And the trough held up! That was last summer, and the trough has made it through the winter so far without cracking or crumbling.
My blog post on this project has details about the herbs that I planted in the trough. My page about our greenhouse has more details about the little greenhouse that the trough is sitting in front of. And my garden page has more garden projects and inspiration.
I estimated the cost of this project at $25, but the cost really depends on what you already have on hand, and some of the materials are optional. I estimated the time at 8 hours, but keep in mind that, because of drying time, the 8 hours spent is over the course of several days.
Resources for this project:
See all materials


Comments
Join the conversation
-
You could sand and paint it
-
Looks great! I did something similar a while back. I got a styrofoam cooler with lid from the dollar store. Something to know. Spray paint will melt styrofoam if you spray it too close, but if you spray it lightly from about 10 inches away it won't. But I wanted the melted look so I sprayed it with gray primer paint about 4-5 inches away. I then mixed some sand in with regular gray paint and brushed it on. The top works as a saucer and I put holes in the cooler. I'm going to tweak it a little next time, but it looks like a flower box and only cost me a buck (got it before they raised the price).


Frequently asked questions
Have a question about this project?
Do you think it could work with screen instead of wire
i love projects I can work in small batches
How did you make drainage holes in the concrete?
thanks
Do you think this system would work with plastic planters as I cannot source polystyrene boxes the right size.?