


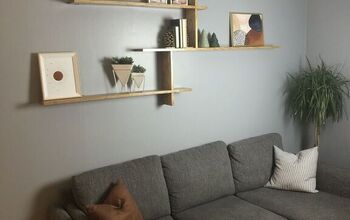
Chunky Modern-Boho Wall Shelf
I saw a shelf on Instagram one day and absolutely fell in love with it. I found out that it was from Urban Outfitters and I decided to make my own dupe!
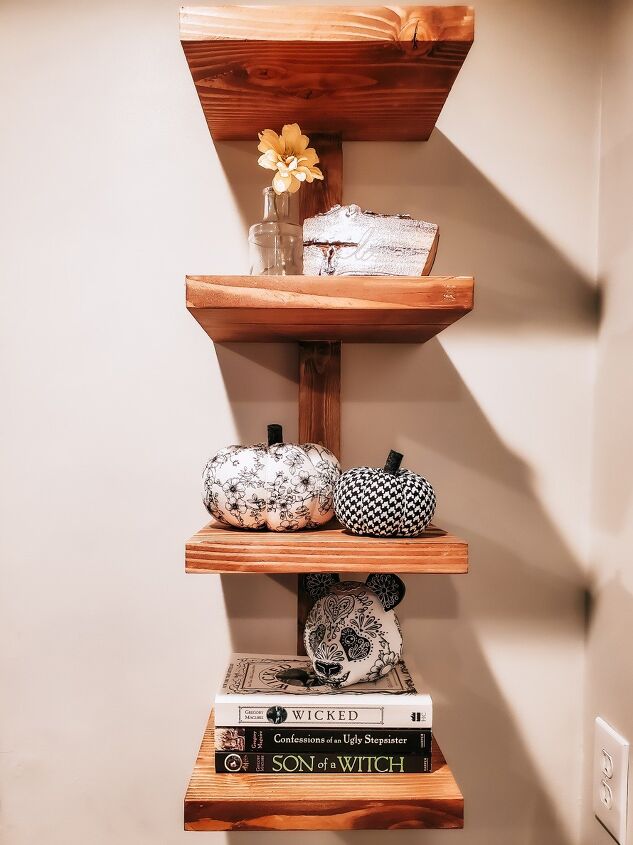
This piece turned out almost better than I had imagined it!
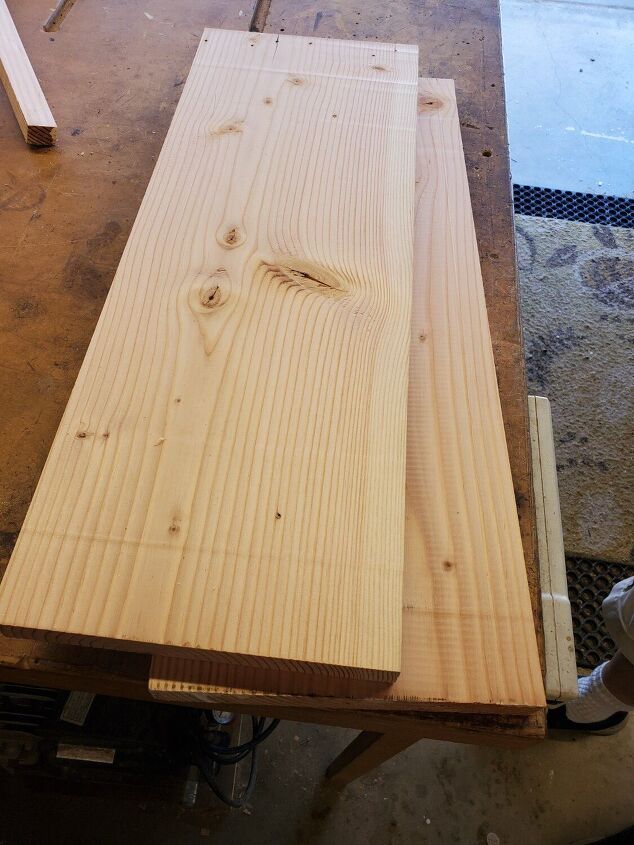
The first thing I did was study the pictures of the shelf I wanted to replicate and try and figure out the best way to build and put it together so it would be sturdy enough. I also consulted my dad who is a master woodworker. Once I came up with a design plan I found some wooden boards we had left over that would work great. The boards I used were super thick at about 1.25 inches which isn't what I imagined at first but I'm always up for using materials I have on hand instead of buying new. You could probably get away with using anything that's at least 3/4 inch thick for the shelves. I started by planing the boards smooth but that step wouldn't be necessary if your wood is smooth and flat to begin with.
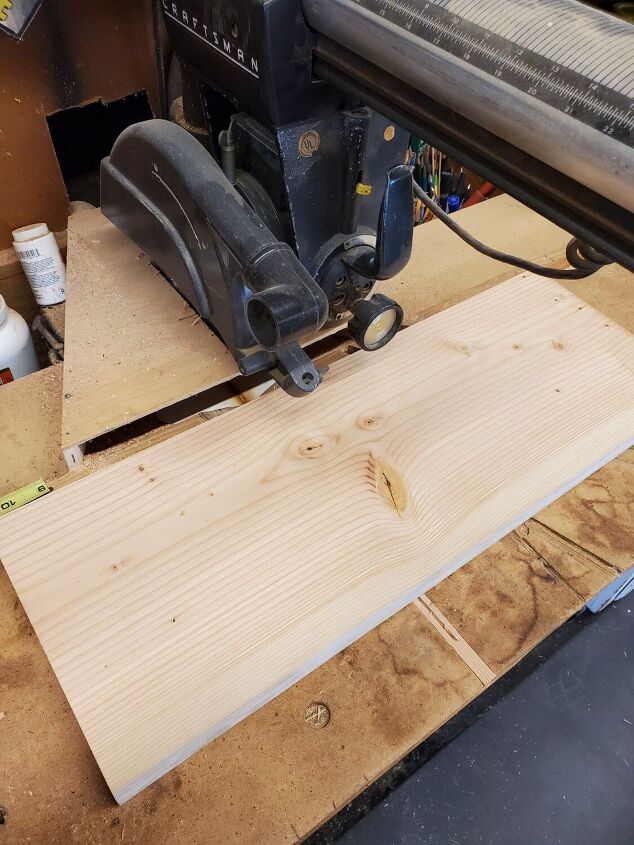
Next, I cut my boards to size using a radial arm saw. I decided on 4 shelves for this piece.
I measured the space where I wanted to put the shelf and also laid them out to figure out the spacing and overall height I wanted to go with.
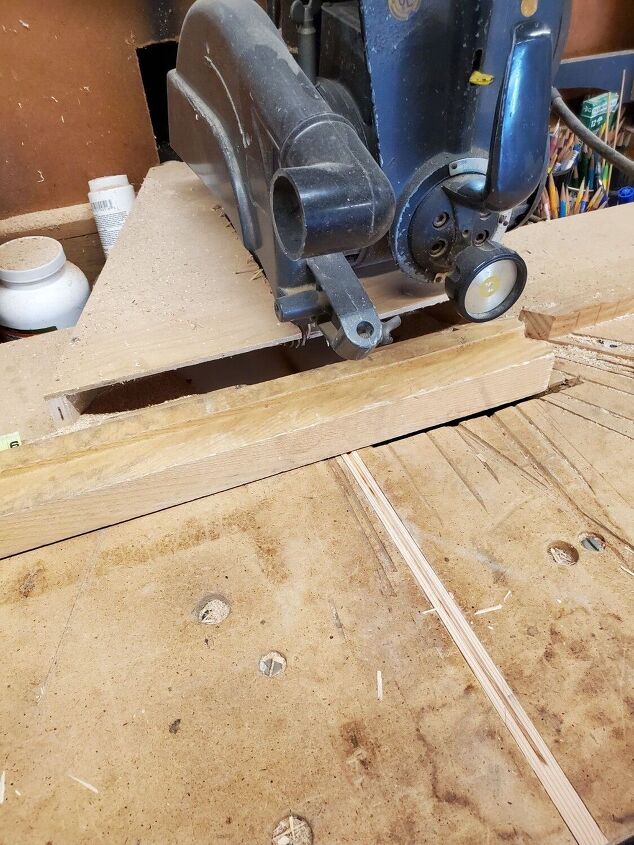
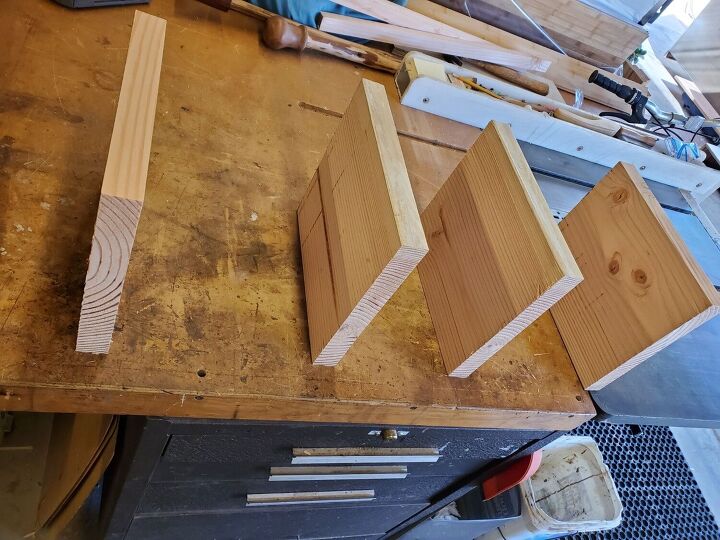
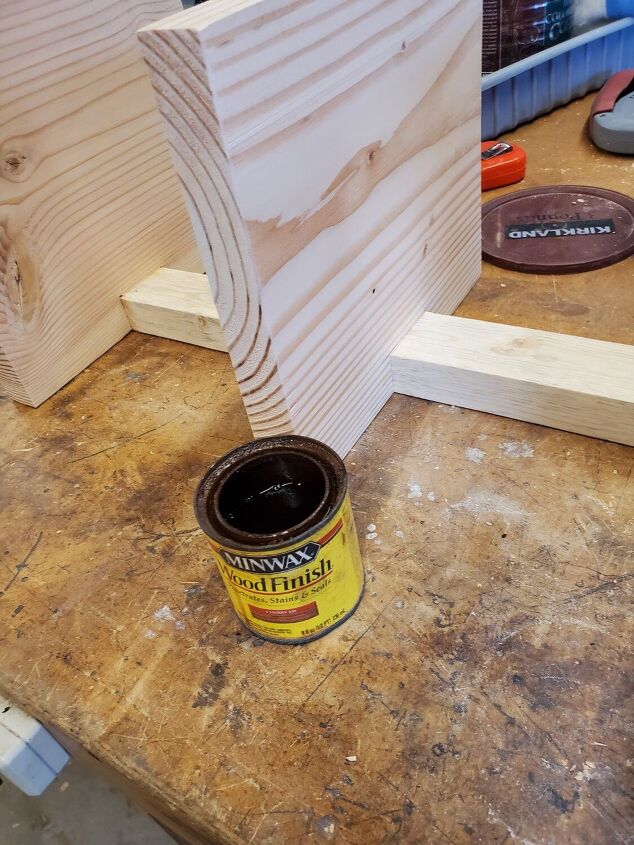
Next, I found a piece of wood that would work perfectly for the "spine" of the shelf. It was from some old pallet wood and it had a groove on one side. I'll be securing the shelves with lag bolts so this way I won't have to counter sink them. You could also use a 2x4 but I wouldn't suggest using anything under 3/4 of an inch thick for the back piece. I cut my piece to length using the radial arm saw.
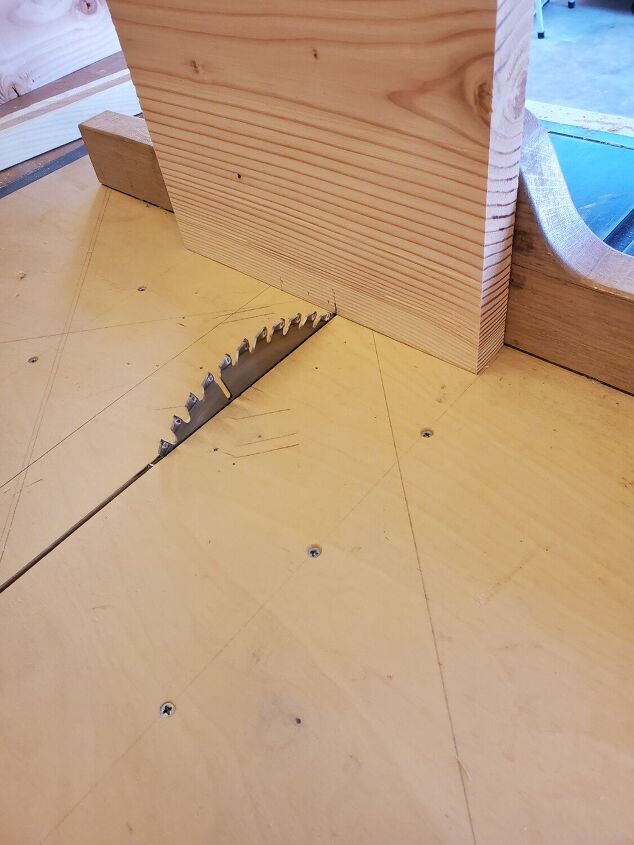
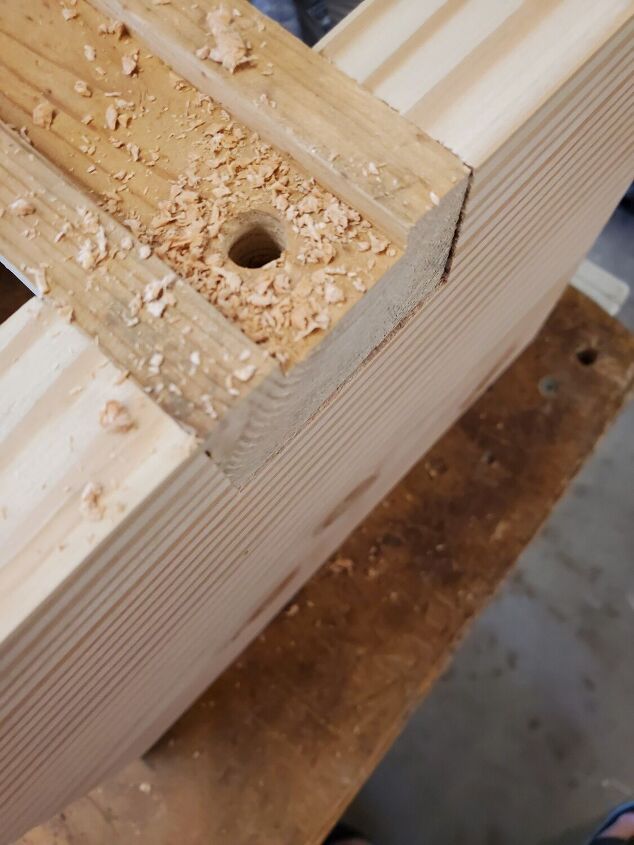
The next step was to cut out notches on each shelf so they would fit snuggly around the spine piece. I used a table saw to make the two side cuts and cut out the rest of the notch using a band saw. You can also use a band saw or jig saw for this entire step but I wanted to get my cuts as straight as possible.
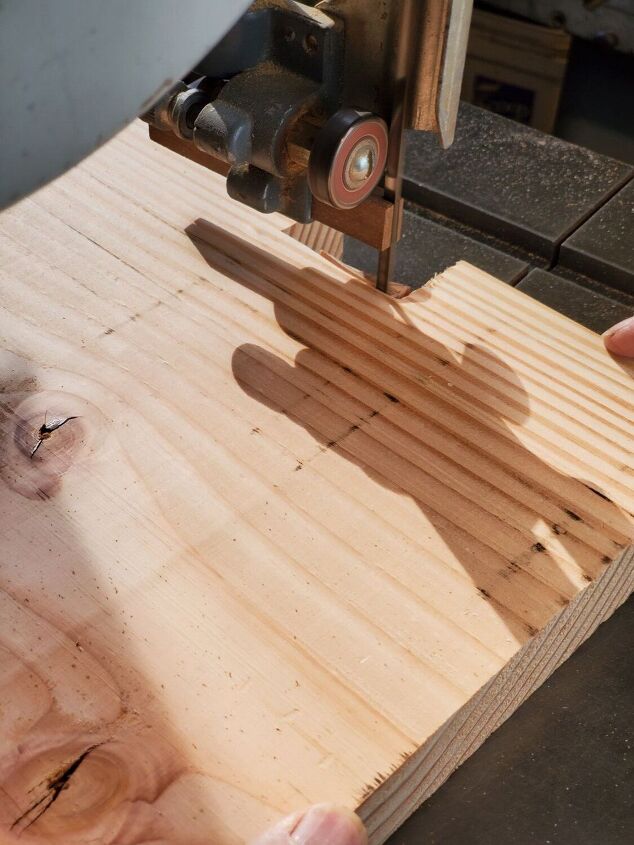
I don't always end up getting super straight lines on the band saw but I really wanted the shelves to fit as snuggly as possible without many gaps.
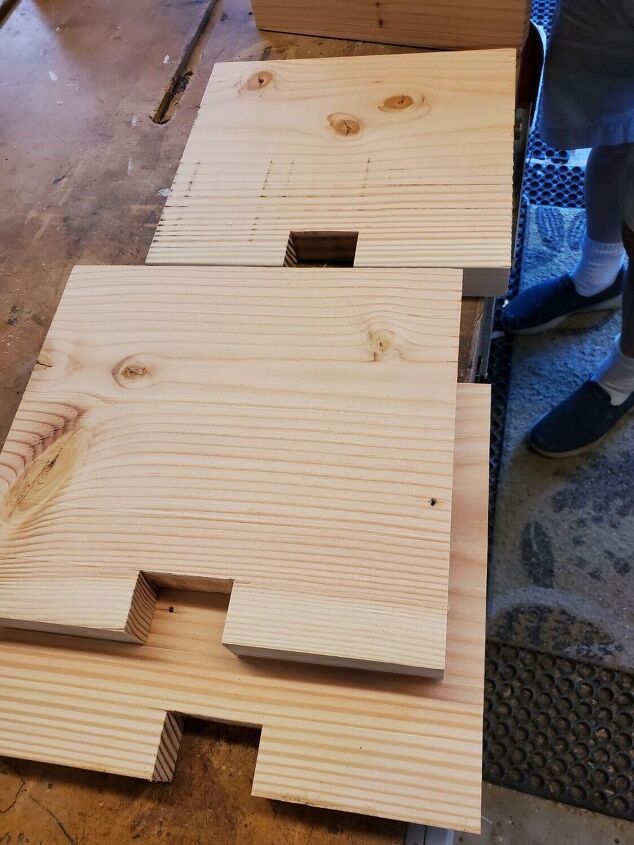
Here are the shelves with all of the notches cut out. I sanded each shelf smooth and broke all of the sharp edges as well.
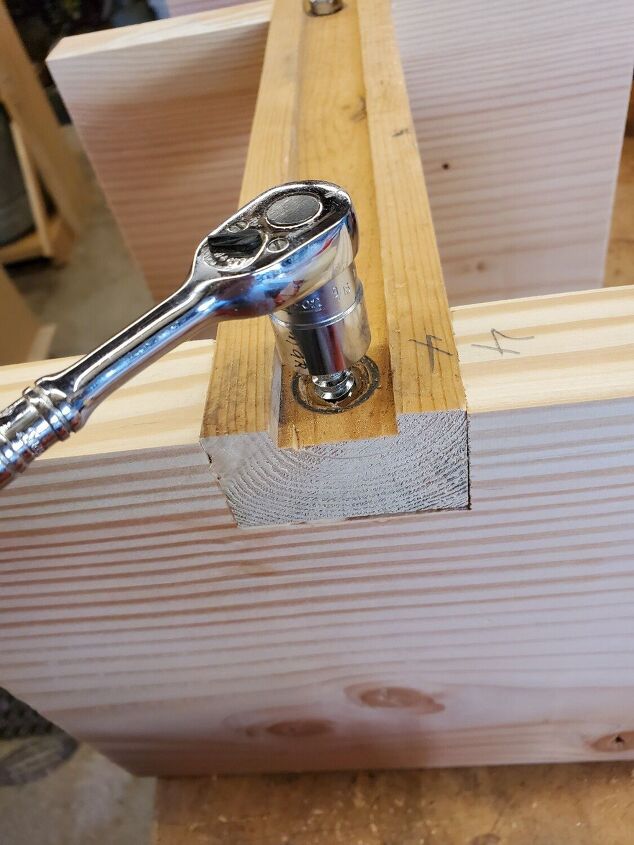
Next I got all the pieces in place and drilled my holes for my lag bolts.
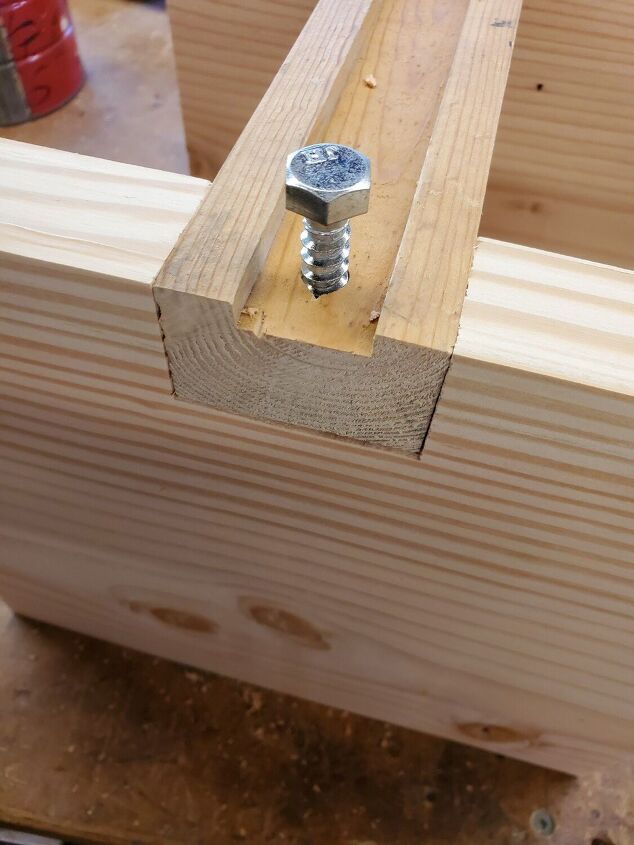
I secured all of the shelves with the lag bolts and made sure that all of the shelves stayed in place and everything looked good. Then I removed the lag bolts and used wood glue on each of the notches and put the lag bolts back in nice and tight.
You can see here how this piece of wood was perfect because of the groove. Most likely you'd be using a flat piece of wood and would need to countersink your bolts or screws.
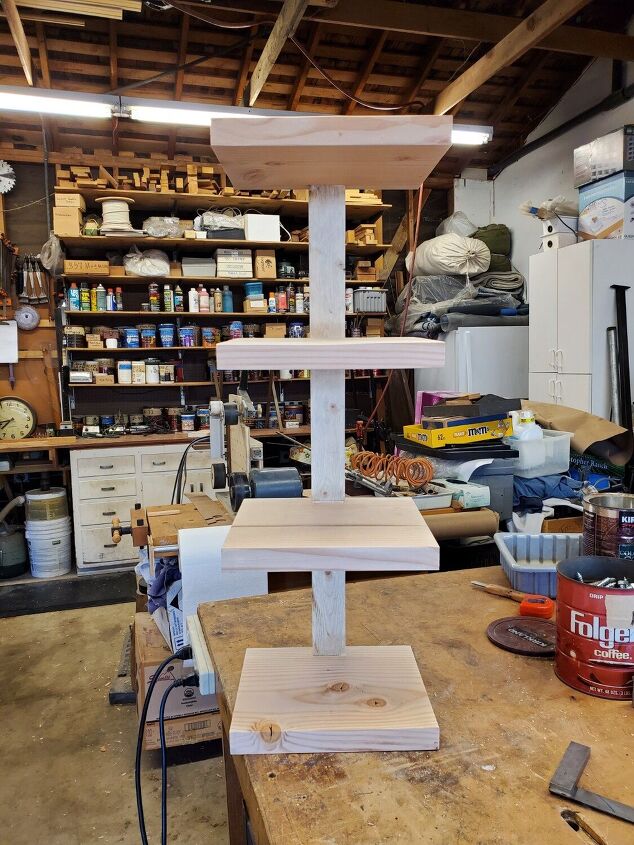
Here's what it looks like so far! Before the glue dried I used a square to check each shelf and make sure any minor adjustments were made if needed. For reference, the overall height is 32 inches and each shelf is 11x10.
Time to stain! I ended up mixing a couple of old stains I had to get a nice warm medium brown color.
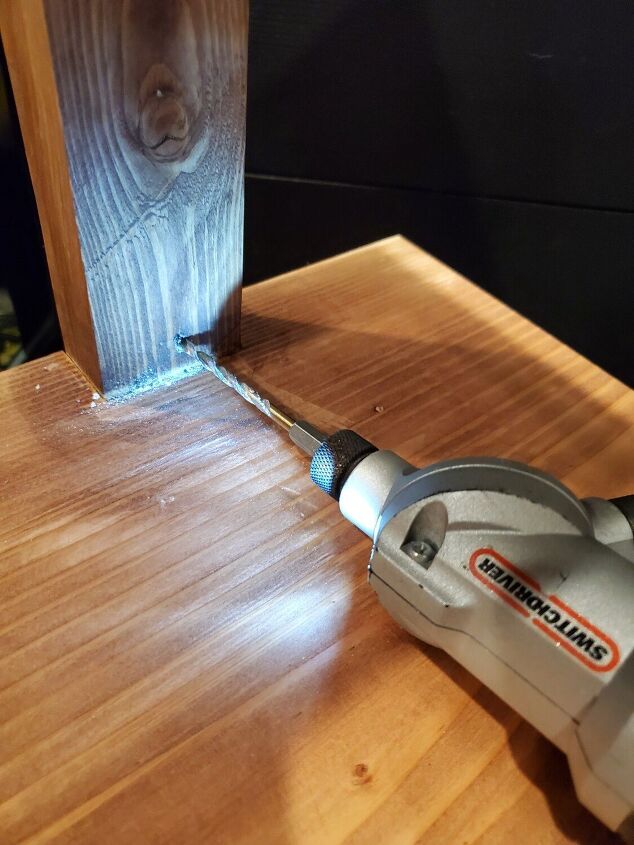
I pre drilled two clearance holes in the back piece and then used a stud finder to make sure I secured my shelf to a stud with drywall screws. If you're installing it in a place without a stud or any blocking, make sure you use something like molly bolts or toggle bolts to keep it secure.
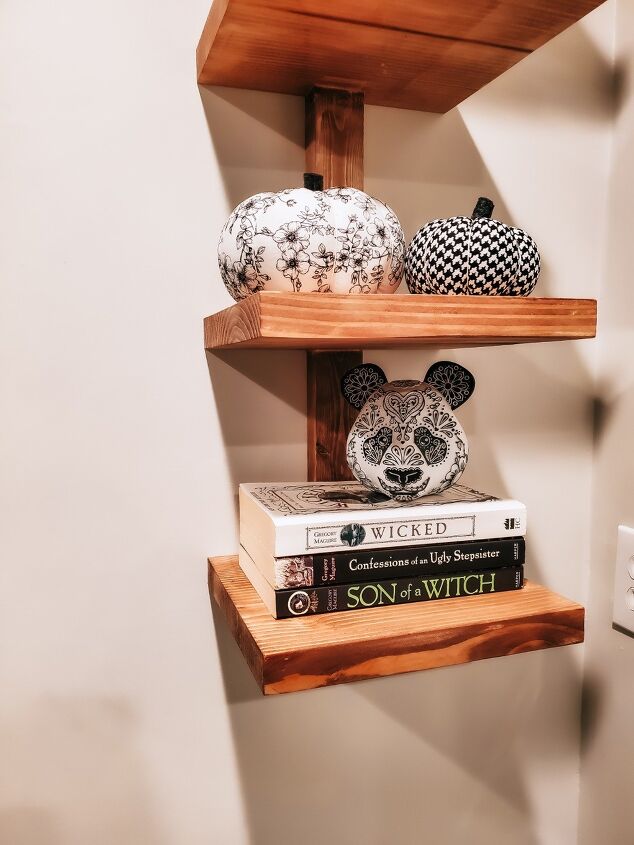
Here's a close up!
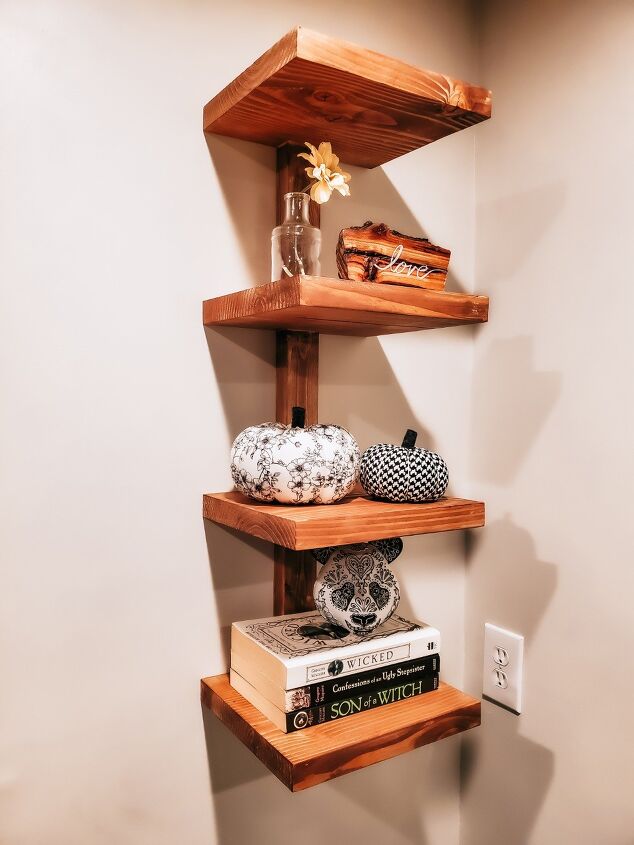
All done! This shelf was a lot of fun to figure out and make, and I'm SO happy with the end result. I had a couple other design ideas in mind as well so I might be building another (less chunky) one in the future as well. Stay tuned! Thanks for following along and I hope you enjoyed this project!
Resources for this project:
See all materials


Comments
Join the conversation
-
Bravo! I did not think that way. I was concerned about the weight of the items but now I can see the support is genius ! Thanks it’s fabulous
-
Lovely job! Some like this would cost way more in the store.


Frequently asked questions
Have a question about this project?