


DIY Farmhouse Shelves

These DIY Farmhouse Shelves were super easy to build and cost less than $50 in materials.
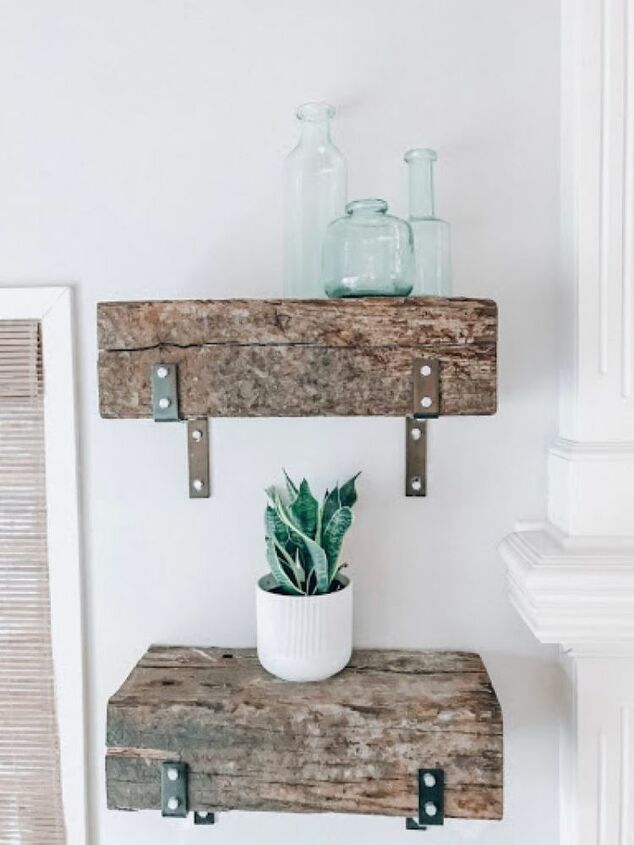
Our main living room really needed a space that could add more character and dimension. I liked that we didn't have huge built ins that needed to be decorated but I also felt like it was a little bare without some shelving. I wanted something simple but that would flow with our modern farmhouse theme in our home. I love the look of vintage beams, but those can be expensive. We wanted to stick within a budget. That is when we found these railroad ties from Menards. They are similar enough to the vintage beams I love, but without the expensive price tag. DIY Farmhouse Shelves Supplies:
- 1 Railroad Tie (We got ours from Menards) - $16.99
- 8 Heavy duty, rubber coated "L" brackets
- 2 inch lag bolt screws
Tips for Success
Before beginning this project, we measured the space that we planned to place the shelves. This allowed us to prepare for how much material to buy. In order to hang the two shelves we planned for, we needed eight brackets total. This is because we used four brackets per shelf. We could not find the brackets that would fit the railroad ties so we combined two brackets to form one. Then, we used 6 2 inch lag bolt screws per shelf to secure the ties to the brackets.

To cut the pieces of wood for the farmhouse shelves, Ry used his DeWalt table saw. He had to cut the railroad tie on both sides because it was so thick. After he cut the two pieces we needed for the shelves, we even had extra wood leftover. Hanging the Farmhouse Shelves
Railroad ties are made from very heavy, solid wood. I am so glad that we decided to go with the heavy duty "L" brackets and bolt screws. Securing these shelves to the wall safely was really important since we have little ones. One piece of advice is to be sure that you check the wall for studs. You will need studs to secure the farmhouse shelves safely to the wall. You can purchase a stud finder like this one at most home project stores like Home Depot or Lowes.
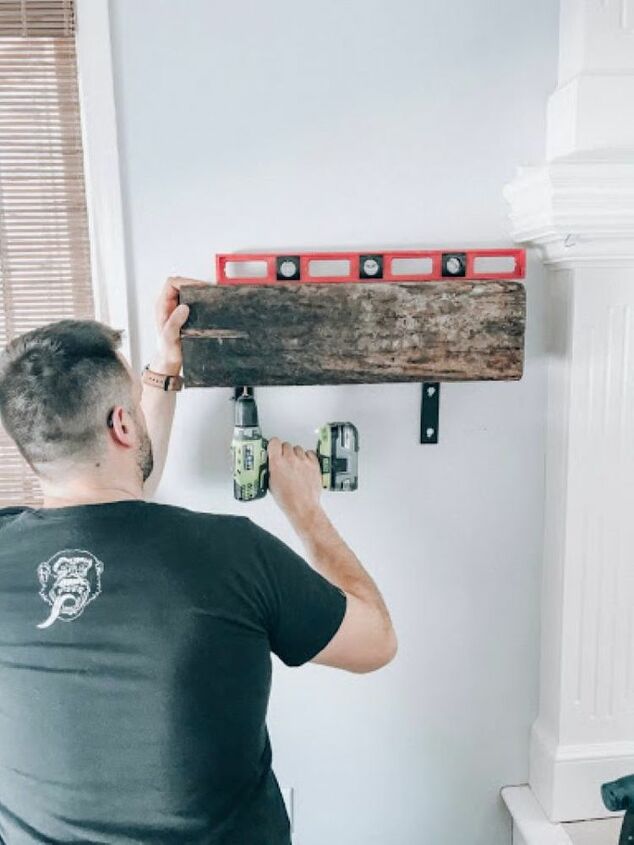
Once we had the studs found, he worked on drilling the holes and attaching the "L" brackets for the first shelf. When we hung the second shelf, I tested out the height difference to ensure I could style them with 8x10 photo frames. Keep in mind how you think you'll use the shelves and plan for that when you are hanging them.
To add a final touch, we placed brackets on the front of the ties to make it appear that they wrap around the ties. This is where the extra two brackets will come from for each shelf.
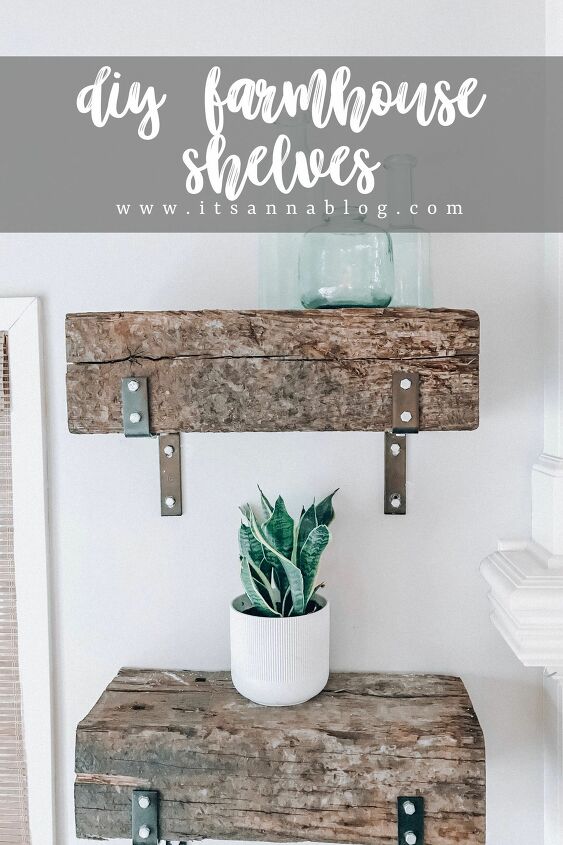
These DIY farmhouse shelves were a really easy, low-cost project that took us no time at all to complete. It absolutely adds the texture and character that I was looking for in this space!
Check out some of our other favorite DIY projects by clicking here!


Frequently asked questions
Have a question about this project?