


DIY Pegboard Entryway Project
*This post was sponsored by WORKPRO® Tools, however, all opinions expressed are my own.
I am excited to be sharing this DIY pegboard entryway project with you today. This is the project, I never knew I needed. At my apartment we have a small key holder that has been used to store my dogs belongings, keys, and my purse. Needless to say that it has been a bit crowded. This is why I am elated to be sharing this super easy DIY pegboard project tutorial. It is versatile, easy to make, and budget friendly.
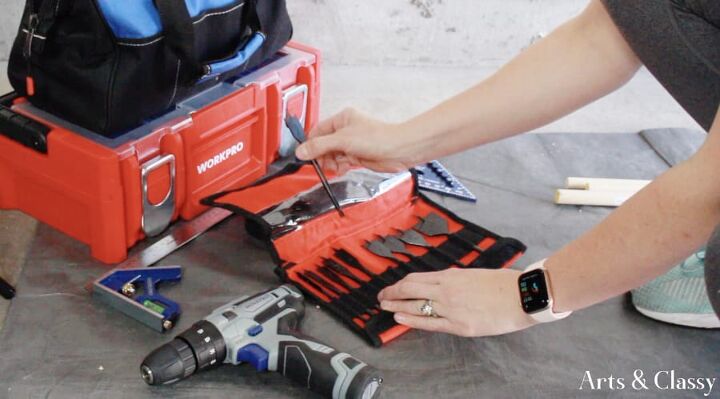
I was stoked receive a lot of new tools from WORKPRO®, and I must say I really enjoyed using them for this project. Not only were the tools great quality, but I am in love with my new tool boxes. I find the more organized I can be with my tools, the easier it is to execute fun projects like this on.
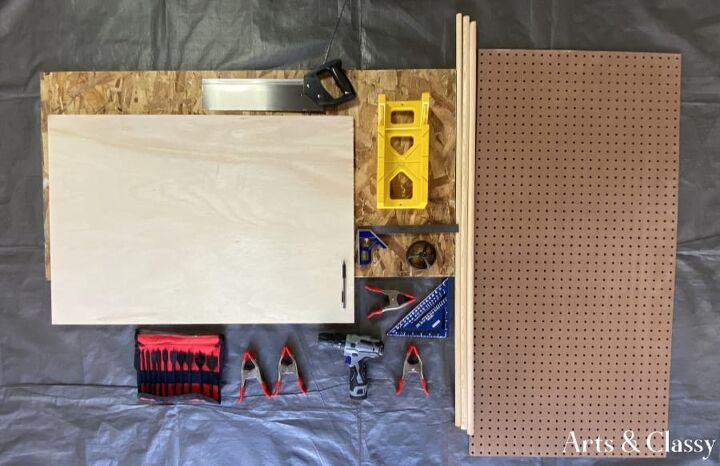
Supply list:
- WORKPRO® 12V Cordless Drill and Home Tool Kit which comes with 177PCs. The Drill is 12V and features a light when the trigger is depressed. It comes with a bag and all essential tools with comfort grip handles.
- WORKPRO® 10PC Spade Bit Set. I used ¾” but the kit comes with sizes 1/4″ to 1 1/2″, Patent pending groove design for quick and smooth chip removal.
- WORKPRO 17" Sliding Tool Box w/18 Adjustable Compartments
- WORKPRO® Rafter Square and Combination Square Tool Set with Detachable level
- WORKPRO® Torpedo/Spirit Level which is magnetic for securing to metal surfaces.
- WORKPRO® 2" Jaw Clamps
- ½ “ Plywood (any dimensions)
- Pegboard
- Scrap plywood
- Pencil
- Jig guide
- Power sander
- Wood screws x4
- Mitre box with back saw
- ¾ “ Wood dowels
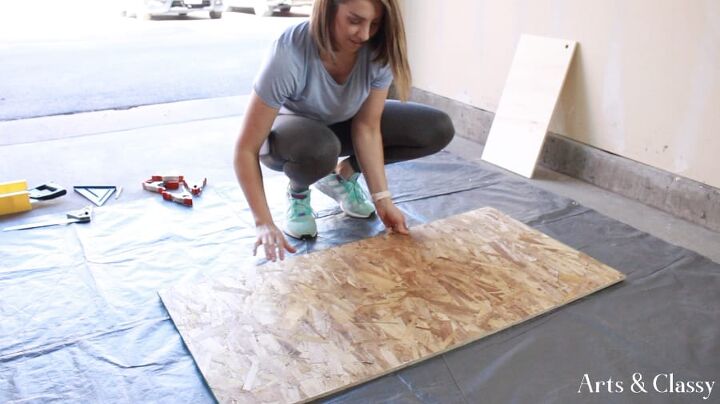
Step 1 – Prepared my Workspace
laid down the scrap plywood I got at Home Depot and layered my ½ “ plywood on top.
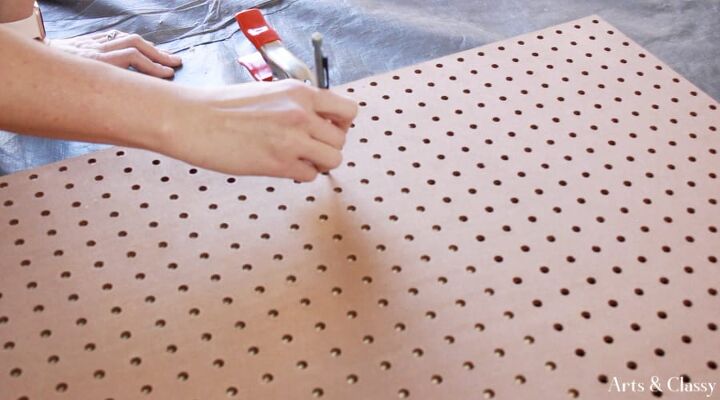
From there, I added a piece of pegboard to use as a guide to draw the holes. To secure these pieces together, I used my WORKPRO® clamps to keep them together.
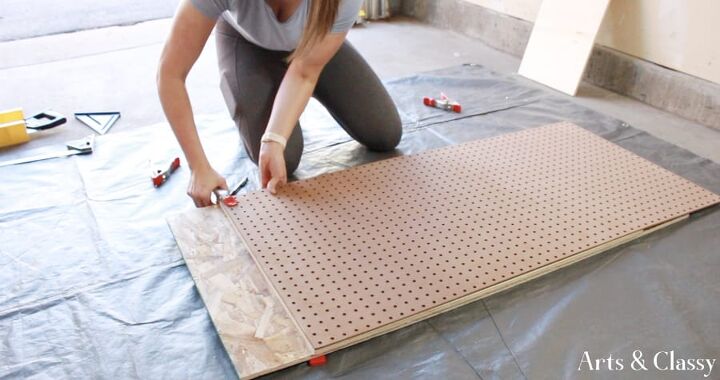
Step 2 – Use My Pegboard as a Guide
I wanted to make sure I drew holes that would be centered on the plywood board, so I divided the length and width to figure out how many holes I needed to use in my pegboard guide to space between the holes I was actually going to drill. I figured out I needed to distance each hole by five spacer holes.
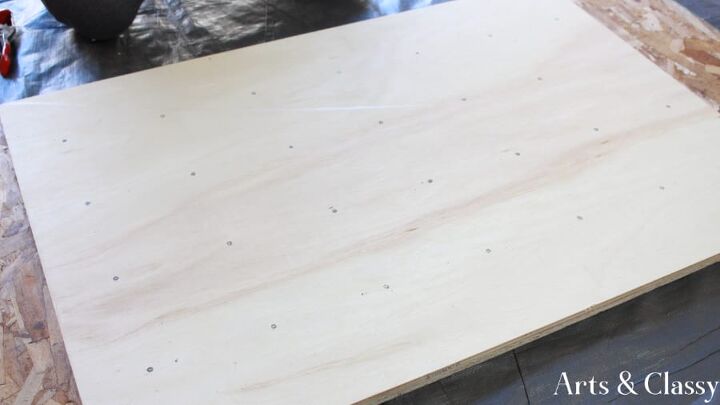
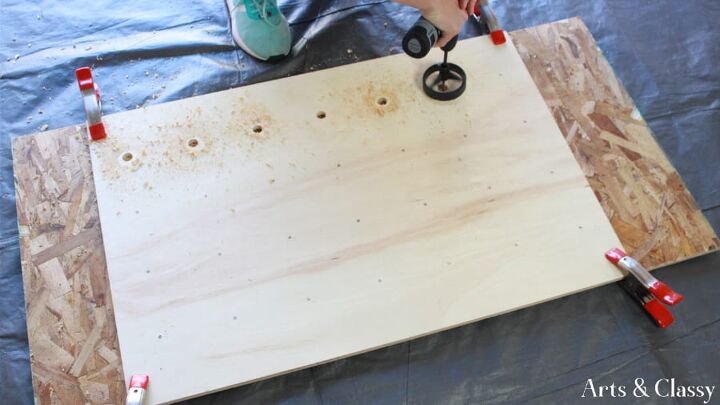
Step 3 – Drilled Holes in Plywood
Once all my holes have been marked, I removed the guide pegboard and got out my WORKPRO® power drill, ¾ “ paddle bit, and jig guide.
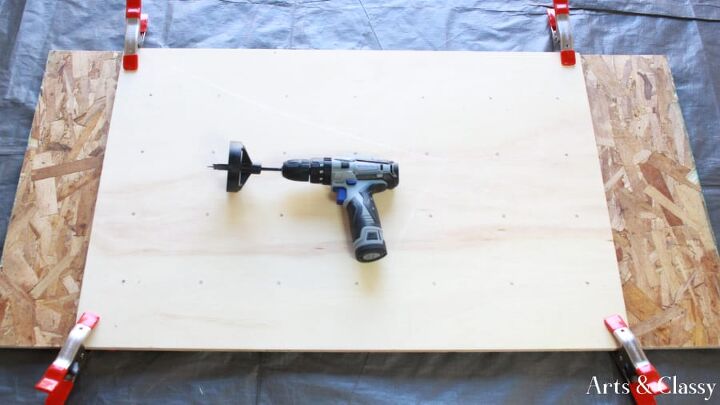
The jig is used to make sure my drill stay at 90 degrees to keep the hole straight.
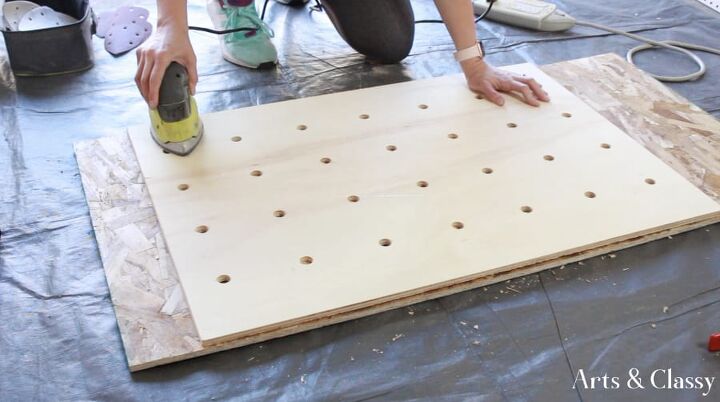
Step 4 – Sand Plywood
I took my power sander and began with a rougher grit and worked my way to a finer grit to make sure it was smoothing out the plywood. I didn’t want there to be any splintering or rough patches.
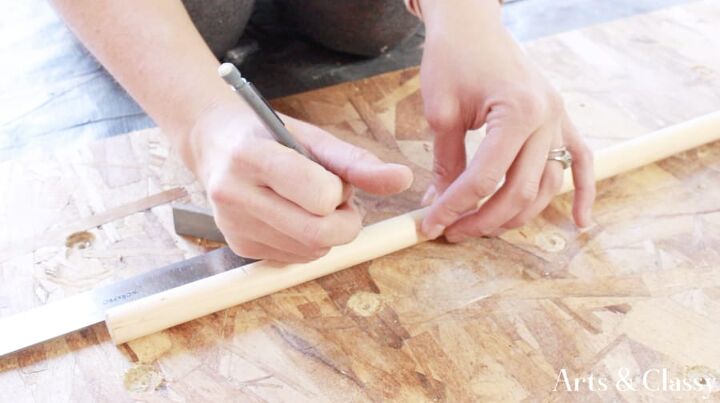
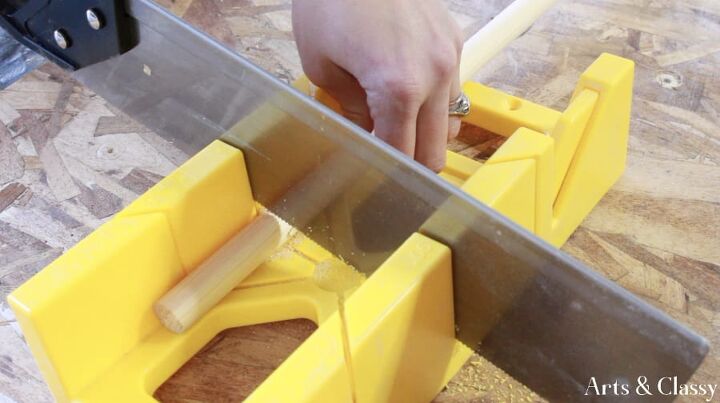
Step 5 – Cut Wood Dowels
With my mitre box, back saw, ruler, and pencil I was able to measure out 2.5” pegs on my ¾” dowels and six 3” pegs for some small 3 inch shelves I made from scrap wood.
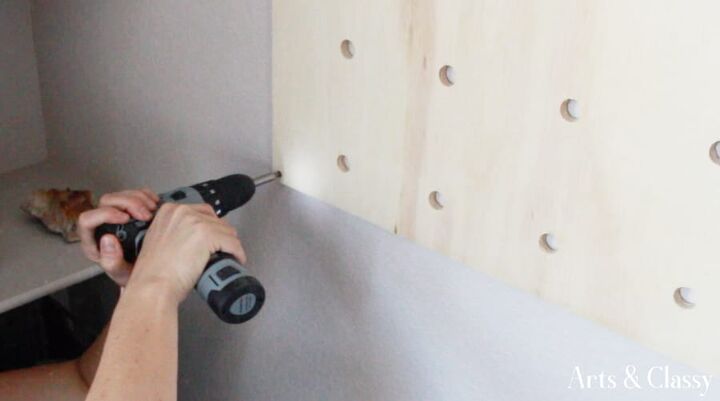
Step 6 – Mount Plywood on the Wall
This step was a lot easier than I thought it would be because the plywood I chose at ½” wasn’t very heavy. Therefore a stud in the wall was not needed to secure it when hanging. I used 4 wood screws in each corner and my power drill to secure it into place.
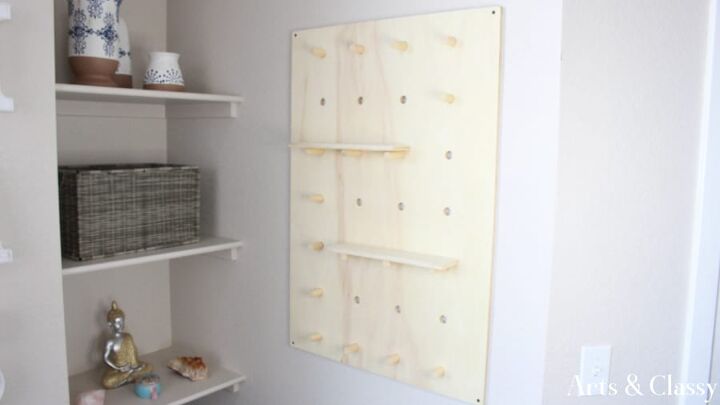
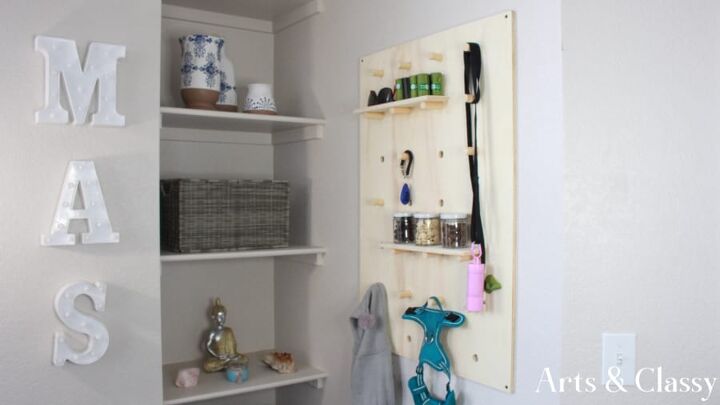
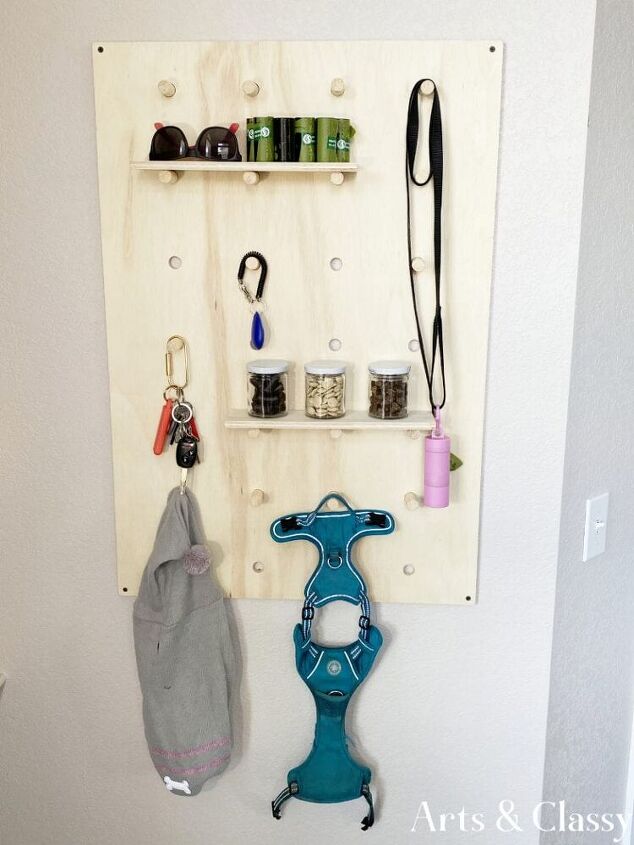
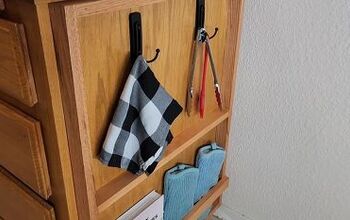
Step 7 – Add Dowel Pegs to Create the Perfect Configuration
What I love about this project is that it can be configured into many different forms.
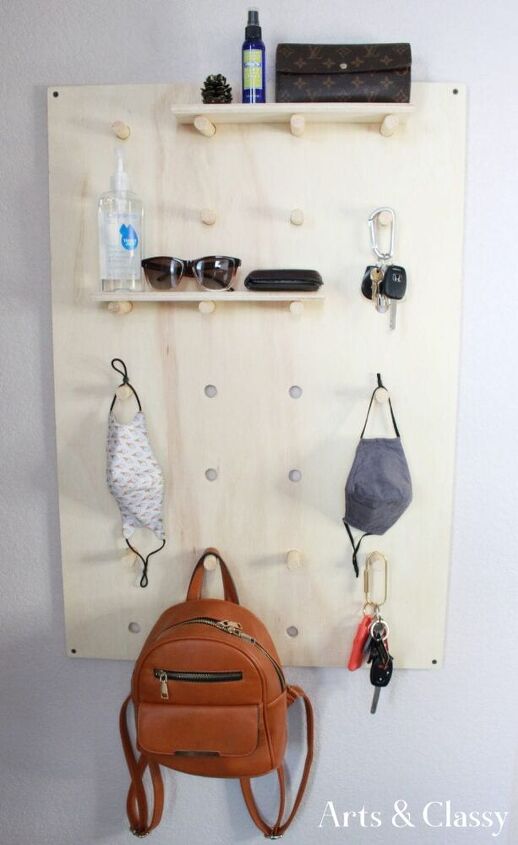
I decided to use it for my dog’s treats, potty bags, harness, sweaters, and leash. It also works for a face mask hanger and a great spot for keys.
So what did you think of this DIY pegboard project? Do you feel inspired to try one of your own? Thanks again to WORKPRO® Tools for sponsoring this project. Please let me know how you would configure it in the comments below.
Resources for this project:
See all materials


Comments
Join the conversation
-
You are hot
-
Yeah, I need a whole set of toolset to do these “great” projects


Frequently asked questions
Have a question about this project?
Did you leave the shelves you put on the pegs loose or did you attach to those pegs?
Very cool project!
Please tell me that you used some kind of drywall anchor to fasten your project to the wall! Drywall screws will not hold it for very long, especially with people pulling and pushing on the pegs as they hang things up and take them down again.
ITW E-Z Anchors are a great option, you can take the board down and use the existing holes in the drywall. Then just drill through-holes just slightly bigger than the anchor screws and hang it back up!