


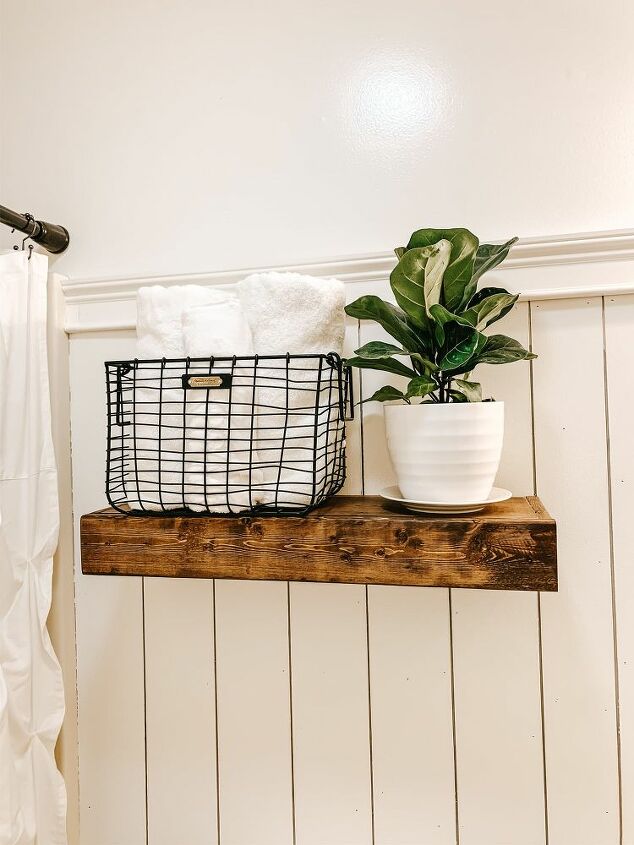
Farmhouse Floating Shelves
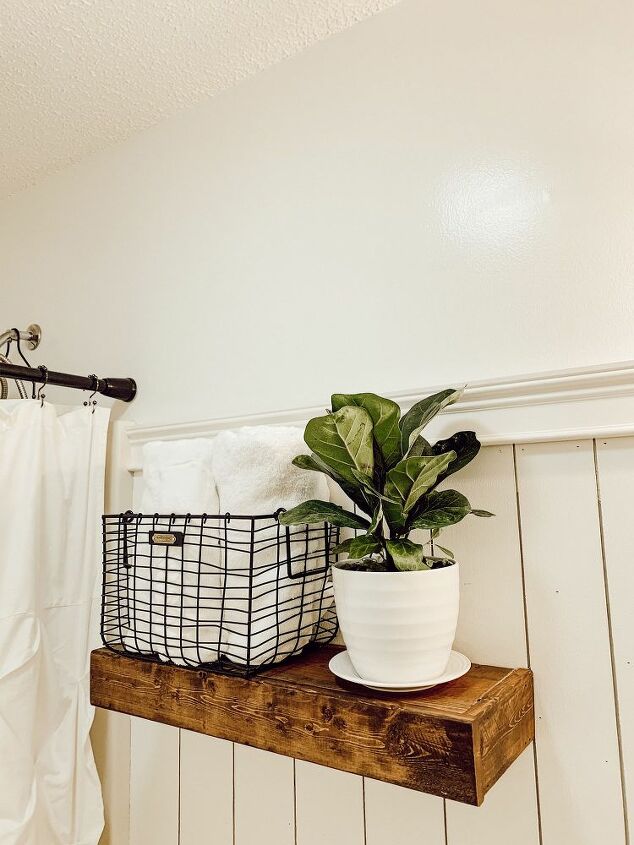
A simple and affordable way to building farmhouse style floating shelves for less than $50. See more on how to style them here!
Once you have that measurement, decide on the length of the shelves. For example, mine are 25inches long.
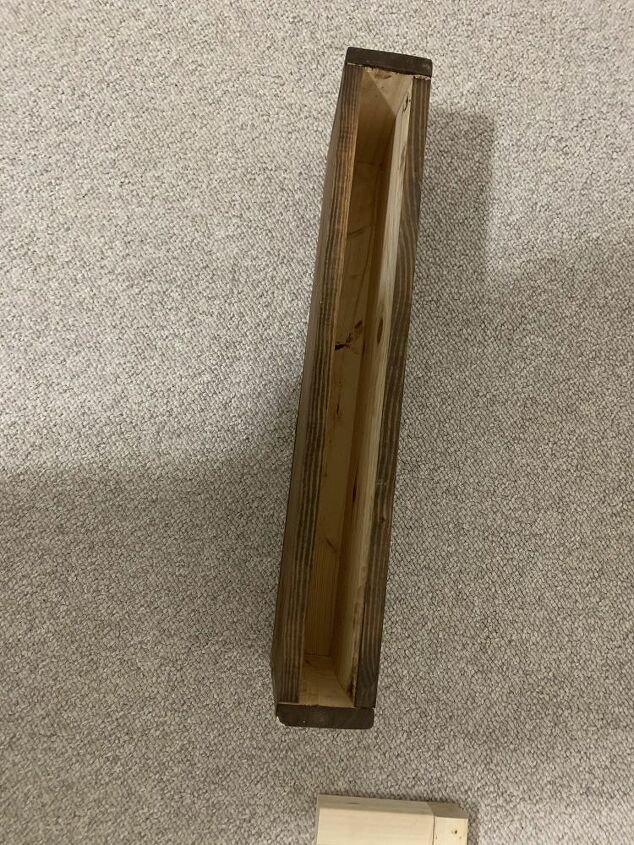
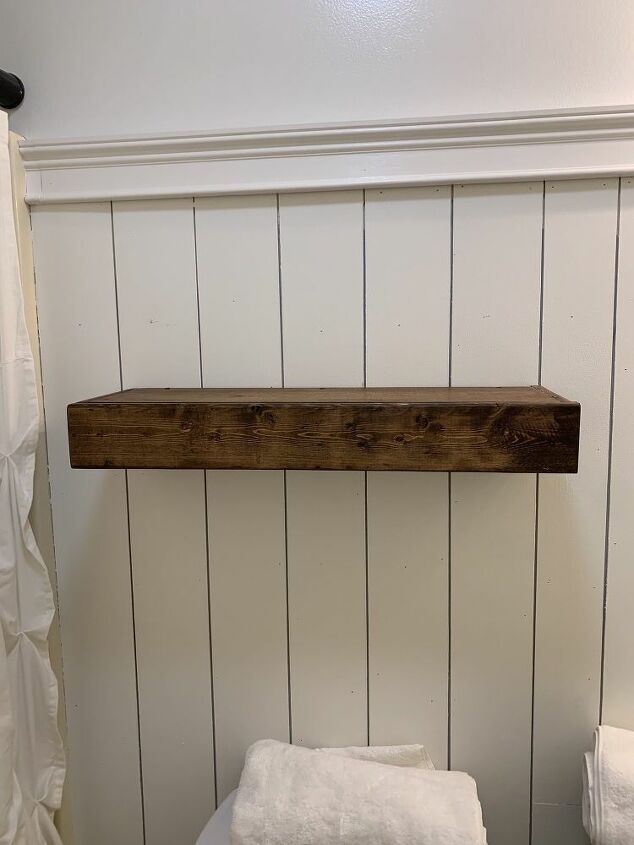
One for the top and one for the bottom. Cut the 1x4x6 to the length of 7 1/8. This will be for the sides. You will need to cut two pieces. Cut the remaining 1x4x6 to the length to 25 inches. This will be your front piece.
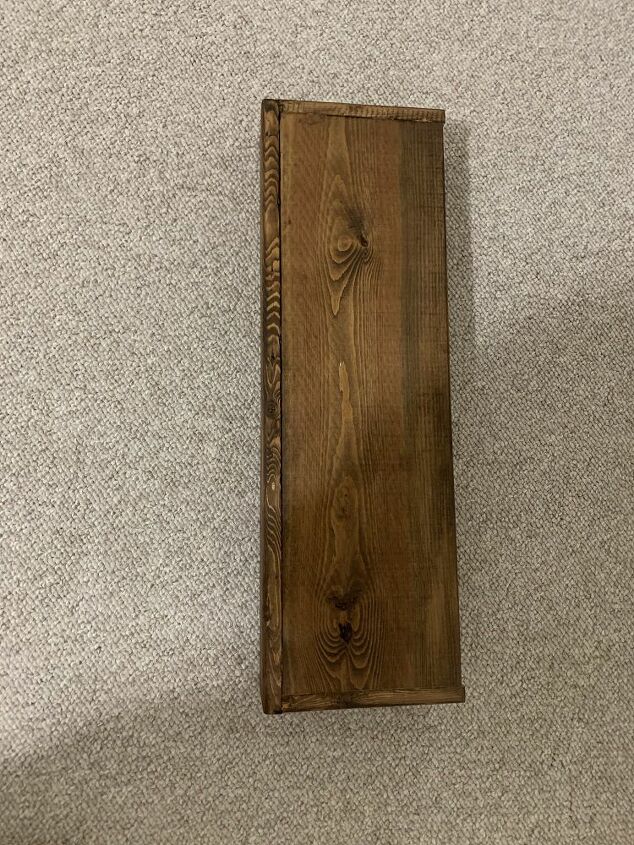
Take one of the 1×4 boards at 7 1/8 inches and attach it to the 1×4 board at 25 inches, on the edge so they form a L. I used a little bit of wood glue and a nail gun to hold this into place. You can use either. If you only use nail glue you will need to use a clamp and let it dry before moving onto the next step. Once you have that part dry, you will do the same thing to the other end.Once the bones assembled all put the top and bottom on. Take your 1×8 boards and slide it in between the two boards at are attached to the 1×4 boards Once you have them both in place glue or nailed, let it dry. If you did only use glue make sure you do use the wood clamp during the drying process. Dry for 30 mins.
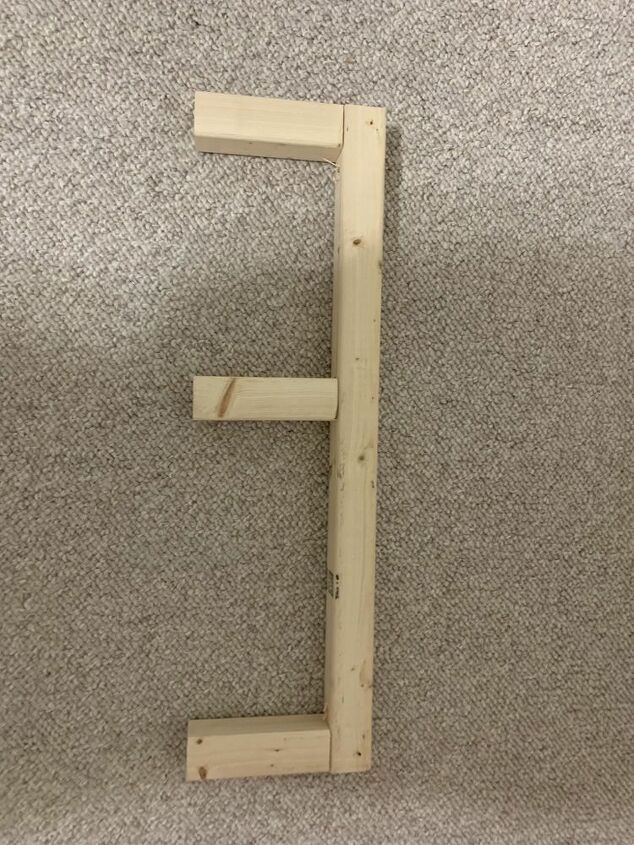
The wall mount should be able to fit inside the shelf. Since my total length was 25 inches, I cut (2) pieces of the 2X2X8 to the length of 23 1/2 inches. Then I cut (3) pieces of the 2X2X8 to 5inches to be the support braces to the shelf. You will take one of the 5inch pieces and attach to one end of your wall mount, then one in the middle, and one on the other end. I held mine together with wood screws.
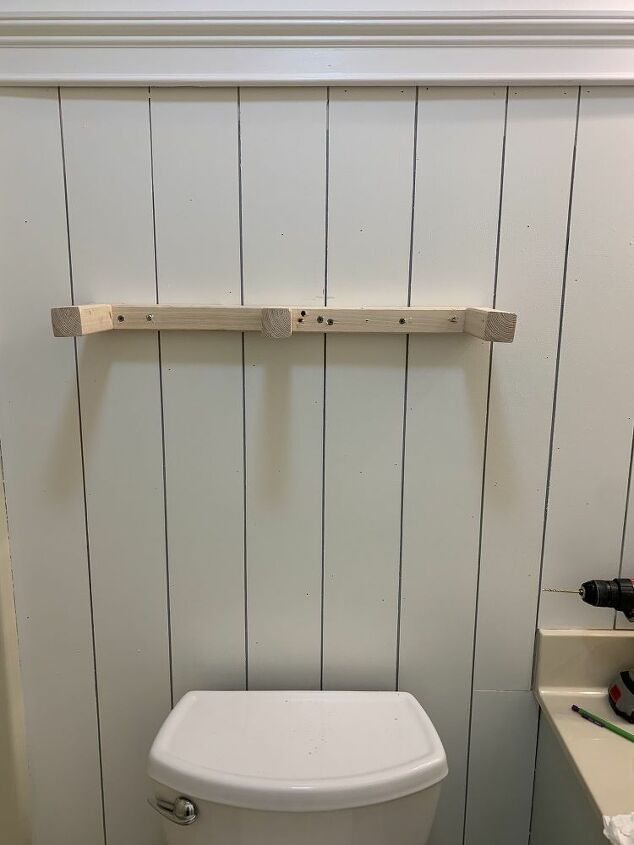
I suggest pre-drilling holes in the wall mount to make for a simple hanging process. Attach wall mount using a level to make sure it is centered and level for your shelf to slide onto.


Frequently asked questions
Have a question about this project?