


Farmhouse Shelves Above the Toilet (for Less Than $20!)
Today, I’m excited to share how we installed the new farmhouse shelves above the toilet. In September, we finished a $100 makeover on our downstairs bathroom for the $100 Room Challenge. Friends, it seriously made SUCH a difference! Check out the before photos here.
Honestly, this was the easiest project we did in the bathroom. And the best part is…it cost less than $20 to install all three!
Farmhouse Shelves Supplies
- 1″x10″x6 foot board (or desired size)
- Farmhouse shelf brackets (hardware included)
- Wood stain
- Rags
- Polyurethane, if desired
- Phillips screw driver (I used our cordless impact gun to make it even easier)
A 1″x10″x6′ board at home depot was about $9, and an associate cut it into three 24″ pieces.
I gave the shelves a coat of stain we had in the shed by wiping evenly with a rag. Next, I sealed with a coat of satin polyurethane.
At first, I thought I would use basic corner braces to make into affordable shelf brackets.
Then, I found this set of 8 black shelf brackets for an even better price…no spray painting required!
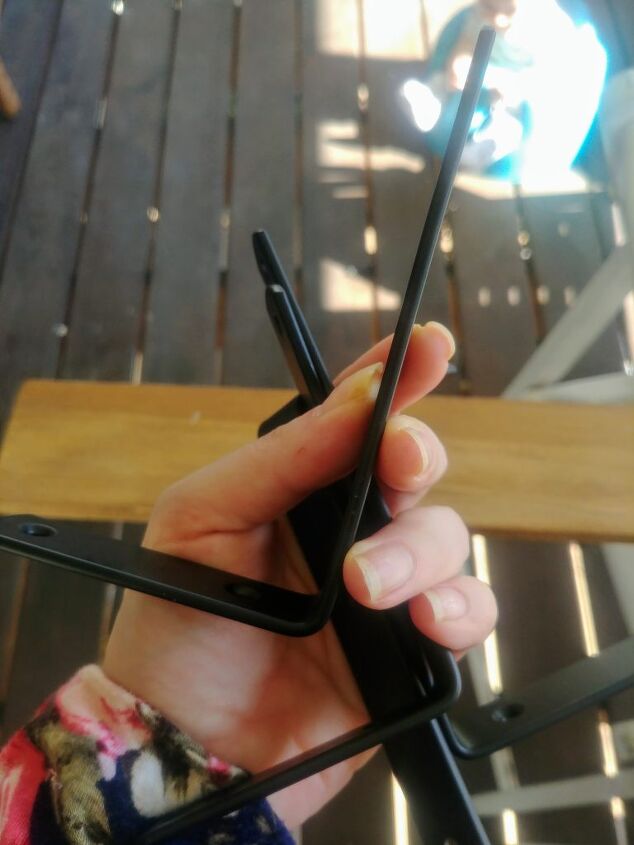
They included all the screws and drywall anchors, so it made the shelves so simple install.
Before installing the brackets, I checked to see if each piece of wood had a “good side”. If there are any imperfections or giant knots in the wood, I try to face them in toward the wall and flipped to the side that is less visible.
Measure the same distance inward on both sides of the wood shelves, and use a straight edge to mark the location for the brackets with a pencil.
Holding the brackets in place, screw them into the shelves.
I used the shiplap on the wall as a guide to evenly space the shelves above the toilet. A level made sure they were nice and straight.
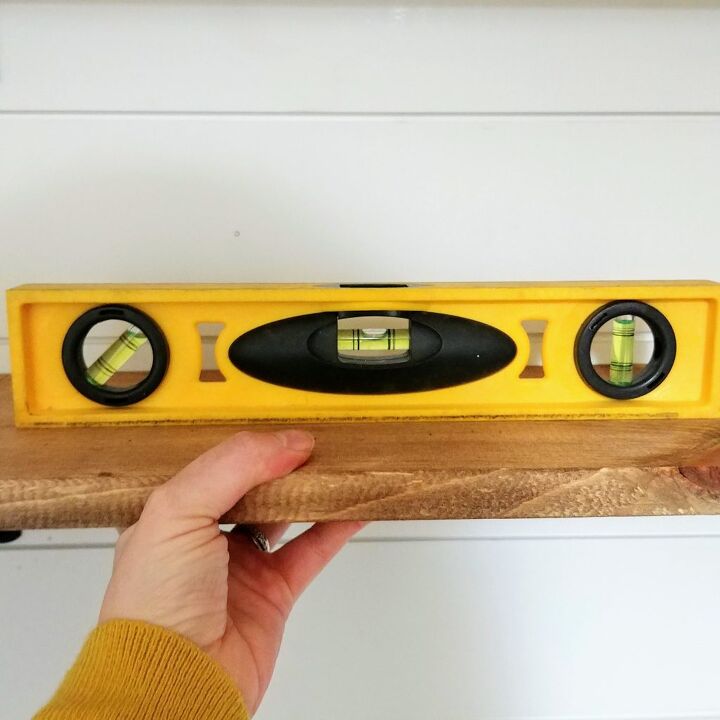
Hanging the shelves is easier as a two person job. Dear husband held the shelves level on the wall while I screwed them in place.
Make sure the shelves are installed centered on the wall one underneath the other. One of mine is off a bit..oops! Luckily, it’s not very noticeable!
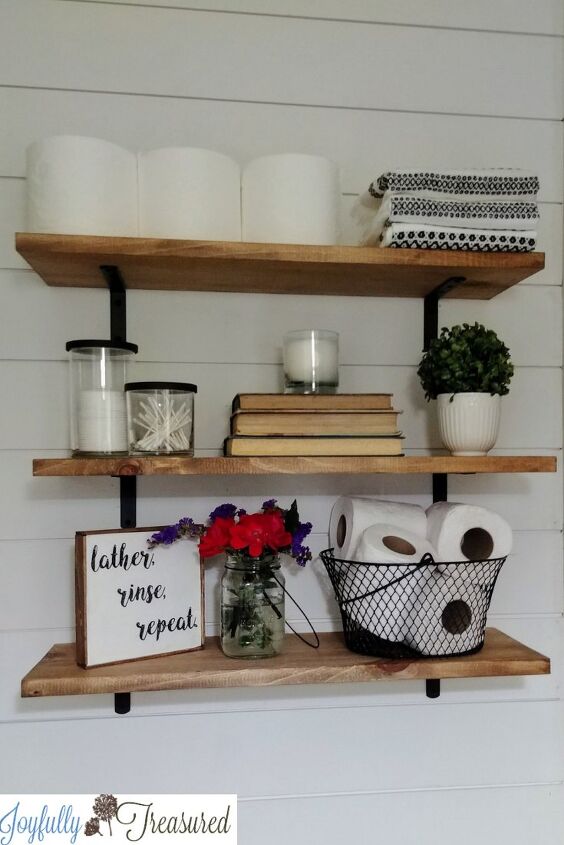
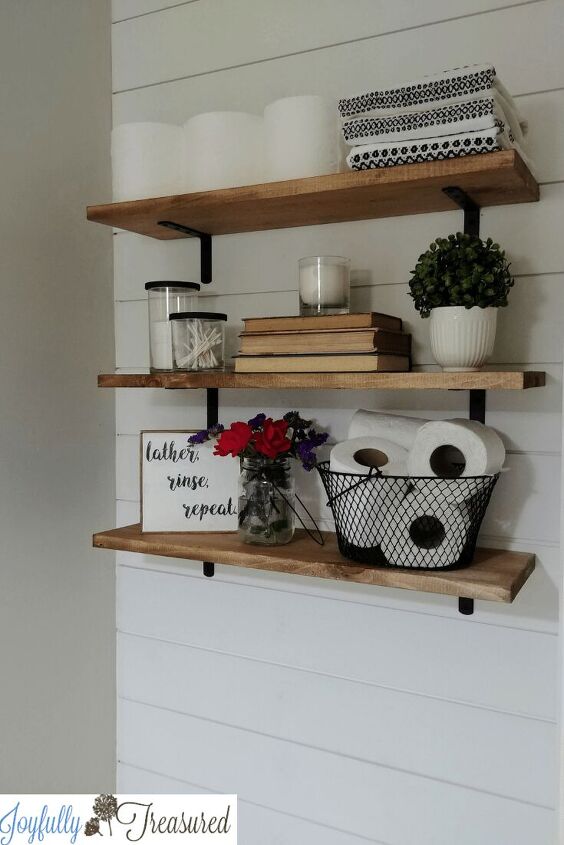
Low Budget Shelf Decor
To stay in budget, I had to get a little creative with decorating the new shelves.
The hand towels are Hearth and Home from Target. I picked up on clearance last year, and I think they work great for this bathroom!
A Dollar Tree basket holds extra toilet paper. The little farmhouse sign is made from a $1 sign from Dollar Tree. You can see the quick tutorial on my blog linked below.
The mason jar is a recycled Ortega salsa jar, I just added a mason jar handle. Recycled Yankee candle jars with black spray painted lids hold the cotton rounds and qtips. I loved the chance to be creative, and decorate the shelves with little to no expense. Being a part of the $100 room challenge really was so much fun!
The small black brackets were the perfect thing to add shelves to our budget bathroom makeover. These farmhouse shelves were so simple, and added charm to our tiny bathroom.
Now, I think our other bathrooms upstairs need shelves similar to these!
For another easy budget farmhouse bathroom DIY, check out this matching farmhouse industrial wall mirror!
For more budget friendly bathroom makeover inspiration, check out the full $100 bathroom makeover reveal linked below!

Comments
Join the conversation
-
I plan on using this idea in my very small family room bathroom


Frequently asked questions
Have a question about this project?