


How to Build a Floating Credenza for Maximum Storage
3 Materials
$250
1 Day
Medium
We were looking for some extra storage for our guest room and I couldn't find the perfect dresser for the space. So I decided to build my own...on a budget!
This floating credenza (what I lovingly refer to as a "fauxdenza") is an easy DIY project that anyone can do. Because you buy the cabinets pre-made, you can completely customize it to your space!
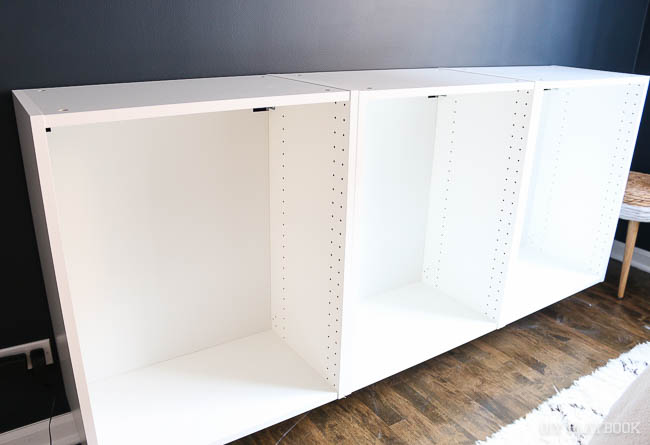
You'll want to find kitchen cabinets (ours are from Ikea) and install them on your wall. I went about a foot off the ground to create the floating effect.
You'll just follow the instruction that come along with your kitchen cabinets to install them securely on the wall.
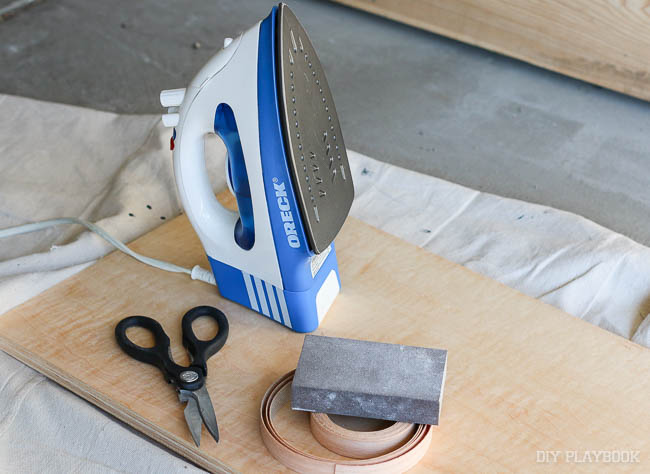
I used plywood for the wood top to keep it cost effective. I had that cut to size right at the hardware store and left with 3 pieces...one for the top, and two for the sides.
But because plywood doesn't have finished edges, I used a wood veneer edging onto the sides of the plywood. It's incredibly easy to install (you only need scissors and an iron...yes an iron!). You take the wood edging, line it up on the edge of the plywood, and use an iron to heat the adhesive on it. It then stays firmly in place!
Once your edging is on, grab a sanding block and get all of the edges super smooth.
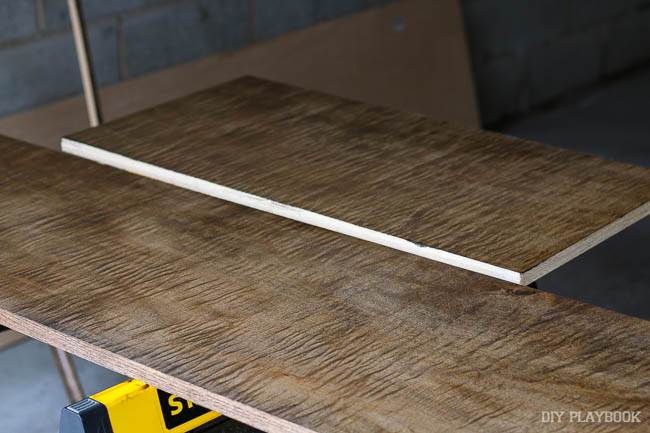
With the wood ready, I applied some wood conditioner and let then dry. I then stained the wood top a pretty dark color (Jacobean) and attached it to the top and sides of the kitchen cabinets using wood screws.
You'll want wood screws that aren't too long where they'll go through and poke out the other side of the cabinet!
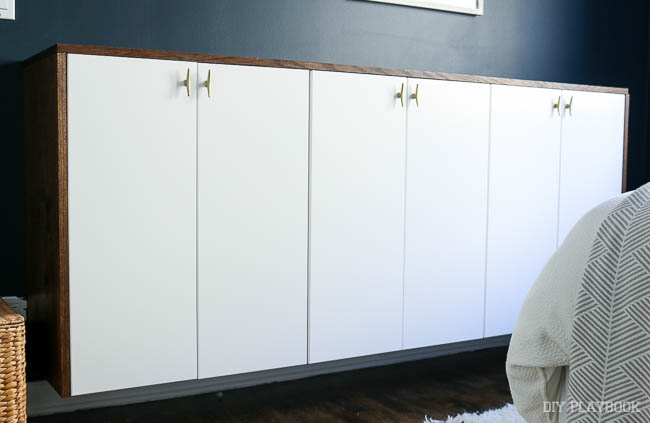
Some brass hardware finished off the look, for a perfectly customized furniture piece.
I absolutely love this project because you can totally make it your own. Change the size, the wood, the color, the hardware...every single piece can be perfect for your space and home style.
To see how I installed our fauxdenza in our guest room, check out my step-by-step tutorial.


Any price and availability information displayed on [relevant Amazon Site(s), as applicable] at the time of purchase will apply to the purchase of this product.
Hometalk may collect a small share of sales from the links on this page.More info

Want more details about this and other DIY projects? Check out my blog post!
Comments
Join the conversation
4 comments
-
This is a wonderful idea to get that extra storage that we all need. Thanks for posting!
-
Great job. Everyone needs storage help, thanks for sharing


Frequently asked questions
Have a question about this project?