


Living Room Built Ins

Turn a plain vaulted ceiling into a cozy, functional wall full of storage! This DIY project uses wall cabinets, faux shiplap, and pine boards to create the full look. This project is extremely affordable compared to custom cabinetry AND we believe anyone can do it!
Here's a short clip that captured all of our progress!
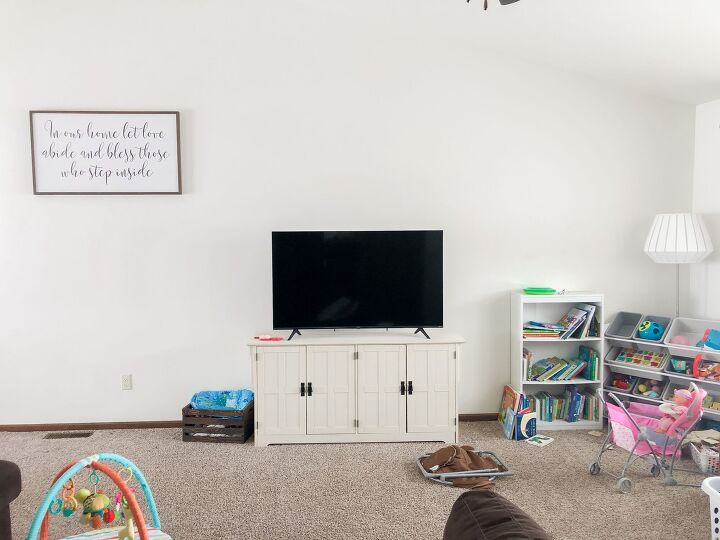
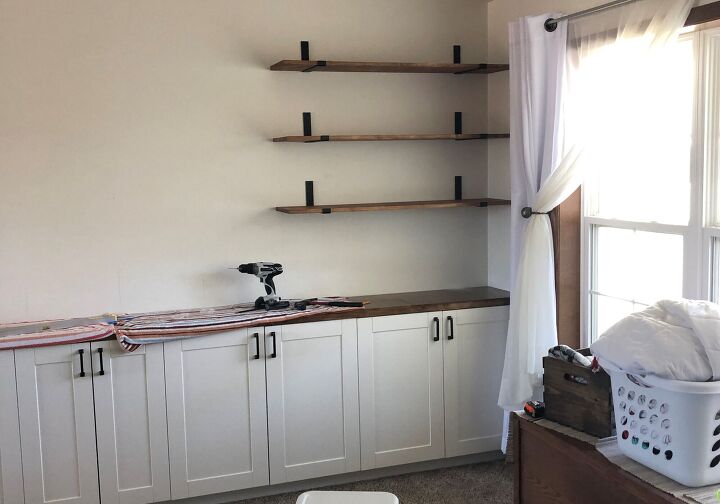
With 2 Kids, an open concept floor plan and a vaulted ceiling, I knew something had to be done to the space in our living room. It was this giant, empty wall that was hard to decorate and full of clutter from the kids as they continued to collect toys and books. After three years of staring at it, a DIY built in system was born. I had entertained the thought about getting custom cabinetry built, but we all know how extremely expensive it is, and I wasn't ready to commit to building bookshelves yet (I'm not that far along in my DIY journey), so I needed another option.
I had about 14 feet of wall space to work with until it hit an electrical outlet and the floor vent. It didn’t perfectly extend out to the peak in the center of the vaulted ceiling, which is completely ok - it helped give even more separation between the living room and the dining room. I knew I needed some sort of cabinets with doors to hide all of that crazy kid clutter, so off we went to Menards to see what they had for cabinets.
Cabinets:
This is where we spent a little more money than we typically do on a DIY Project - we decided to get some higher quality stock cabinets and ultimately ended up purchasing Klearvue Cabinets. We did this for a few reasons:
- These would be high traffic doors & cabinets with the kids hanging on them, playing with them, opening and closing doors, etc, so we knew we needed something that would last.
- We currently have carpet and still wanted the option to tear it out down the road if we needed to. Klearvue cabinets come with little legs that they stand on instead of the entire base, making it easy to swivel the legs up and down temporarily if we ever wanted to get under there to tear out the carpet and lay new flooring.
Now, let’s talk about these cabinets for a minute. Here’s what we ended up getting -
- We didn’t want these cabinets to be obnoxiously deep and take up two feet in depth of the room, so we actually bought wall cabinets that are 14” deep. This is PLENTY of depth for toys, books, games, etc for storage and didn’t take up a ton of room in our living room. Because Klearvue has the legs instead of the full base, we just simply added their little feet to the bottom of the wall cabinet and turned it into a floor cabinet! Genius. (Thank you to the helpful Menards worker for suggesting this!)
- We got the largest cabinets in width that we could get, simply due to ease of fitting larger toys in it, etc. It ended up being five boxes total - four 3’ sections and one 2’ section. We also did the 30” height on these boxes.
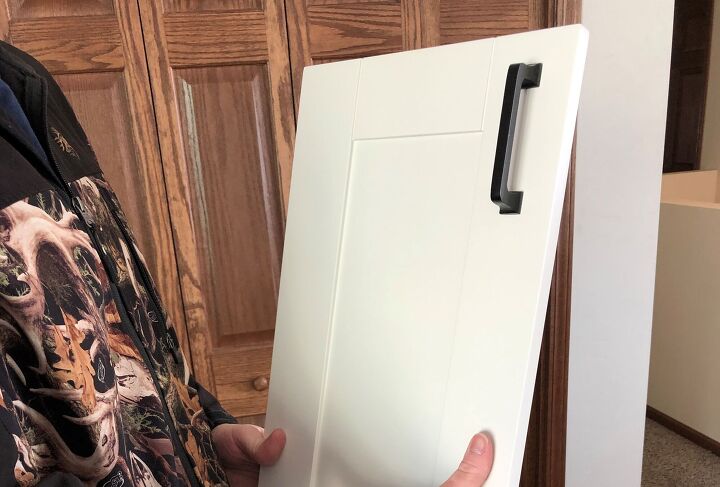
- Klearvue has a TON of finishes that you could choose from, but we did the white shaker cabinet in Stromma White. We’ve had these in place for a little over 6 months so far and even with the kids pulling and pushing and playing with them, they still look brand new - I’ve been SO thrilled with them!
- If you end up purchasing this brand from Menards, work with someone in their cabinet area - they will be able to mock it all up and will make sure you have all the axillary pieces that you need to go with this - the toe kick, the door hardware, the cabinet screws, etc.
The one downfall with these cabinets is that they were a bit more pricey than other “stock” cabinets. BUT, if you check out your local home improvement box store, there are many options that have a similar look and could accomplish the same goal. I have also used the stock cabinets from Home Depot that are still shaker style, in addition to painting unfinished cabinets, and while they don’t have as many fancy bells and whistles as the Klearvue cabinets do, it’s definitely more of an economical pick that has the same functionality.
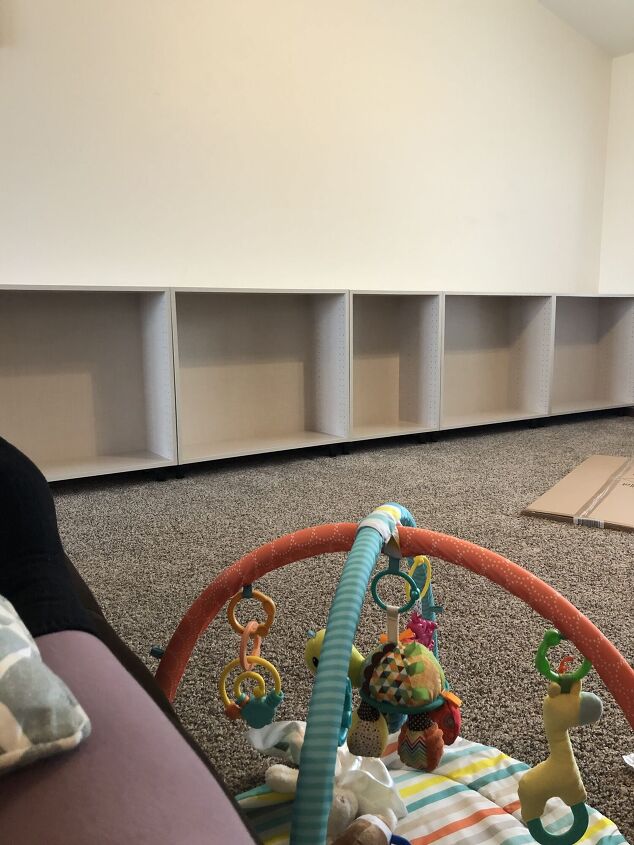
Cabinet Installation:
Let me tell you - we are most definitely NOT professionals when it comes to cabinet installation - actually, we have no CLUE on how to put in cabinets, but we used one basic principle - KEEP THEM LEVEL. And it seemed to work just fine - no one would know the difference now. (I fully recognize that there are ways to make this easier - the laser on the wall, etc, but we didn't have any of these things and didn't think it was necessary to buy at the time. Long story short, you don't need it to be successful!)
A few tips/tricks that we learned along the way with these puppies -
- One cabinet at a time. With these cabinets, the little feet just turn left or right to give more height or less, so it was easy to adjust the heights vs. having to shim it with wood - this was a HUGE time saver and worked really nicely with the carpet underneath. As things settle afterwards, it’s also really easy to go back under there and adjust if needed.
- Make sure to connect the cabinets together one at a time as you add them, and don’t tightly screw to the wall until you have everything (and I mean everything) exactly where you want it and attached to each other. It took a lot of finagling of cabinets, screwing and unscrewing again to get these suckers level. (We also left a few holes in our wall & cabinets that are unnecessary, but I won’t sweat the small stuff…)
- Screw your cabinets into STUDS in the wall. If you don’t have a stud finder, just go buy a cheap one- we probably have one of the cheapest ones out there and it works just fine- it takes the guesswork out of hopefully hitting something solid.
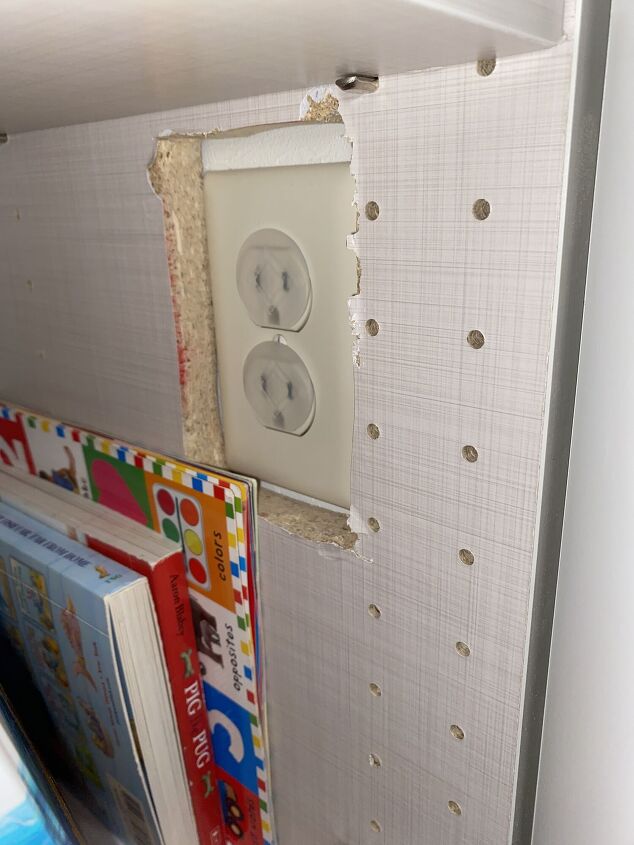
We also were covering up an outlet cover on the corner of where the cabinets were going to go, along with one in the middle of the wall that we use for our TV. Don’t let this scare you away from putting cabinets there! Just cut a hole in the cabinet with a jigsaw after you figure out where it is going. While I was scared at first to cut holes in our brand new expensive-ish cabinets, it really is fine. They aren’t the perfectly cut holes, but they aren’t visually seen every day since they are behind cabinet doors - it’s functional, and that’s all it needs to be.
Countertop:
We have a lot of two toned pieces in our home - white painted on the bottom, and stained on the top, so we decided to continue with this theme and built a wood countertop from some standard pine boards. When we bought the house, they left some of the stain leftover in the basement, so when we add wood to the house, we just make sure to color match the stain so everything matches. For reference, our house is stained in English Chestnut.
Now, 14 feet is REALLY long, so we weren’t going to buy a slab of wood that length - it just wouldn’t be economical considering what we spent on the cabinets. However, if you wanted to purchase something, you could get something like a butcher block custom ordered, or really any countertop custom ordered to get the look you’re going for.
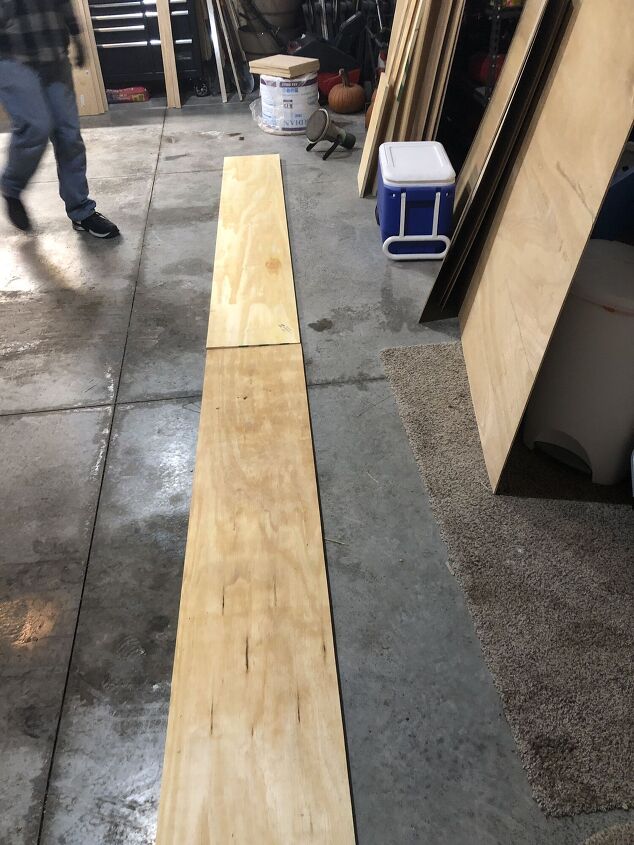
For our top, We started with just some basic 1” thick plywood and cut it to size. How did we find the size? After we installed the cabinets, we measured the length and the width of what it actually ended up being. This basically gave us the template of what we were going to run our pine boards over. The plywood gave us a sturdy base and added some thickness to the counter top.
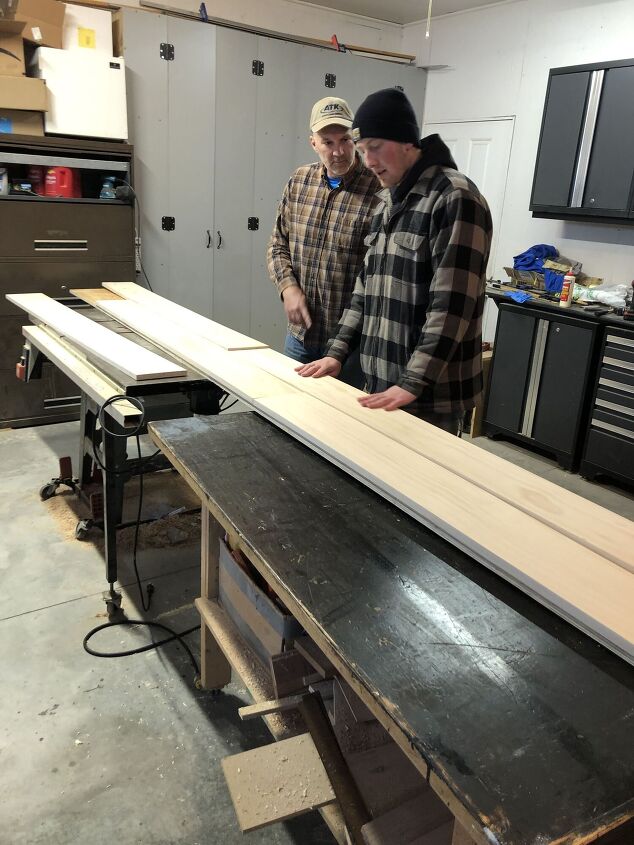
Then, we ran two rows of 1x8x8 foot pine boards over it in a running bond pattern to give it some strength and a bit of a design. After everything was cut and it filled the plywood template, we glued the pine pieces onto the plywood, then we flipped the whole countertop over (plywood on top, pine on bottom) and used the nail gun to give it that extra bond through the bottom for good measure.
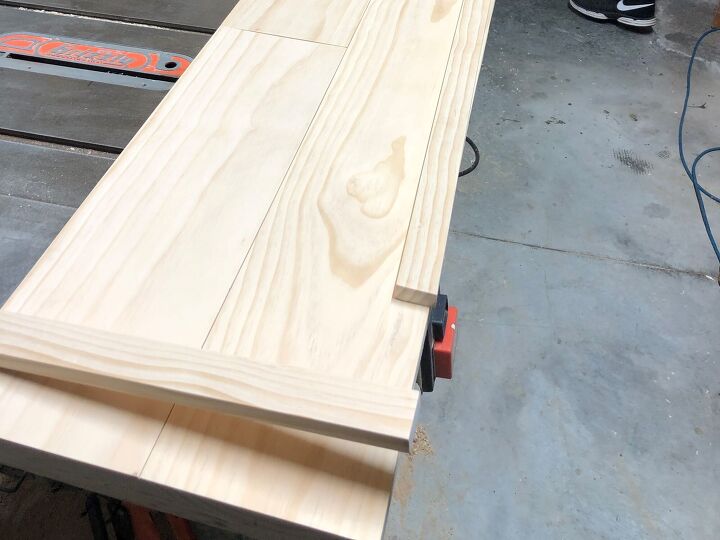
After that was done, we framed it out with some 2x1 pieces of plywood on the edges that were not against the wall to give it a finished edge and also give it an overhang on the exposed edges and just used the nail gun to secure these pieces.
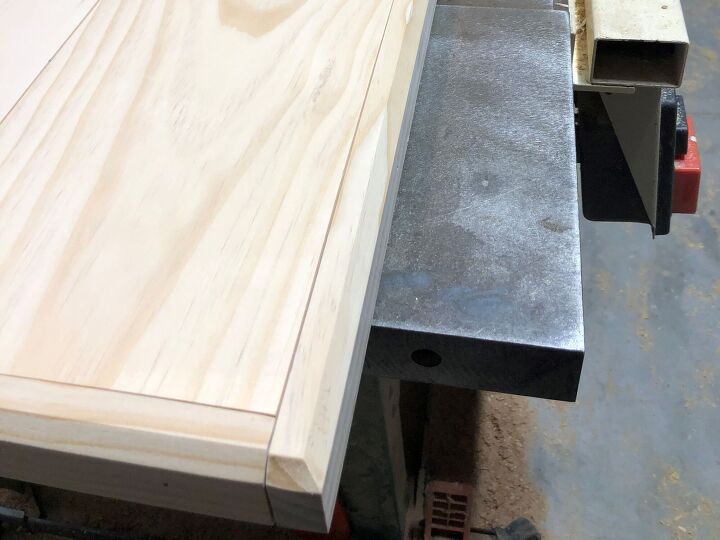
First, we chose to router the edges to give it a bit of a “fancy” look, but I don’t believe this is necessary - this was just something that was quick and easy to do. At this point, you sand it down until it’s really smooth with an orbital sander - up to that 220 grit works fine.
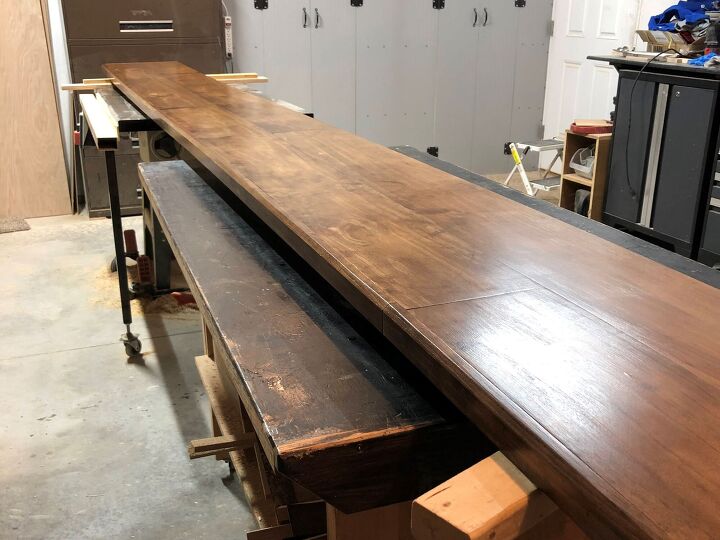
Now it was time to stain, which like I said, we did in English Chestnut to match our house wood and then topped it off with about five coats of varnish/sealer - I prefer the semi gloss, as I don’t like super shiny wood, but needed to make sure to give it something to protect it from the wear and tear of countertop use.
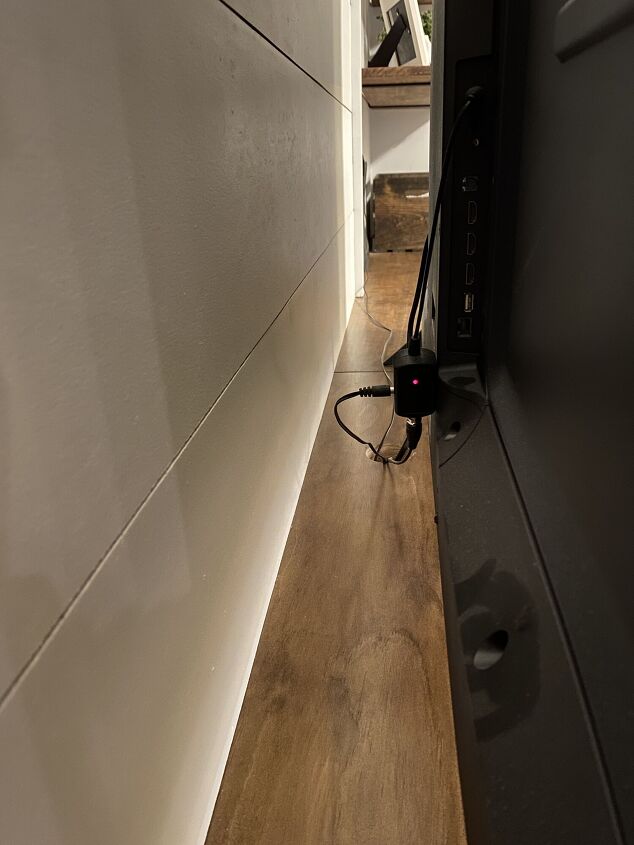
We also knew we needed to be able to string our TV cords through the countertop and cabinets, so at this point, we used a 2” Hole Saw to cut a hole towards the back middle of the countertop that lined up with the cabinet with the electrical socket before we placed it on the cabinet. (I'm not sure why, but this part really made me nervous. If it makes you nervous too, let me tell you that it is totally fine!)
Countertop Installation:
Now, it was FINALLY time to put that really long countertop on top of those empty cabinets - this was when it started to get real!
First, we put the doors on our cabinets to make sure our countertop wouldn’t stop them from opening and adjusted the hardware pieces to get the doors as straight as possible. This was the first time I ever learned that there was a way to adjust door levels with the hardware, so if this is your first time hearing this too, go check out a Youtube video about adjusting cabinet doors - it’s fascinating. (P.S. We also did have to purchase door hardware separately, so we ordered a pack off of Amazon - you can find what we used here)
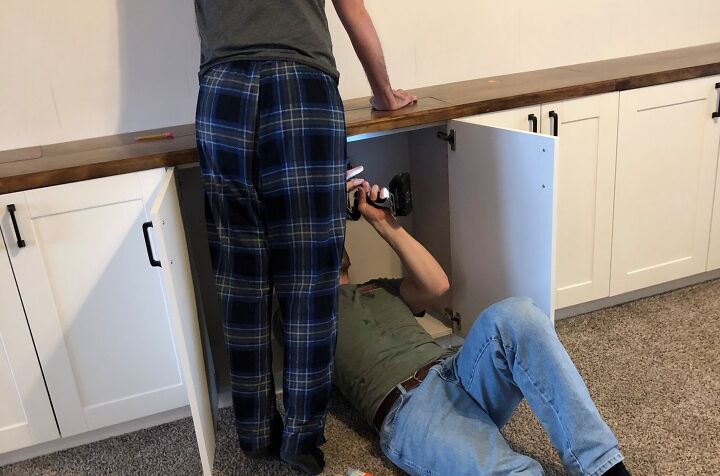
To attach the countertop, we used some basic screws to screw from the bottom of the cabinets up into the plywood until it felt secure (my brother came over to help in his pajama pants!) We then used the hole saw again to drill the rest of the way through the cabinets to make sure we could get to the outlet and hook up our TV. Again, I was SUPER scared that we were going to screw up our cabinets by drilling this hole, but Jake made it look easy and there really wasn’t anything to worry about (I may on occasion worry about unnecessary things…)
And just like that, half the project was done!

PART 2: Shelves & Shiplap
For shelving, we just did some pine floating shelves! These are SUPER easy to execute - I did the 12” width boards and cut them to the length we needed and sanded. Since we knew how big our TV was, we started with how wide we needed in the center to place the TV, and whatever was left we split evenly on each side of the focal point. After cutting & sanding, I stained them our English Chestnut color, and looking back now, I probably would do a clear coat on them now (I still might take them off someday and put a clear coat on). For now, they don’t have a sealer on them and they look just as fine, clean easily, and they don’t get a ton of heavy use anyway.
When things were ready to be placed on the wall, we started from the corner with the three shelves and worked our way to the outside. Note: When placing the lowest shelf, make sure there is enough room above the countertop in case you need to put something like a small lamp or a crate or something - you don’t want too tight of a space where the countertop isn’t functional! The hardware we used for these 12” width boards were found on Amazon, and I have used them in a few places in our house so far; they are heavy duty and while they make a statement, are super minimalist. You can find them here! (DIY Shelving tip: A 12” width board isn’t actually 12”, it’s closer to 11” wide, and the same goes for every width that’s listed vs. actual width. Make sure you measure actual width of your board when determining your shelving bracket size).
A few more tips on hanging shelving if it’s your first time:
- If you can get any into studs, do it! Even if it’s one side of the shelf, this will give you a much more sturdy shelf.
- If you can’t screw it into studs (we had to do this on one side), make sure to use the drywall inserts - years ago I didn’t think that these were useful, and I couldn’t have been more wrong!
- Screw the brackets onto the boards first and make sure to put them in the same spots on each board to ensure good lines, then hold the boards against the wall and draw circles in the screw holes after you have them leveled and spaced out - this is especially helpful if you have to put the drywall inserts in first - saves you from making wrong holes down the line.
- This WILL take time to do it right; it took us a few hours to attach the brackets and hang them to make sure they were even, so don’t plan on it going super quickly. Just be patient, and measure and level a billion times.
If you have two people to do this, this is MUCH easier!
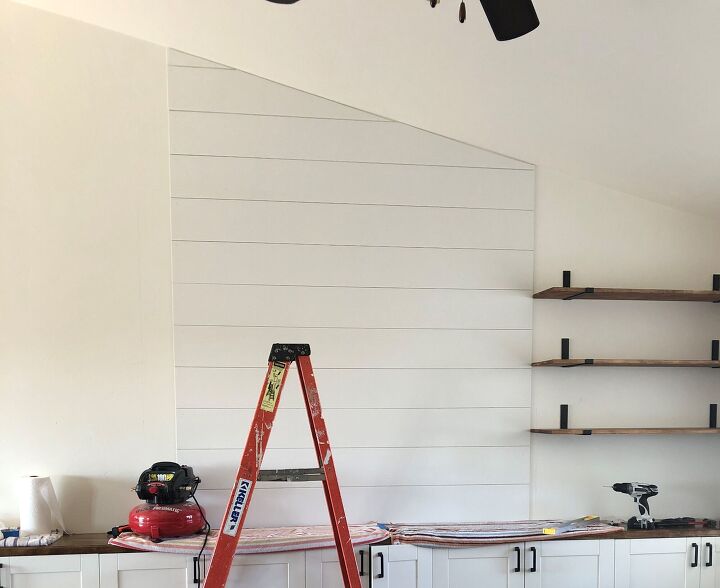
Next was our shiplap focal point - our goal was to bring the feeling of the ceiling down and have it as part of the room versus the feeling of the large expanse it was. It also gives an impression of what a fireplace would give without actually having the fireplace. If you are looking for a quick tutorial on DIY shiplap that is REALLY inexpensive (and I mean CHEAP) and really easy to execute, check it out here! We started from the bottom against the countertops and worked our way up to the ceiling. At the time, we didn’t have a fancy miter saw that actually could cut angles, so it was a guess and check once we got to the slanted part and just measured lengths from the top of the slant to the bottom of the slant on the wall, then went to cut on our table saw and hoped it turned out correctly...I don’t recommend this method, but if it’s all that you have, there is a way to make it work with a tape measure and a table saw. We framed out the shiplap on both sides with some cheap poplar 1” boards that are only a few bucks a piece and called it good!
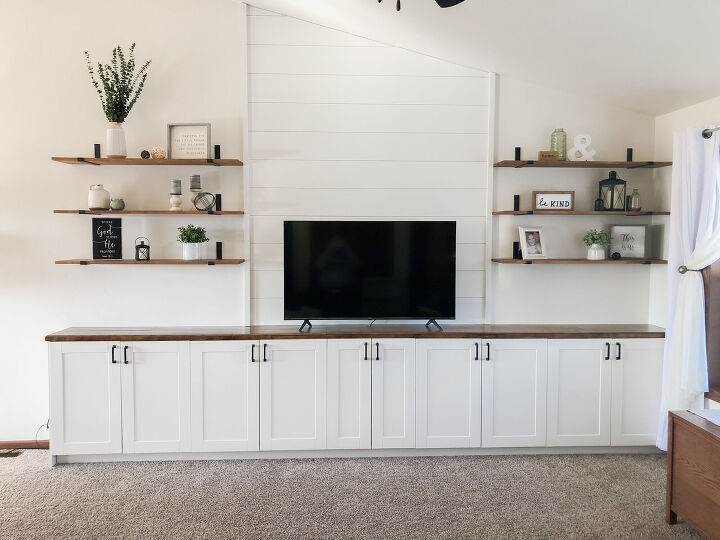
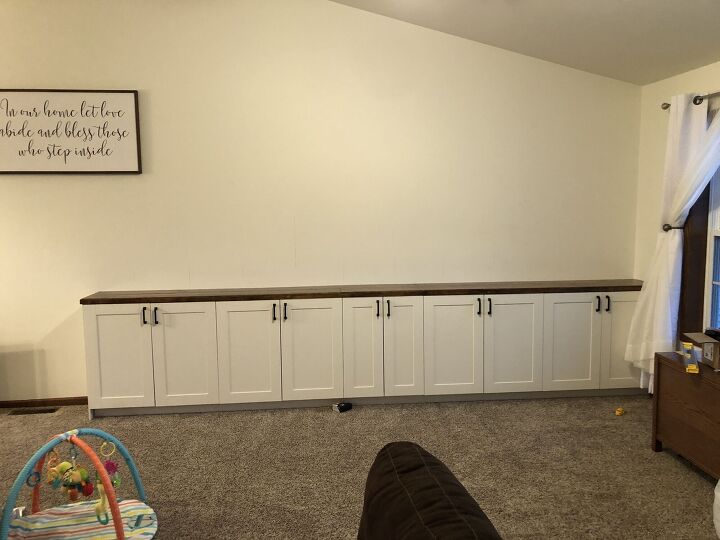
After that, we butted up the other shelves against the shiplap and lined them up with the shelves on the other end, and the project was seriously done! It has honestly been the best thing - we fit all of the kids toys and books in the cabinets and we STILL have room in them Also, I was able to go to Hobby Lobby to buy a bunch of fun knick knacks to decorate, and the best of all, in our open concept living space, it defined the living room into its own space and made it feel much more cozy and like it was always meant to be there.
Overall, this was a bit more of an expensive project than we are used to, simply due to the cabinets, along with buying wood at one of its highest points, but depending on the style of cabinets you choose to buy, compared to hiring someone to put in built in cabinets, this is a very economical choice to do, and you can get it done in a weekend (or two if you have kids to attend to, like us)!
We hope this helps inspire you to build your own - it has probably been one of my favorite projects to date!
Love this project? Check out our blog: https://www.fiercelyblessed.com/blog/livingroombuiltins1
More Wallet-Friendly Room Makeovers
Comments
Join the conversation
-
Nice job. Your project is nicely designed, well built, functional & looks great.
One suggestion regarding the outlet behind your unit: there are plastic outlet extenders available which bring the outlet forward so it's not "embedded" in your wall. With one installed, you'll be able to attach an outlet cover plate.
Also, if needed, there are slightly larger cover plates for sale which are made purposely to cover not only the wiring, but the cuts made to accomodate the outlet.
It's safer that way & meets code.
-
Accessible, yet hidden storage areas. Functional and attractive. 👍️👍️
A large round artwork piece or clock, above the TV, would help balance all the straight horizontal lines.


Frequently asked questions
Have a question about this project?