


Shelf in My Master Bathroom Using Galvanized Pipe Hardware!
3 Materials
$30
2 Hours
Easy
About a hundred years ago (February of 2016) my best friend Rachy and her husband Shane gave me this hardware and a shelf for my birthday. They finally gave up asking me if I was ever going to put it up because I just kept telling them, “I have a plan! I will use it soon!” And then a whole bunch of stuff happened (including my divorce) and FINALLY I got to the project I had been planning on for two years! A shelf for my Master Bathroom above my very very very favorite double slipper bathtub!
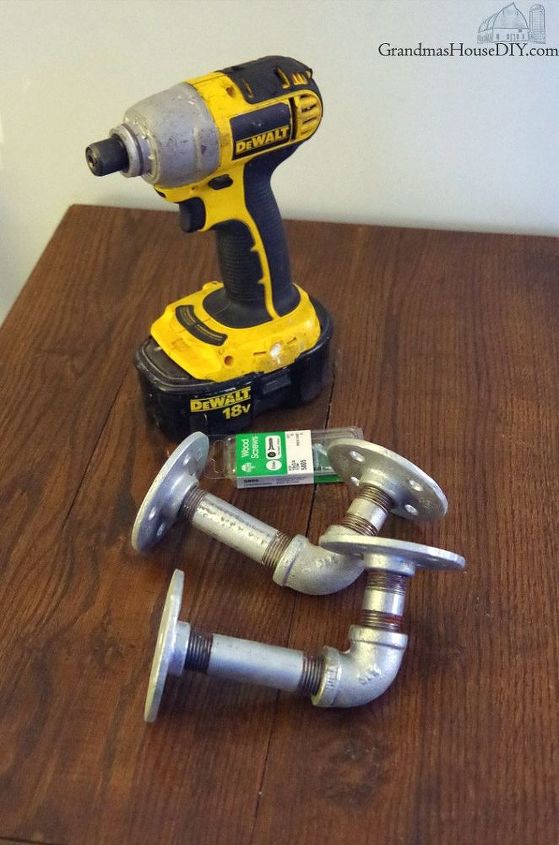
I know we’ve ALL seen this galvanized pipe hardware used all over the DIY web over the last couple of years because, quite frankly, it looks awesome. You can find people using galvanized pipe right now building everything from stools, to frames, to shelves, to benches and everything in between.
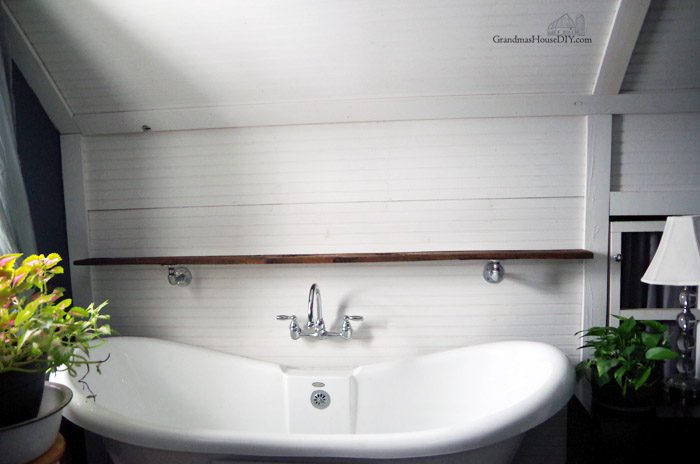
Heck I even made myself a pipe rack for my grill outside on my deck! Unfortunately the shelf they gave me (a lovely sanded down 1×8) was not long enough for this project (don’t worry it will be used in another project, you guys know how I am) so I grabbed a piece of oak from out in the barn left behind by my Grandparents.
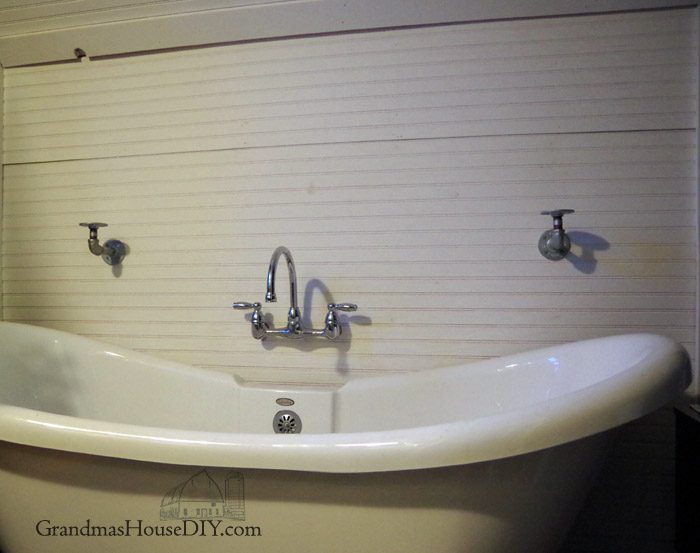
I wanted this shelf to go almost from molding to molding across the entire length of my bathtub. I wanted it to be for display but I also wanted it to be a place to keep bath salts and scrubs etc.
I also wanted to add even more plants in here mostly for the opportunity to use these buckets/pales/pots I’ve been keeping in my stash. (Yes one of them is a spittoon bucket lol but I still think its cute!)
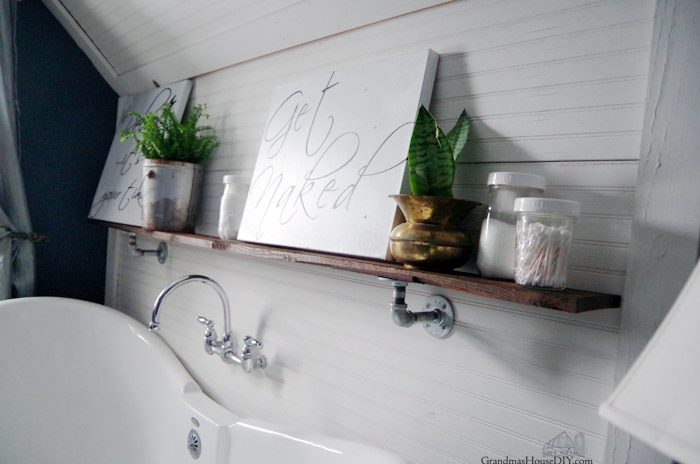
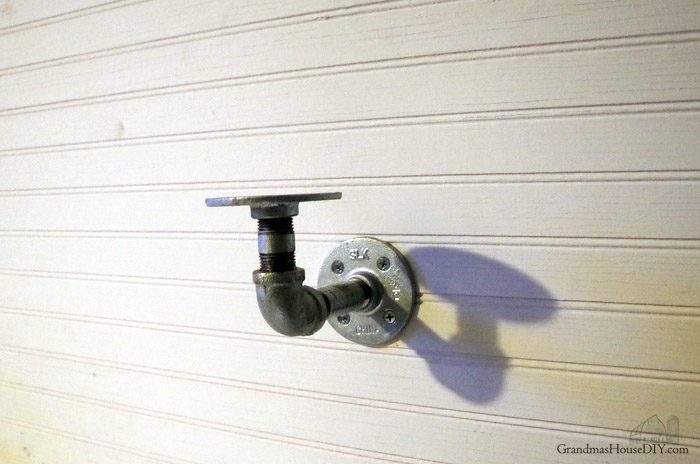
Fortunately for me, I was able to put the hardware into studs and still have them look like they ended up in spots that I actually intended… like I measured it… I also felt pretty certain I needed to get them into studs to be on the safe side even though this is a wall of bead board plywood: it is not very thick.
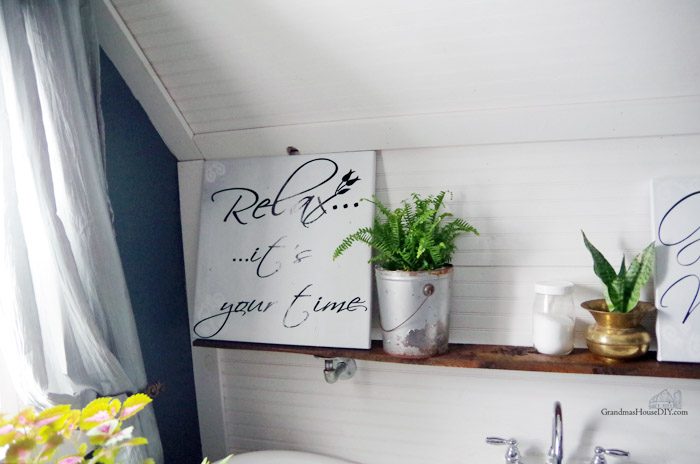
I stained my board I found in the barn to match the floor using dark walnut stain by Minwax though it would have been just as pretty left to its natural state. I also put a couple of coats of poly acrylic on it because this is a “wet” environment.
After that I got to dress it up! Coming next week how I made those fun custom canvas prints!
Resources for this project:


Any price and availability information displayed on [relevant Amazon Site(s), as applicable] at the time of purchase will apply to the purchase of this product.
Hometalk may collect a small share of sales from the links on this page.More info

Want more details about this and other DIY projects? Check out my blog post!
Comments
Join the conversation
4 of 46 comments
-
HO
I was thinking it was over a bed ... still gives me more ideas other than just wood supports... thanks R L P
-
Perfect complement to your bathroom!


Frequently asked questions
Have a question about this project?
Did u put a short 'lip' on the front edge to make sure nothing slides off and hits u in the tub ? Jeano