


How to Remove a Clog From a Bathroom Sink
If standing water or slow draining is a problem in your bathroom sink, you probably have a hair/soap clog.
Removing the sink stopper in order to get direct access to the clog is a very DIY-able homeowner project.
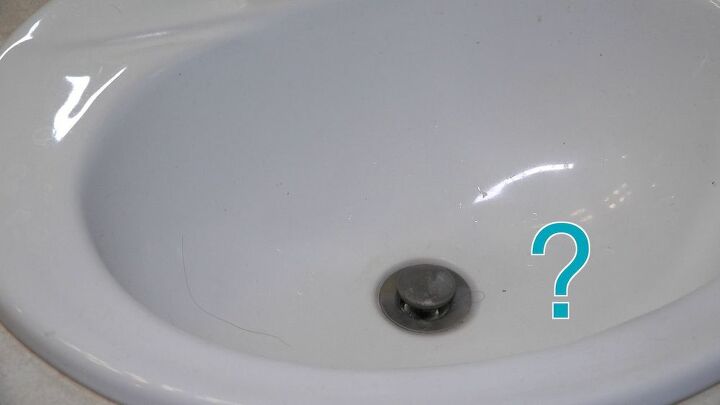
Be thankful, we didn't show the sink full of dirty, standing water!
Watch the video to see step by step how to remove the stopper and how to tackle the clog.
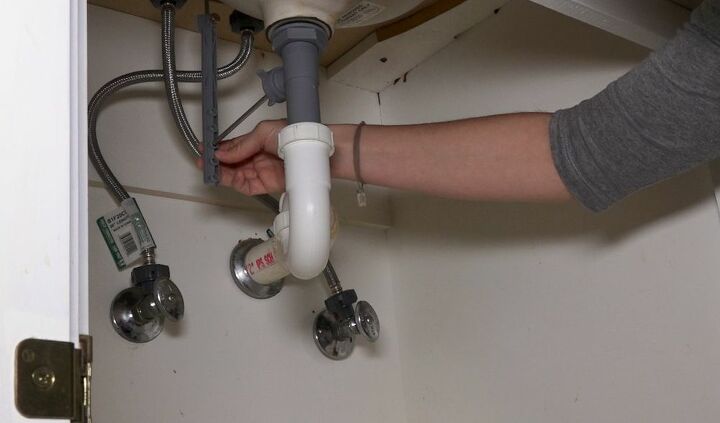
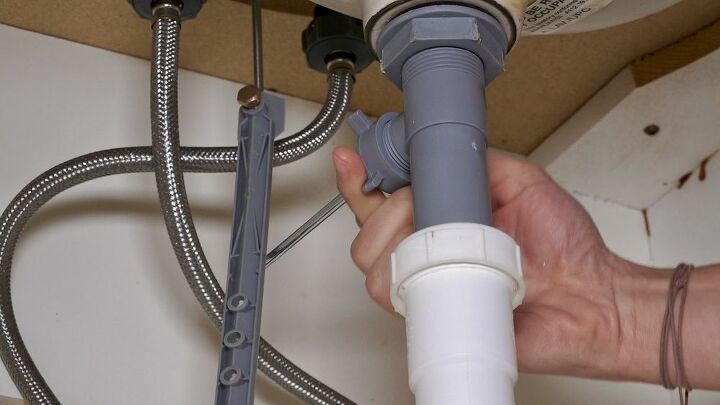
The first step starts under the sink where you'll remove the horizontal rod that holds the stopper in place. There is a spring clip holding the horizontal rod to the vertical strap (The gray thing with the holes.) Pull this clip off and pull the rod away from the vertical strap. Take a picture to show which hole the horizontal rod goes into the vertical strap. You'll want to return the rod to the same hole when reconnecting everything.
Unscrew the grey nut on the backside of the drain and pull this out (you might need a wrench if hand strength isn't enough). Go ahead and clean this with a little soapy water and a brush. Put a bucket under the drain just in case there is any dripping water.
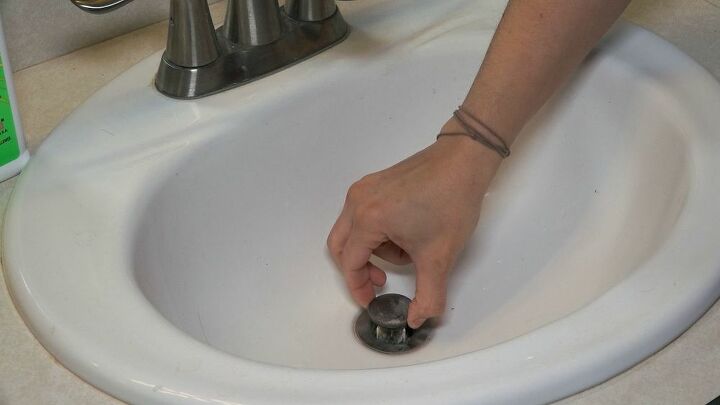
Now the stopper is free and can be removed from the sink. Wash the stopper as well. I put this in a glass of soapy water with a little vinegar and let it soak; finish with a light brushing (an old toothbrush works well) and rinse well.
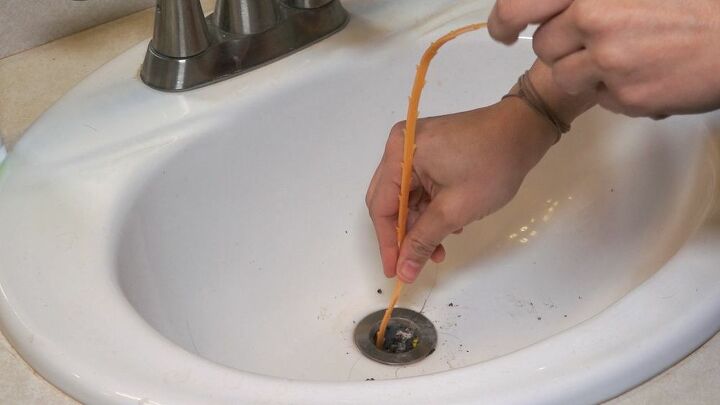
This is a disposable plastic hair clog removal tool that works well to remove hair clogs. Ug, this hair clog was too gross to show here!
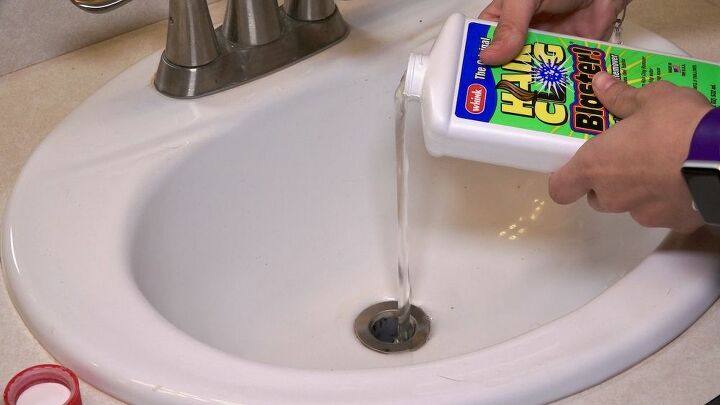
We followed up with a drain cleaner to get any remaining residue. Follow the directions on the drain cleaner you use.
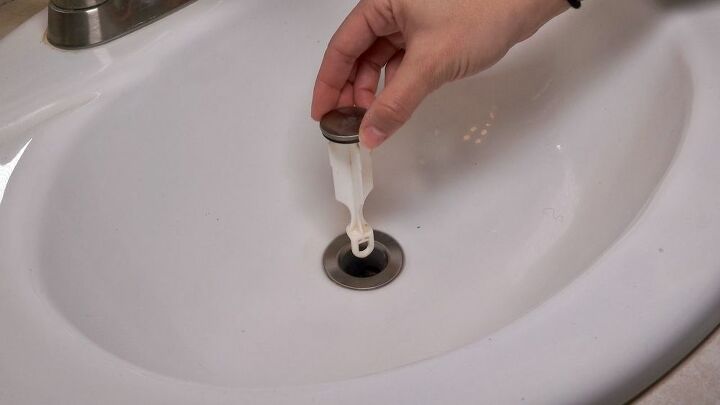
Time to reassemble the parts. Drop in the stopper with the hole facing forward towards the front of the sink. That hole is where the horizontal rod connects to the stopper under the sink.
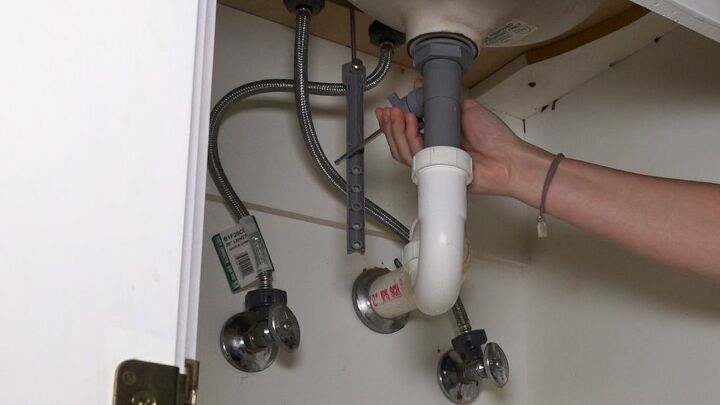
Replace the horizontal rod. Tighten the nut. Don't over tighten as these are plastic parts.
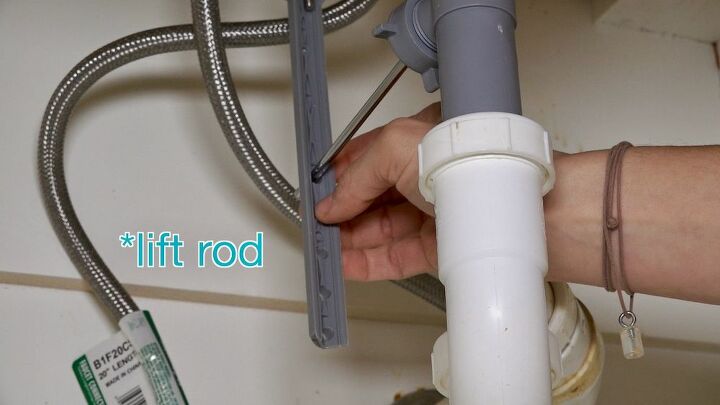
Fit the rod into the vertical strap which is connected to the lift rod. Replace the spring clip on the back of the horizontal rod. (This is the part that makes the stopper go up and down.) Refer the picture you took in the first step to be sure the rod goes back into the original hole.
You are done and now have a sink that drains freely! Congratulations, you did it!


Comments
Join the conversation
-
Great tutorial. The clog was out of focus.


Frequently asked questions
Have a question about this project?
I notice in some of my rooms I'm getting bubbles in the wall up near the ceiling I'm wondering if they are nails or screws that might be coming out. How do I fix that?