


Hairpin Leg Corner Table

This is by far my favorite build so yet! I may say that about every build, but this is such a beautiful and functional space now! I literally never want to leave! I have been using a dinning table as my work table for years, its large and in charge, ample work space but the depth has always been an issue. It was gifted to me when I got my very first apartment, and while its no longer being used as a dinning table, I'm a sentimental person and the thought of ruining it with paint, or glue, or WHATEVER the case may be, made me cringe. I tried multiple types of table covers, but that's just cumbersome and annoying at times. So when Hometalk sent me these beautiful hair pin table legs, I knew exactly how I was going to use them!
This is where we started! Pretty, functional, but look at that beautiful table! Do you see why I was always nervous! It’s too pretty to be a craft table! Don’t worry though, it’s going to live with my brother, and will be used in his office, also as a work space, but more office work than crafty work!
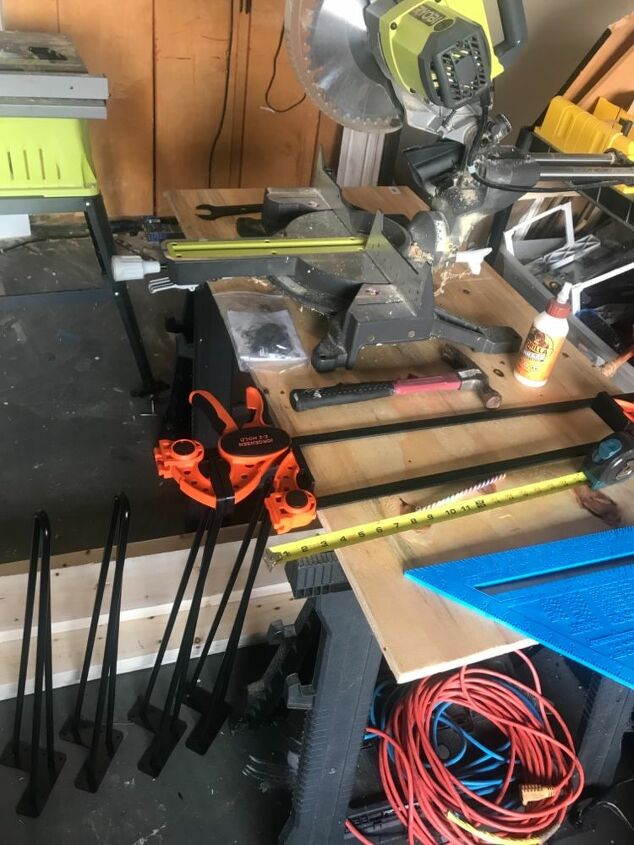
The pile of supplies! For this project I used:
- 8- 2x6x8 pine boards, just your standard dimension lumber for the hardware store. I like slightly imperfect board with texture and knots, but you want them as straight as possible!
- 4 hairpin legs (or whatever type legs you want)
- 2 heavy duty shelf brackets
- stud finder
- self anchoring screws
- Ryobi 12V drill and driver
- Ryobi 12” sliding miter saw
- spax 1-1/4 inch self tapping screws
- wood glue
- 24" wood clamps
- stain of choice
- level
- speed square
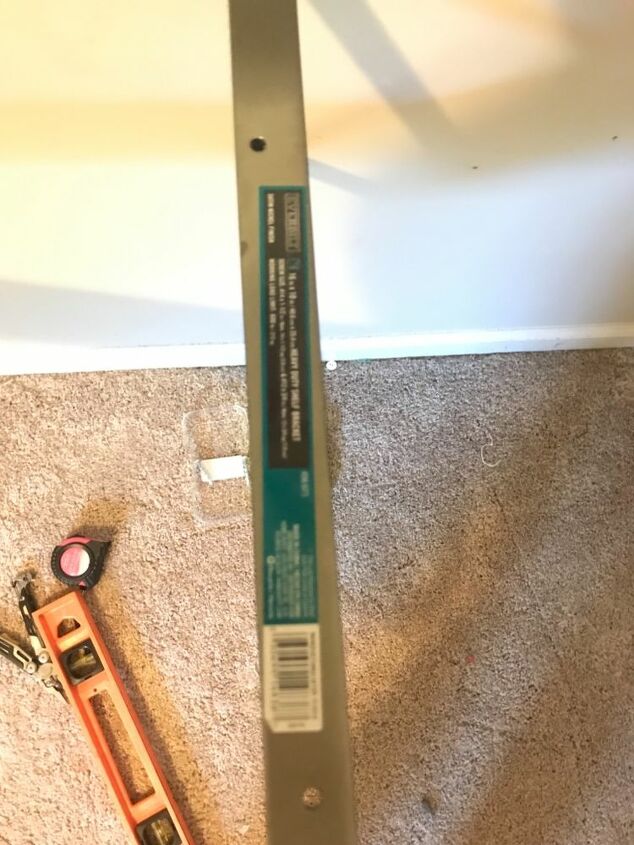
These are the brackets I used! They didn’t come with screws, the man at Home Depot suggested cabinet screws if I was attaching them to studs, which I was and they worked perfectly! Looks for something that is self anchoring, it will have a broader thread pattern
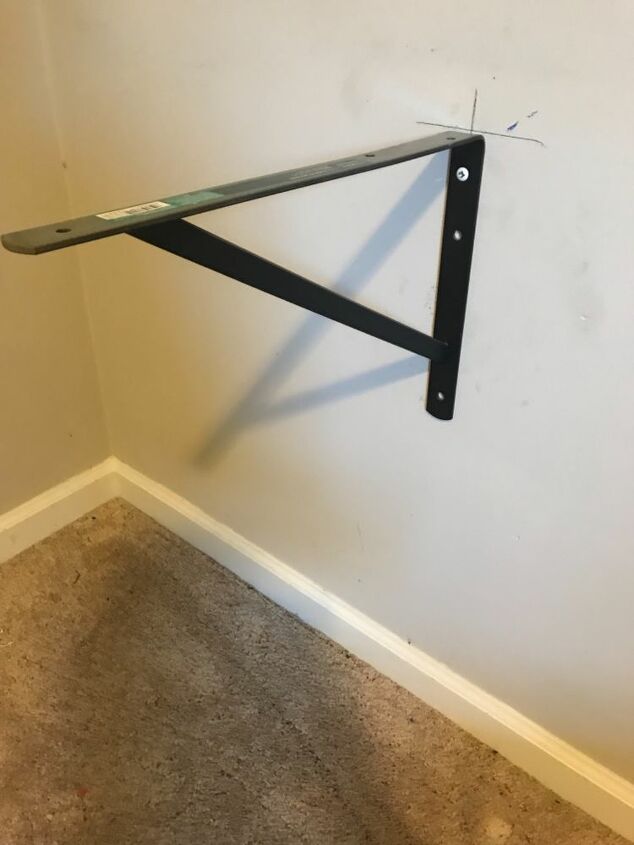
Just about her view of the bracket, I love the industrial feel of these and they’re black iron like the legs, perfect!
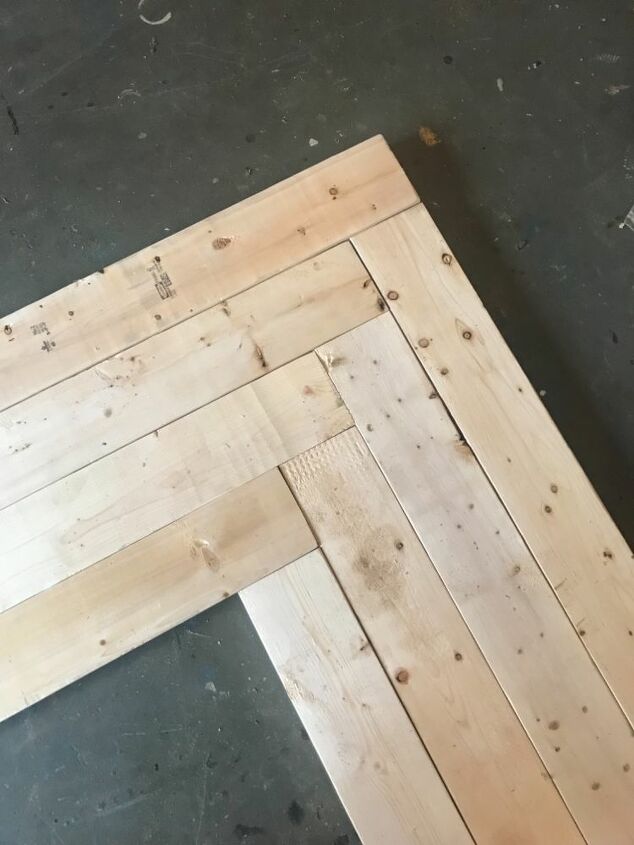
Test fit your boards, I wanted a herring bone feel in the corner, which also made the cuts easier since no angled cuts were needed, which means no resetting my miter saw! I laid all the boards into the pattern I wanted them measured the length from the corner, I like to do minimal math with my projects! Haha. I wanted my top to be 6’ x 7.5’! It will extend from the bed in my guest room to the doorway!
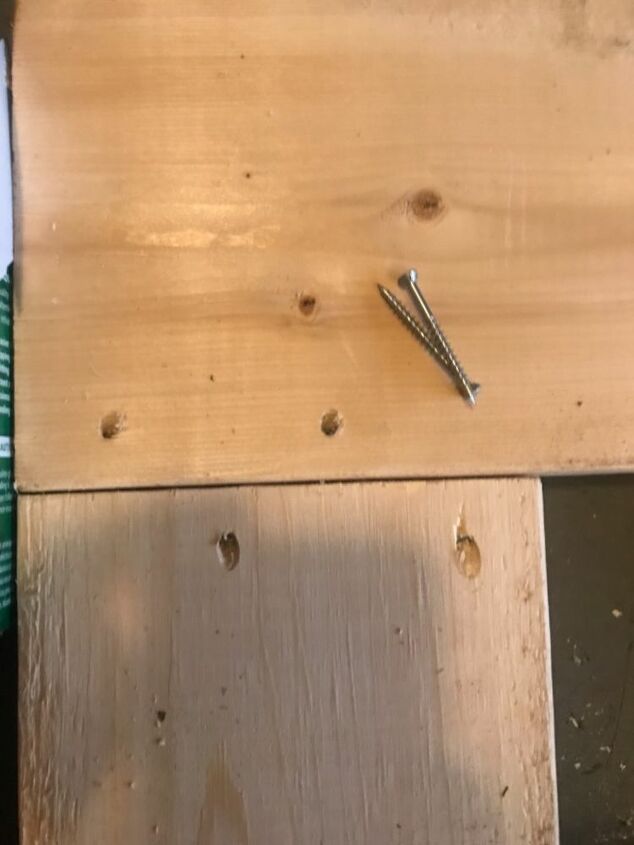
I didn’t glue the corners just in case I needed to dissemble this bad boy to get it in the house. I don’t have a pocket hole jig at the moment.... sorry, correction.... I CANT FIND my pocket hole jig at the moment, but this technique worked fine for this, if it were a bench or a shelf or something that would be holding any amount of weight, a pocket hole jig would be the best and safest option, but I just screwed the screws in at an angle to attach the boards.
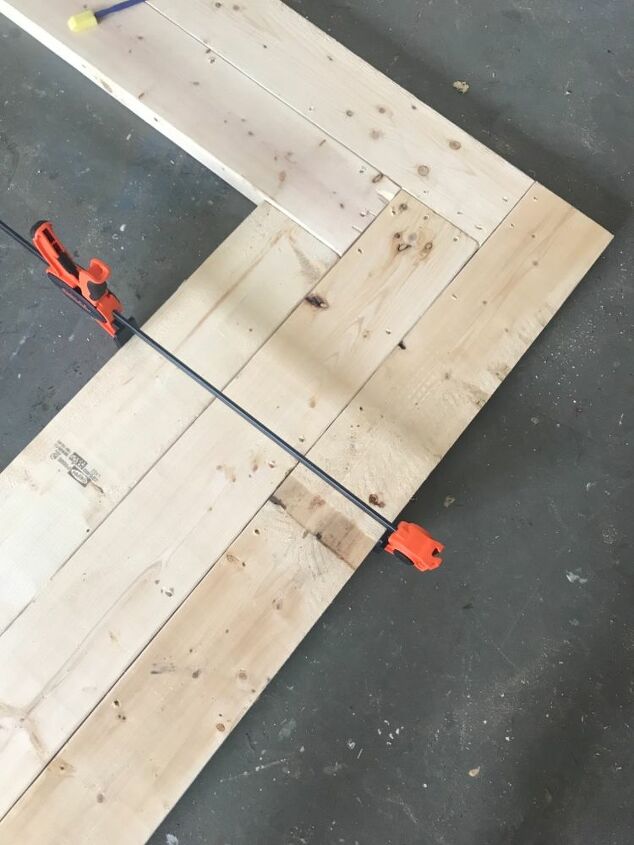
On the long sides I did use wood in addition to the angled screws to hold the boards together, I used the awesome clamps to hold everything together while the glue dried as extra insurance that nothing would budge! I just spread a thin line between the boards, clamped, then screwed everything together. Once everything was assembled I clamped everything up and went to bed while I waited for the glue to dry!
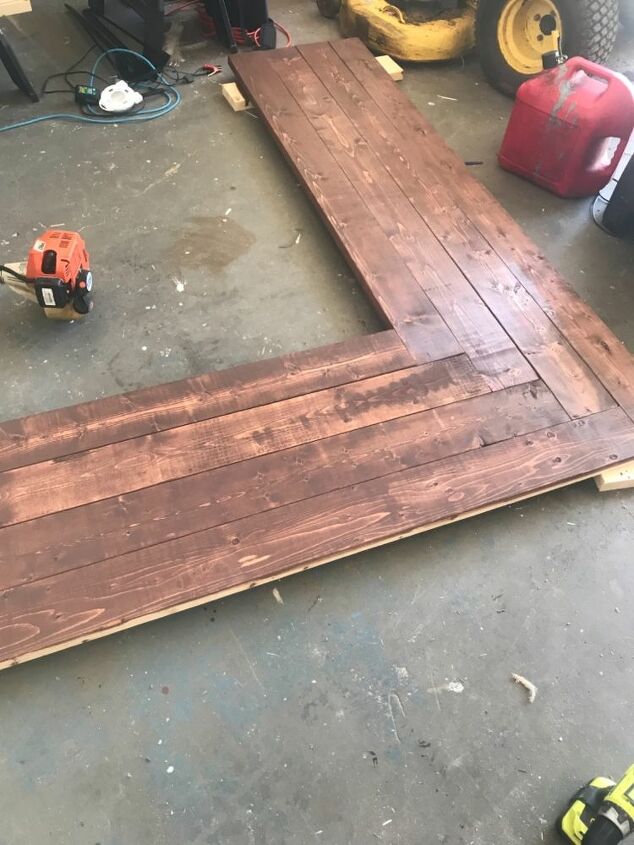
Once all the glue was dry, it times to sand the top! I used 100 and 150 grit sand paper, I didn’t mind if it still has a little texture to it, but you sand until your heart is content! Once it’s all sanded and dusted off really well it’s time to stain, or paint the top ! I mixed a grey and a warm brown to get the color of my table top, the brown stain was Carrington and the grey was Weathered Grey both by Varathayne, I only needed one coat to achieve the color I wanted!
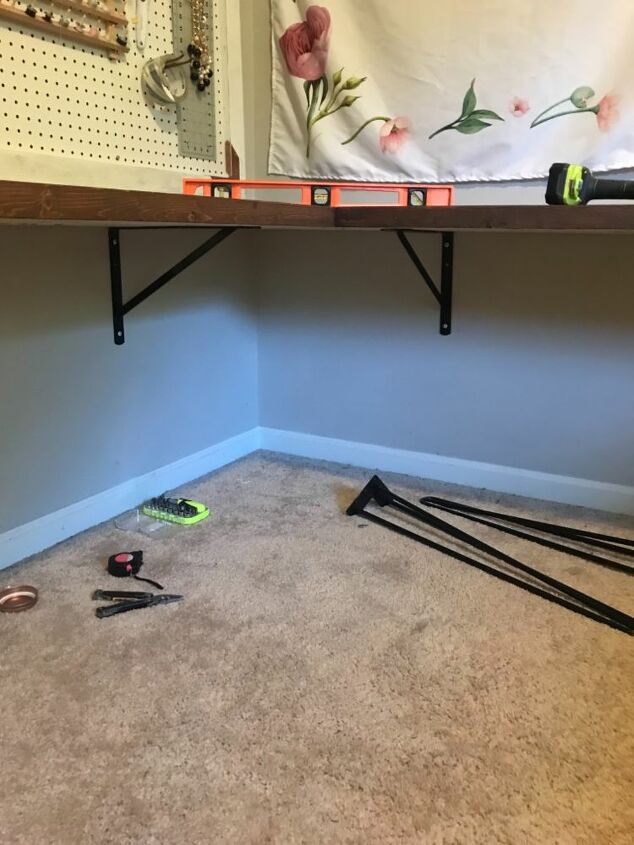
Once the stain is all dry it’s time to take it inside to install it! Use a stud finder to find the studs in the corner, but to be honest, I recruited my fiancé for help with this part! He’s so much better at finding studs than my stud finder, that could be an operator error though, in all honesty! Those these blow my mind! But anyways! Find your studs and mount your brackets at the height of the table legs, mine were 28”.
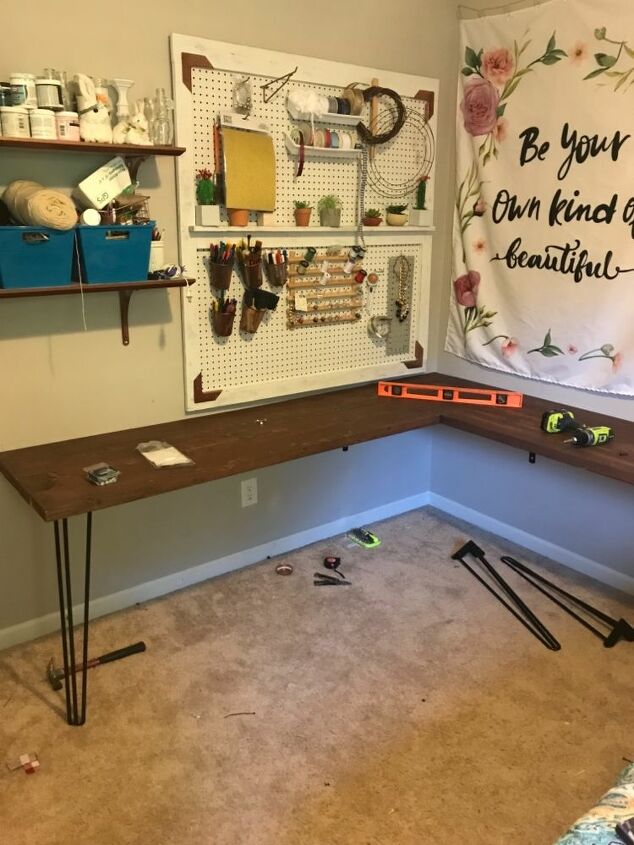
We positioned the table top on the brackets and fit the legs on the corners of the ends of each side to check that everything was level! Added the screws for the tops of the brackets to the table top and this puppy isn’t going anywhere! Guys! This is the biggest workspace I’ve ever had! I’ll have room for blogging, sewing, and Cricut work without having to put anything away to work on a different type of project! I’m so excited!

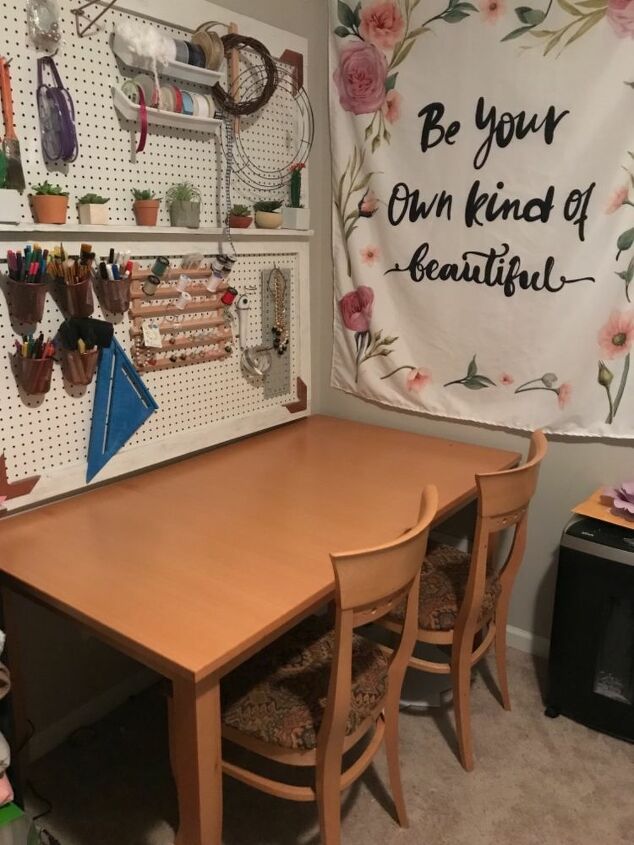
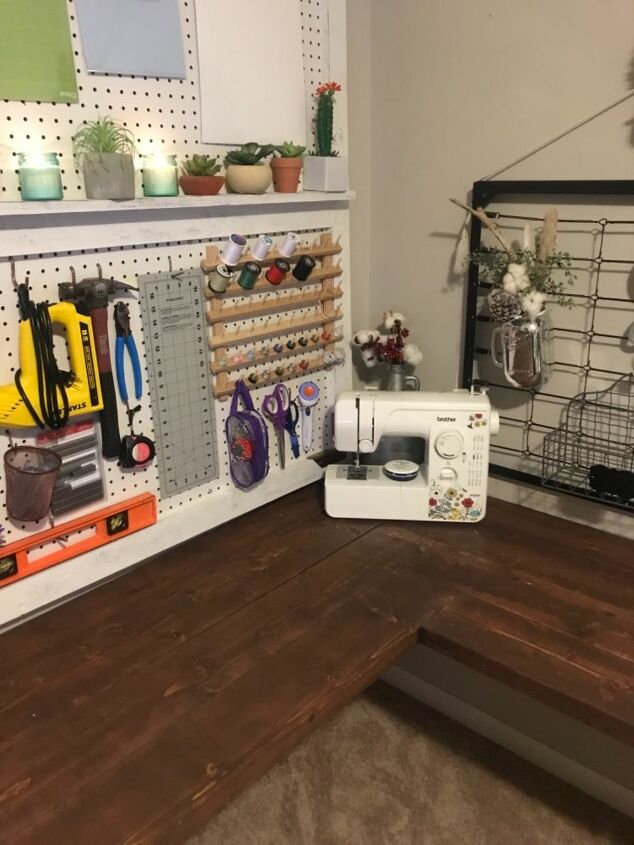
Here’s a look at the pegboard I made a while back, all organized in her glory with all the tools I use on the regular at an arms reach! This side of the desk will be perfect for assembling signs and such, sewing, and doing small detail work!
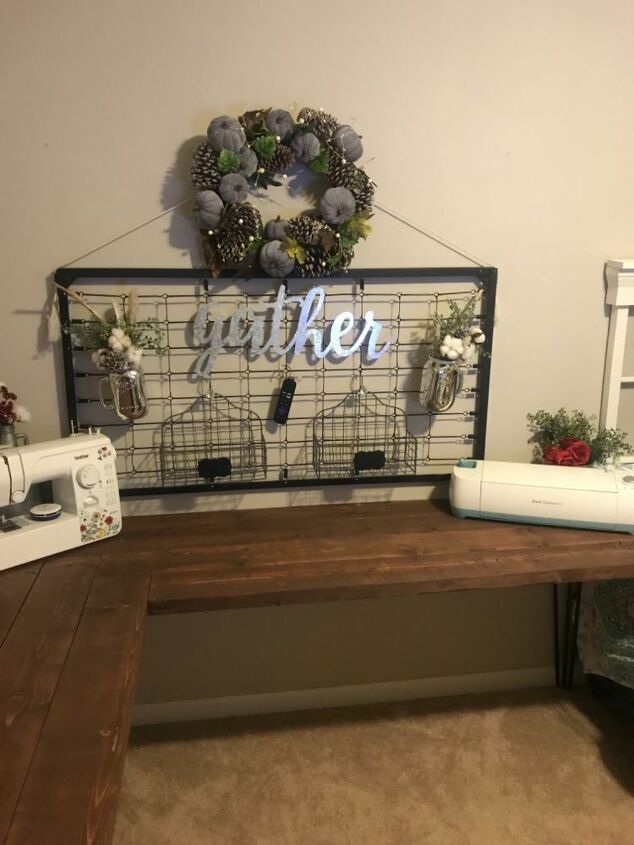
And this side! I still need to get containers for all my Cricut gizmos to organize my hanging baskets, but this side is so cute! Anyone want to see how I converted this crib base into an organizer?
A view of that herringbone inspired corner, I just love the simplicity of this little detail!
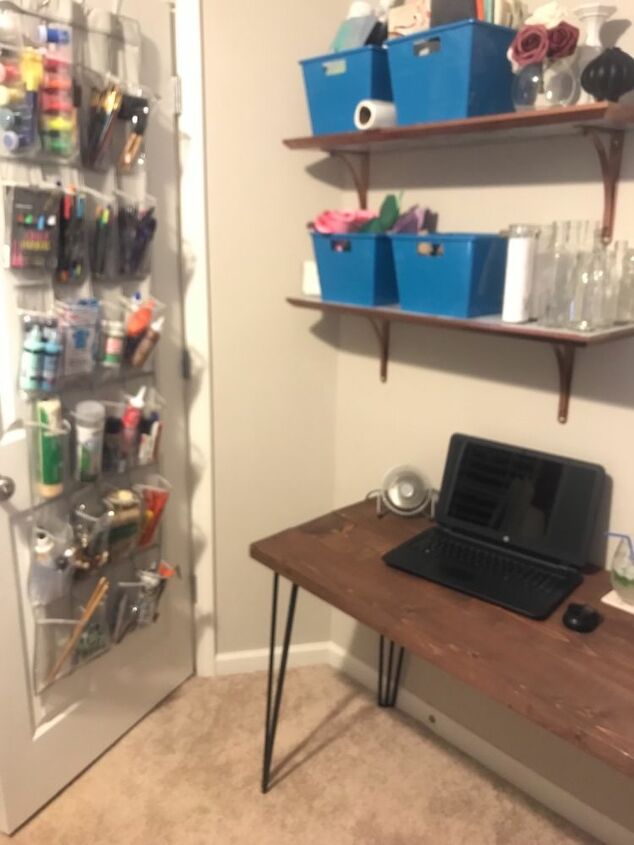
And my little blogging corner! And my shelves where I keep additional crafting supplies! Also, shoe organizers make great craft storage! Pens, pencils, paintbrushes and the like that can easily make a desktop look cluttered fit perfectly in one of these without taking up table space!
I hope you all enjoyed this build! I can’t wait to use this space to create more wonderful projects to share with you!
For sneak peaks of whats to come to come follow me on Instagram @redsrusticworkshop, I’ll see you soon!
Resources for this project:
See all materials


Comments
Join the conversation
-
Hello gorgeous new table! Love what you did!!
-
That my friend is some kind of wonderful! Love your new space! The corners, the legs, the organization... you had me at hairpin!


Frequently asked questions
Have a question about this project?