


Hanging Spray-paint Holder, No Sew

This spray-can holder is ideal for non-woodworkers and -sewers and can be hidden in a closet. But best of all, you can read all the labels at a glance.
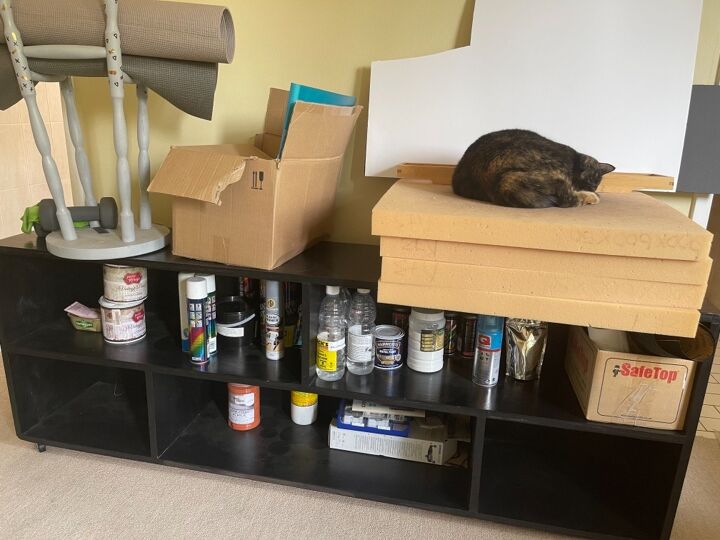
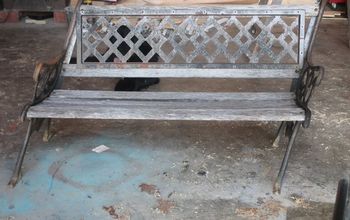
This is where I used to keep my spray-paint. If you get down on all fours and look, preferably with a torch, you will still see some cans lurking in the dark corners. Just don't try to take one out (assuming you could even find the right one) because the whole lot will come tumbling down like a domino run.
So, in the interest of desperate do-it-yourselvers without any serious skills or money, I offer you a possible solution to storing a lot of spray cans out of site in a closet.I have seen people using ready-made shoe holders but they take up a lot of space.
If you could, sewing this would make it even stronger. But, if like me, you can't sew, here is my suggestion. Please feel free to comment or suggest a way of improving the design, or even post your own, improved version.
Update: A cheap eyelet kit can also work, similar to the ones you use for eyelet curtains, only smaller.
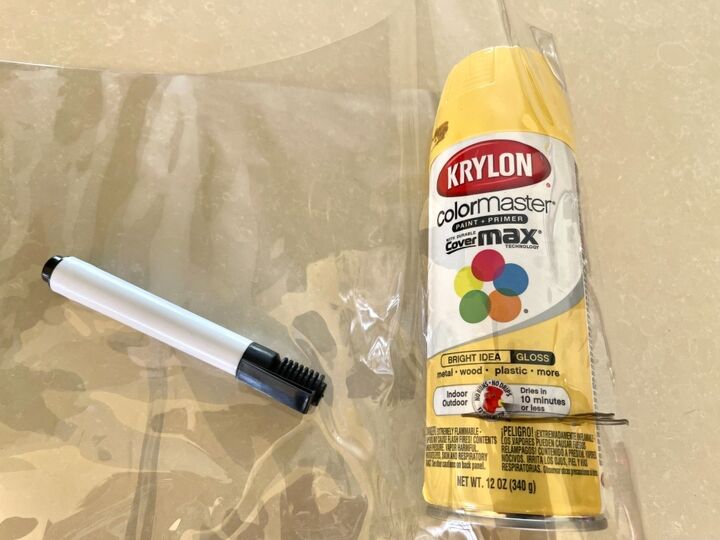
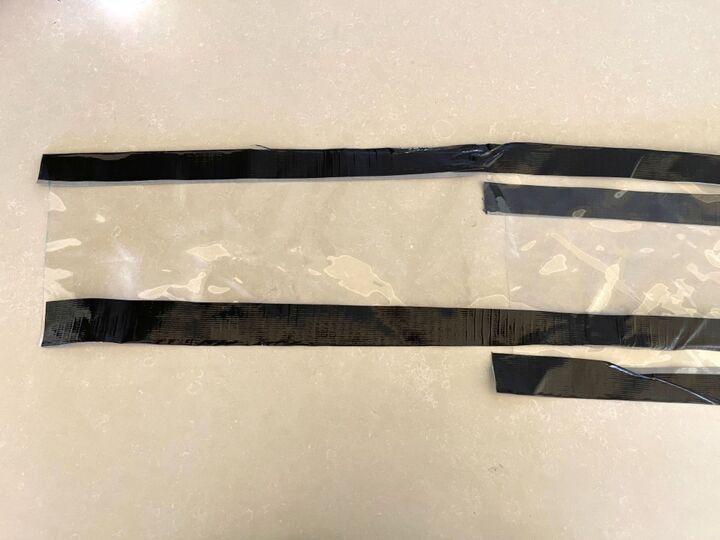
Cut a strip of plastic
You need about an 83 inch (2.12m) long strip of sturdy, see-through plastic. With the length placed horizontally on a large table, place one of your biggest sized spray-cans onto the plastic with the lid jutting out beyond the plastic. Make a mark with an erasable pen somewhere close to the bottom quarter of the can. This means that the edges of the can would stick out on either sides once the plastic is cut.
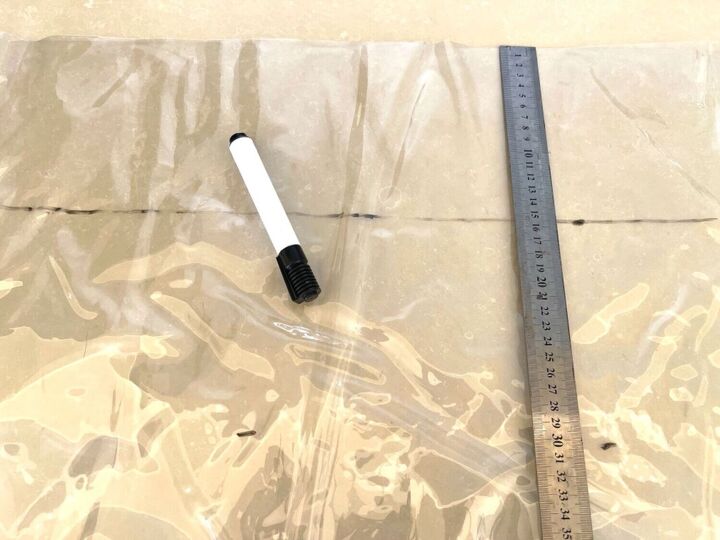
Now measure this distance from the edge of the plastic and draw a line all the way along the horizontal. If you are making more than one holder, now would be a good time to measure and draw as many strips as you need. My design has space for 8 cans. It's quite heavy once the tins are inserted, so I don't think you would go wrong by making it smaller.
Cut the strip(s). Once cut, you would be left with a long strip looking like the one above. Mine is about 15cm (6") wide.
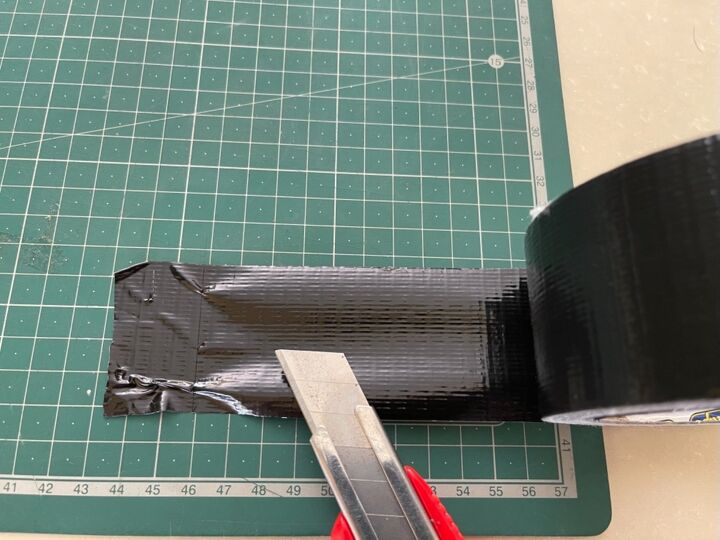
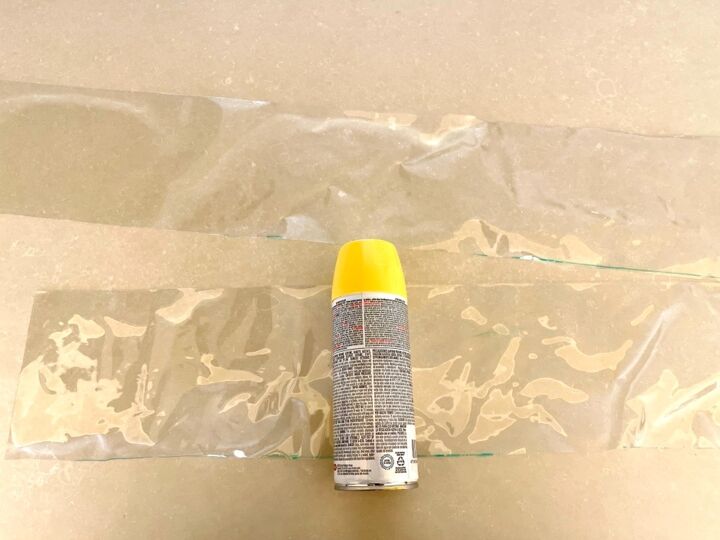
Cut tape strips
Let's face it, duct tape can be a mission to work with but it is sturdy and quite forgiving as long as it doesn't touch itself. I stuck my 5cm (2") black one down on a cutting mat and trimmed it with a box-cutter, not scissors. I made 1m (40") strips. Any longer and it becomes difficult to handle.
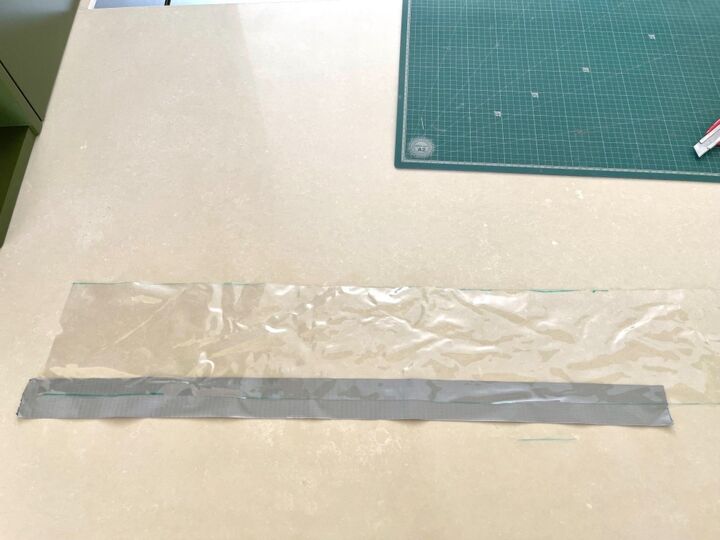
Stick hems
With the tape strip laying sticky side up, place the first section of plastic over it's mid-line.
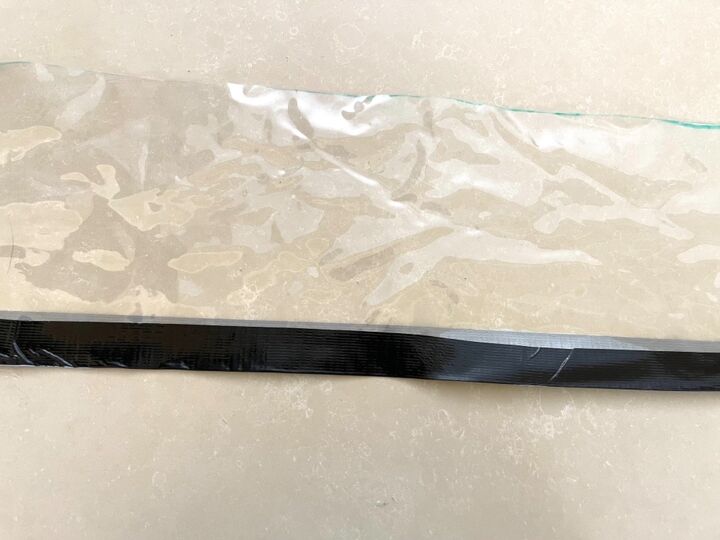
Now carefully fold the still exposed section back over. Yes, it's fiddly! The reason I made tape hems is to prevent the plastic from getting torn and then running when you remove the paint. You could skip this altogether if it frustrates you too much. The neatness could also depend on what tape you are using. Or get a second pair of hands to help.
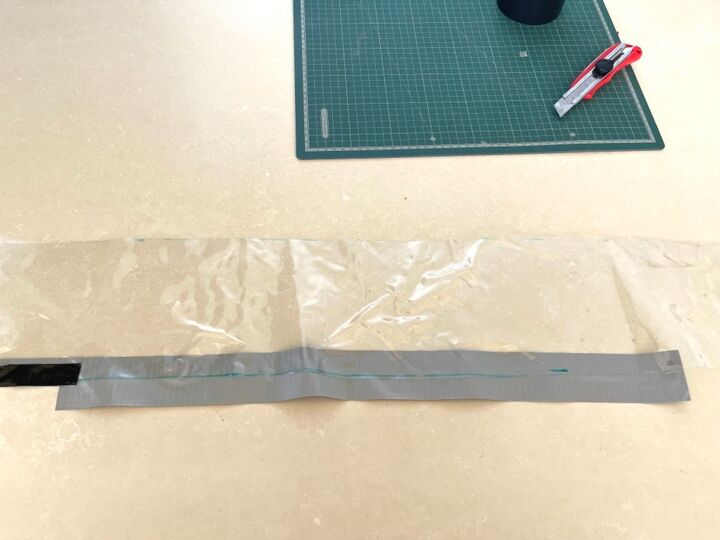
Repeat with more pieces of duct tape until you get to the end of the plastic strip, overlapping the ends where the duct tape pieces meet. Repeat the process on the other side of the plastic.
Fold the strip into place
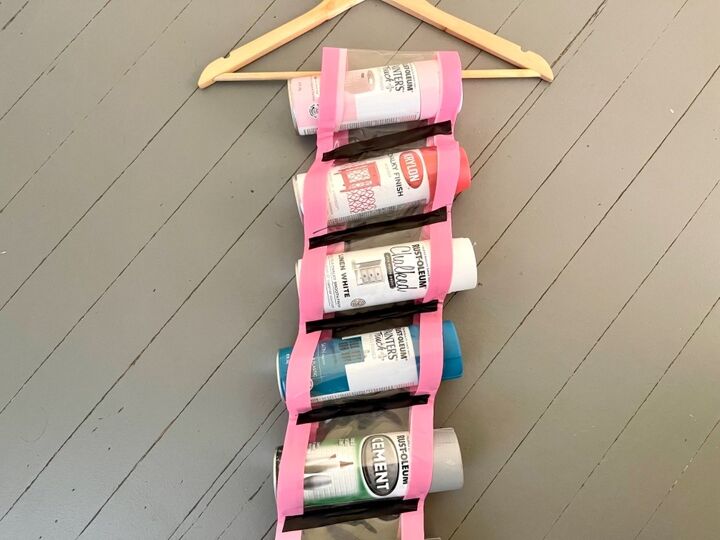
Fold the completed plastic strip double. The bottom half should be shorter than the top measuring about 85cm (39") from the edge to fold. The top side should be roughly 85cm plus about 42.5cm (17") i.e. about half a length extra. As mentioned, I made an 8 pocket holder, which is big! You could go smaller.
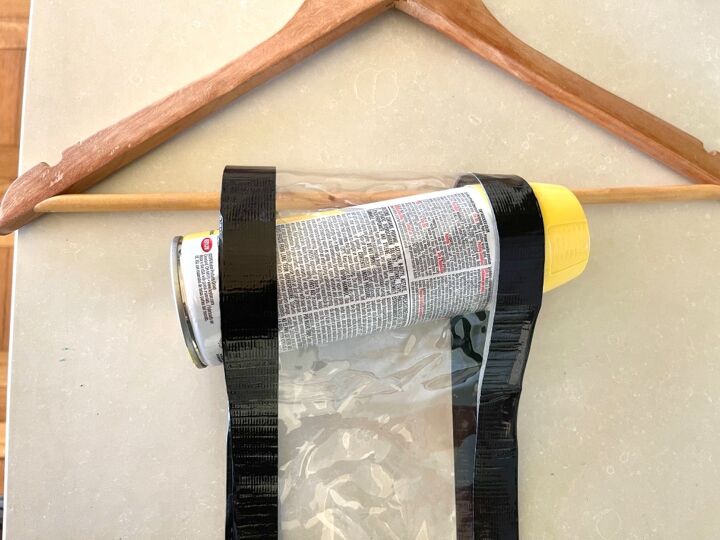
Wrap it around a hanger
Wrap the fold over the cross-bar of the sturdiest clothes-hanger you can find, longest section still on top. Don't use a cheapie plastic hanger! In fact, you wouldn't go amiss by reinforcing the join between the cross-bar and the v-shaped part with cable-ties or something.
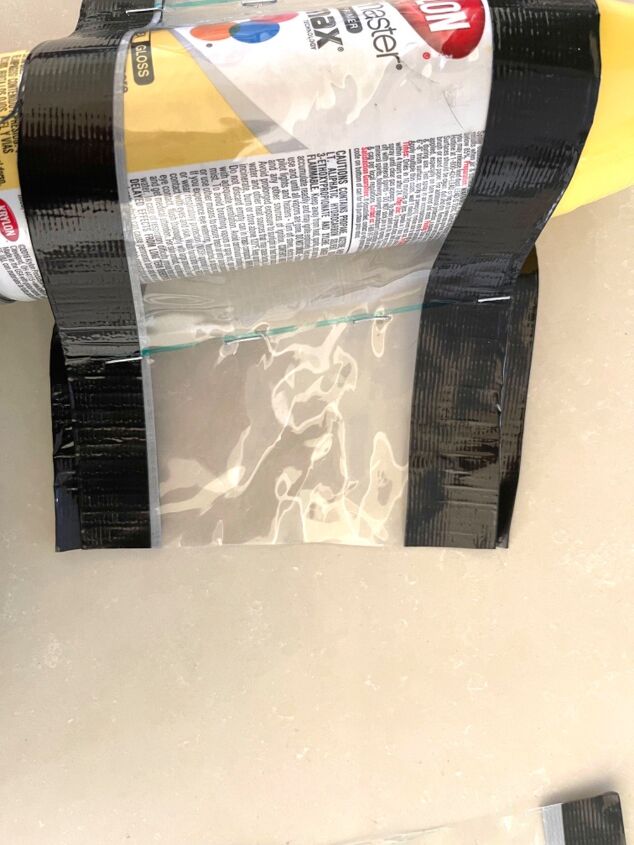
Next, put your star spray can between the two layers at an angle. Storing the paint at an angle will prevent it from leaking.
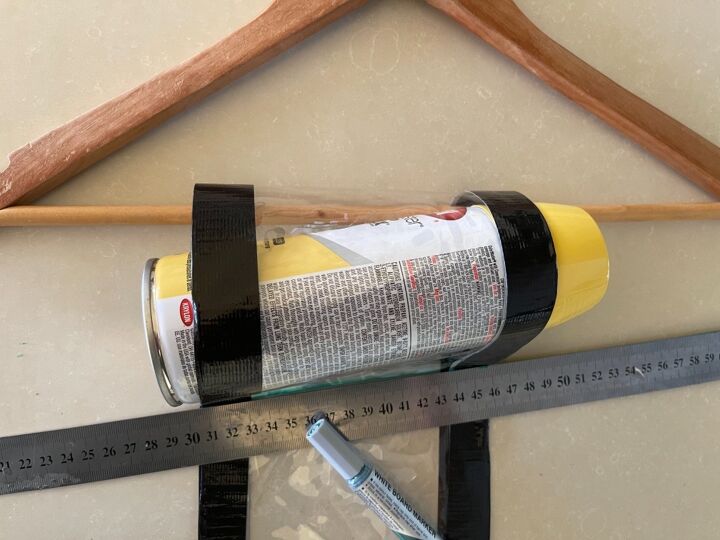
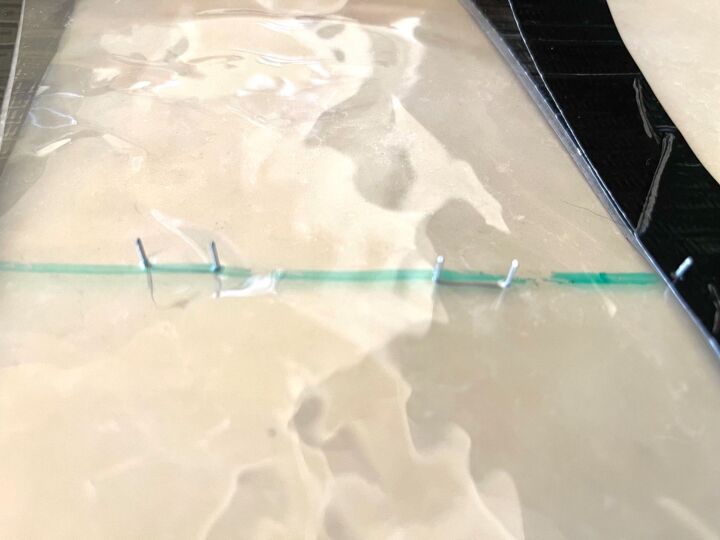
Make a seam
Mark a diagonal line beneath the can but leave enough wiggle room to easily remove and insert it. Adjust the size of the pocket by adjusting the top section (i.e. the one that is longer).
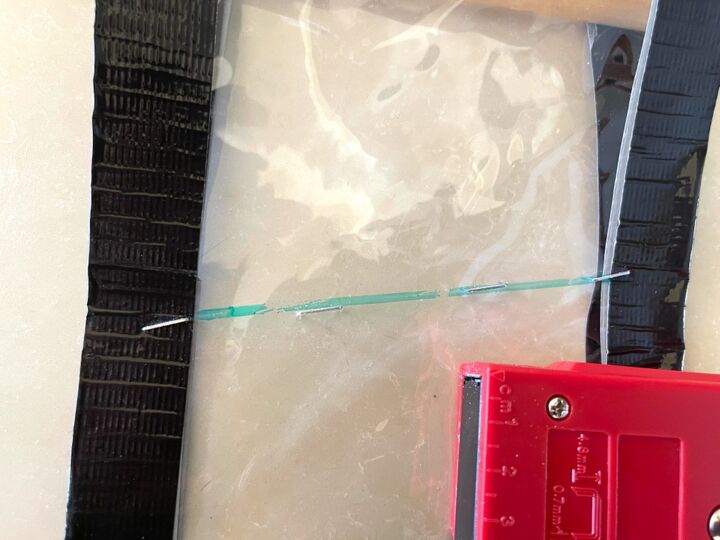
The stapling requires a bit of a workaround. If anyone has better suggestion (other than sewing) or knows of a better tool, please leave a comment below.
Remove the tin and put at least 4 staples into the diagonal line. I used a Tork Craft Light Duty Staple gun with medium length 'tines' - just one step above an office stapler and definitely not one of those pneumatic jobs you use to do upholstery with!
Lift the plastic off the table with your one hand and staple with the other, taking care not to injure yourself. You are effectively stapling into the air and the staples will still be open as shown below on the reverse side.
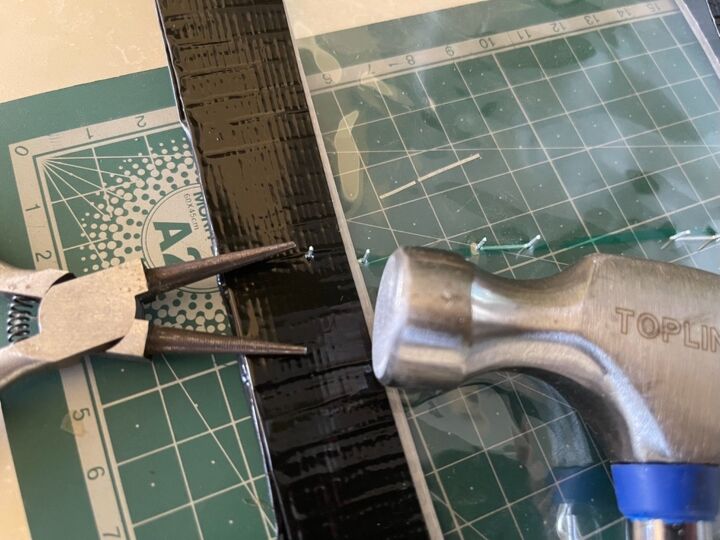
With the plastic now laying flat on a cutting mat, on the reverse side, use small pliers to hold one tine of the staple still, whilst knocking the other tine towards the center until it is flat. Whilst still holding the same, second tine with the pliers, knock its protruding part towards the center and release the pliers as it starts to bend. Keep hitting gently until it too lays flat. The result should resemble a normal staple. Don't worry if it isn't perfect, as long as it keeps the two sheets together. Repeat for all the staples.

Repeat the process until you have made enough pockets. Make sure that the angle of the diagonal line stays the same and don't make the pockets too tight.
After completing the row, trim the bottom so that it is level and the sides are even.
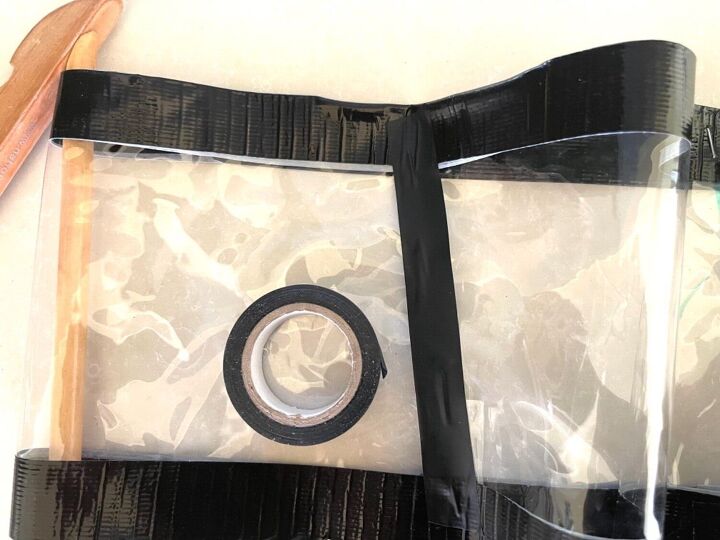
Cover the seams
Use a thinner matching tape to cover both sides of the staples. Press the tape down firmly so that it reinforces the staples. I am holding thumbs that this idea will work!
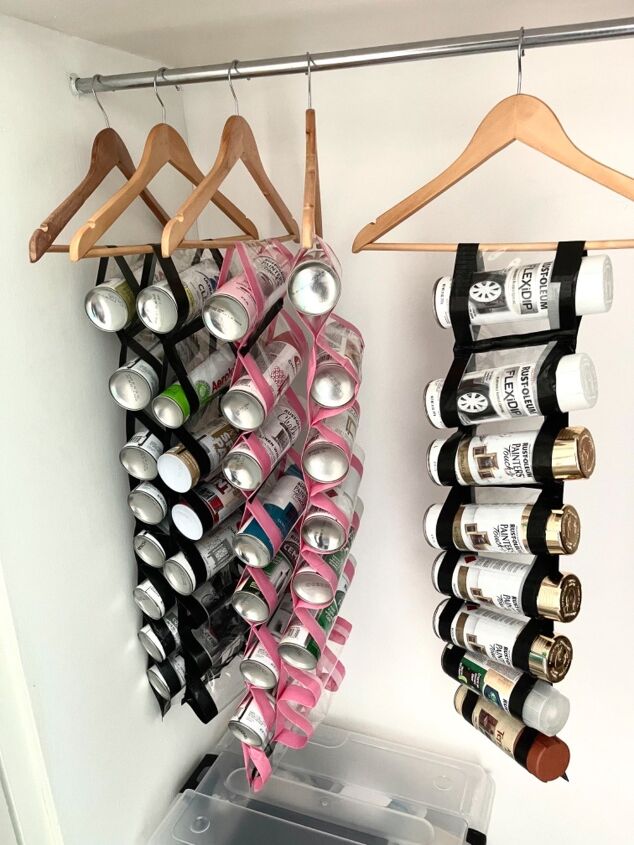
And we are done! Insert all the tins and hang in a closet on a firm cross-bar. As you can see, the holders take up very little space and ensure that the tins are visible and easily accessible.

What's nice about this design is that you can see all the labels quite clearly. No more guessing which of the numerous white capped cans is actually the plastic primer!
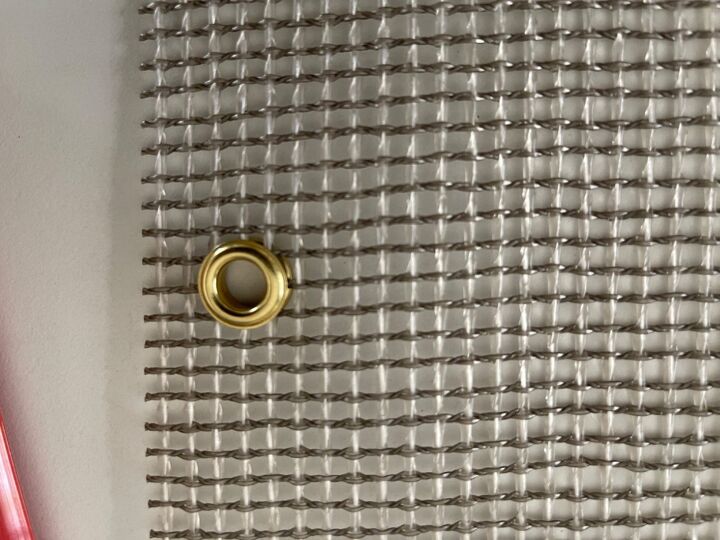
Update: It's been a couple of years and I still love my holders. A simple eyelet kit, the one with which you use a hammer, would also work well instead of staples.
Resources for this project:


Comments
Join the conversation
-
Well done. Now that is a clever idea.👍️♥️👍️👍️
-
A wine rack would work nicely, as well. That’s what I use, a plain Jane cheapy that I found at Goodwill.


Frequently asked questions
Have a question about this project?
Do u think that hot glue would work in the place of the staples? I was thinking it might work if a thick enough sheet of plastic is used. Otherwise, it may melt the plastic and ruin your invention. Great idea though, my mom has used the plastic shoe holder for years.