


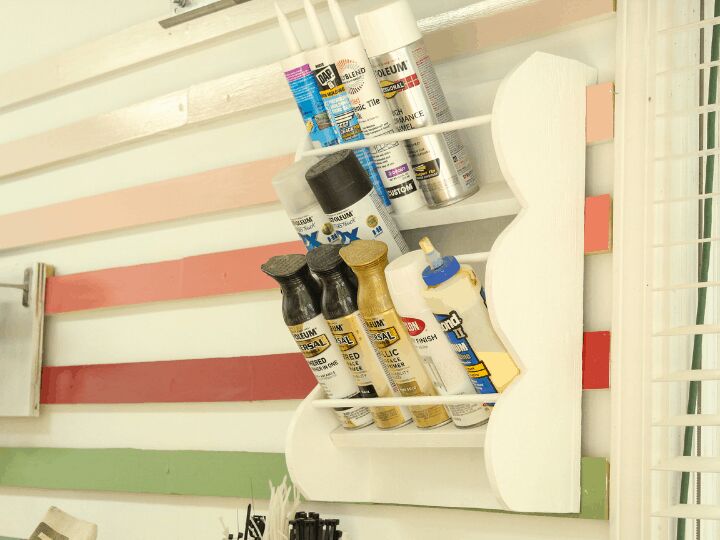
Scalloped Spray Paint Storage Rack
This isn't your grandpa's paint shelf! Last week I built a simple but elegant shelf for storing spray paint on my french cleat wall.
Here's how it turned out.
If you've never worked with scalloped edging before, now is the perfect time to start!
Tools
- Miter saw
- Table saw
- Jig saw
- Measuring tape
- Power drill + bit
- Nail gun
- Build plans - grab them over on Topshelfdiy.com!
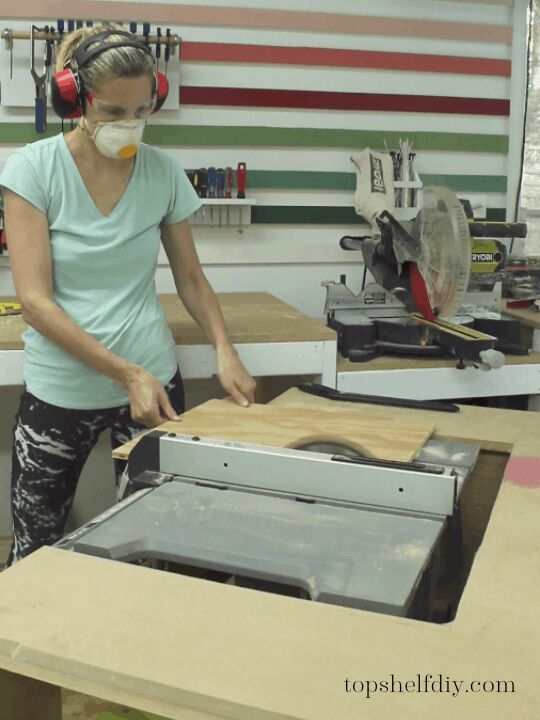
Step 1
Rip down your plywood on your table saw. To get exactly 5 cans of spray paint to fit per shelf, you'll want your base to be approximately 14" wide. You can make your rack as tall as you want -- mine was just short of 20" tall.
In addition to the base, you'll also want two pieces of plywood for your scalloped sides. Make them the same height as your base and ripped to a width of 7".
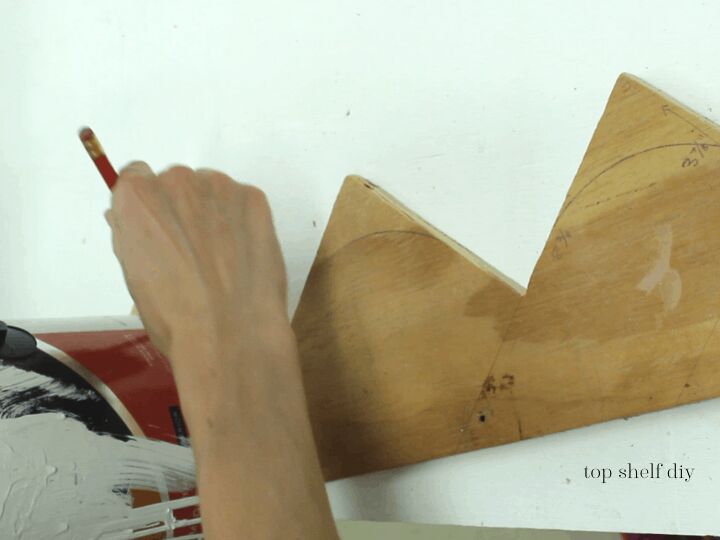
Step 2
At this point your base should be ready to go. Your sides still need "scalloping." The easiest way to create scallops is to cut a symmetrical zig zag pattern with a table saw or jigsaw.
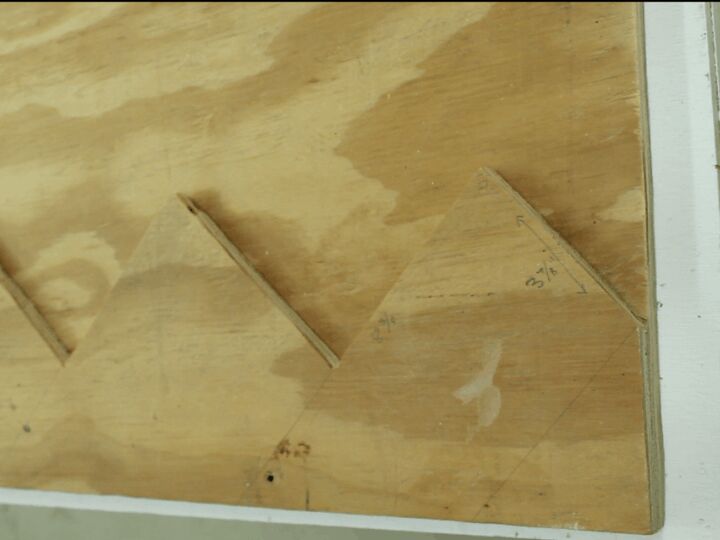
Next, use a paint can or template to create a curved edge at each point. Cut out your template with a jigsaw.
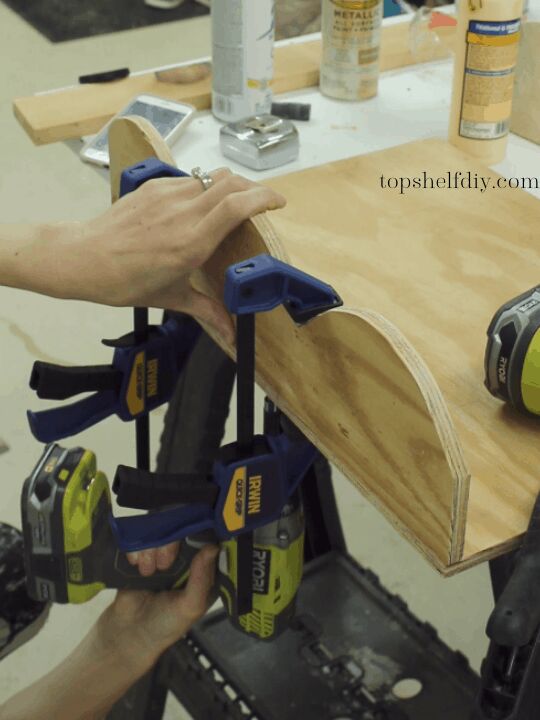
Step 3
Pre-drill 2-3 holes along the left and right side of your frame, being sure to use a countersink drill bit so that the screws will end up flush with the wood.
Run a bead of wood glue along the end of your scalloped sides and secure them in place with clamps. Attach them to your frame using 1" screws.
Step 4
Set your table saw to 30 degrees and rip your 1x4s to 2.5 inches in width. The final shelf will measure 3" from the long end of your mitered edge.
Make three marks spaced 4 15/16" apart; this is where the mitered edge of each shelf will sit.
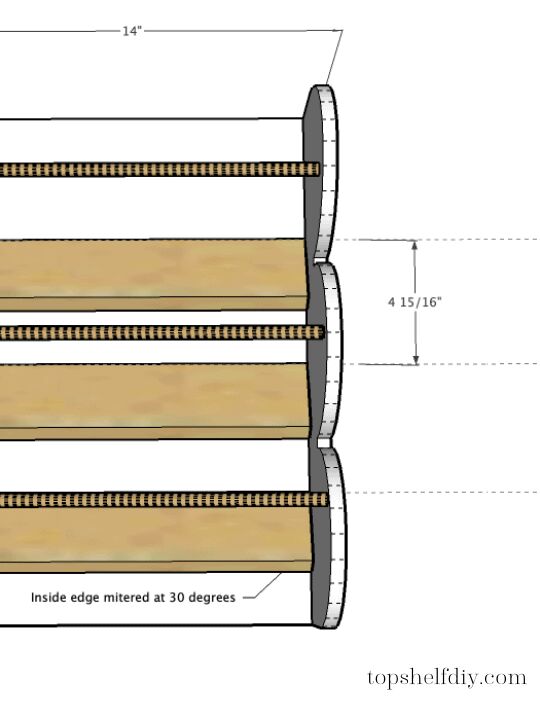
Run a bead of wood glue along the edges of each shelf; secure in place with brad nails. I used a combination of 5/8" and 1 1/4" nails.
Determine the placement of your dowel rod by setting a can of spray paint on the shelf and testing for fit.
Step 5
Mark the placement of your dowel rod and then drill a small hole with a drill bit, spade bit, or countersink bit. Basically you want to make a small indented area for your dowel to rest.
Cut your dowel about 1/8" long so that it fits tightly across the front of your shelves. Add wood glue to either end and snap into place using your pre-drilled hole. Check for level.

Step 6
Now for the final touches. Add a few layers of paint if desired, and give it a coat of polycrylic if you want to protect the finish. If not, I won't tell.
Add a corresponding french cleat to the back, and you're done!
Get the Plans
These plans are free to subscribers on my blog.
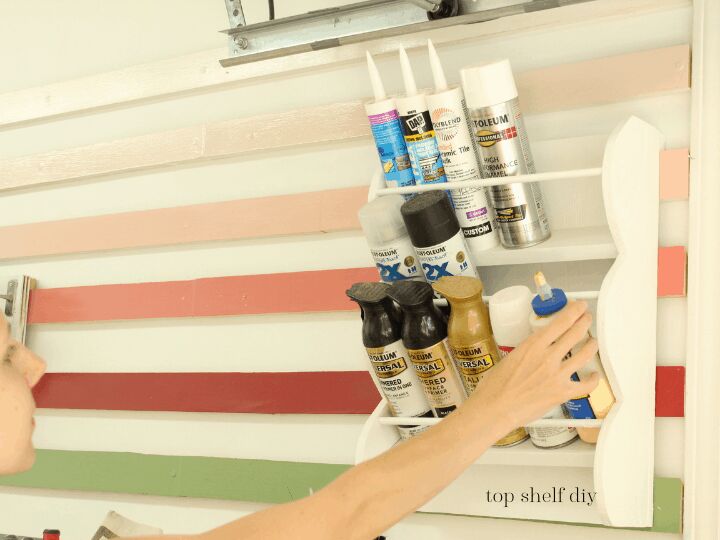
Not only does this shelf keep cans and bottles up and out of the way, it also keeps them within easy reaching distance. Loading this baby up was probably the best part of the entire project.
Resources for this project:
See all materials


Comments
Join the conversation
-
I would like about three or four of these!


Frequently asked questions
Have a question about this project?