


DIY Soy Wax Candles - The Antiqued Journey
$40
24 Hours
Medium
DIY Soy Wax Candles
Posted on
December 13, 2020
in DIY Projects
Imagine the soft, warm glow of a candle on a snowy winter evening from your very own DIY soy wax candles. Isn’t that cozy?
Posted on
December 13, 2020
in DIY Projects
Imagine the soft, warm glow of a candle on a snowy winter evening from your very own DIY soy wax candles. Isn’t that cozy?
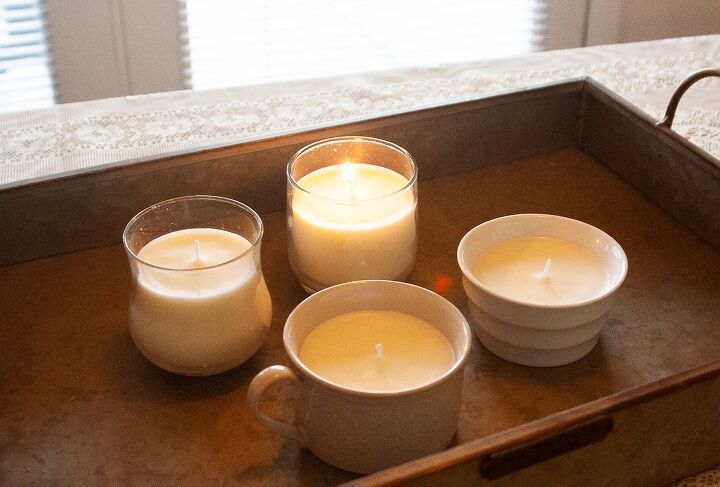
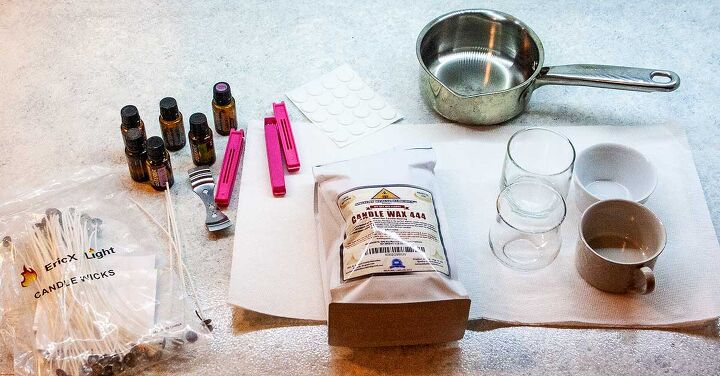
Candles, especially in the winter time, are so comforting. They make your home feel extra special on those cold evenings. This project is simple, inexpensive, and creative and make excellent homemade gifts. DIY soy wax candles! By following the tutorial below, you too will be able to add extra coziness to your home this winter season! Supply List:
- Glass Containers of some sort
- Soy Wax
- Candle Wicks
- Small pot (for stove option) or glass bowl (for microwave option)
- Long stir spoon
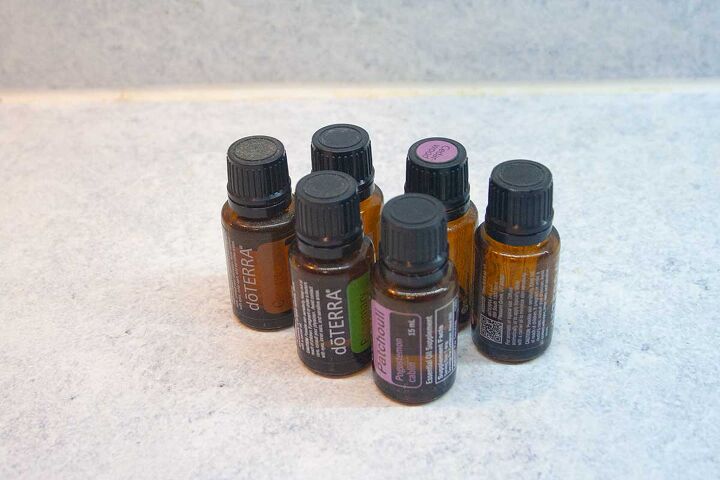
- Essential oils (pure oils like doTERRA are what I prefer but you can use what you like)
- Scissors
- Hot pad or mitts
- Wooden skewers or long chip clips
- Measuring cup
- Spoon for scooping
- Double sided tape (optional)
Step 1: The Containers.
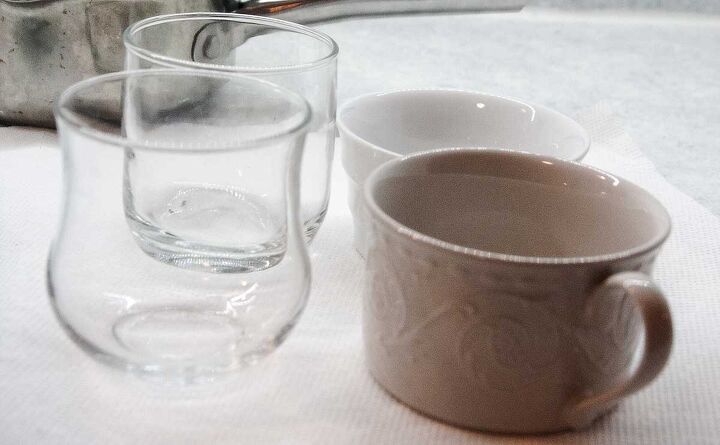
Glass containers and jars are easily found at thrift stores for under $1.00. I found 4 of them to use for this DIY and the total bill came in at just under $4.00. You can use typical clear glass jars but feel free to get creative and use mason jars, ceramic tea cups, or even small coffee mugs! Be sure to wash your containers well with warm soapy water to remove any debris. Step 2: The Wicks.
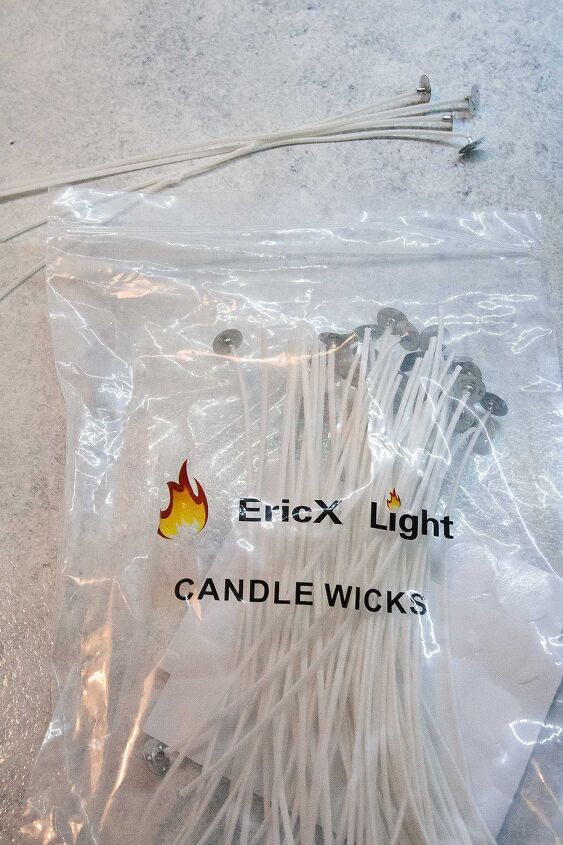
If your wicks came with sticky bottoms, all you need to do is adhere them to the bottoms of each jar .
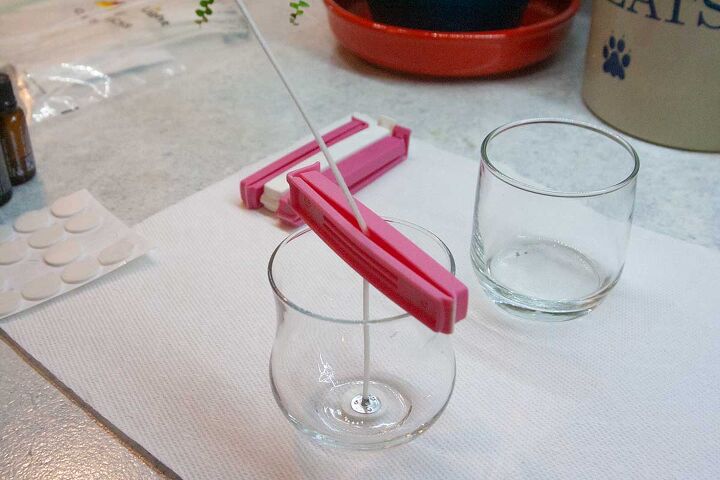
If your wicks didn’t come with sticky bottoms, double sided tape is best to attach them to the jar. Once you have each wick secured, you will need to lay a skewer, chip clip, or wooden dowel across the top of each jar to wrap each wick around so that is taut and centered in the jar. I used a long chip clip to hold the wick up and that worked well. Step 3: The Wax.
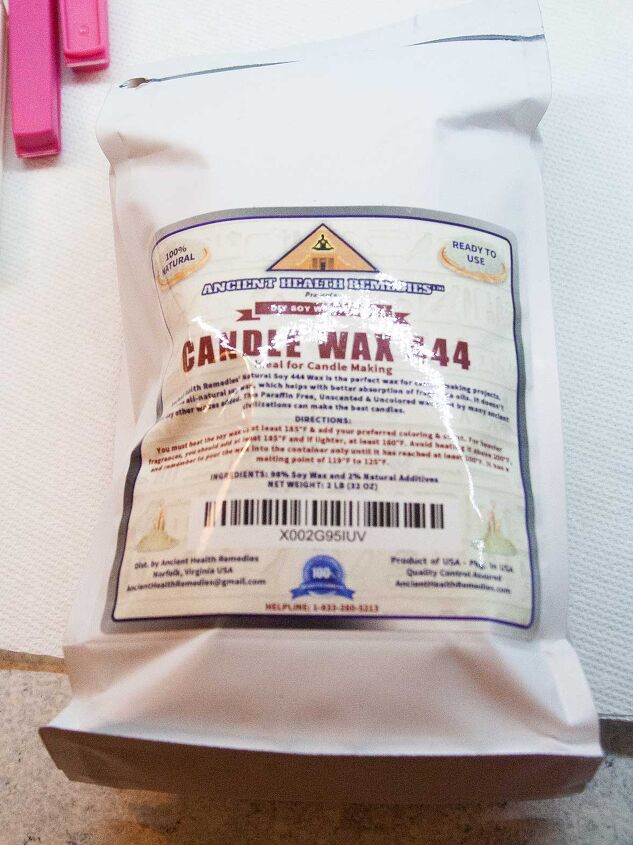
For this step, you will first need to find the capacity of each jar then double the amount of wax flakes. For example, if your jar holds one cup of liquid, then you will need to measure out 2 cups of wax flakes.
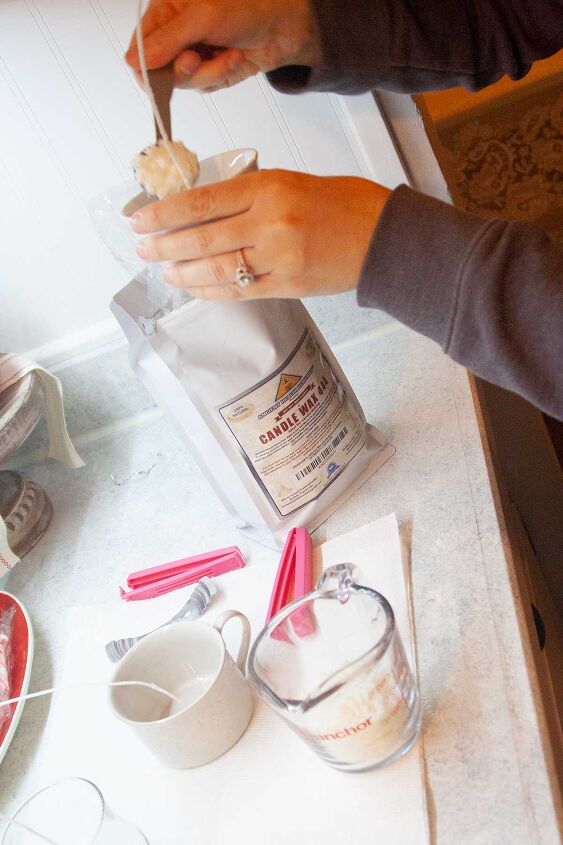
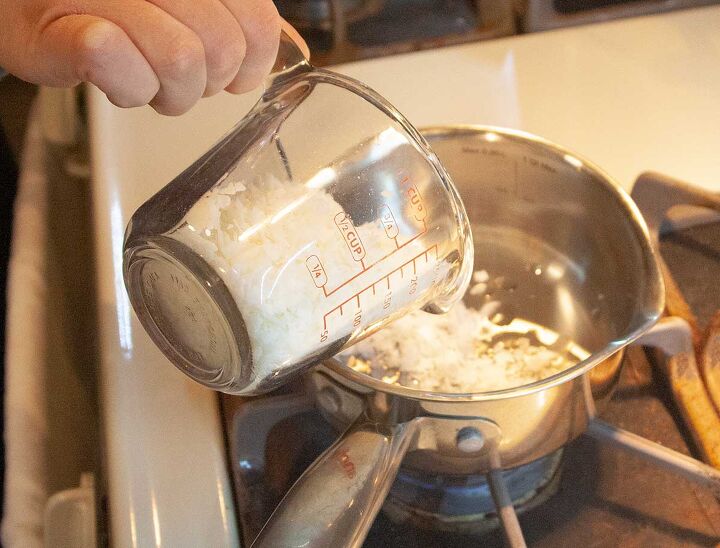
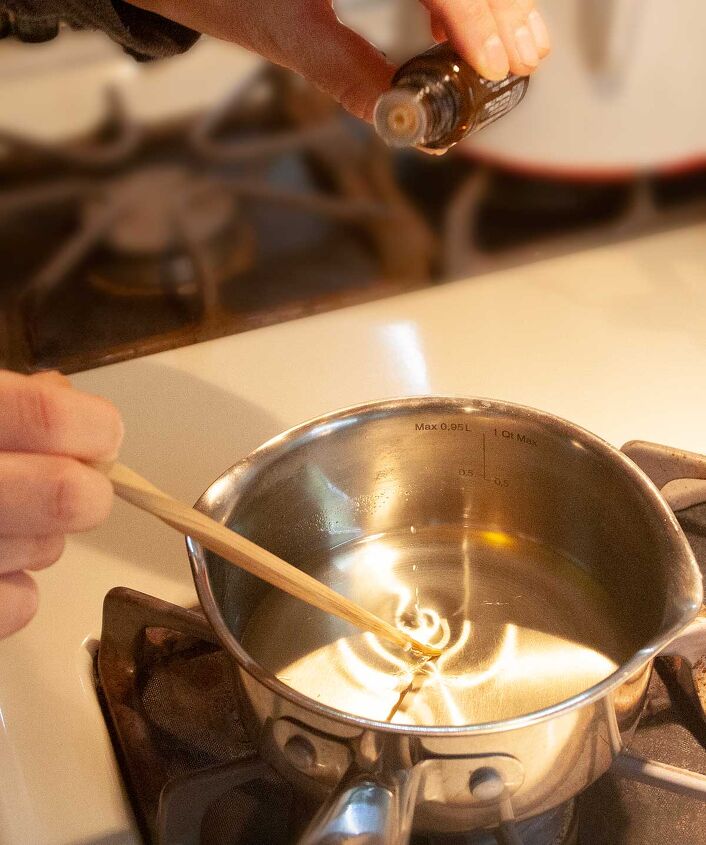
Tip: The easiest way I found while doing this is to use the actual jar that you want to make next, scoop the wax flakes into it with a spoon, pour those flakes into a measuring cup, then repeat. That way you have the exact amount of wax needed for each particular jar while not wasting any wax. Pour all of the wax flakes into a heat safe container. You have the option now to either heat your wax on the stovetop until melted, stirring regularly, or in the microwave, stirring every 20 seconds. I much prefer melting the wax on the stovetop. For me it’s much easier to control and I like the fact that I don’t have to keep opening and closing the microwave to stir the wax as it melts.
Step 4: Adding Scents.
When scenting your wax, it’s important to let it cool down a bit after you melt it. You still want it pourable, but not magma hot. If you add the oils while the wax is still very hot, you run the risk of evaporating your scents before the candle ever gets used. The candle will still burn, it just won’t smell like anything!
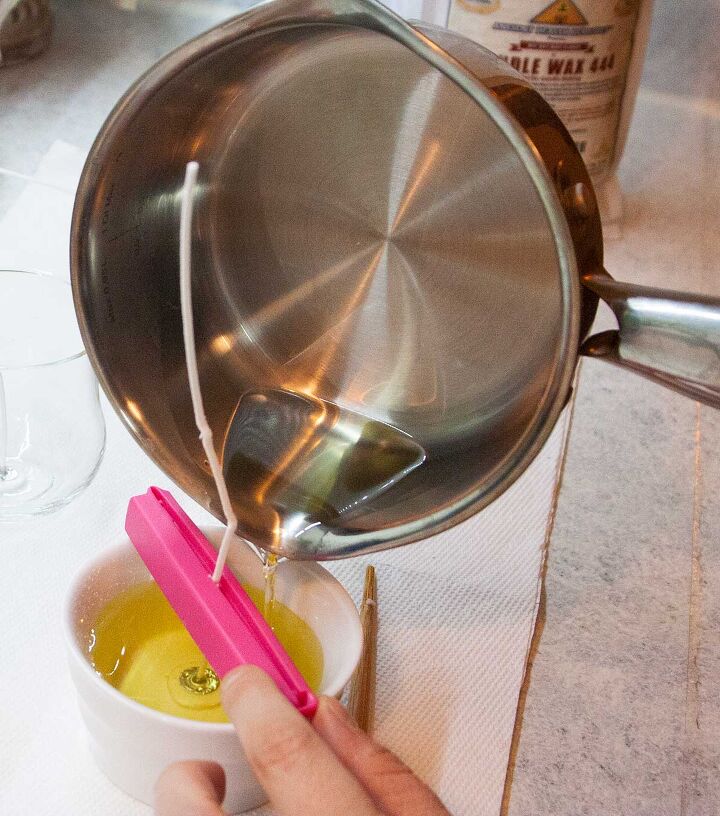
It’s important to add an oil from each of the top, middle, and base notes. Basically, top note oils are the first oils you smell when you light the candle and will dissipate into the air first. Some oils in this category include Cinnamon, Eucalyptus, Orange, Peppermint, and Tea Tree. Middle note oils have a bit of a softer scent and these include Lavender and Rosemary. Base note oils last the longest and evaporate the slowest. Some oils in this category include Cedarwood, Clove, Frankincense, and Patchouli. How To Create A Blend: Go through some of the oils listed above (or other ones you may have) and pick 1 scent from each note category. For example, some scents that pair nicely together are Clove, Peppermint, Orange, and Cinnamon. Alternatively you could try Eucalyptus, Orange, and Patchouli. There are endless combinations so just go with whatever smells pretty to you! Start with just a drop or two of oil, stirring while adding. Stir well before adding more oils. When you have a scent that feels beautiful to you, pour the wax into your jars, leaving about a half inch of clearance at the top of each jar. Be sure the wicks are centered and straight as you do this. Leave the jars to stand for at least 12 hours before moving or touching them! Step 5: Pour. Pour your melted wax into its container!
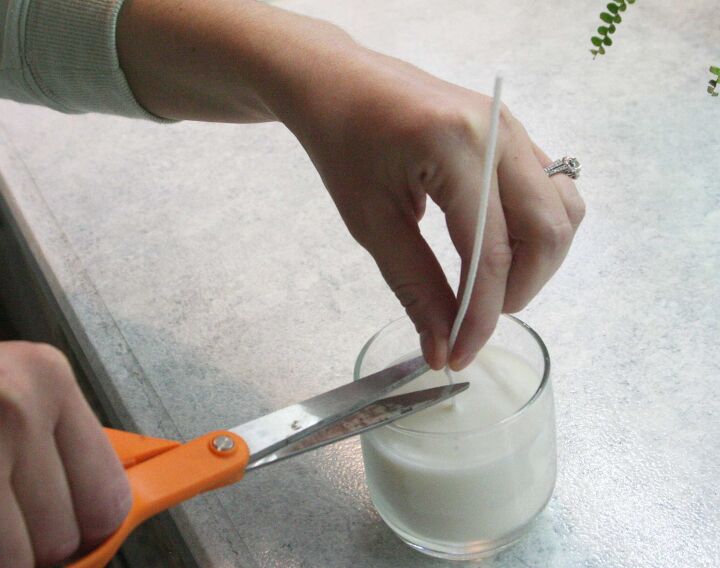
Step 6: Trim.
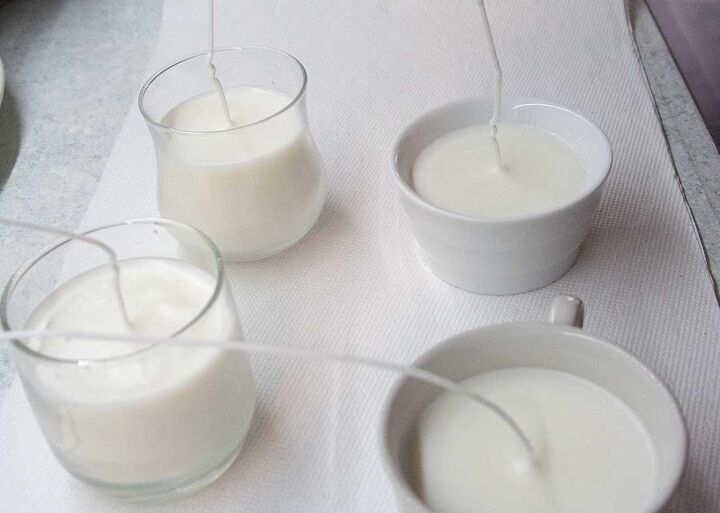
After the 12 hours are up, use a scissors to trim each wick down to 1 inch.
There you have it, your very own homemade candles! I hope these simple candles enrich your home during this winter season. Let me know in the comments how it went for you and what oils you used! Happy candle making!
Find more inspiration for your home.

Want more details about this and other DIY projects? Check out my blog post!


Frequently asked questions
Have a question about this project?