


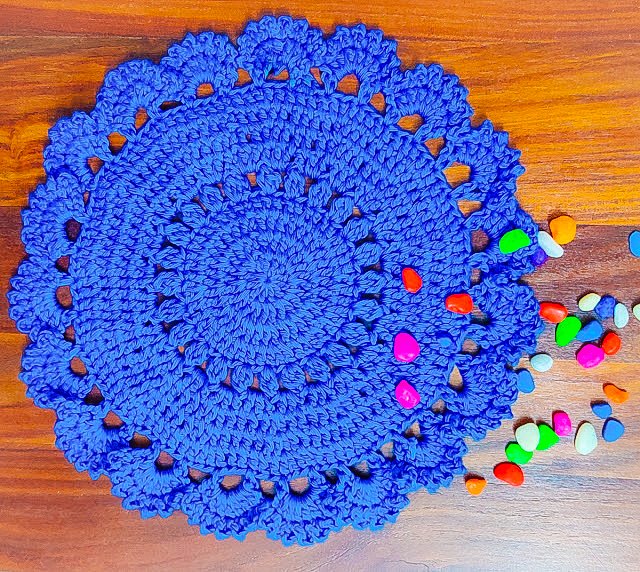
Blue Lagoon Crochet Placemat
Dress up your table with these cool and serene Blue Lagoon Crochet Placemats. I wanted to call this a Blue Lagoon Crochet Placemat because of how well the Blue Color Yarn suits the name. This crochet pattern is pretty easy and quick to make. This is super simple crochet placemat pattern that a beginner would also easily enjoy making.
Crochet placemats are not only beautiful to look at but also very practical too. These would also make great housewarming gifts for your loved ones. You can use different combination of colors to make suit for any season and holiday.
Materials Used:-
4 Ply Cotton Knitting Yarn
4mm Crochet Hook
Size:- 13 Inches( Can be customized to any size)
Notes:-
For this whole Pattern, the Starting Chain 2 is not counted as a stitch. It is Just to bring the yarn to a working height. Start the next stitch in the same stitch.
Here is the Video Tutorial:-
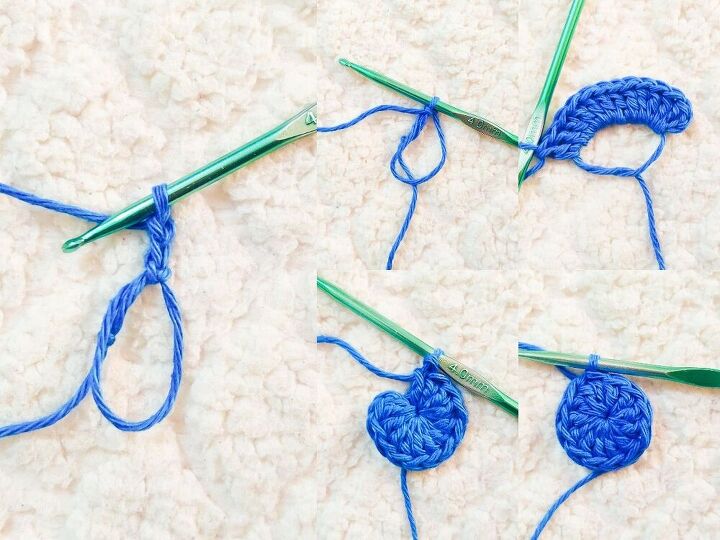
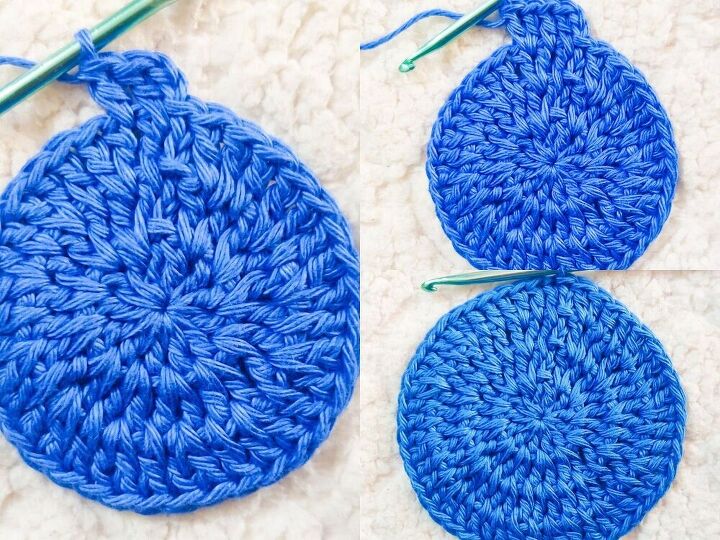
Round 1:-
Start with a Magic Circle.12 Double Crochets in the circle.
Pull the yarn end to close the gap.
Slip Stitch on top of the first Double Crochet.
12 Stitches.
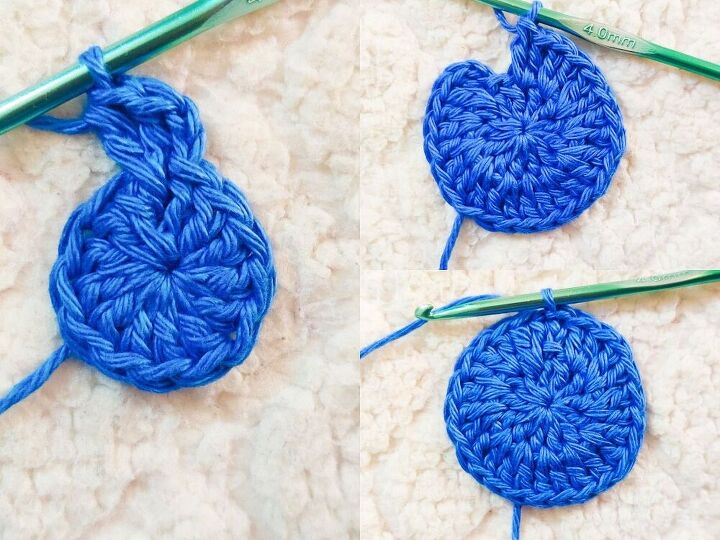
Round 2:-
Chain 2.
2 Double Crochets in each stitch around.
Slip stitch on top of the first Double Crochet.
24 stitches.
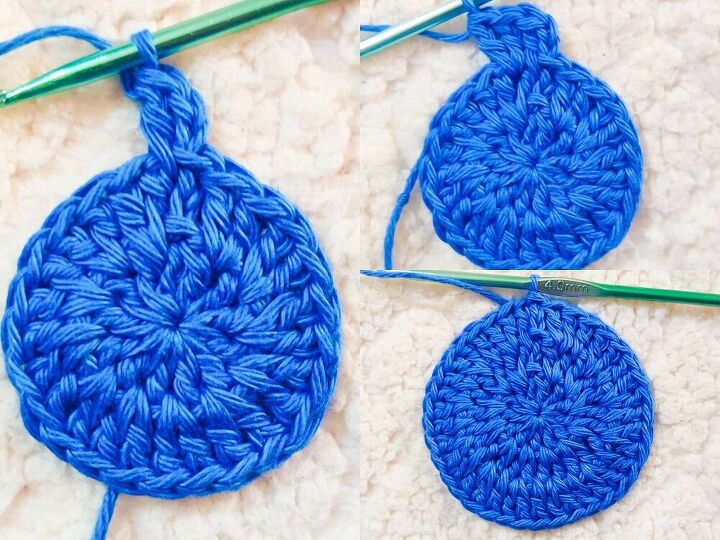
Round 3:-
Chain 2. 1 Double Crochet in the same stitch.
2 Double Crochets in the next stitch.
Repeat*(1DC, 2DC).
Slip Stitch on top of the first Double Crochet.
36 Stitches.
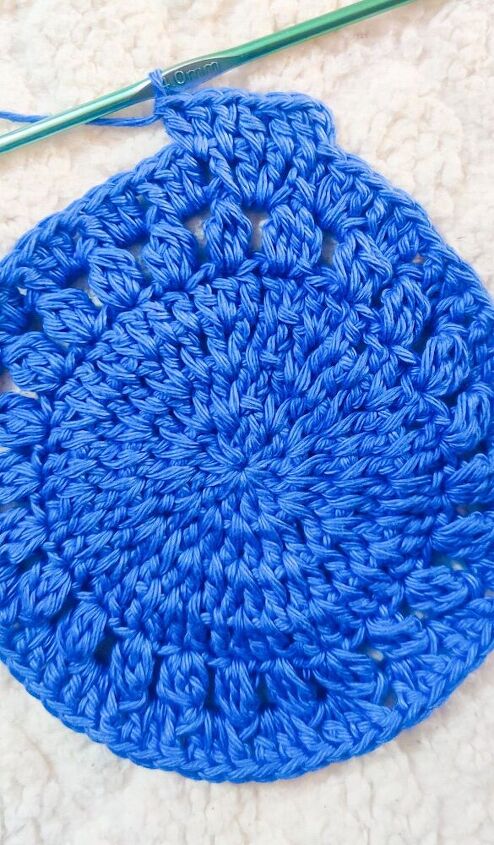
Round 4:-
Chain 2.
1 Double Crochet each in 2 stitches.
2 Double Crochets in the next stitch.
Repeat*(1DC, 1DC, 2DC)
Slip Stitch on top of the first Double Crochet.
48 Stitches.
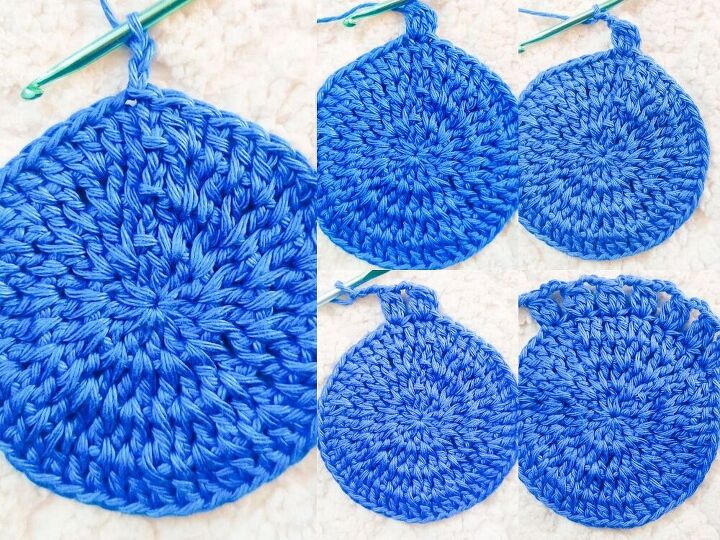
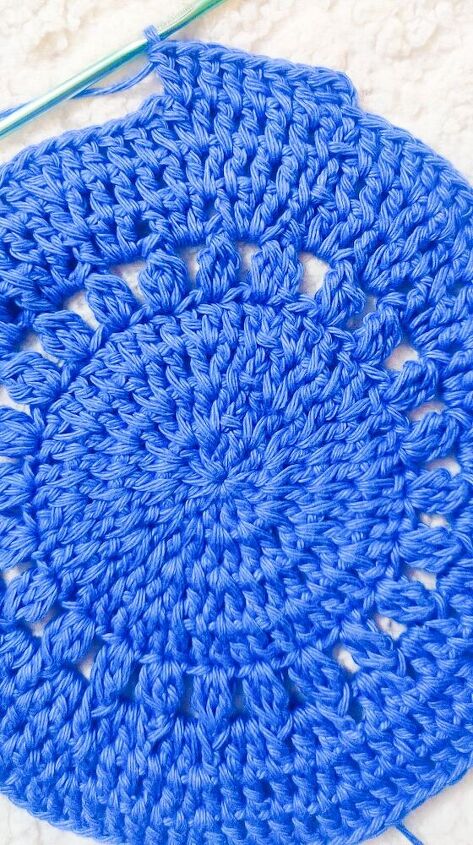
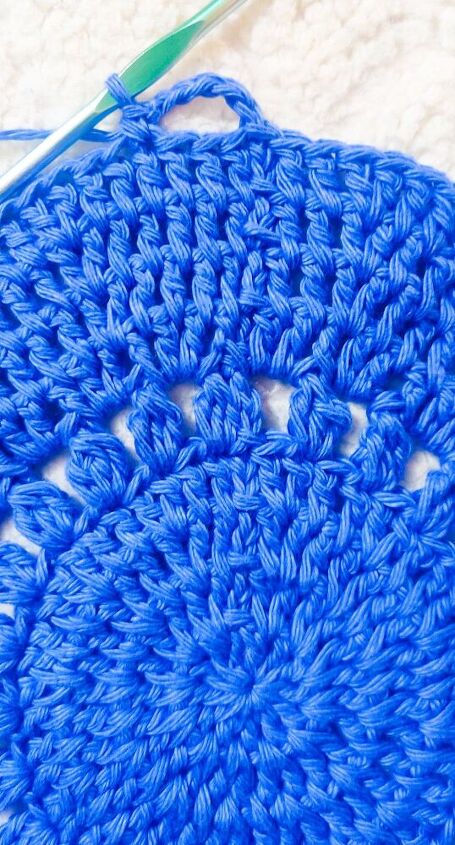
Round 5:-
Chain 2. 1Double Crochet Cluster stitch in the same stitch.
Chain 2.
Skip 1.
Repeat(1DC Cluster, Chain 2, Skip 1)
Slip stitch on top of the first Double Crochet Cluster.
To Make a Double Crochet Cluster Stitch:-
- Yarn over, insert the hook into the stitch, yarn over and pull through 2 loops on the hook.(This is same as doing a Double Crochet Stitch. It is just that , you don't finish the Double Crochet Stitch and continue doing the first part of the Double Crochet Stitch again and again).You should have 2 loops on the hook.
- Yarn over, insert the hook in the same stitch, yarn over and pull through 2 loops. You should have 3 loops on the hook.
- Continue with the first part of Double Crochet stitch untill you have 4 loops on the hook.
- Yarn over and draw the yarn through all 4 loops on the hook.
- Chain 1.
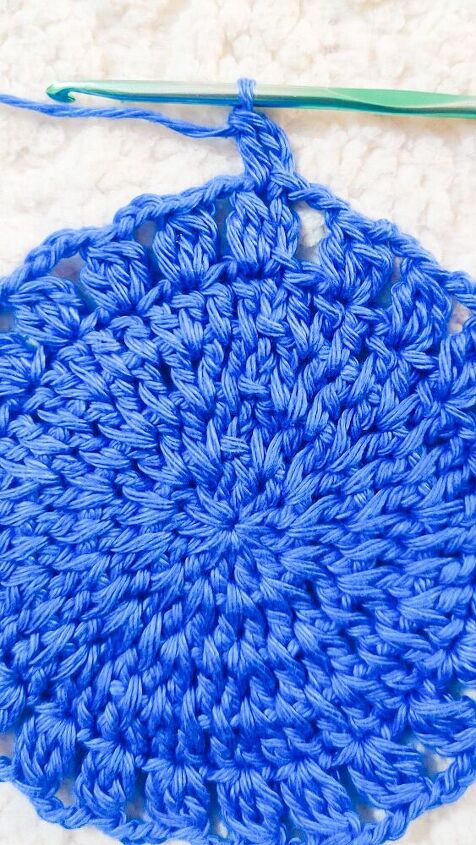
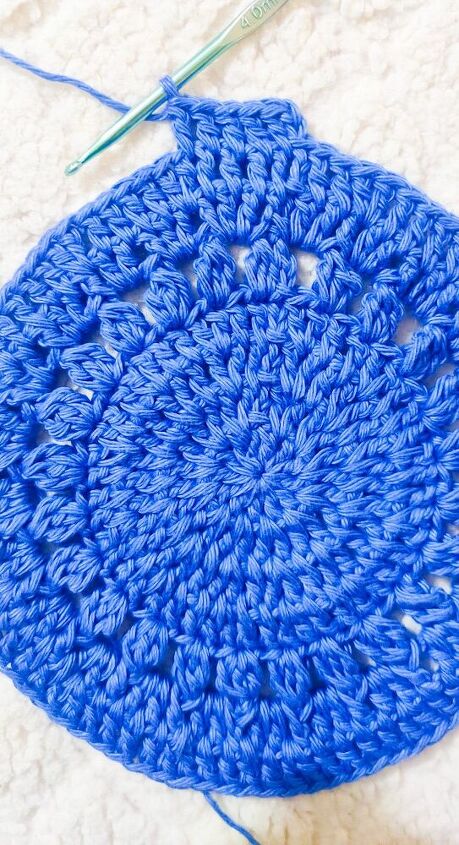
Round 6:-
Chain 2.
1 Double Crochet in the same stitch.
2 Double Crochets in Chain Space.
Repeat(1DC,2DC(in space))
Slip stitch on top of the first Double Crochet.
72 Stitches.
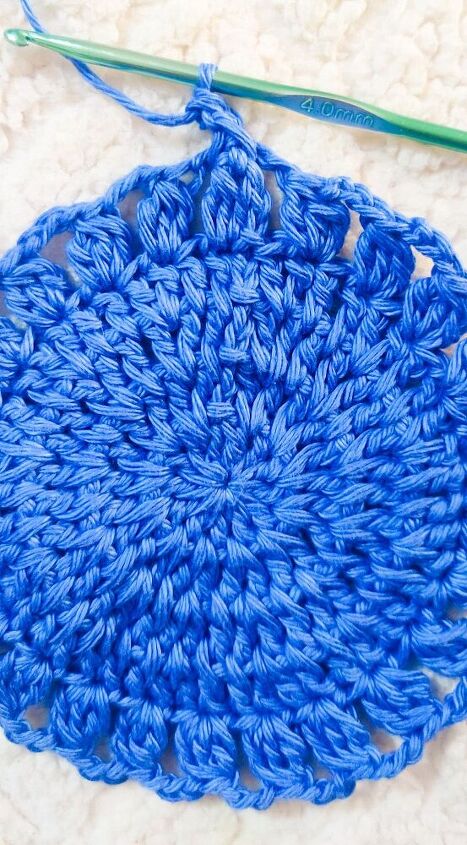
Round 7:-
Chain 2.
1 Double Crochet each in 4 stitches.
2 Double Crochets in the next stitch.
Repeat*(1DC*4, 2DC)
Slip Stitch on top of the first Double Crochet.
86 Stitches.
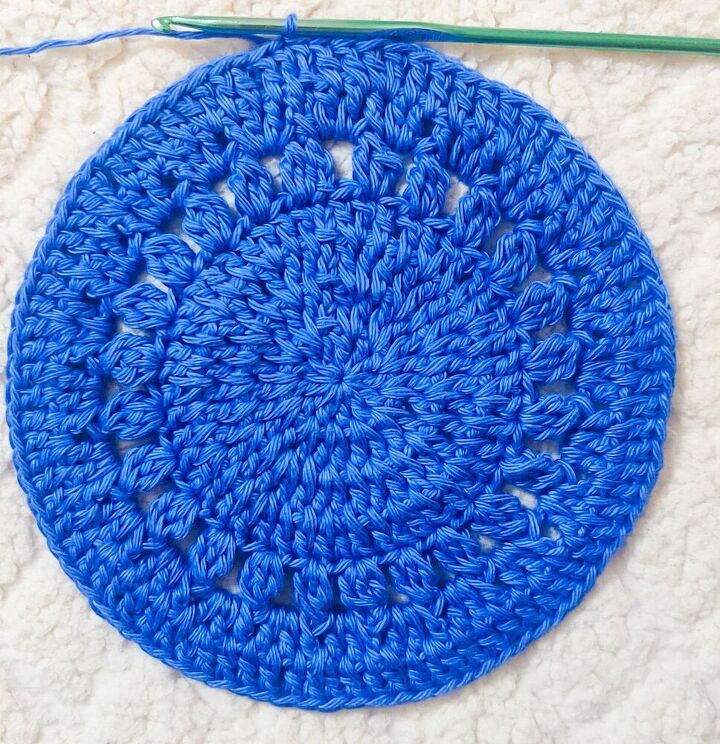
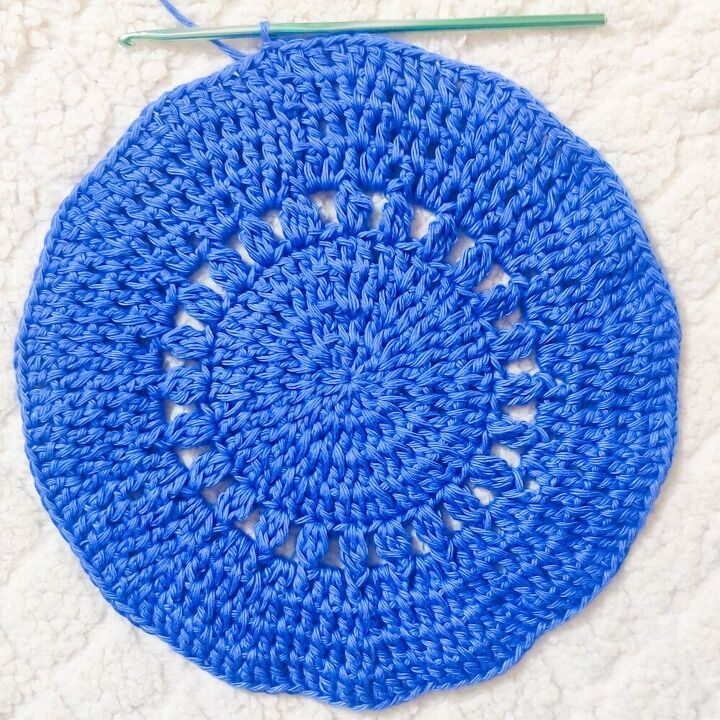
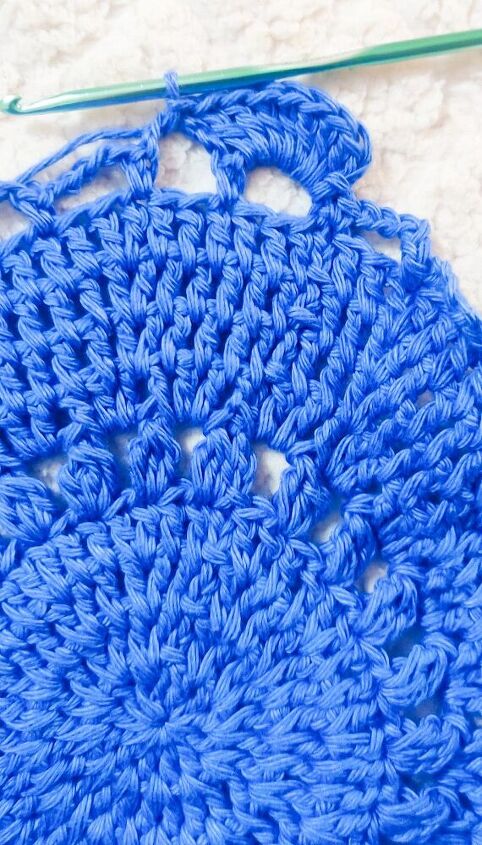
Round 8:-
Chain 2.
1 Double Crochet each in 5 stitches.
2 Double Crochets in the next stitch.
Repeat*(1DC*5, 2DC)
Slip Stitch on top of the first Double Crochet.
100 Stitches.

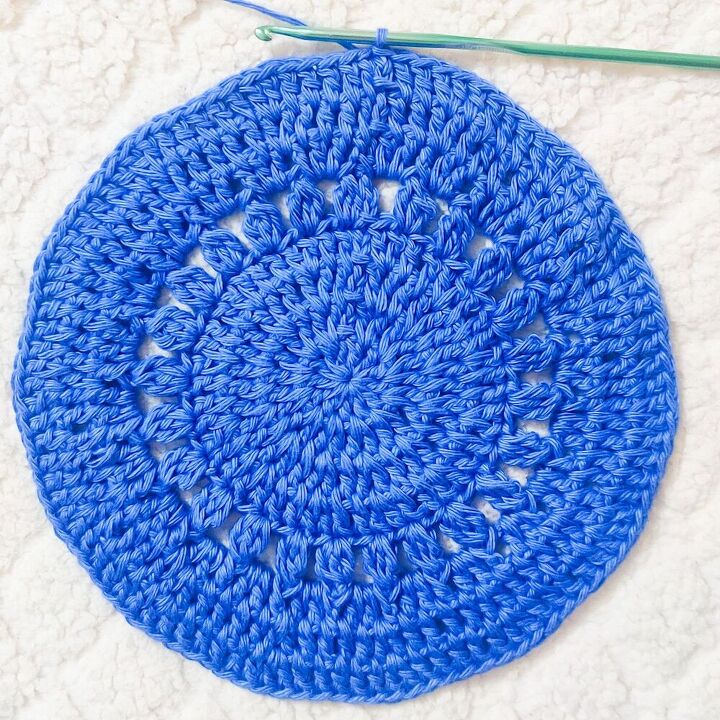
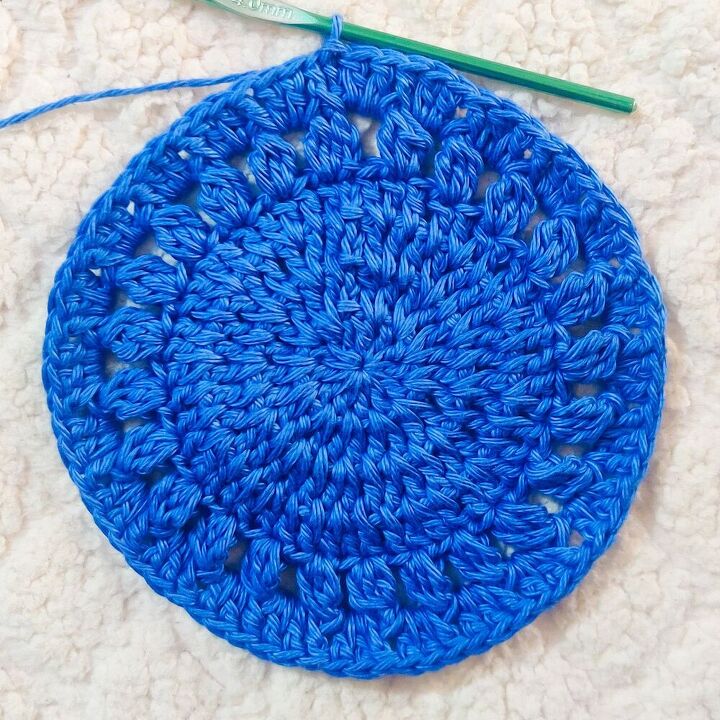
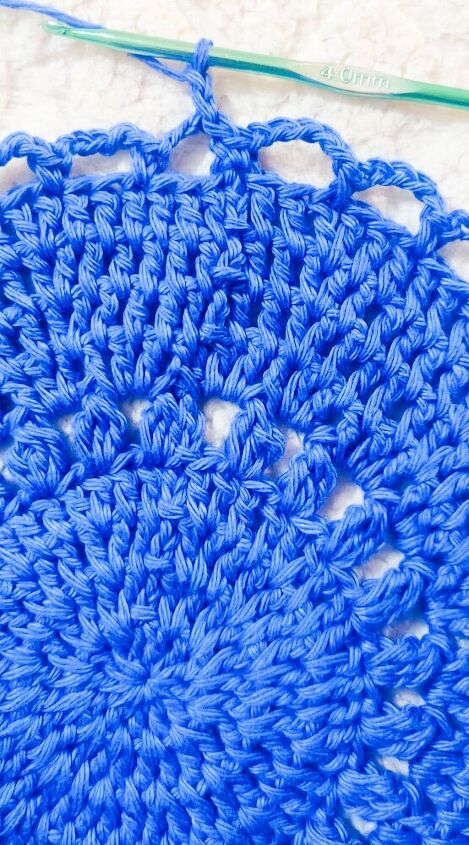
Round 9:-
Chain 2.
1 Double Crochet each in 6 stitches.
2 Double Crochets in the next stitch.
Repeat*(1DC*6, 2DC)
Slip Stitch on top of the first Double Crochet.
114 Stitches.
If you wish to make a Bigger Placemat, then continue with the increase pattern as below:-
Start each round with Chain 2(Not counted as a stitch)
Round 10--DC 7, 2DC in next stitch(128) Round 11--DC 8, 2DC in next stitch(142)Round 12--DC 9, 2DC in next stitch(156) .....and so on.
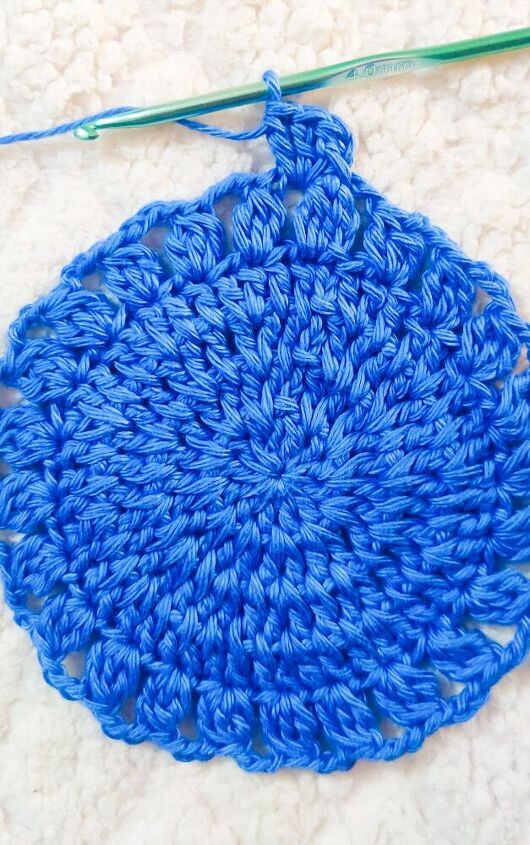
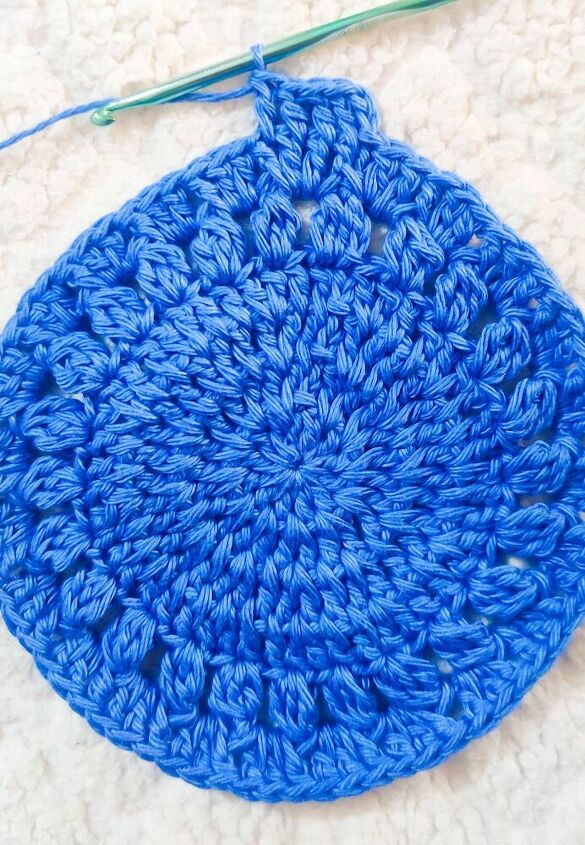
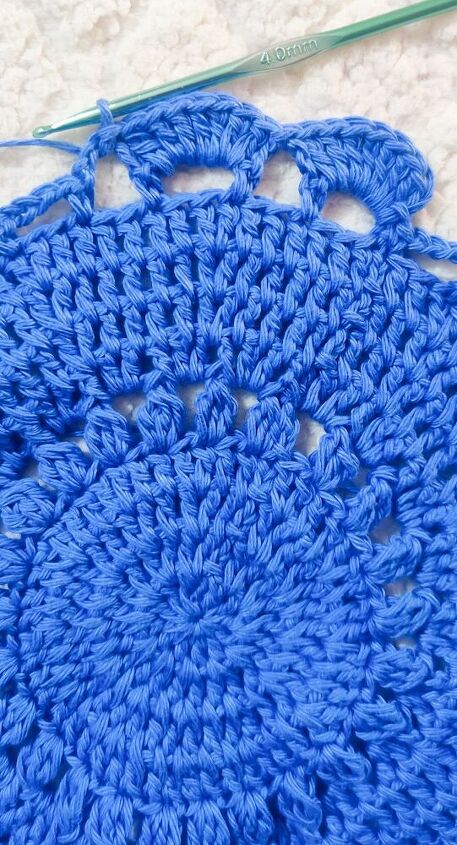
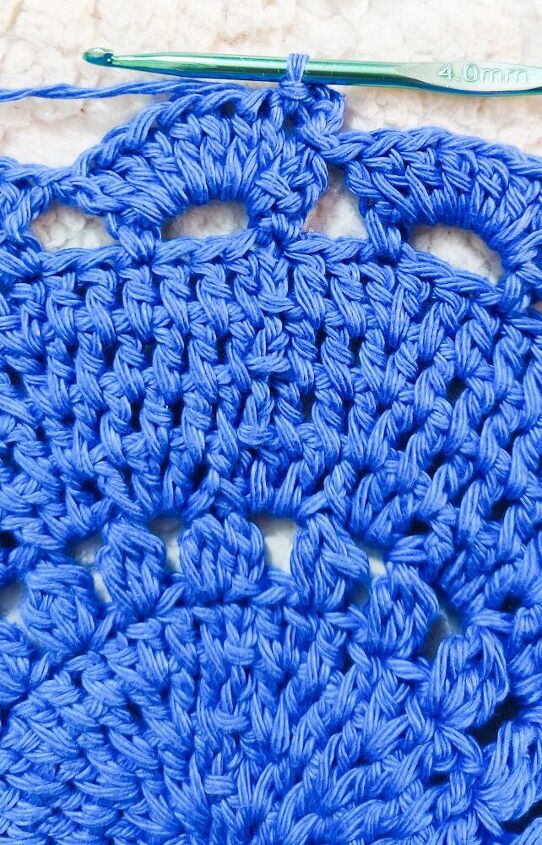
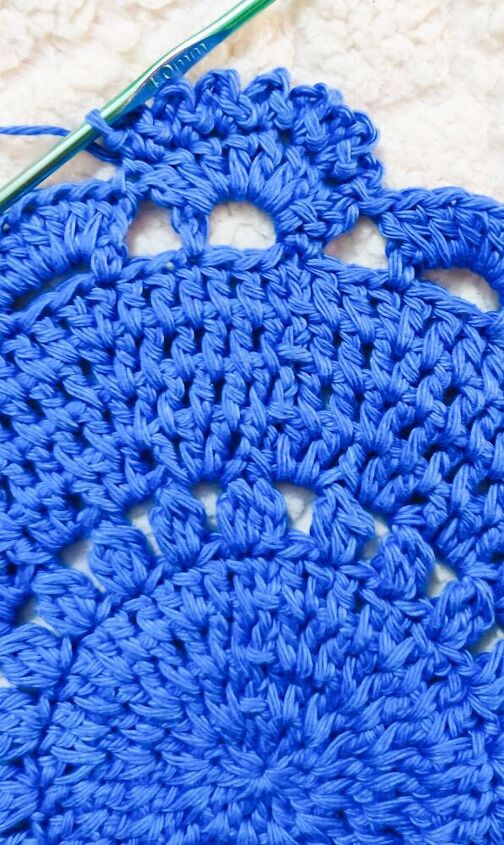
Round 10:-
Chain 5
Skip 2
1 Single Crochet in the next stitch.
Repeat(Ch5, Skip 2, 1 SC)
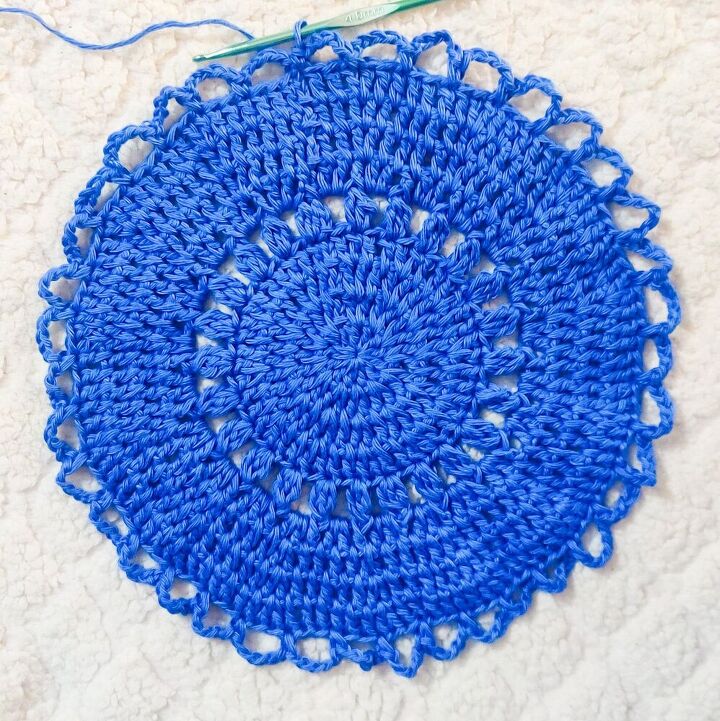
Round 11:-
Slip Stitch into the Chain space.
Chain 2.
7 Double Crochets
Slip Stitch into the next Chain space.
Repeat(7DC,1SL)
Slip stitch on top of the first Double Crochet.

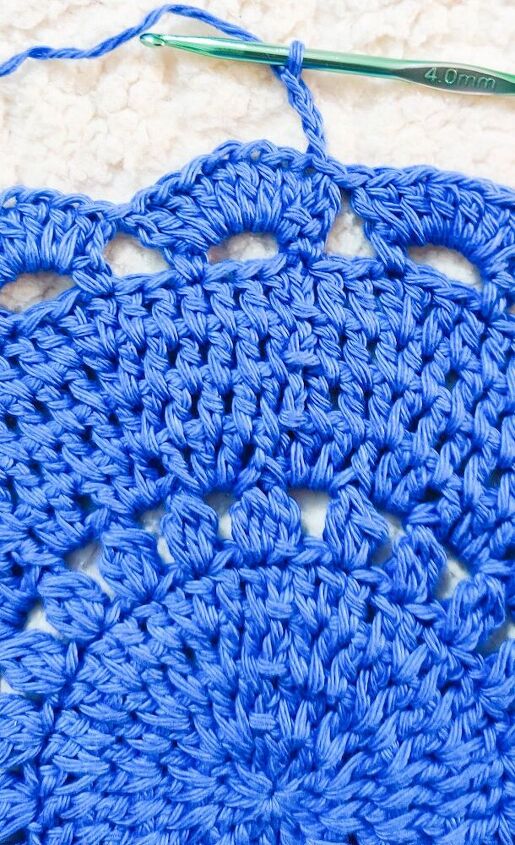
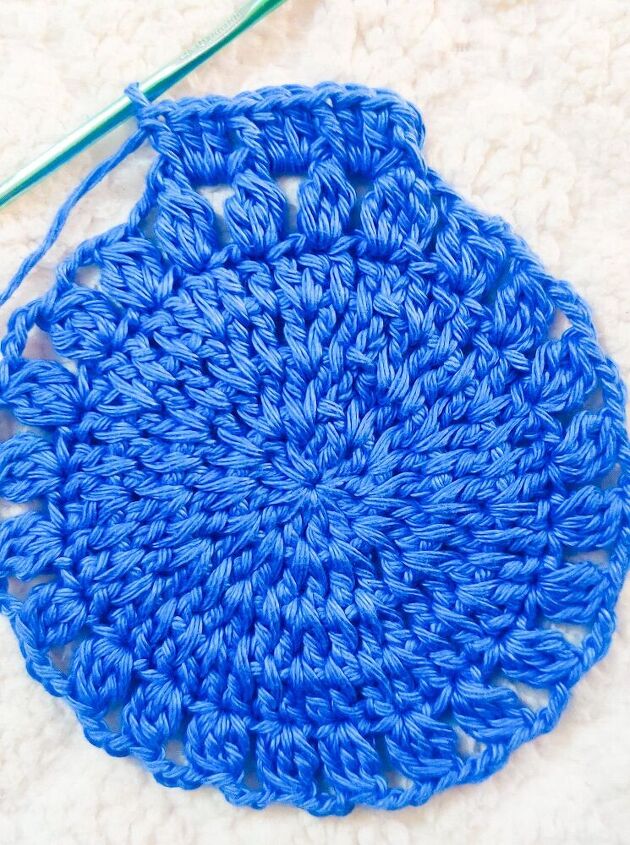
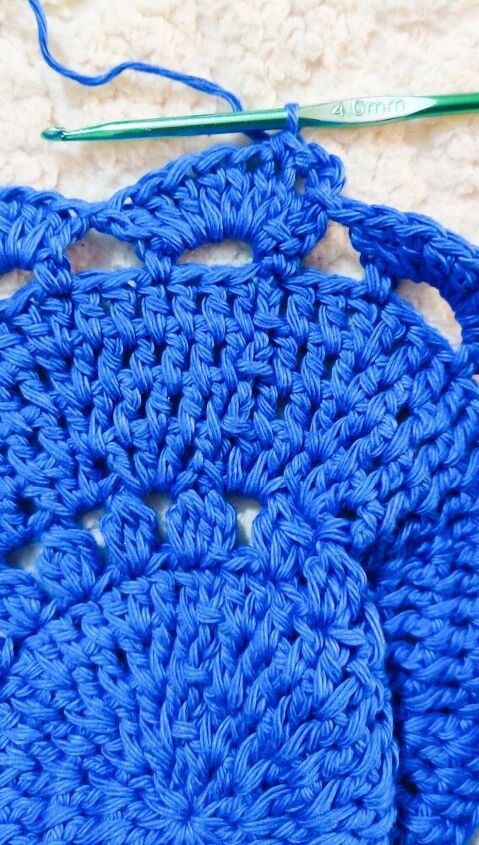
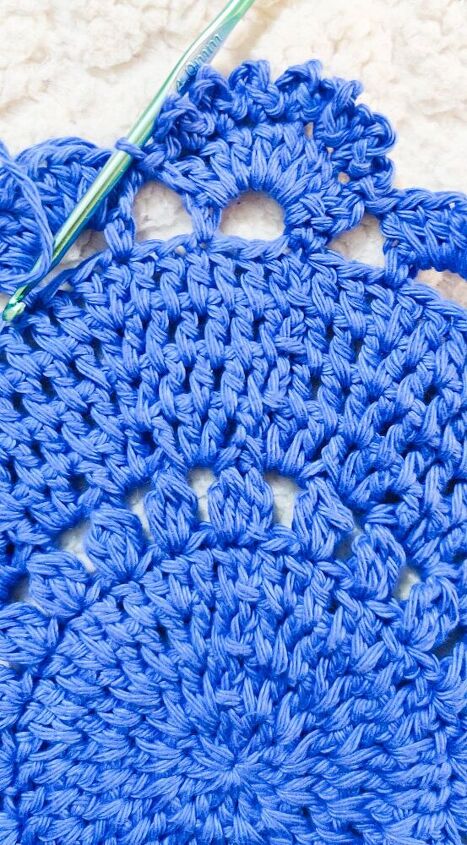
Border:-
Chain 3, 1 Single Crochet in the same stitch.
Repeat(Ch 3,1 Sc(in same space) for the remaining Double Crochets.
Slip stitch into the next space(i.e. the slip stitch from the previous round.)
Repeat((Ch3,1Sc(in same space)*7, SL(into next space))
Slip stitch and weave off.


Frequently asked questions
Have a question about this project?