


Crazy Easy DIY Cute Plate Chargers
WARNING… these DIY cute plate chargers are SO easy you won’t believe it! And the best part is they cost practically nothing to make!!
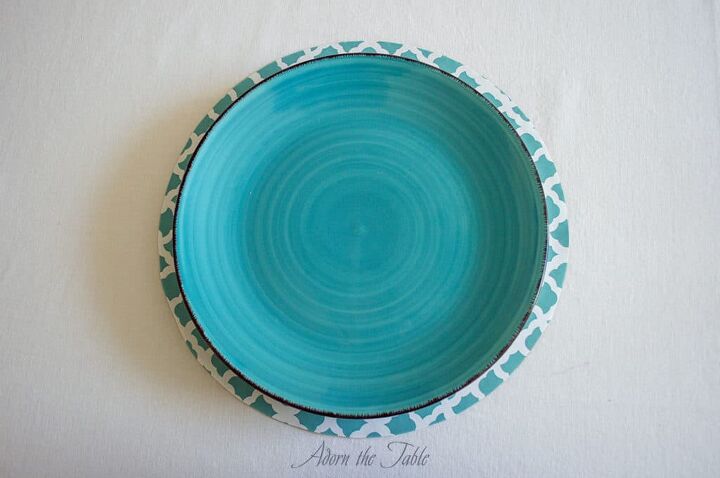
Charger plates are purely for looks. They have no function on your dining table. But when you can make plate chargers for practically nothing, it is worth it to use them, because they add that punch of color that really completes your table setting.
To make these plate charges, I reused cardboard circles from my take and bake large pizzas and found $1 rolls of cute contact paper from Dollar Tree. Two items – that’s all you need! That’s why these simple DIY cute plate chargers are wonderful! You won’t regret spending money on something you will rarely use. Plus, they are easy to store, or in this case, toss if you prefer.
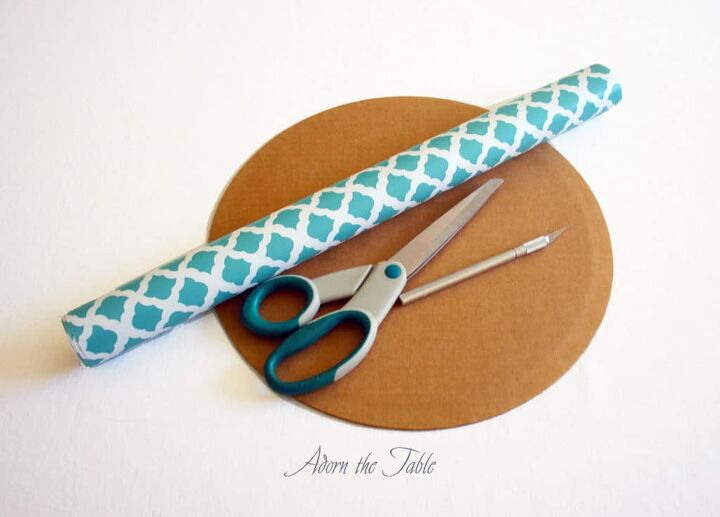
Supplies for DIY cute plate chargers
- Contact paper (2 rolls for 8 chargers)
- $1 a roll from Dollar store
- 12” Cardboard circles
- Mine are reused from take and bake large pizza
- Or you can buy 12” cake boards from your local craft store
- Scissors and/or craft knife
Budget: $2 for 8 chargers (crazy cheap!)
- Or $11 if you buy cake boards from a local craft store (still pretty cheap)
How to: Step-by-Step Instructions
Step 1
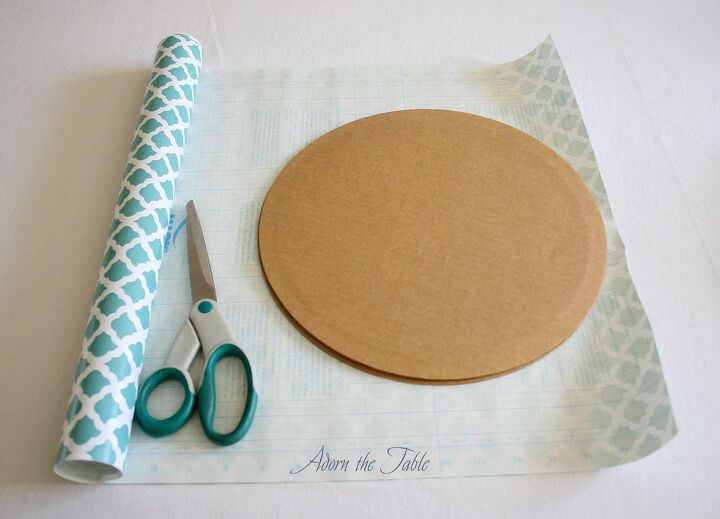
Save the cardboard circles from the large take and bake pizzas. If there is any food residue, wipe it off with a disinfectant wipe.
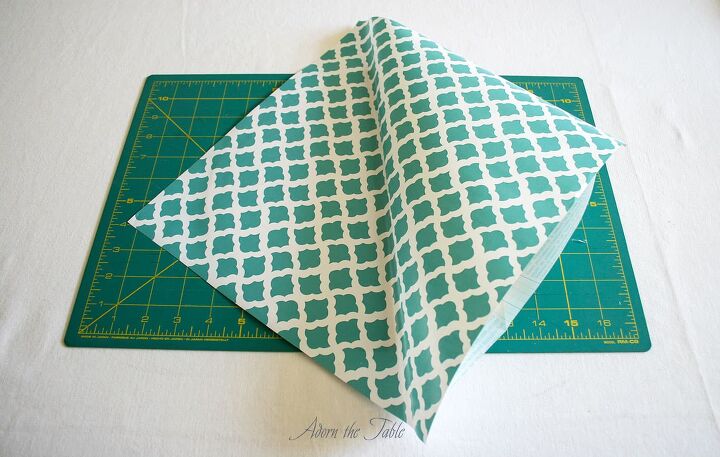
Roll out the contact paper, lay the cardboard circle on the contact form, and cut about ¼” from the edge. Note: my contact paper had a grid on the back, so the cut line was easy to follow.
Step 2
You now have a rectangular shape of contact paper, just a little wider than your cardboard circle.
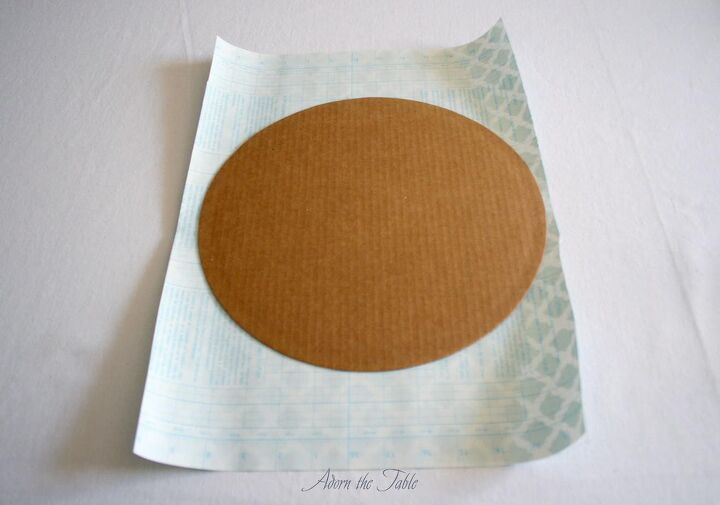
Step 3
Position the cardboard close to the short edge of the contact paper and cut a ¼” from the opposite side. You now have a square piece of contact paper.
Step 4
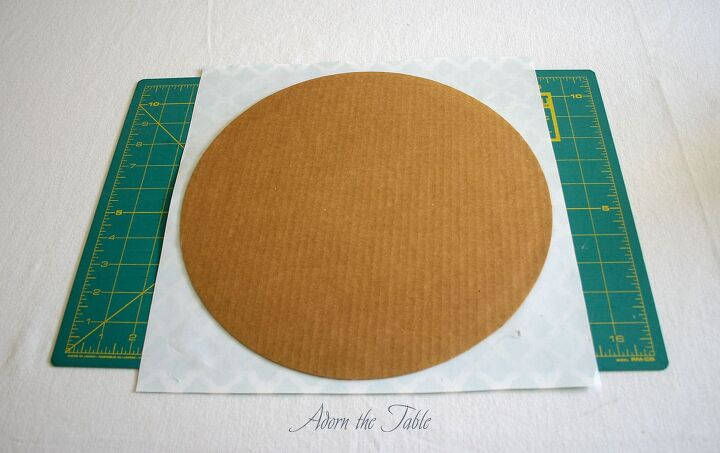
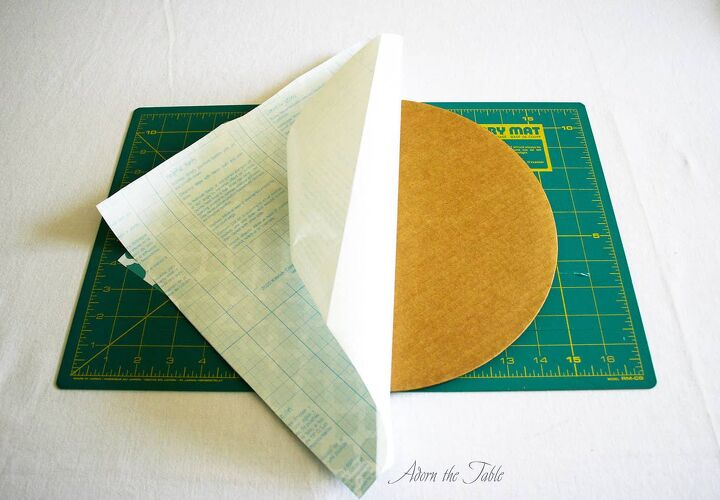
Peel away a few inches of the backing from the contact paper and fold it over to expose the sticky side of the paper.
Carefully align the cardboard circle a ¼” from the edges, so that it is centered on the contact paper.
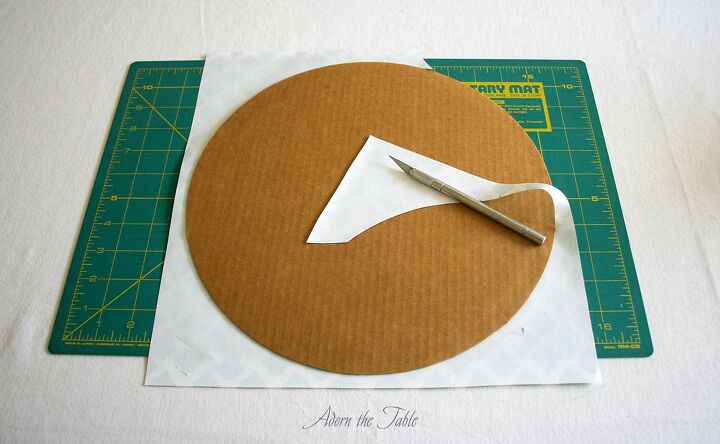
Press the cardboard onto the sticky side of the contact paper, then gently pull off the rest of the backing, as you smooth the sticky side down at the same time. If there are any bubbles, find a firm straight edge (like a credit card, or ruler) and gently push them out from the center to the edge. *with contact paper you should easily be able to lift it off and reapply, as it isn’t super sticky.
Flip it over, so the contact paper is face down and the cardboard circle is on top.
Step 5
Cut around the edge of the circle with scissors, or a craft knife.
If you use a craft knife, be sure and cut on a self-healing mat, or a larger piece of cardboard, that you don’t cut through. Don’t do it on a wood table, or something that the craft knife can damage.
Flip it back over and admire your cute DIY plate chargers.
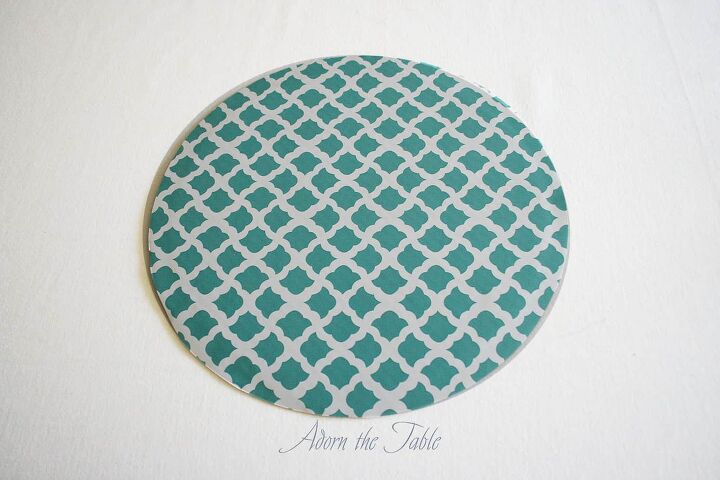
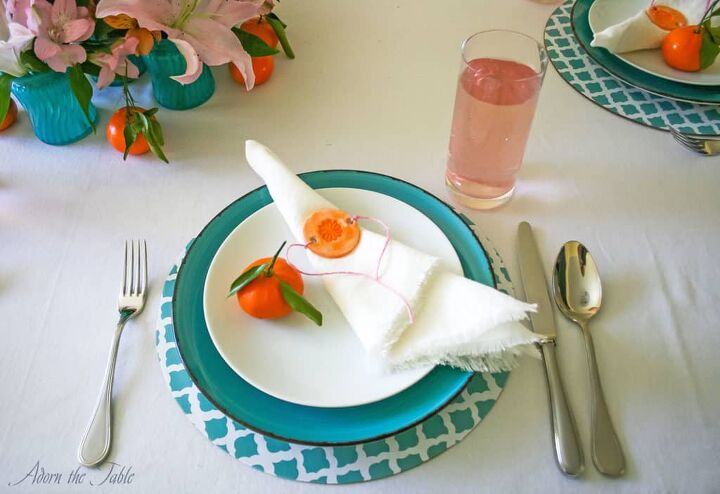
Don’t these charger plates look SO CUTE on my easy DIY Mother’s Day table setting! And SO simple, you can whip them up crazy fast for any gathering. Just keep those cardboard circles from your take-and-bake large pizzas.
Check out other easy DIY projects here.
*Note: you can embellish around the edge with ribbon or a string of beads to add a little more pizzazz to them.


Frequently asked questions
Have a question about this project?