


DIY Christmas Terrarium
My DIY Christmas Terrarium became a thing when I decided I wanted to feature one of my mercury glass ornaments that I have been collecting for years.
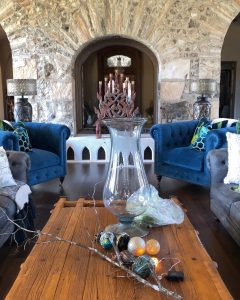
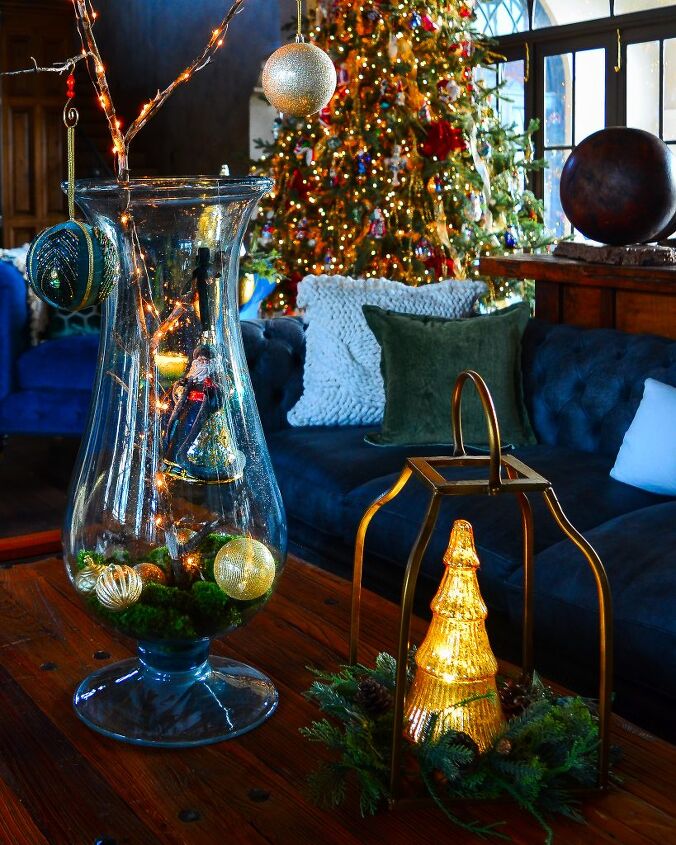
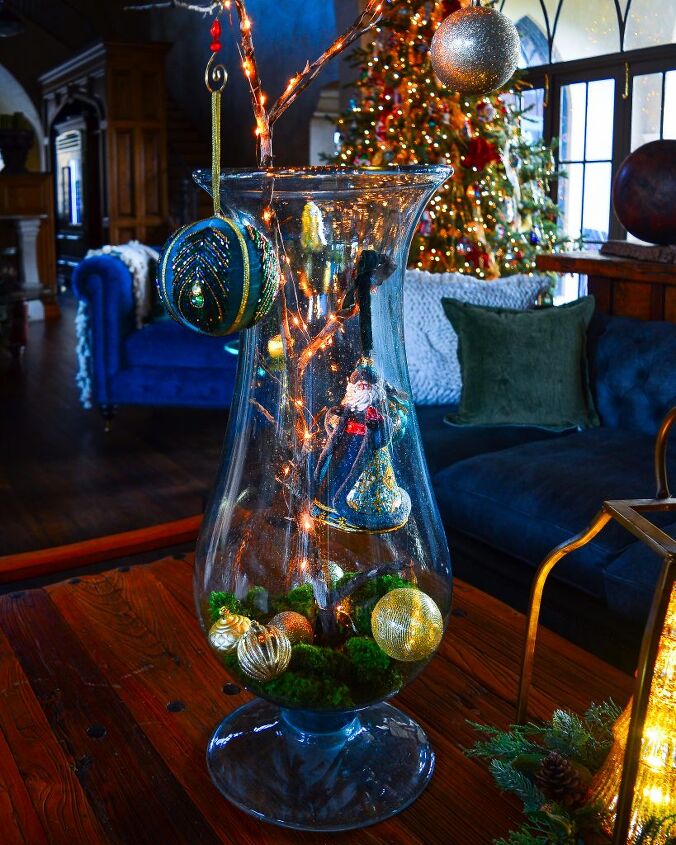
For the holidays, I wanted to feature our large floor hurricane vase on our coffee table in the living room.
I chose one of my favorite mercury glass ornaments to feature within the hurricane.
I then began thinking about how to safely hang him inside the glass hurricane.
I put this entire piece together in less than 20 minutes.
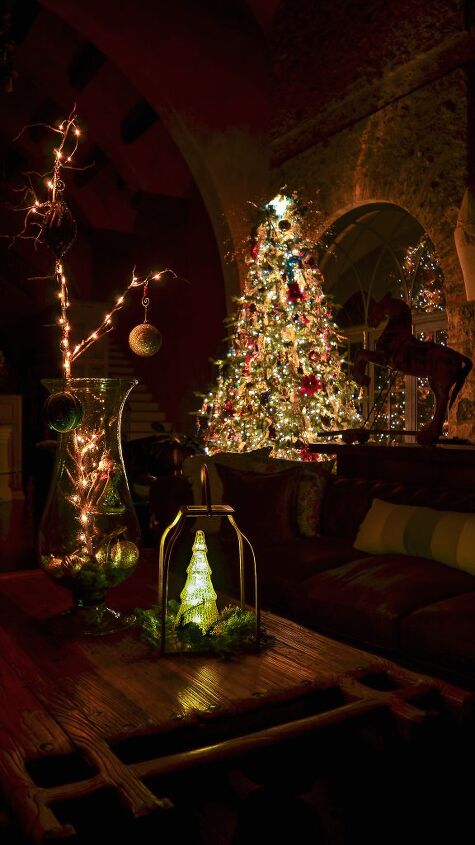
The lights come on automatically at dusk and it looks spectacular in front of our tree.
Let's learn how to make a terrarium! Below are all my supplies I used and the steps I followed to make this statement DIY Christmas Terrarium.
Supplies
Large glass floor vase (the bigger the better, and big enough to get your hand into it to work with the materials)
A tree branch from your yard that has small side branches ( you will need to trim it to fit within the dimensions of your vase)
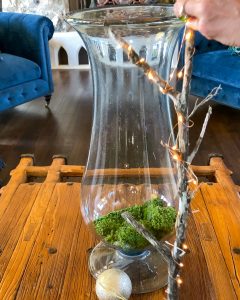
Moss
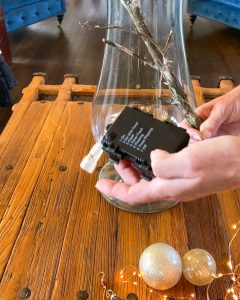
Battery operated lights with a timer function (6 hours on 18 hours off so that you do not have to turn it on each time)
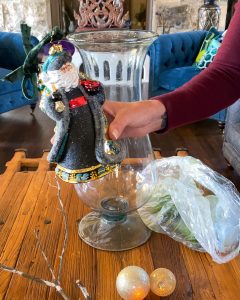
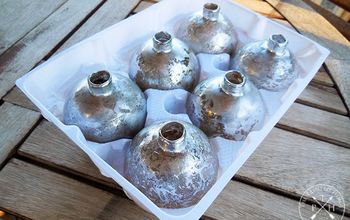
Ornaments to place in the bottom ( I used 5 gold balls of different sizes and texture)
Ornaments to hang on the outside (I used 3 balls of different shapes that match the theme of my tree)
A feature ornament ( I used my 2019 limited edition mercury glass Christopher Radko Santa)
Velvet ribbon (optional)
Decorative ornament hangers (optional)
Directions
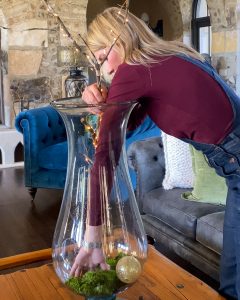
- Place your vase in the spot where you are going to feature it.
- Place moss in the bottom of the glass vase. You want to place enough moss in the bottom that it will hide the battery pack for your twinkle lights.
- Wrap your branch in the twinkle lights starting at the bottom of the branch. You want to start the lights on the end with the battery pack so that it will be at the bottom under the moss.
- Place your branch within your vase to make sure it fits.
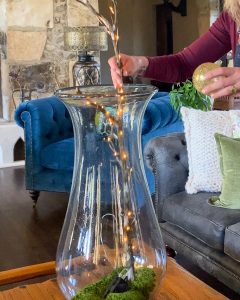
- Add in the gold balls (or whatever color you chose) around the bottom of the vase in clusters and singles.
- Remove the branch and carefully hang your feature ornament on the branch of your choice. I chose a very sturdy branch close to the bottom to support my Santa. I also tied a green velvet ribbon in a bow to use as the hanger for the Santa.
- Finish off the top branches by hanging a few decorative balls. I did not hang many as I want the Santa to be my feature.
- TipsI created my terrarium at around 2 pm one afternoon, and left the lights on steady until 6 pm. Then I turned on the timer with the steady function. I covered the box back up with moss, and the terrarium automatically turned itself off at midnight and back on at 6 pm the next day.
- You can put a small amount of hot glue on the back of the velvet bow to hold the Santa in place on the branch.
Gather your supplies and place your vase where it will be displayed.

Add moss to the bottom of the vase.
Turn your lights on steady. You will place them on the timer once it gets dusk.
Wrap your branch with the lights starting with the battery pack end at the bottom of the branch.
Place branch in the vase and check that it fits.
Add the gold balls to the bottom and make sure that you have enough moss to eventually cover the battery pack.
Add a sturdy hanger to your feature ornament. I used green velvet ribbon.
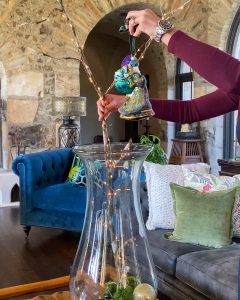
Hang the ornament from a branch within the glass vase.
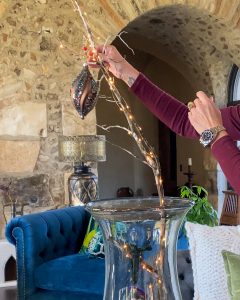
Add a few ornaments to the branch outside the vase.


Frequently asked questions
Have a question about this project?