


DIY Fall Centerpiece From the Dollar Tree
As I put away my summer dining room decor and centerpiece I realized I didn’t have an early fall centerpiece to put out. I have a bunch of items that I bought from the Dollar Tree two weeks ago so I knew I could put something together to decorate my table. So today I am sharing with you a tutorial for creating a DIY fall centerpiece using those items.
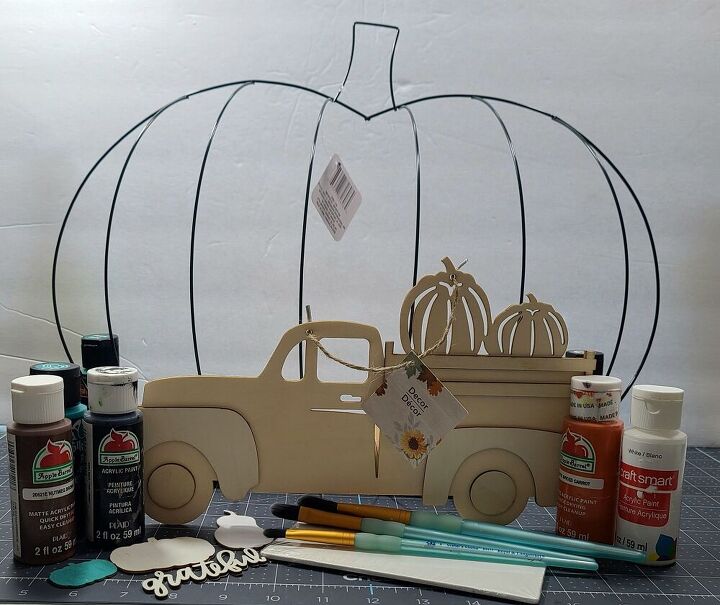
- To make this DIY fall centerpiece you need:wood farmhouse truck
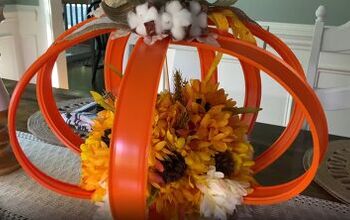
- pumpkin wire wreath form
- acrylic paint & paint brushes- I used spiced carrot orange, sage, aqua, black, and gray.
- spray paint (optional- You could use acrylic.)
- Spanish moss
- 4×6 canvas
- vinyl, stencils, or pencil to use this carbon copy method
- wood or something to have the centerpiece to stand up on
- hot glue gun & glue
- wood glue (if you’re using real wood)
- paper towel & water (optional)
Paint Wreath Form, Canvas, & Truck
Pumpkin Wreath Form
Use your spray paint to paint the pumpkin wreath form. I used white spray paint because I want to put orange pumpkins in the bottom of the form and there’s pumpkins on the truck. You can paint it whatever color you’d like. You can also use acrylic paint if you don’t have spray paint. It’s just really painstaking! When it is dry, you can paint the “stem” a different color if you want. I painted mine in a chalk paint called Spanish moss. It was the best color that I had for it; yours doesn’t have to be chalk paint.
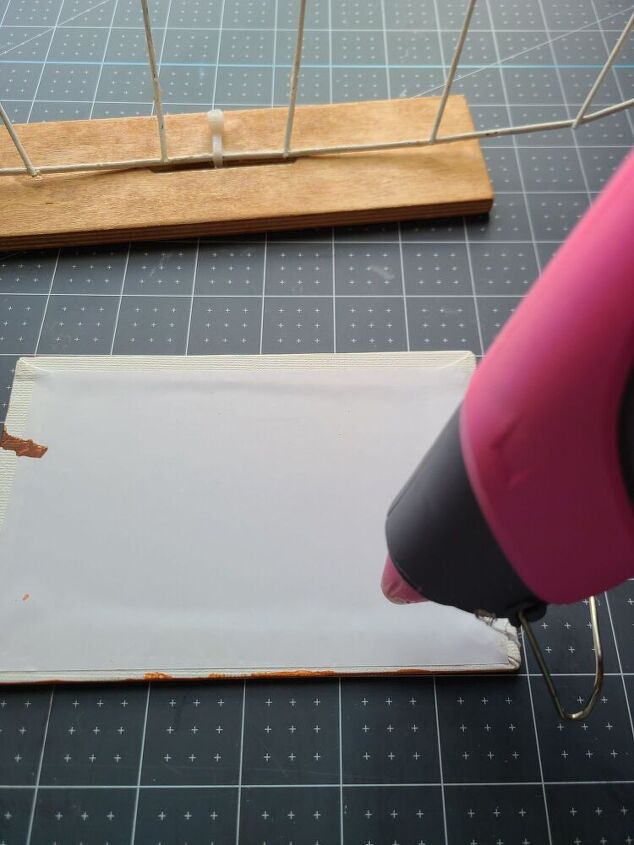
Canvas
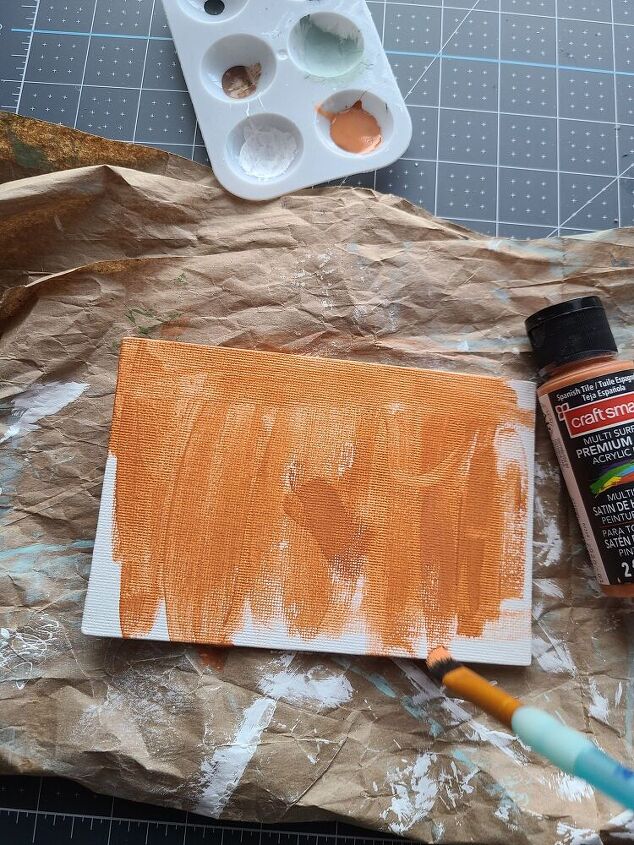
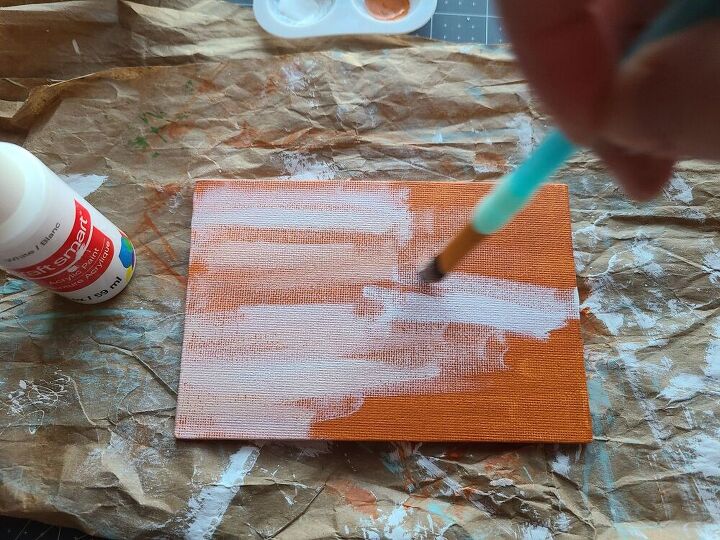
While that is drying, you can go ahead and paint the base of your canvas. First I painted mine in a burnt sienna color, but it seemed way too dark. I used a wood base to sit the entire DIY fall centerpiece on, so I decided to go for a wood type look. I mixed the burnt sienna with a little white and brushed it randomly, in a horizontal motion, across the canvas. Then I did the same with nutmeg brown.

Truck
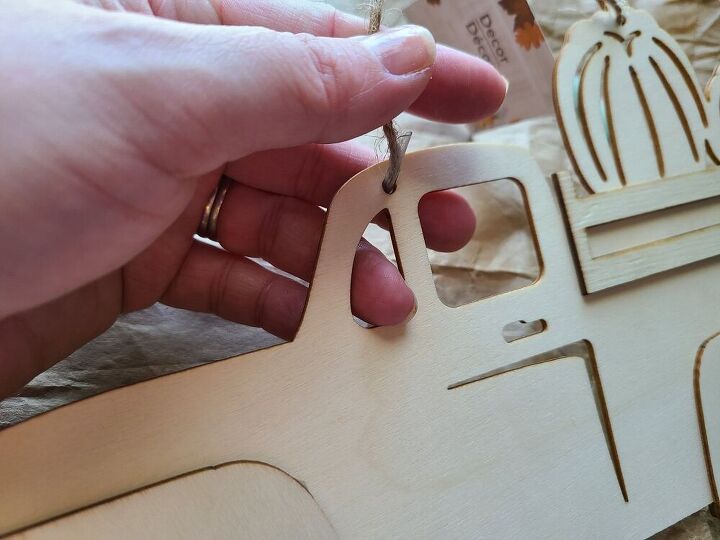
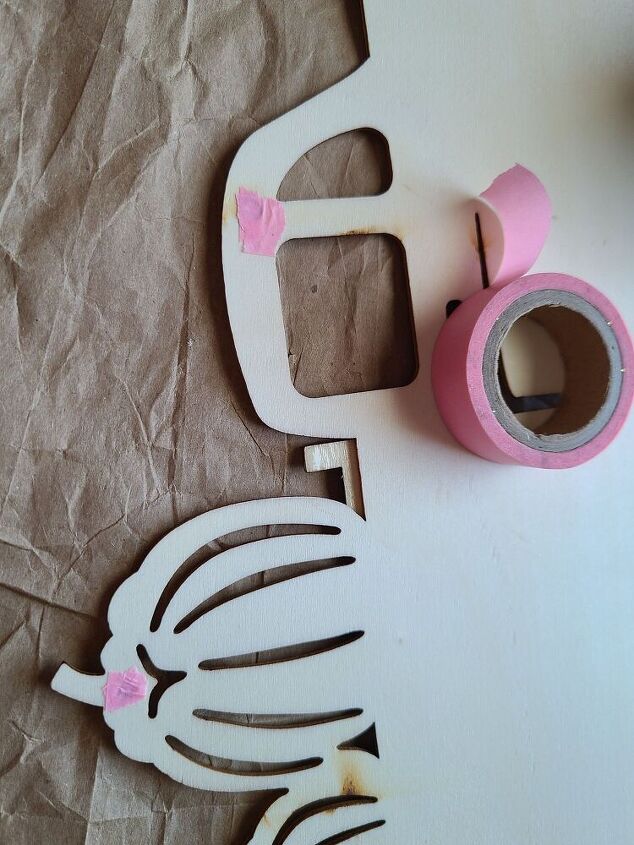
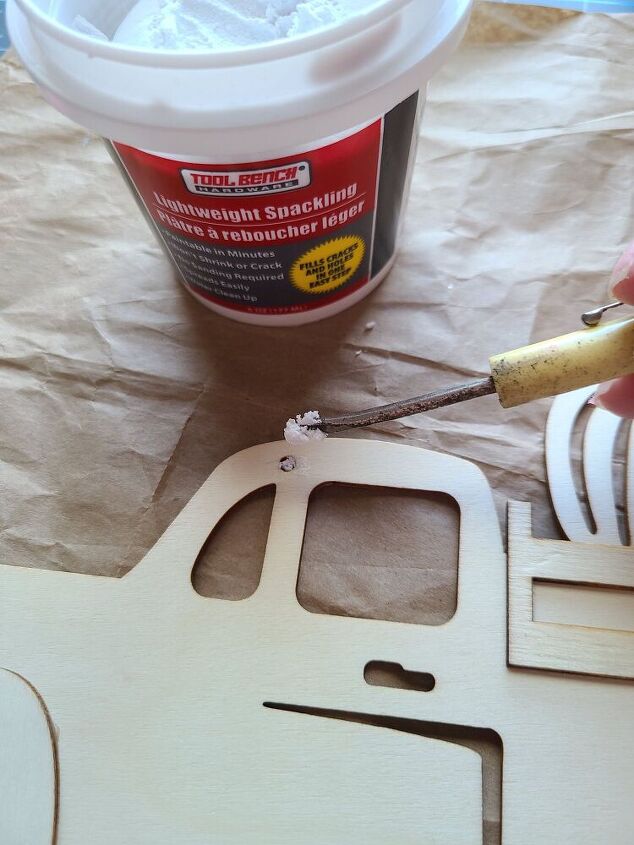
This centerpiece will sit on my dining room table, and my early fall theme, throughout my home, is orange, white, and aqua. So I designed it around those colors. Before you begin painting the truck, remove the twine that’s used to hang it from. There are two holes left, and I chose to use some Dollar Tree spackle to fill them. If you want to do that you can, or you can leave it like it is. It’s not really too big a deal.
How to Fill the Holes
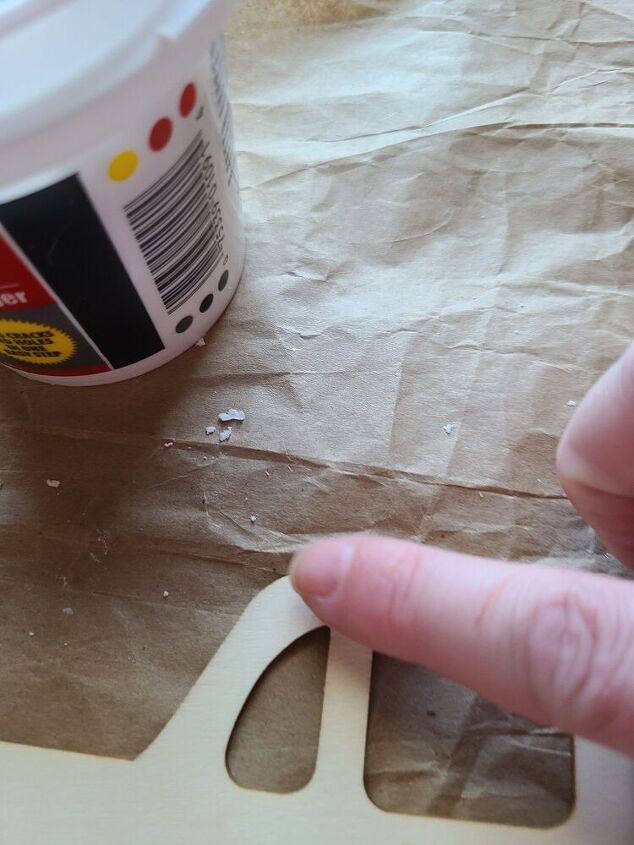
If you choose to fill them with the spackle, you need to put something on the back to stop it from just going out. I used two tiny pieces of washi tape and placed one over each hole. You can use any tape you wish. Use either your finger or tool to scoop up a small amount of spackle and press it in the hole. I started by using a tiny flat head screwdriver, but my finger worked so much better! With that Dollar Tree spackle, it was dry and ready to paint in like two minutes.
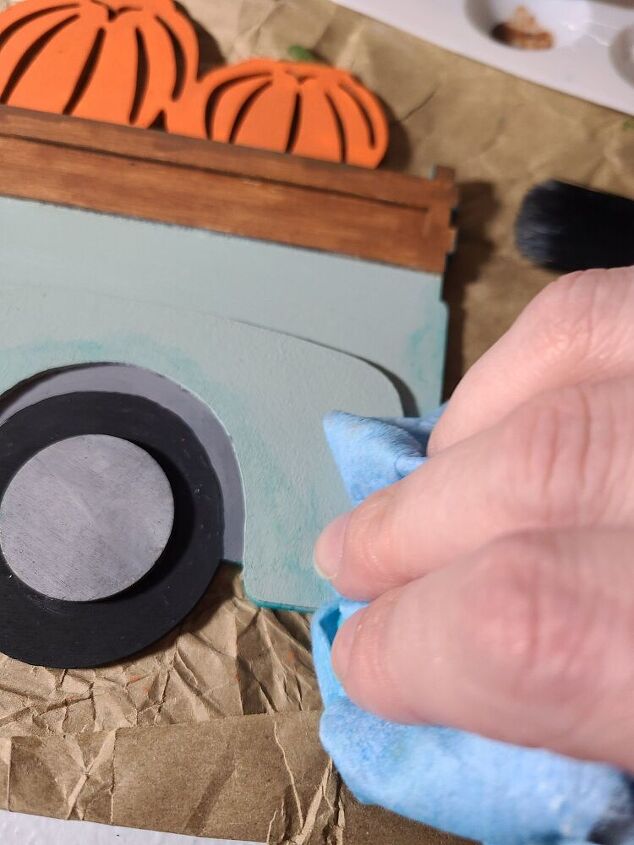
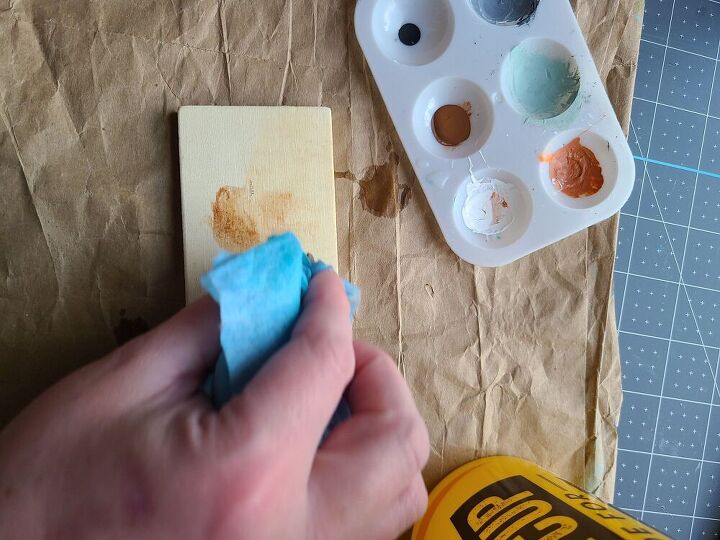
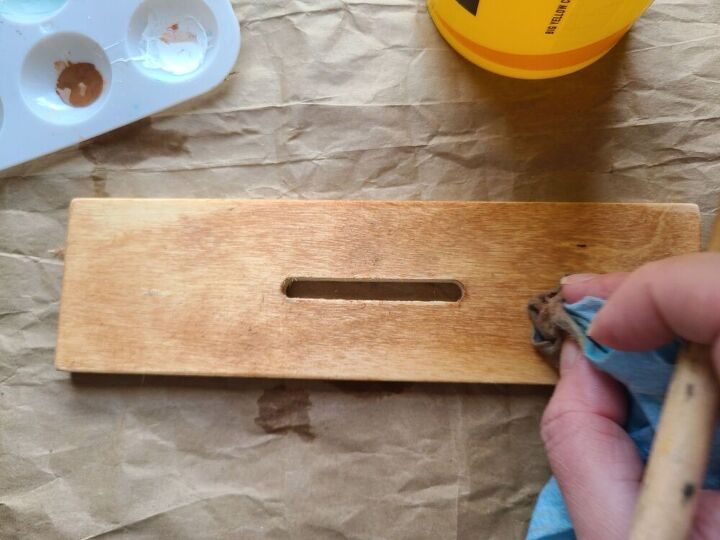
When that’s dry, it’s time to paint the truck. I painted the truck portion of the wood sage since I didn’t want too much aqua or too much orange. You can use colors that will compliment your decor. Next paint the pumpkins, wheels, and wood around the bed of the truck. I used brown on the bed, but really lightly, so it looked more like wood.
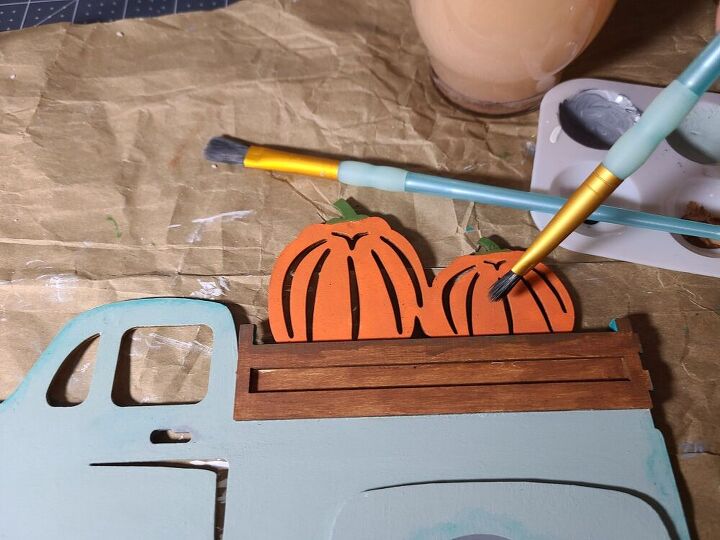
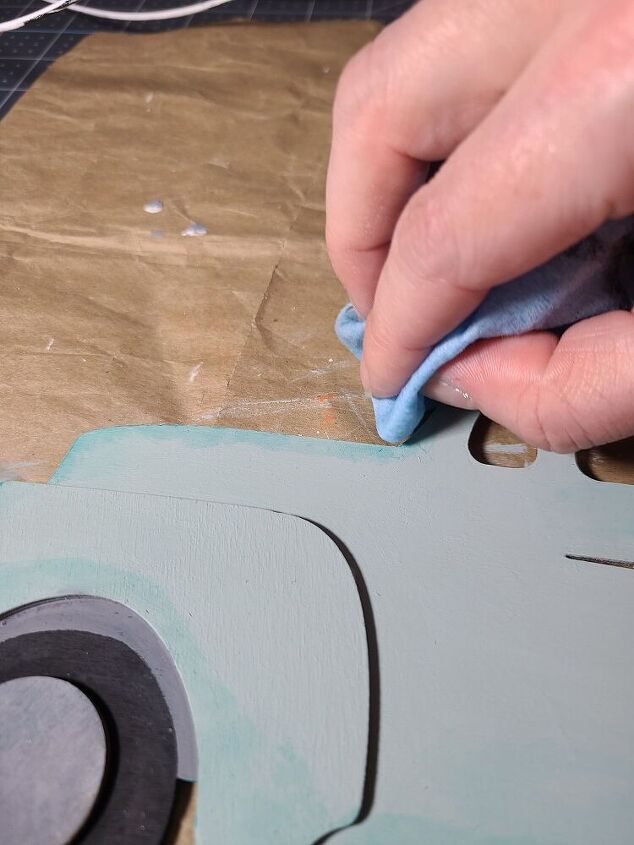
I wanted to add some aqua to the DIY fall centerpiece, so I decided to add some aqua to the truck. Since the truck looks like an old model, and they tend to rust around the edges, I wanted to use the aqua in place of rust. In order to that you will need a cup of water and a paper towel. Dip the paper towel in a very small amount of the paint then into the water. Make sure you don’t have too much paint on it by dabbing it on paper or something first. With your paper towel, rub in tiny circular motions around all of the edges of the truck.
When your farmhouse truck is dry, you can add some hay or Spanish moss to the bed of it. Place a strip of hot glue to the bed of the truck, in between the two “wood” pieces that run under the pumpkins. Take some moss or hay and add it on top of the hot glue. This makes it look like your pumpkins are sitting on a bed of hay! I’m sorry that I didn’t get a picture of me doing that. It was kinda an afterthought, once I had it already on the stand. It will work a whole lot better by doing it now!
Create & Add a Design to the Canvas
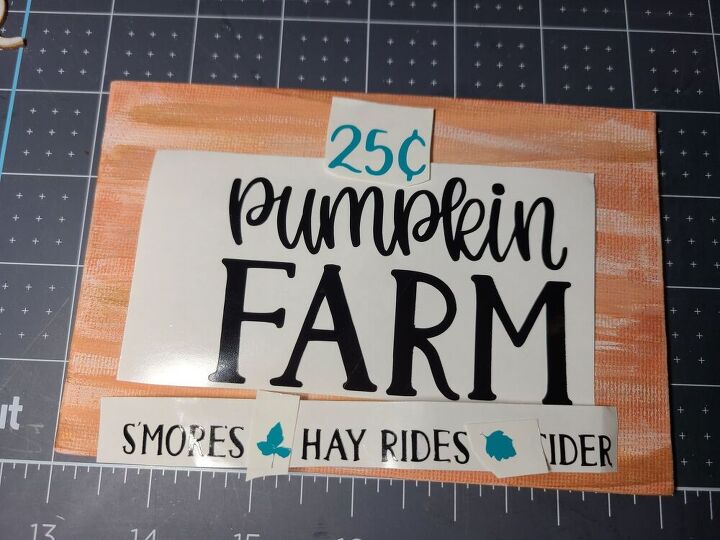
Since the truck will sit inside the wire wreath form, I wanted to add some hay or moss around it and make it like a pumpkin patch. I found a design on Cricut that says pumpkin farm, s’mores, hay rides, and cider with leaves and twenty five cents at the top. It is available with the Cricut Access subscription. I cut the design using black vinyl for the words and aqua for the leaves and the twenty five cents. Use transfer or contact paper and apply the design to the canvas.
If you don’t have a cutting machine you can still make a sign for your DIY fall centerpiece. You can use stencils from the Dollar Tree and your paint. They also have stickers that I’ve used before, and they look great. You can see them here on my decorative outdoor thermometer with deco mesh swag. Another great option is the carbon copy method, and all you need to create a beautiful design is your printer and a pencil! Check out my step-by-step tutorial here.
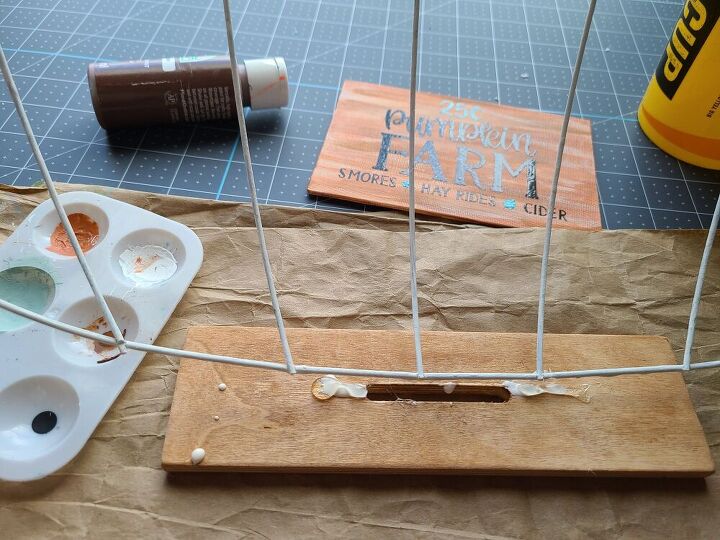
Attach the Pumpkin to a Stand
Now it’s time to attach the pumpkin wreath form to something that will make it stand up. You can use wood and cut two pieces, one that runs horizontally and the other vertically so it doesn’t fall backwards. I used a piece of wood that was attached to a “paint your own piece” from Michael’s. I got it from one of their grab bags. It held up a wood flower, and I was never going to use that part. It popped off really easy. Another great option to use is the fall pumpkin or acorn faux wood signs from Dollar Tree. Just pull the bottom wood piece off of the main part and use it as a stand. Keep the main piece for a future project!
You can either stain or paint the piece of wood that you’re using. If you’re using one from a Dollar Tree table-top sign it will already be painted. I didn’t have wood stain, so I used brown paint. I watered it down and applied it with a wet paper towel just like I did with the aqua paint. That made it look more like stained wood.
I’m going to be honest with ya’ll. It took me hours to get the pumpkin wreath form to stand up on this freaking piece of wood! If you have a router, making the hole in the middle longer might help you stand it up faster or easier. I’m not sure because I don’t have one. The way I finally got it upright was by using a zip tie, wood glue, and a piece of wood that originally stood a Dollar Tree chalkboard up.
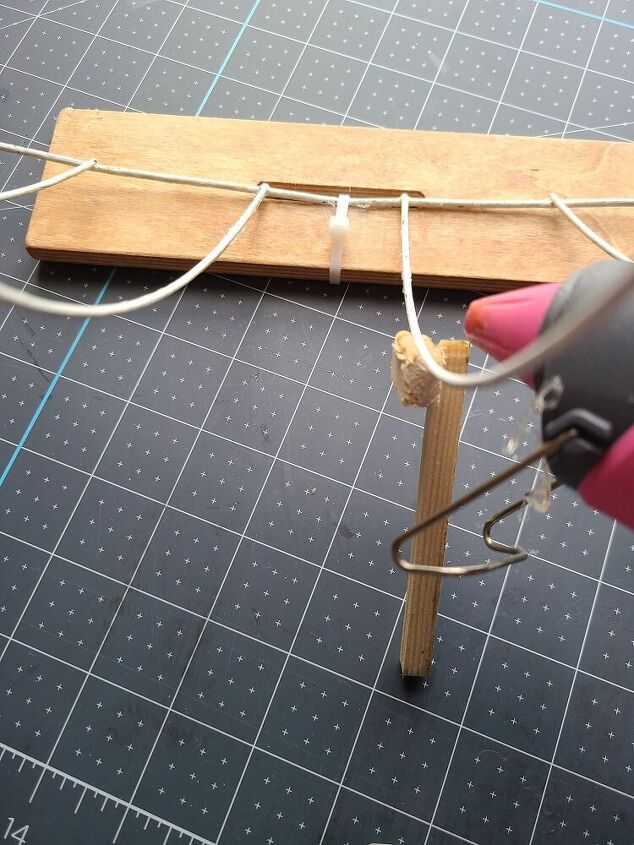
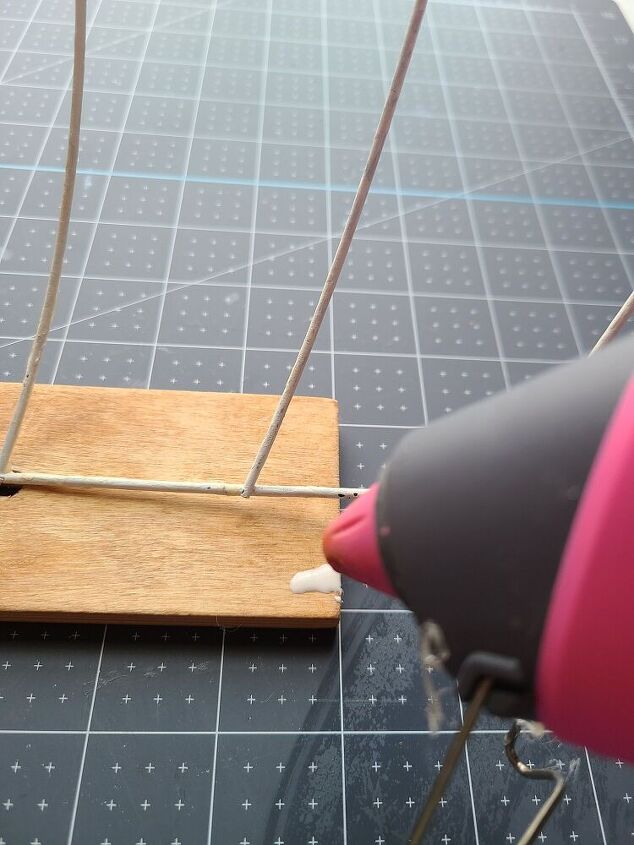
Ok, so this is how you do it. Place your wreath form on the stand and see where it will sit. Add wood glue on those spots. It will hit along the middle of the bottom and will rock back just a bit and two of the wires will hit in some spots. Add hot glue on top of those spots then put the wreath form on the stand. Put a zip tie around the form and the wood while it dries. If you don’t have zip ties, you can use painters tape, just make sure you don’t glue the tape to the form.
Next get a piece of wood, a popsicle stick, or something else that will hold it up like the back of a picture frame. I used a piece of wood from the back of a chalkboard that has a screw that allows you to move the wood piece higher or lower. It held the chalkboard up like a picture frame. Put a good amount of hot glue on it and place it on the back of the wire form. Hold it on while the glue dries & hardens.
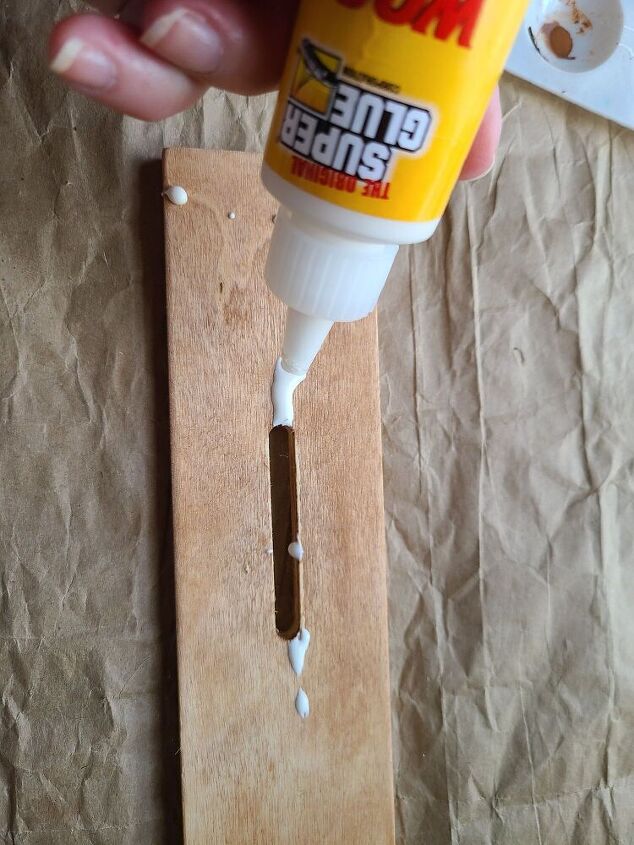
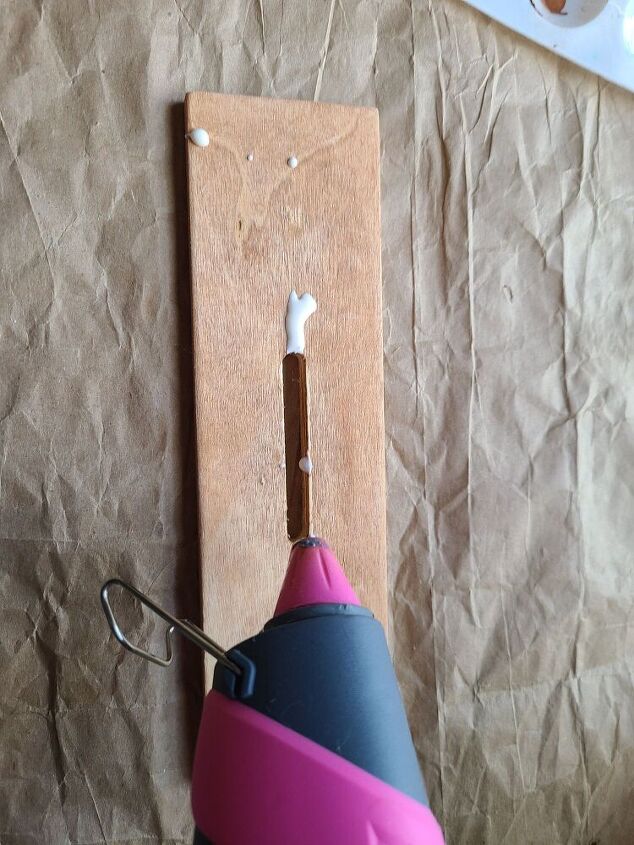
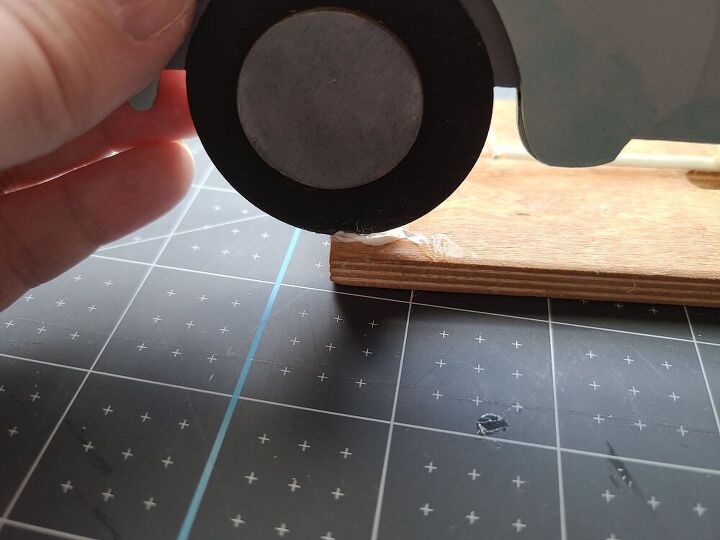
Place the Truck on the DIY Fall Centerpiece
Now attach the wood truck to the stand. If you didn’t add a wide stand, you can attach the truck to the pumpkin wreath form. Add wood glue to the places where the truck tires will hit the stand, then put hot glue on top of that. Put the truck on the glue and hold it while the hot glue dries. If needed, you can make “stands” (I don’t know what to call it, but basically the pieces that fold out on the back of the picture frame so it stands up) out of pieces of popsicle sticks of other thin pieces of wood. Glue those on the stand and allow the truck to lean just a little like a picture. This is just if you get so frustrated and tired of waiting on the glue to dry, ha! Wipe any extra glue off with a towel.
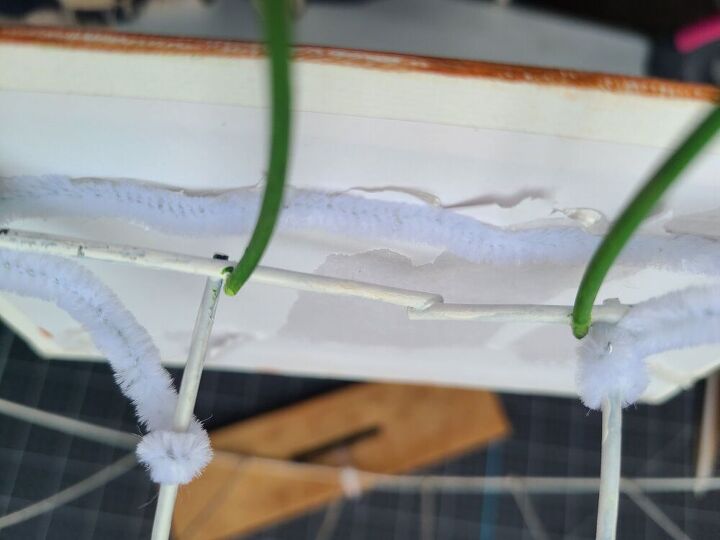
Hang Sign on the DIY Fall Centerpiece
Now you need to attach the sign you made to the centerpiece. Place a strip of hot glue, about 3″ long, across the back of the canvas about 1″ from the top, in the middle. Place a pipe cleaner on top of the glue and press it down. Make sure that the center of the pipe cleaner is in the center of the canvas. Next use the ends and wrap them around the top wires of the pumpkin wire wreath form. The middle of the form should be in the middle of the stem of the wire pumpkin. I hope you see what I mean from these pics!

Your DIY fall centerpiece is done!
I haven’t broken out my fall seasonal decor boxes yet, so I don’t have my hay bales. In it’s place I used Spanish moss to place between the truck and the pumpkin form. Then I placed a few styrofoam pumpkins on top. I will take more pics when I place the centerpiece on my table and have the hay in it. I just wanted to get this tutorial out to you so you can have all your decor made when fall gets here!
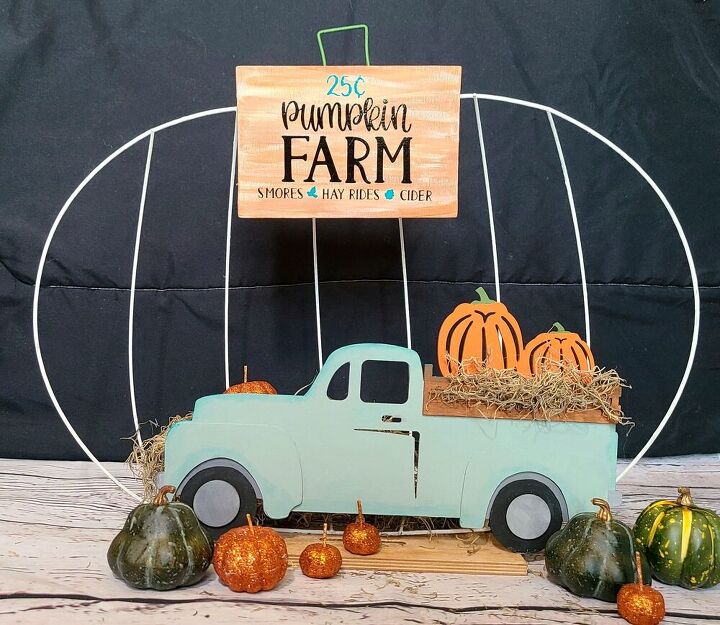
Isn’t he adorable?! I really love it. Usually I do things that are more “fancy” during November for late fall and Thanksgiving, so I love to have more playful things in early fall. I really love this farmhouse truck! Let me know in the comments if you use other ways farmhouse trucks. Also tell me if you have any Dollar Tree items that you don’t know what to do with, and you’d like me to come up with a tutorial for them!
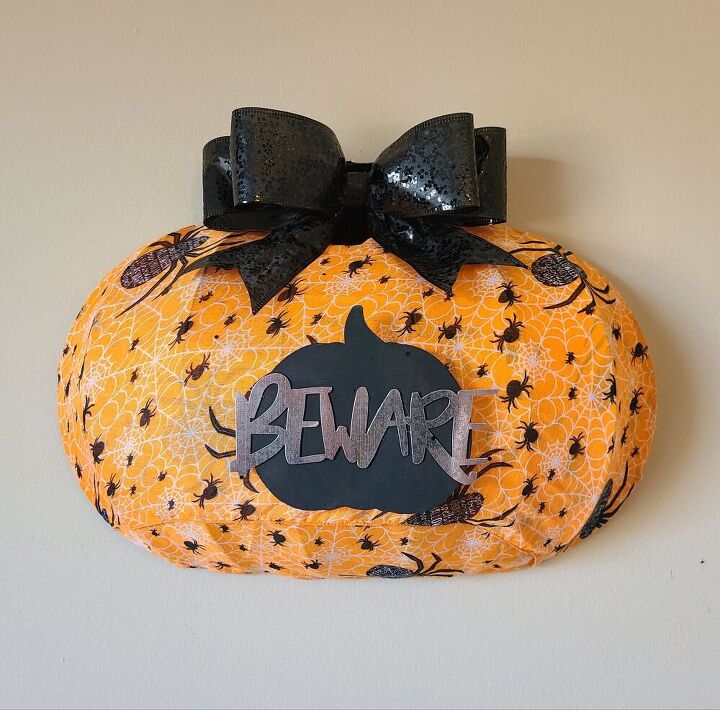
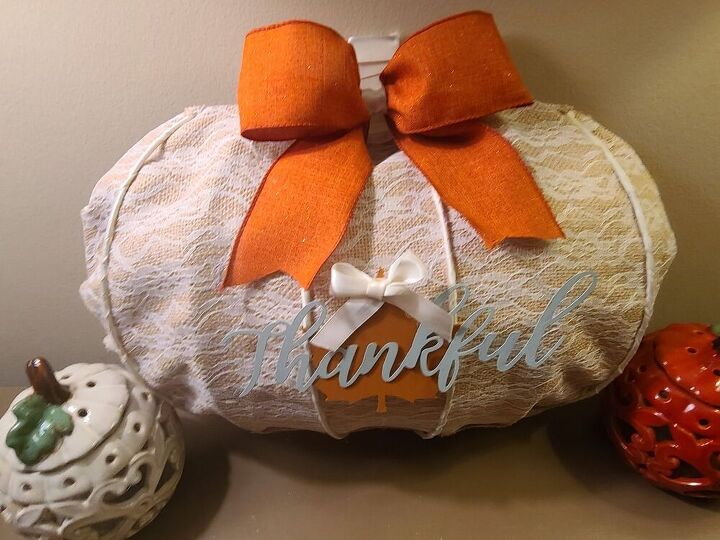
I hope that you enjoyed this tutorial. Make sure you pin it for when you’re ready to make it! If you know someone who loves farmhouse and fall decor, share this post with them! The pumpkin wreath forms are now out at Dollar Tree so if you have some, here are a few tutorials that you can use them for: an orange buffalo check wreath, this Halloween pumpkin wreath, and this beautiful burlap and lace wreath.
For my lovely blogger friends, make sure you link up with us on our three link parties, Happiness is Homemade, You’re the Star Blog Hop, and Traffic Jam Weekend. If you’re not a blogger, check out those posts for tons of inspiration and great ideas for recipes, DIYs, home and seasonal decor, gardening, crafts, fashion, family ideas, and much more!
Enter your email address below so that you don’t miss a thing from the blog! You’ll get an email when I add a new post, and you’ll never get any spam mail. Please follow me on social media as well. I’m trying to grow it finally (now that I have this blogging thing down a little more), so follow me and let me know when you do, and I’ll follow back.
If you like this tutorial and are looking for more fall decor ideas make sure you follow me on Pinterest. I am steadily adding to my fall decor board.
You’re the Star Blog Hop

Christian Apparel for Women That You’ll Love!

How to Make a Bow for a Wreath

Burlap Wreath Tutorial

Reversible Dollar Tree Pumpkins Tutorial
Resources for this project:
See all materials


Comments
Join the conversation
-
All lovely ideas, and I just happen to have one of those pumpkin forms that had been a fail😻
-
💖💖💖


Frequently asked questions
Have a question about this project?