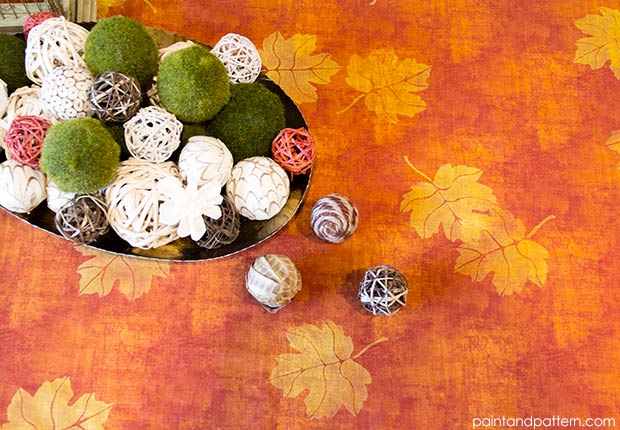
How to: Stencil With Discharge Paste for an Elegant Autumn Table

Royal Design Studio
by Royal Design Studio
Summer is fading and soon Fall will be upon us, with more time spent indoors. What a perfect time for a quick stencil project to brighten your tabletop through the Thanksgiving season. This tutorial walks you through the easy steps to stencil with discharge paste and a maple leaf stencil. It can be used on an existing cotton tablecloth or one you create with purchased fabric.
Stencil Supplies


Maple Leaf Stencil (Free during the month of August with purchase)


Jacquard Discharge Paste


1 Stencil Brush


Paper Towels, Painter's Tape


Discharging is the process of removing dye from fabric in a controlled manner. Jacquard Discharge Paste stenciled on any natural fiber fabric to create a pattern of color removal. Its thick viscosity makes it ideal for using on fabrics stencils. Discharge Paste will safely remove color from natural fibers and is also safe for use with silk. Unlike bleach, Discharge Paste will not weaken or deteriorate the fabric.
Stencil with Discharge Paste Step-by-Step


This stencil project uses a single leaf motif that is scattered randomly across the tablecloth to create an allover pattern. We recommend that you start in the middle and work out, turning the leaf in different directions as you go. Our tablecloth was created using two "layers" of leaves to the create the pattern, as outlined below.


Step 1: Load just the tips of a 1 stencil brush with Discharge Paste. Offload the excess by swirling onto paper towels. Brush the paste through the stencil using a firm, swirling motion to cover completely.


Step 2: Lift one edge of the stencil to check your coverage. The Discharge Paste will go on clear, but you will be able to see it on the surface as it will darken the fabric slightly while it's wet. If you want to ensure complete coverage of the Discharge Paste for a more even color removal, go over each leaf motif twice with the stencil brush. Continue stenciling the leaf motif randomly over the entire tablecloth, spacing them about 1 apart. Allow to dry.


Step 3: Once the Discharge Paste has dried (approx. 15 minutes) you will use hot steam iron to activate the paste and achieve the desired amount of color removal. The longer you keep the heat on the fabric, the more the color will "discharge". Do this in a well-ventilated area.


PRO TIP It is very important to iron the fabric on a proper surface, like an ironing board, if you do it on a hard surface the vapor emitted from the iron will wet the fabric, and this will affect the discharge process.


Step 4: Once you have discharged the color from all the stenciled leaves, assess your design arrangement. Now, it's time to add some additional leaves in between and layered over the first leaves to create a more "filled in" pattern.


Step 5: Stencil additional leaves following Steps 1-2 above. To create a "layered" look, simply place some leaves partially positioned over previous stenciled leaves. Apply the Discharge Paste overall through the stencil. Allow to dry.


Step 6: Iron again to remove the color.


Wash your tablecloth to remove and residual Discharge Paste before using.
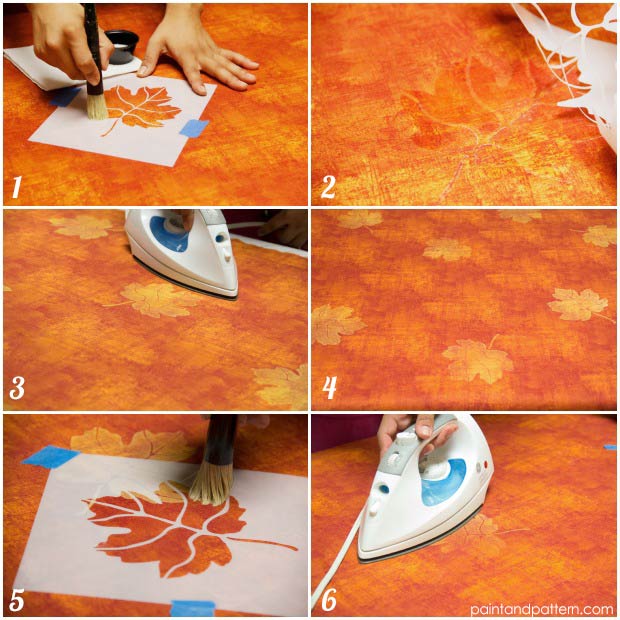
Different fabrics use different kinds of dyes, so your color removal can be more or less that what is shown here. But part of the beauty of stenciling with Discharge Paste is that the color removal can be very random. You can also play with the amount of color removal by varying the amount of pressure on the iron and time you hold it over the Discharge Paste to create different effects. Less time and pressure = less color removal.


Check out more Thanksgiving and Fall stencil projects, ideas, and tutorials on our blog Paint + Pattern here:
Frequently asked questions
Have a question about this project?
Comments
Join the conversation
Next