


Creating Your Own Halloween Village Pieces
$20
2 Hours
Easy
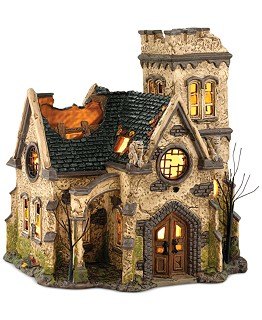
I have wanted to create a spooky Halloween village for awhile now. So much fun to build it piece by piece until you have a thriving spook town all your own. Every time I found a piece I loved though, I was put off by the cost. Spending $110 on just one piece like this beautiful Department 56 haunted church just wasn't in the budget.
I decided I would just have to make my own! It started with this discounted Christmas church! Yep, a cheap Christmas village set piece.
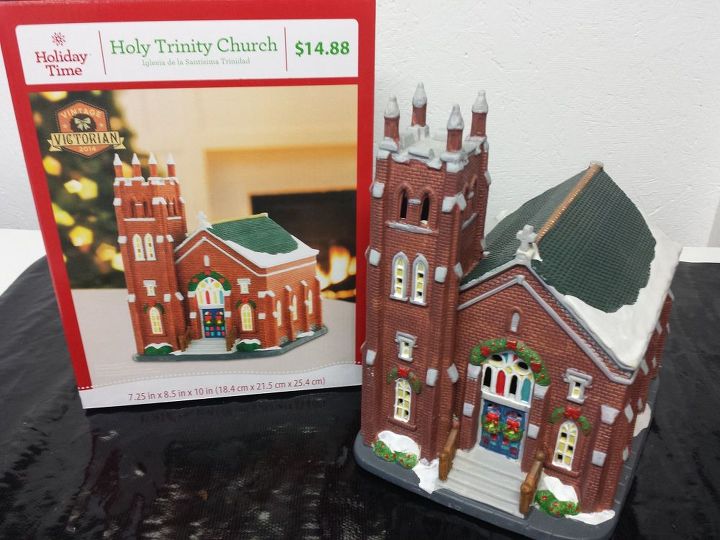
I needed to change a few of the churches features. Christmas wreaths, for example, are beautiful at Christmas time, but not so much at Halloween.
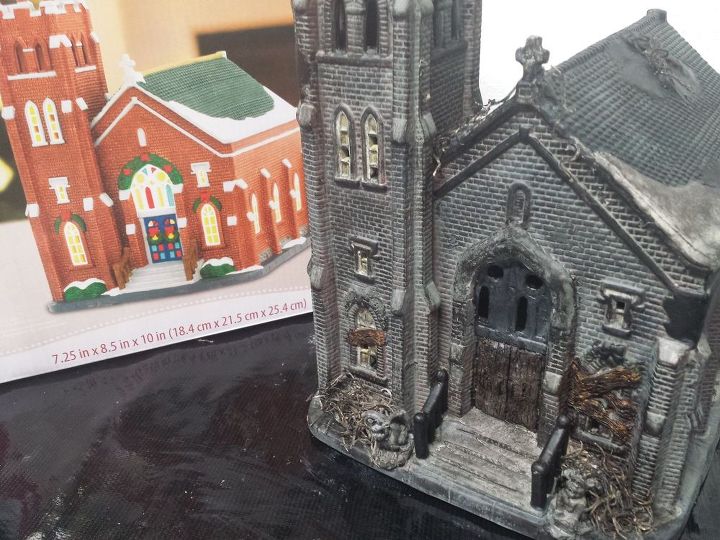
So instead of spending $110 for one piece from the name brand collection, I spent $15, plus a little bit of clay and a little bit of paint! For under $20 I have a creepy one of a kind building for my creepy one of a kind Halloween village! Now I can't wait to add more pieces to the collection!

Want more details about this and other DIY projects? Check out my blog post!
Comments
Join the conversation
2 of 43 comments
-
I love this so much! Great job!
-
Thank you for your great idea. I wanted to make my own out of cardboard but I believe your idea is much better.


Frequently asked questions
Have a question about this project?
Have you done anymore building's