


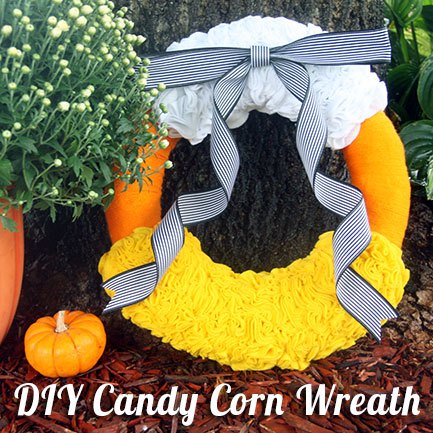
DIY Candy Corn Felt Wreath
I am crushing on everything candy corn this fall! Well, here is a candy corn DIY project, a felt candy corn wreath!
I won't lie, this wreath was a lot of work... it took some time to cut out all of the felt circles. I worked on it A LOT this weekend and finished it up with a simple black and white striped bow today. I am in love with how it turned out!
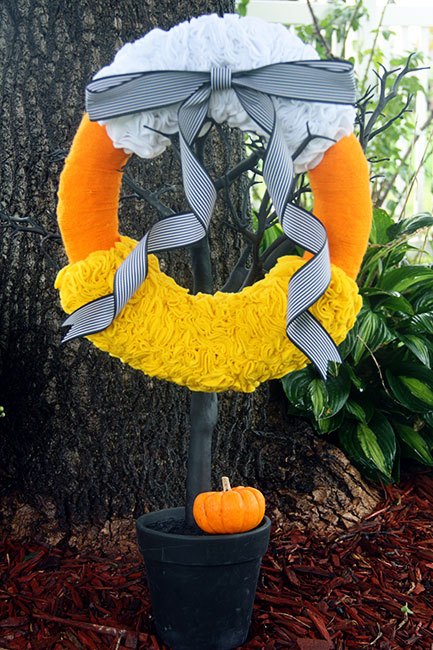
It has been gloomy and rainy here in St. Louis since Friday! Off and on rain and even a tornado warning nearby in Illinois today. We are supposed to have some 'normal' fall weather here once the rain clears by Thursday. Since it was SO gloomy indoors today, I decided to take the wreath outside and photograph it under a tree in our yard that protected us from the rain sprinkles. There was a break in the rain and I knew I would get a lot better photos outside. I was putting up my Halloween decorations today and I decided to try hanging the wreath on my black Pottery Barn Halloween tree. Oh my goodness, I loved how it looked... a candy corn topiary!! Isn't this the cutest??!
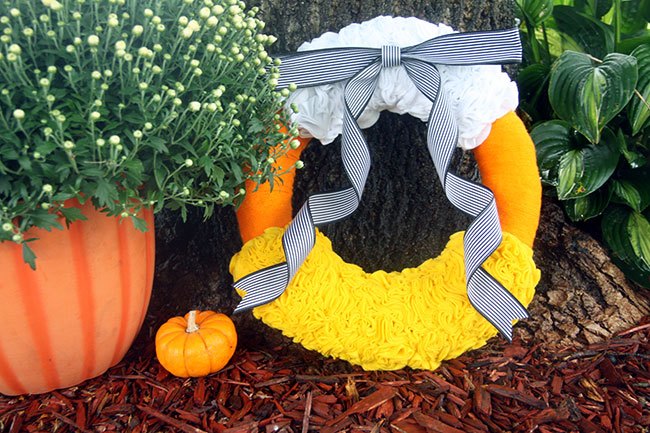
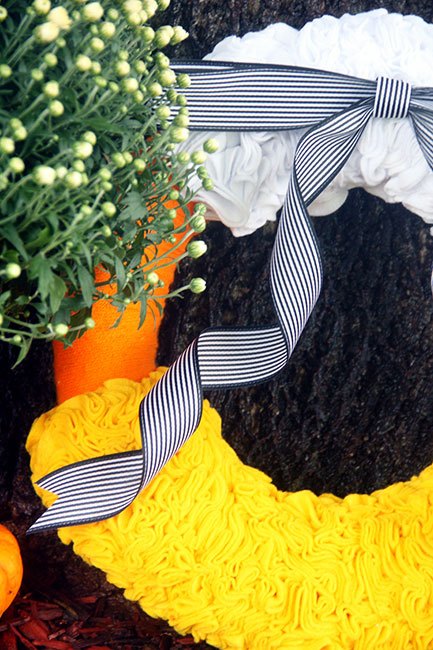
I also brought out some of my items that I plan to decorate my front porch with (once the rain subsides later this week). Who doesn't love mums, a pumpkin pot and a baby pumpkin as props? I really love the different textures and colors on this candy corn wreath.
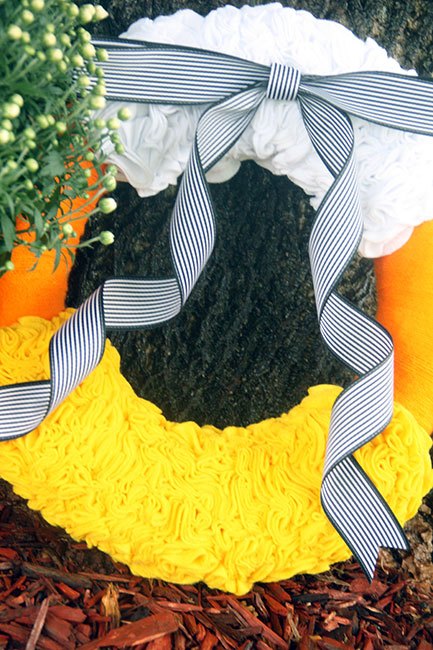
I usually do really full bows with my Bowdabra maker, but I wanted to create a simpler and flatter bow for this wreath. I thought the wreath was already 'full' enough with all of the waves of felt. I found a simple (and easy) bow tutorial on Pinterest from Ann at On Sutton Place. She has you cut your ribbon into three different lengths (36", 24" and 6") and then you staple the bow together! Seriously, it was SO easy... I am going to be making this bow a lot in the future (in addition to my full bows still, too!).
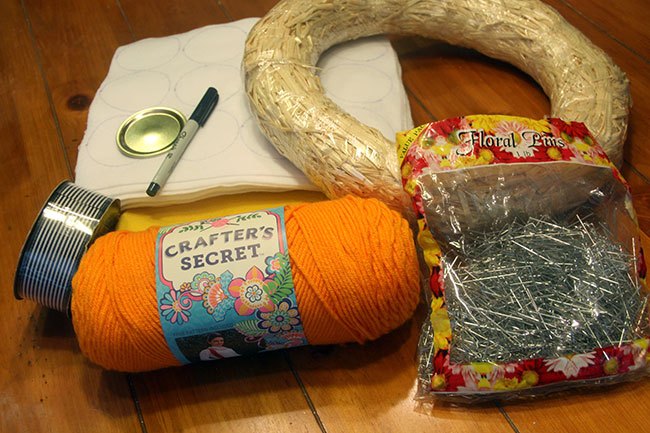
So, how did I make this wreath? Here are the supplies, I bought 16 sheets of felt (4 for $1.00) in two colors (a total of 32 sheets), a straw wreath form, ribbon, yarn, headed pins (not the ones pictured, use the ones with the little balls on the back of them) and a mason jar lid to use as an outline for your felt circles. Also, you may want to invest in a pair of fabric scissors to use for cutting the felt into circles.
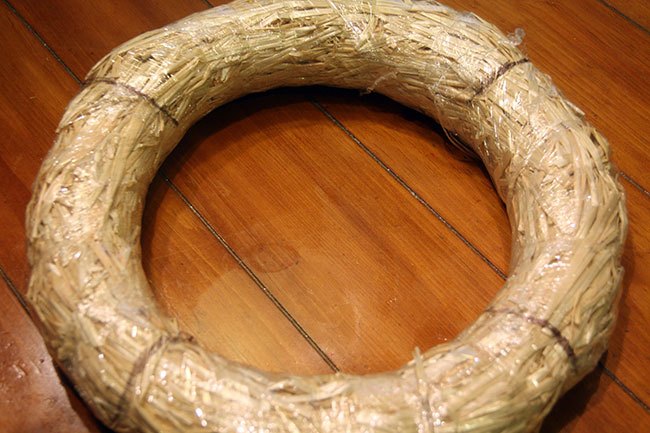
First, block off your wreath with a black marker.
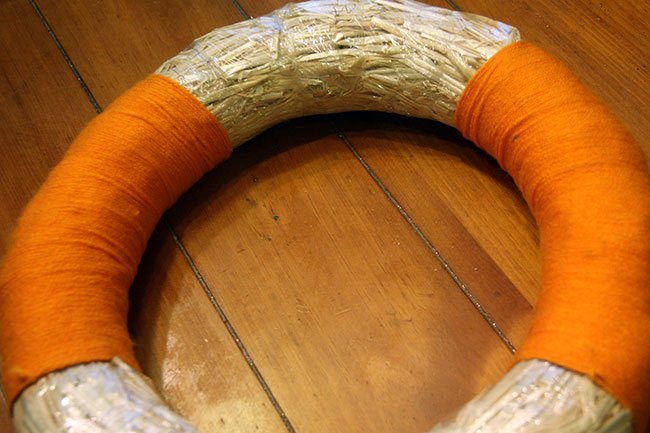
Wrap your yarn around the middle section. This doesn't take as long as you would think it would... not nearly as long as it took me to cut out all of the felt circles!
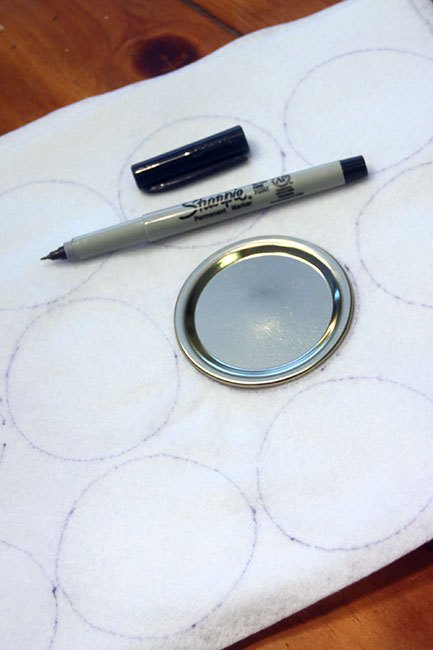
Trace circles around mason jar lid and cut out circles with fabric scissors.
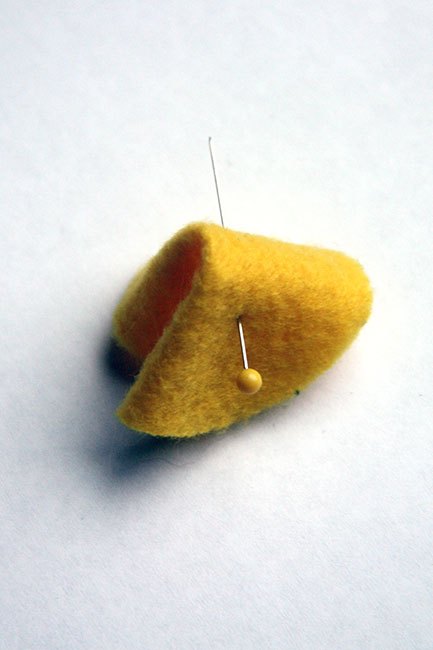
Take one of your felt circles and fold it in half and then fold in half again. Then pin it on the wreath. Don't worry, the pin head won't show, because the curves of the felt will hide it.
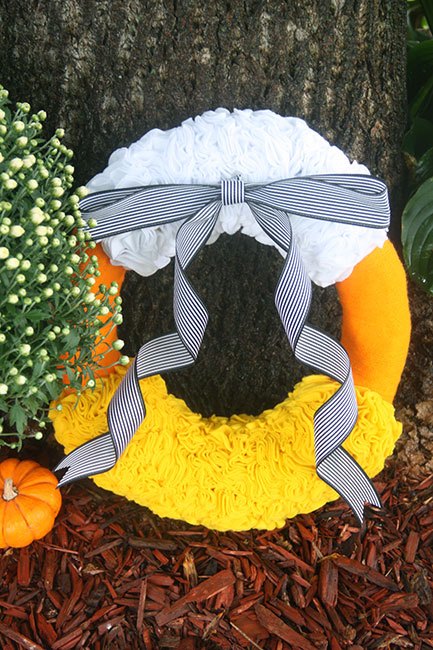
End result! I hot glued the bow on the top and then twirled the ends and hot glued them to the bottom of the wreath.
I really had a lot of fun making this wreath (once I got all of the felt circles cut out... whew!). I have seen a lot of all felt wreaths, but I wanted to break it up by adding a band of string in the middle. It gives the wreath a little more texture and interest and it also saved me from cutting out a million felt circles in orange! lol! I will close out this post now as I dig my hand into a jar of tiny candy corns! Yum! Happy Halloween season!

Want more details about this and other DIY projects? Check out my blog post!
Comments
Join the conversation
3 of 4 comments
-
Thank you! I really love it, too! :)
-
This is too cute! Love how bright it is!


Frequently asked questions
Have a question about this project?