


DIY Felt Turkey Votive
Each year for Thanksgiving my Niece, Nephew, and I make gifts for everyone. They are ALWAYS Turkey themed and usually quick and easy to make. This year we made cute DIY Felt Turkey Votive holders for everyone to brighten and lighten up the table. You can put one of these together in less than one hour!
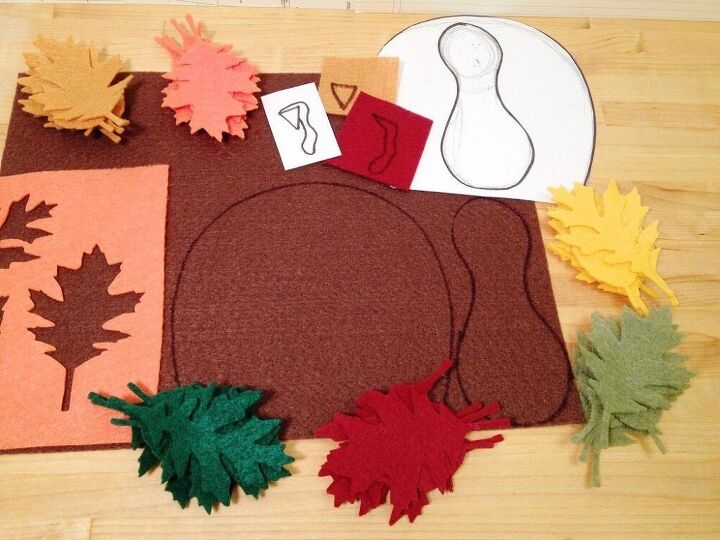
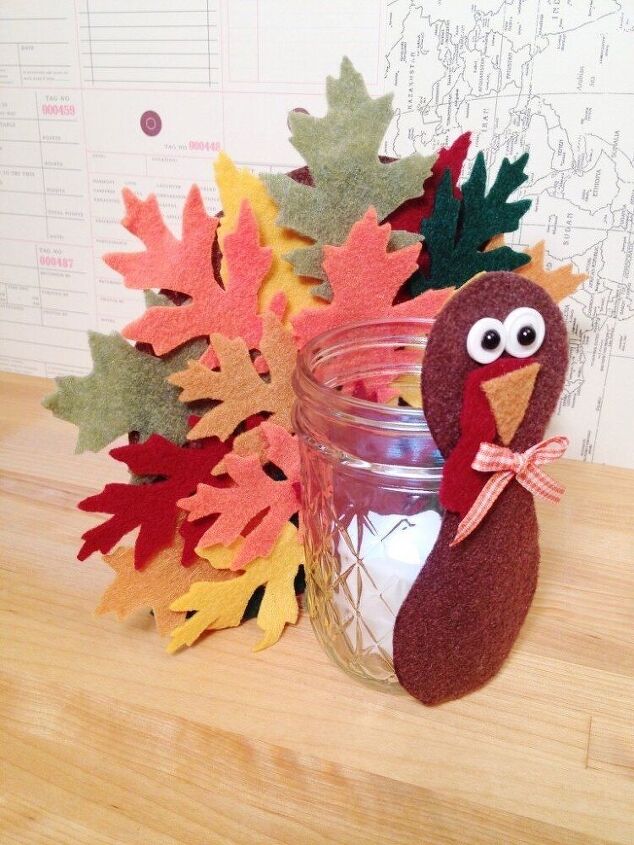
On a piece of plain paper draw a half circle for the Turkey tail, a large number 8 for the Turkey body, a small triangle for the Turkey beak and an upside-down letter “L” with a squiggle for Turkey waddle. Cut out to create patterns. Trace and cut one Turkey tail and body from Walnut Brown felt, one Turkey beak from Golden Rod felt, and one Turkey waddle from Ruby felt.
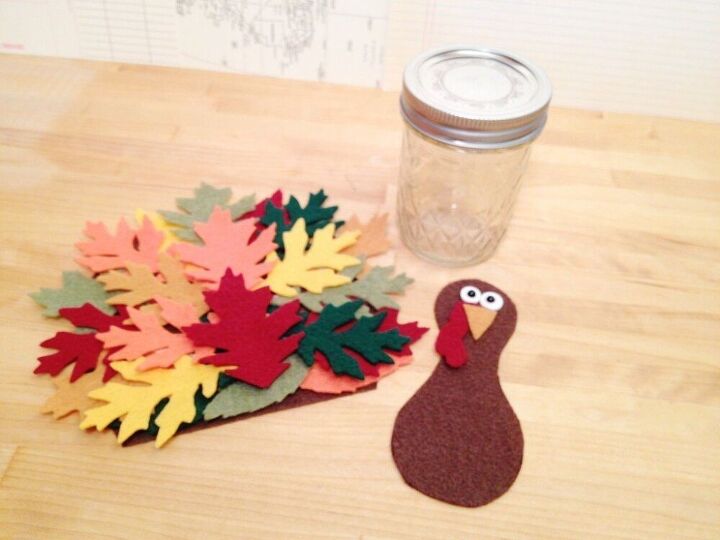
Die-cut two sets of leaves from each color of felt. Attach leaves in a random pattern around Turkey tail with Tacky Glue, let dry. Continue attaching leaves until you are pleased with the fullness and color saturation.
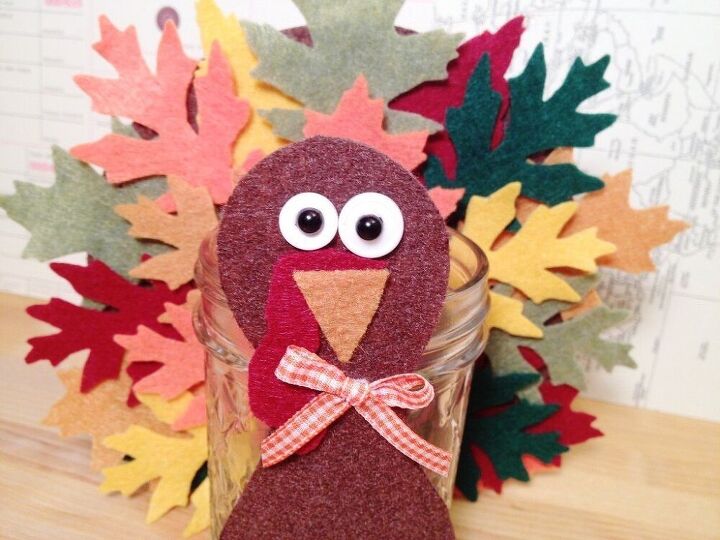
Attach waddle, beak, buttons, pearls, and bow to Turkey body, let dry. Adhere Turkey’s body and tail to Mason Jar with liquid glue and then let dry.
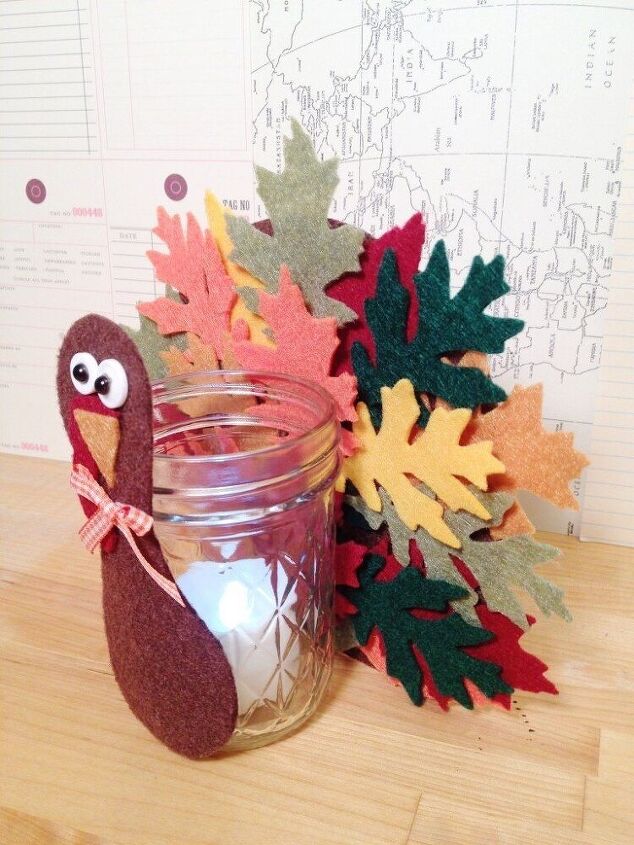
The final step is to insert a battery-operated votive and enjoy it!
I hope you will use my DIY Felt Turkey Votive as a jumping-off point to showcase your Kunin Creativity to create a fun holiday decoration! A quick and easy craft to create in an afternoon with the kiddos to keep those Holiday Traditions ALIVE! Felt is an easy, versatile, and forgiving medium that allows you to create affordable but trendy projects whether you are a beginner or an expert crafter!


Frequently asked questions
Have a question about this project?