


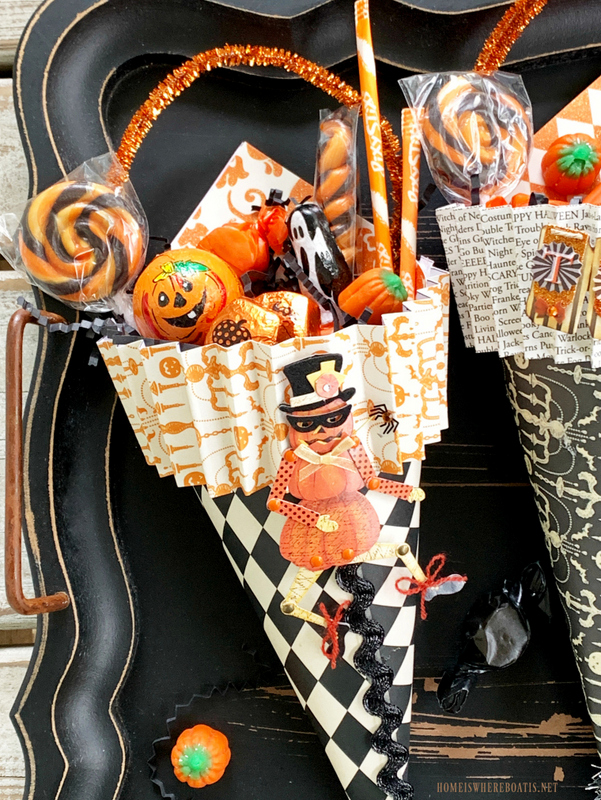
DIY Halloween Treat Cones
These Halloween Treat Cones are affordable to scare up using scrapbook paper! They make festive Halloween party favors or add some vintage charm as a table decoration.
They’re fun to assemble and go together quickly once you have all your supplies gathered together.
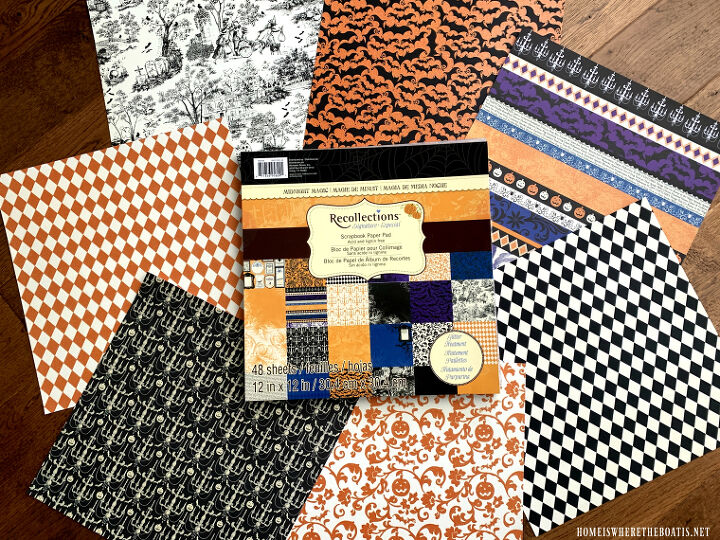
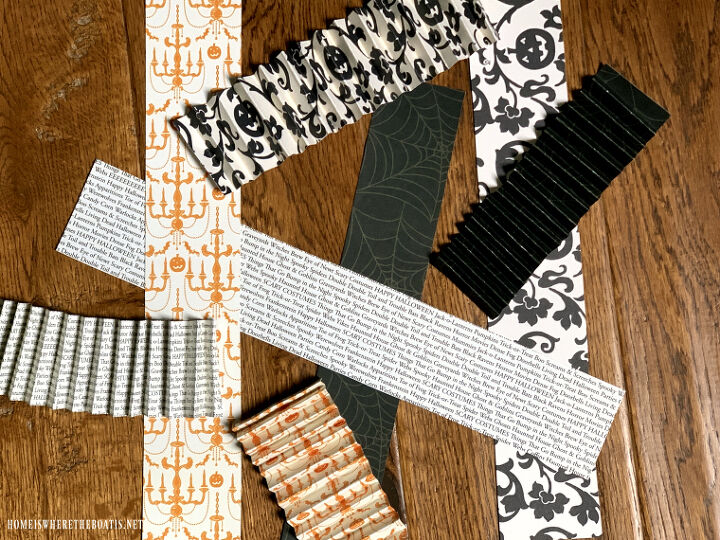
To make these Halloween treat cones, you’ll need some scrapbook paper. I had some leftover paper from a Recollections Halloween paper pad that I purchased at Michaels a few years ago.

You can also find single sheets of scrapbook paper in every pattern imaginable at Hobby Lobby or Michaels. These cones would be fun to create for any holiday, birthday or celebration!
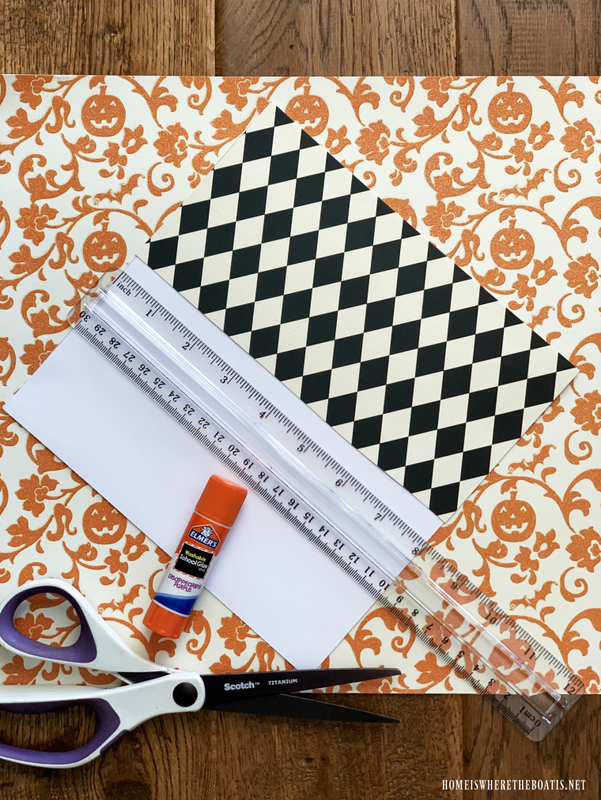
I cut the paper into 8 x 8 inch squares, using the same method as with my Patriotic Tussie Mussies. I prefer these cones with some pattern on the inside of the top of cone so the white backside of the paper isn’t visible. I glued a 4 x 8 inch piece of paper to the back of the 8 x 8 piece of paper with a glue stick so it would lay nice and flat and add some pattern to the inside of the top of the cone when rolled.
Tip: Use double-sided patterned scrapbook paper to skip this step.
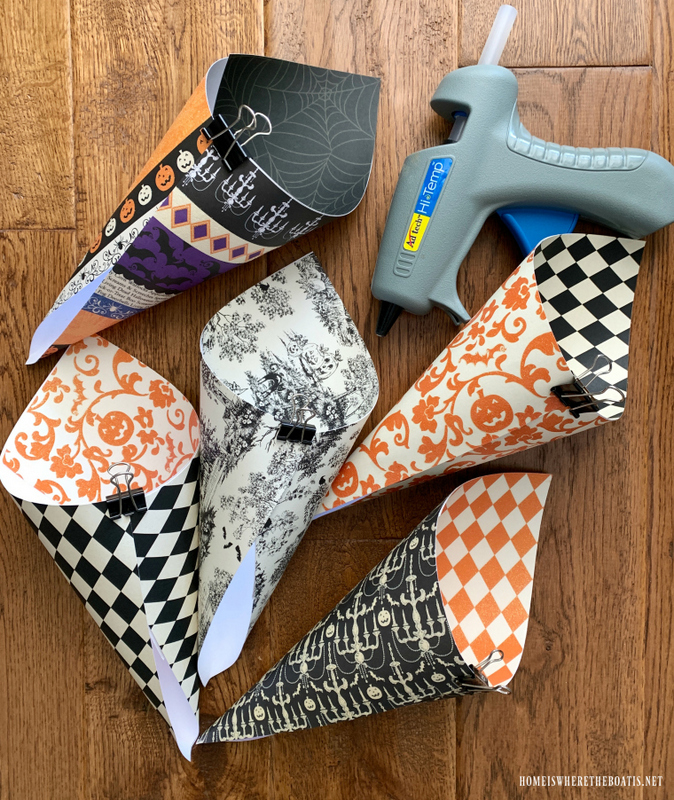
Roll your 8″ square of scrapbook paper into a cone, overlapping the edges slightly. I used a glue gun as it dries quickly, while using a binder clip to help the cone keep its shape while gluing.
Tip: When using a hot glue gun, have an emergency glass of ice water available in case you get hot glue on your fingers. . . *ouch*
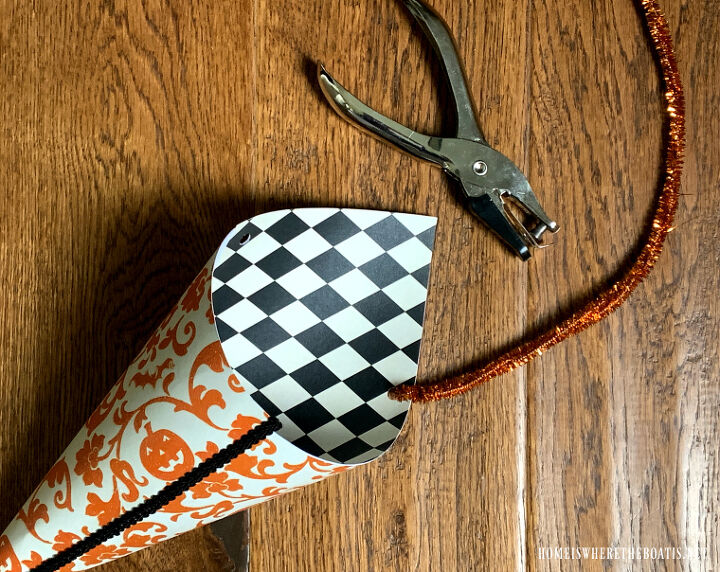
I picked up a package of assorted orange and black tinsel stems from Hobby Lobby. Use a hole punch on the sides of your cone and thread your stem through the holes, wrapping the ends to secure it. I used two stems twisted together per cone.
I cut some 2 inch strips of paper from my trimmed scrapbook sheets and accordion pleated them, then glued a pleated paper ‘cuff’ along the top of the cones.
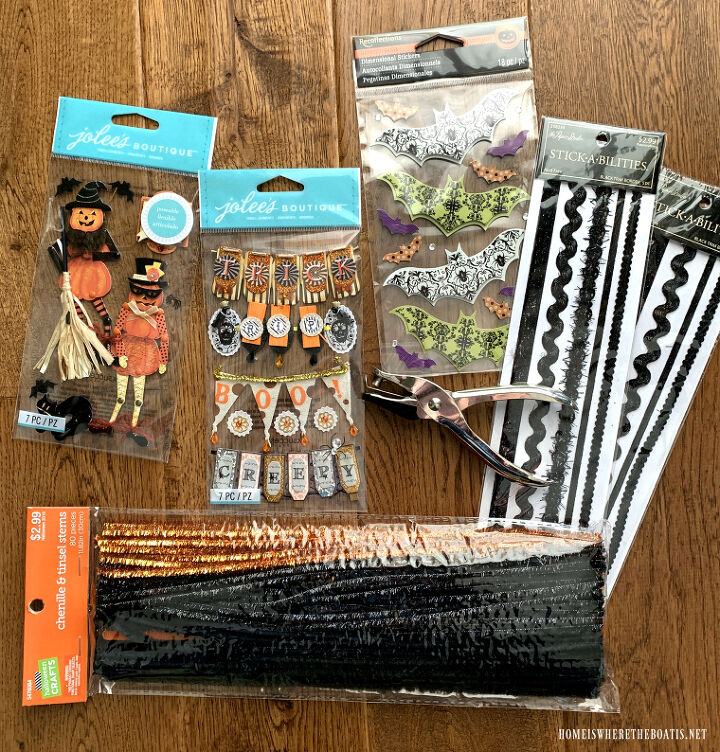
Now the fun begins, decorating your cones! I found all kinds of goodies on the scrapbook aisle of the craft store. All the Halloween scrapbooking supplies were 50% off at Michaels and Hobby Lobby.
After the cones were glued together, I ran a bead of glue down the front seam to attach some decorative trim which also helps conceal any extra glue that might show on the seam of your cone. In addition to the scrapbook trim I found at Michaels, I used some silver tinsel ribbon to embellish the cones and cover the seams that I had in my gift wrap stash. Use the ribbon, decorative braid or trim of your choice.
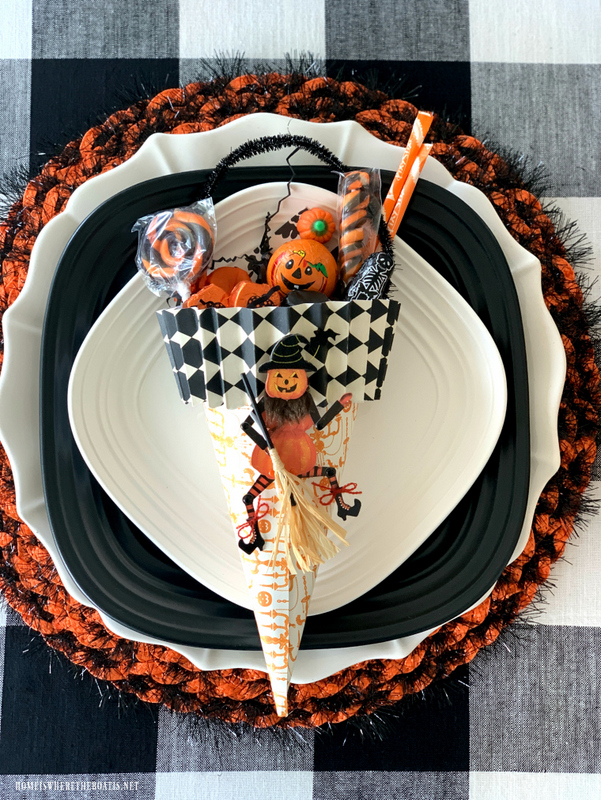
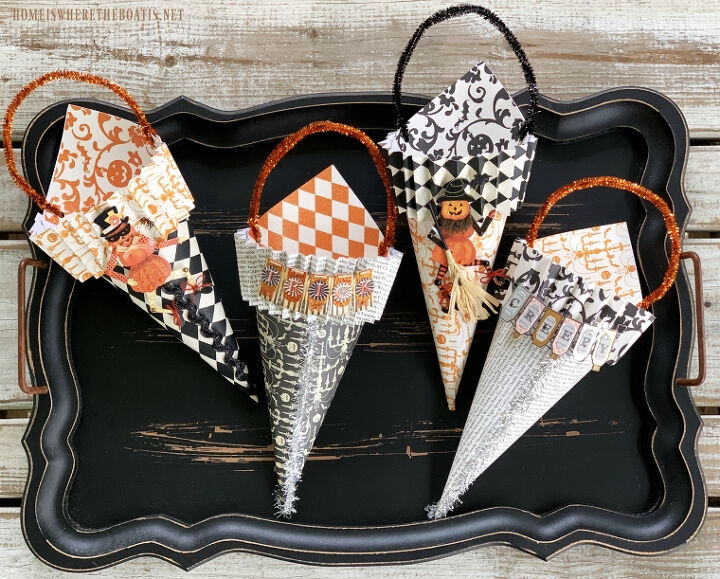
Now you’re ready to fill your cones with some paper shred and assorted Halloween candy and treats!
Scrapbook paper runs 25 - 40 cents a sheet. You’ll use 2 sheets if you want 2 patterns for your cones. Tinsel stems or pipe cleaners are around 4 cents each. If you have a glue gun and glue sticks, you’re can assemble these cones for less than $1 each. Add the stickers or embellishments of your choice, making them as simple or as elaborate as you want.
These Halloween Treat Cones are as fun to make as they are to receive! I made 8 assorted cones. They come together quickly if you work in an assembly-line fashion, cutting your paper, gluing your cones and tying on the handles before decorating.
More photos at the blog link below.
Happy Haunting!
Resources for this project:
See all materials


Frequently asked questions
Have a question about this project?