


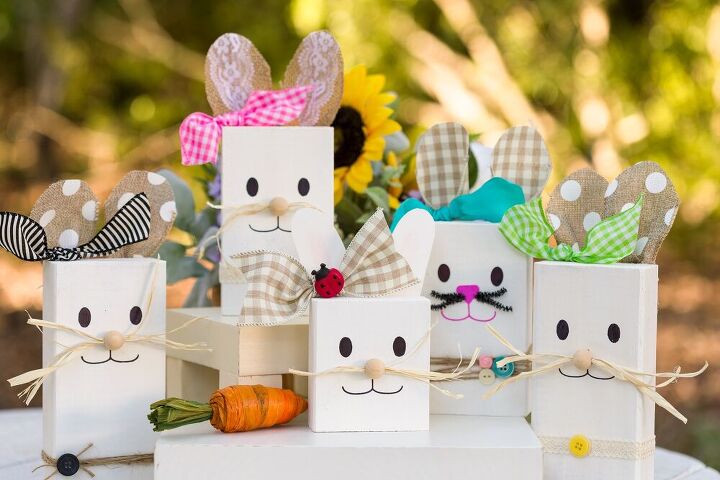
DIY Scrap Wood Easter Bunny
It is that time a year to start decorating for Easter and I have a ton of wood scraps and reclaimed pallet wood, hence I started creating the DIY scrap wood Easter bunny. Making the DIY wood bunny was such a blast and adorable I had to make more and, of course, share how with my readers.
Scrap wood bunnies
DIY Easter Bunny Decorations
This easy DIY project I enjoyed with my daughter, Olivia, who is also a blogger.
We made a video you can see it HERE. 🐣
During our “staycation” we have been crafting, sewing and cooking. We are trying to share a live event every day on my Facebook page to inspire everyone to have fun.
Our goal is to craft with items we have on hand, thus we are using up-cycled items, re-cycled items, scrap wood, leftover paint, etc.
Reclaimed Wood Bunny Supplies
- White Chalk Paint
- Chalk paintbrush
- 2 x 4 scrap wood
- Saw
- Bunny template (face print-out)
- Wood beads (unfinished wood beads)
- Sharpie
- Twine
- Buttons
- Glue gun and glue
- Hot Glue finger protectors
- Burlap Ribbon
- Tan check ribbon
- Scissors
- Pom-pom maker
- Yarn
- Raffia
I asked Mr. Kippi at Home to cut some 2 x 4 wood scraps in 4″, 6″, and 8″ lengths. Some of the scraps were used wood from other projects, however, they still can be used for this Easter home decor craft.
The first step is painting the wood scraps with white paint (I used chalk paint) that you have on hand.
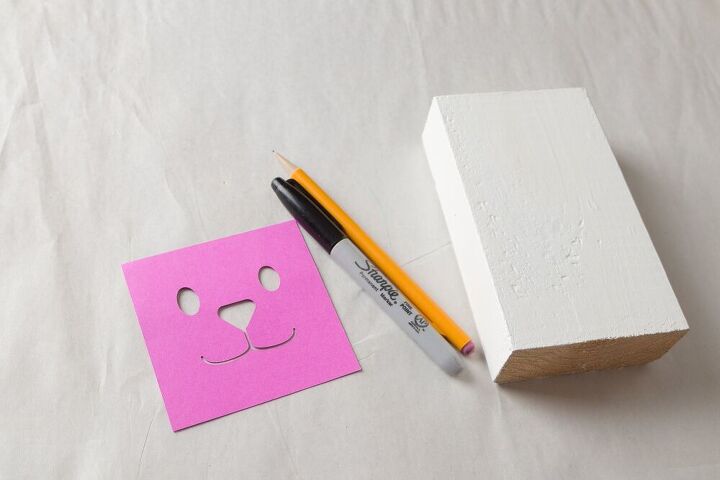
Scrap wood bunny face pattern and supplies
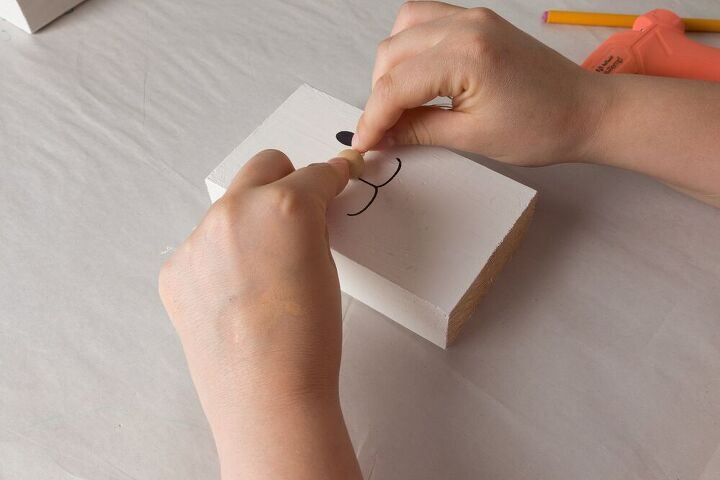
After gathering my supplies I started drawing on the bunny face by placing the face template over the painted wood block and using a marker I filled in the face.
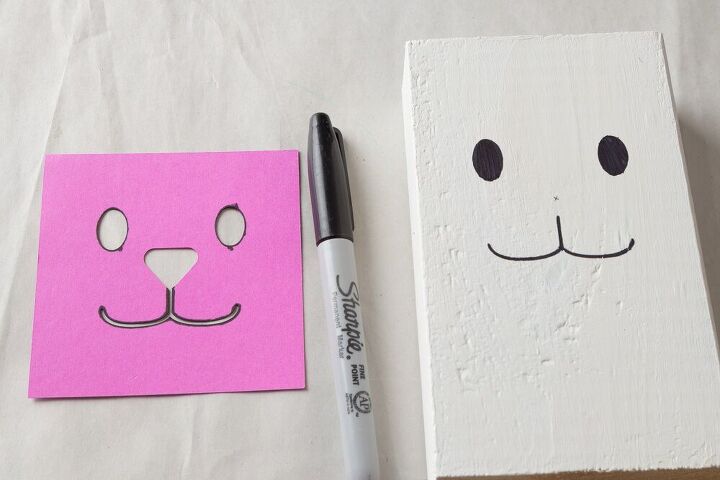
Finished bunny stencil
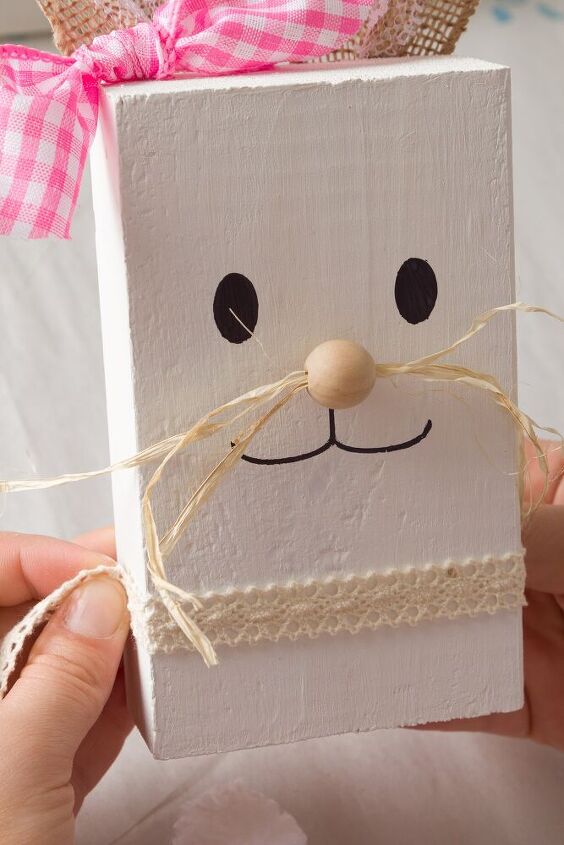
DIY Wood Bunny Face
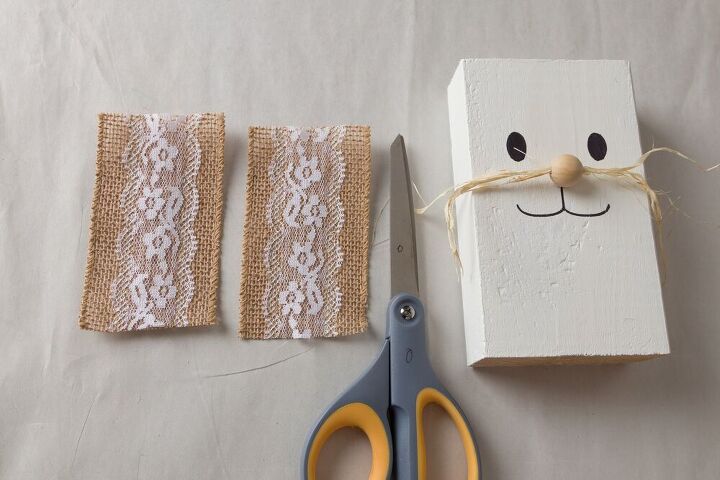
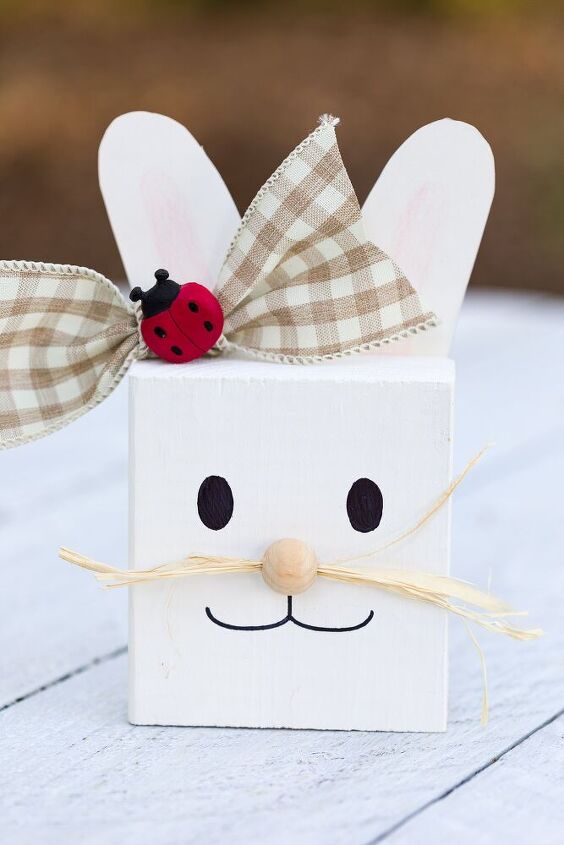
The unfinished wood bead can be painted or you can use your marker and draw on the nose. I like it both ways, however, the hole in the wood bead provides the perfect place to thread some raffia whiskers through.
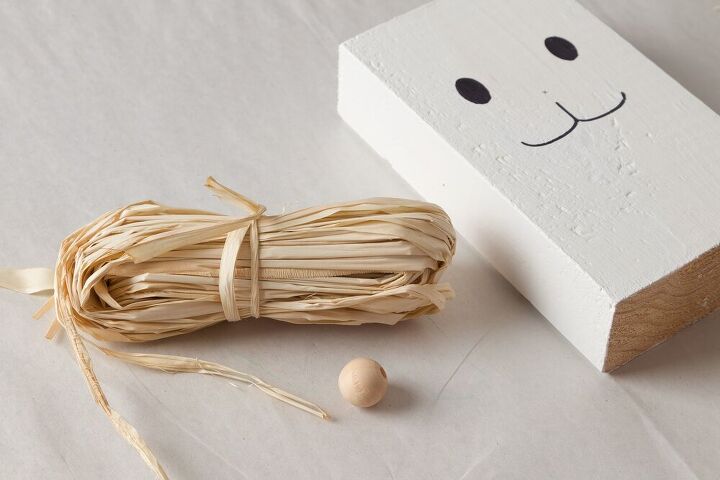
Supplies for bunny nose and whiskers
Glue on the wood bead nose
How to Make the Bunny’s Ears
Burlap ribbon and bunny
To form the ear folds we made a mini pleat in the center of the burlap ribbon and adding a dot of hot glue, then using finger protectors pinching it together until it cools.
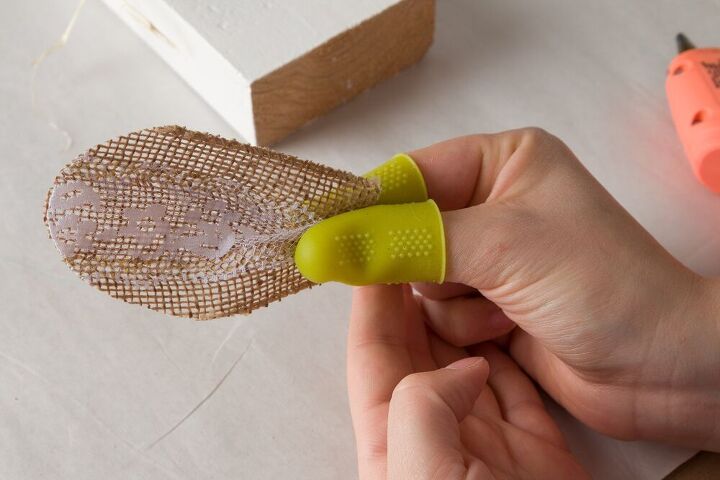
Glue a tiny pleat in the ear
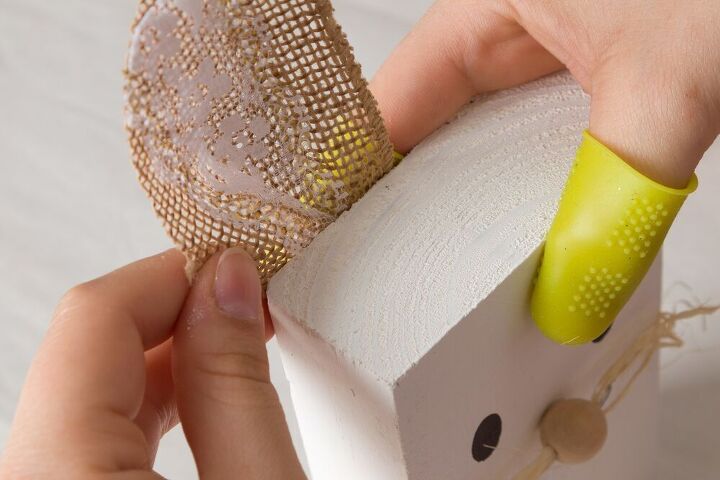
Attaching burlap ribbon ears to bunny
Olivia made the yarn pom-pom tails for the wooden bunnies and you can see how she did with a pom-pom maker in the video. The block is a bunny sign of sorts, but with the adding dimensions of ears, nose, ribbon tie and pom-pom tail it turns into an adorable Easter bunny decoration.

Wooden Bunny with lace, pom pom and button supplies
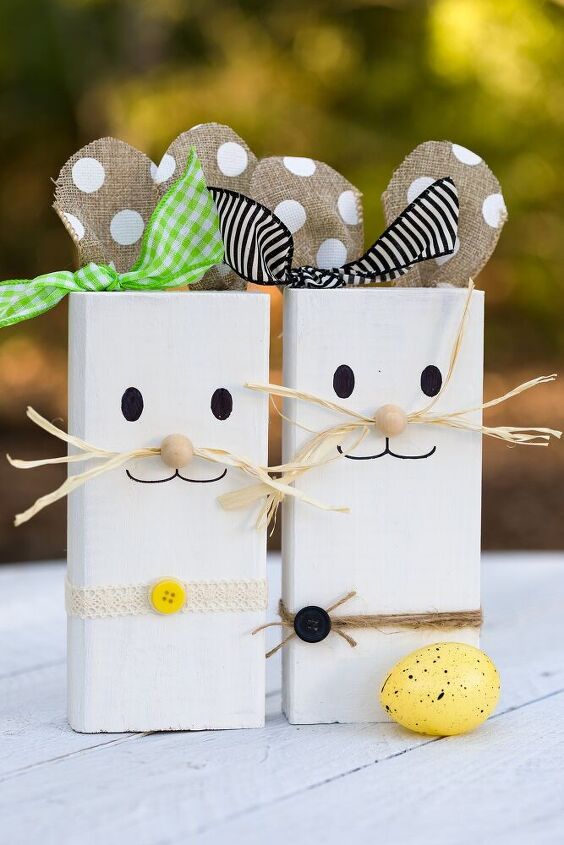
Each of our bunnies got a little different look with different combinations of ribbon, lace, twine, button, whiskers, and noses.
DIY Rustic Wooden Bunny
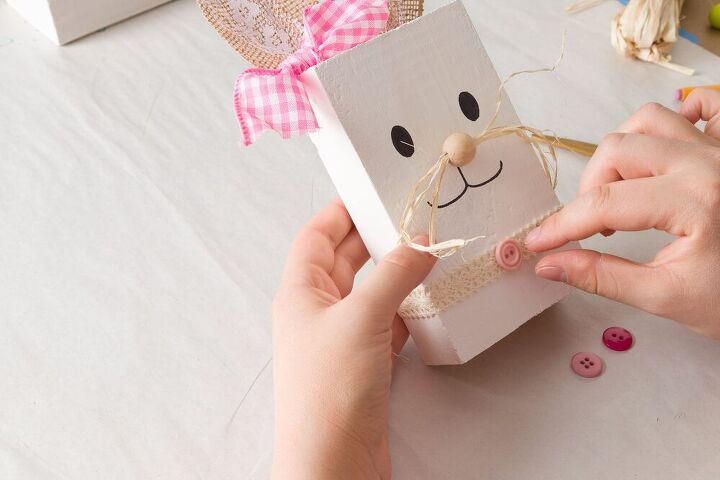
Adding a pink button to the reclaimed wood Easter Bunny
Scrap Wood Bunny Pom-pom Tail

Gluing on the bunny’s pom-pom tail
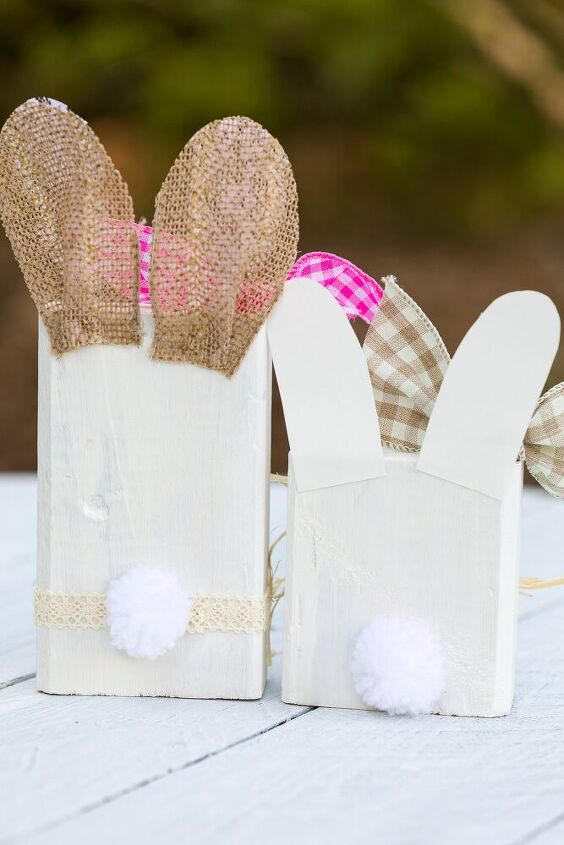
Block Easter Bunnies with handmade pom-pom tails
DIY Wood Bunny
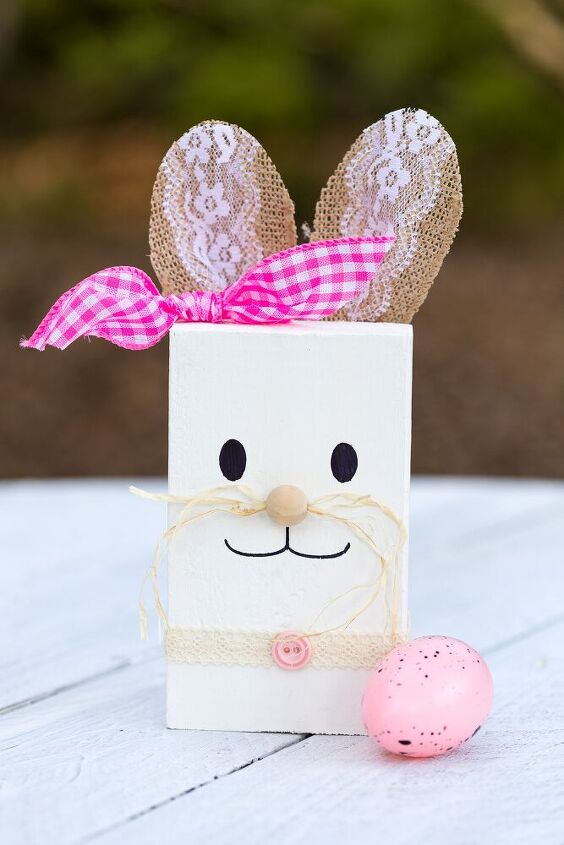
DIY Wooden Easter Bunny with burlap ribbon ears and pink check ribbon
Easter wood crafts an adorable bunny with paper ears
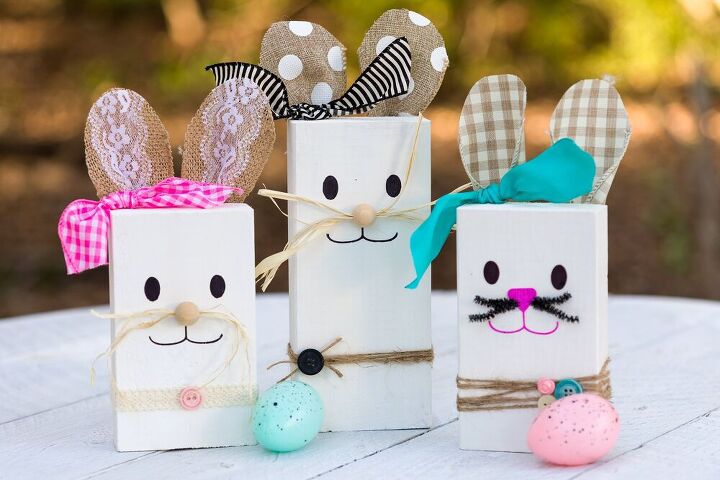
Wooden bunny from 2 x 4 scraps and Easter eggs
These adorable little bunnies will make you smile! I had a wonderful time making them with my daughter and I hope you will find some joy making them too.
DIY Wooden Bunny
You might also enjoy these other Easter crafts, reclaimed wood projects, and more.
Reclaimed pallet wood standing bunnies.
Thank you so much for your visit today. I hope you found some inspiration for some Easter decorations.
Have a safe and healthy spring,
Kippi


Comments
Join the conversation
-
Love this ❤
-
Love these adorable little bunnies!


Frequently asked questions
Have a question about this project?