


DIY Valentine Gnomes & Hearts Garland

This year I wanted to give myself some new Valentine’s Day decorations. I love to find ways to blend facets of different ideas that I have come across, so I decided that I would make a pretty fabric garland and add some Valentine Gnomes to it! I have been seeing gnomes everywhere lately, and, during the holidays, I made quite a few. I made them to match wrapping paper colors, high school colors, college colors, and just any color I thought looked cute. I had a skein of yarn that was variegated colors of hot pink/fuchsia/magenta, and I thought that some Valentine-themed gnomes were in order.
First things first - Painting
Take care of any painting that needs to be done so it can dry. In this case, painting was done on the unfinished wooden hearts and the wooden beads for the gnome noses.
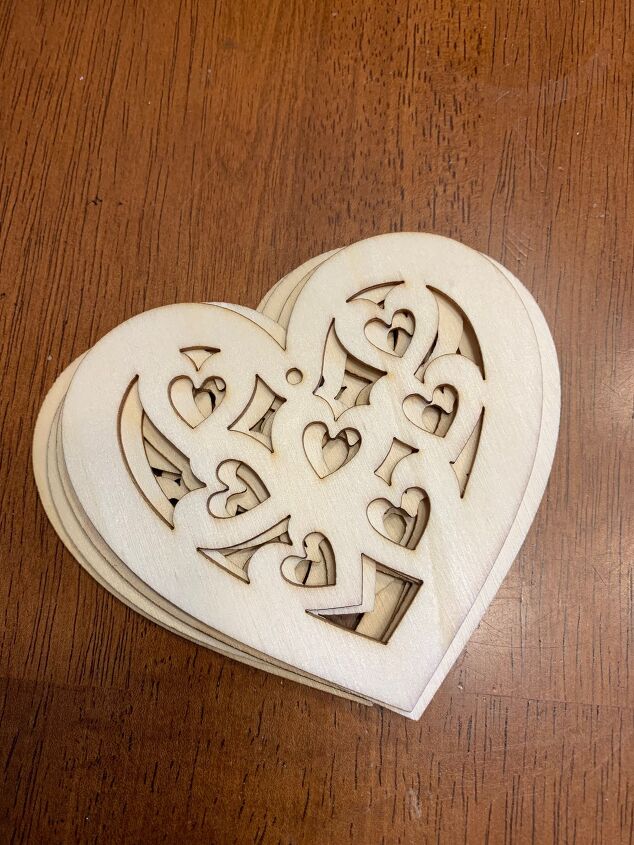
3 Wooden Hearts
A pack of unfinished wooden hearts was purchased at the Dollar (Twenty-Five) Tree. These already had a hole in the center for hanging.
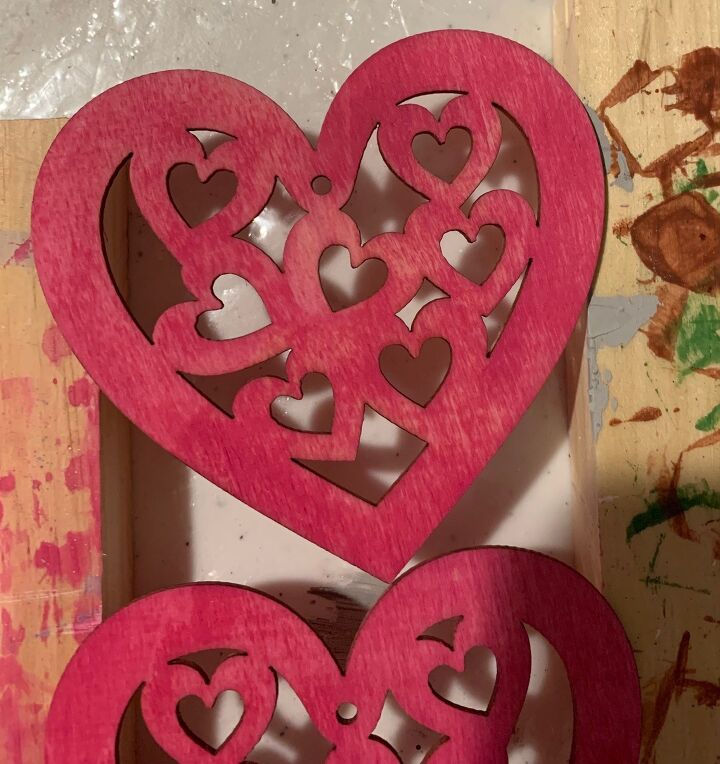
A paint “wash” was used.
Add a little water to craft paint and stir.
[The more water you add the more diluted the wash will be.]
Paint the wash on the hearts on both sides.
Wipe off excess.
Let dry.
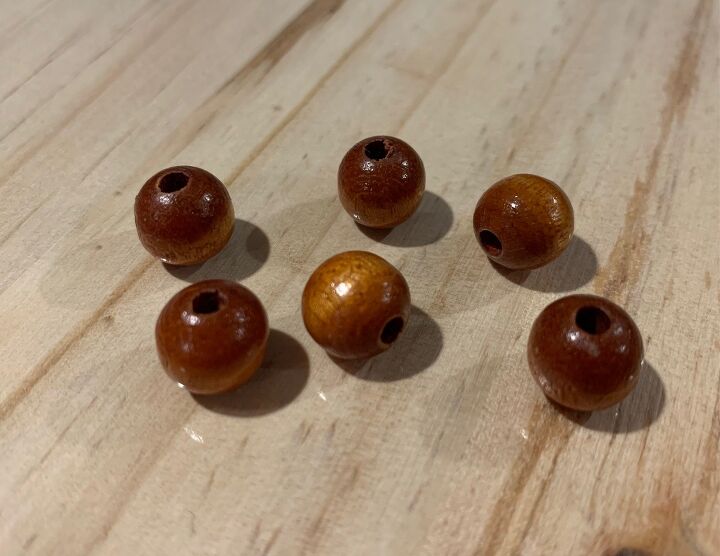
Wooden beads for gnome noses
I used ¼” beads for the noses that were taken from an old bracelet (they can be purchased as well).
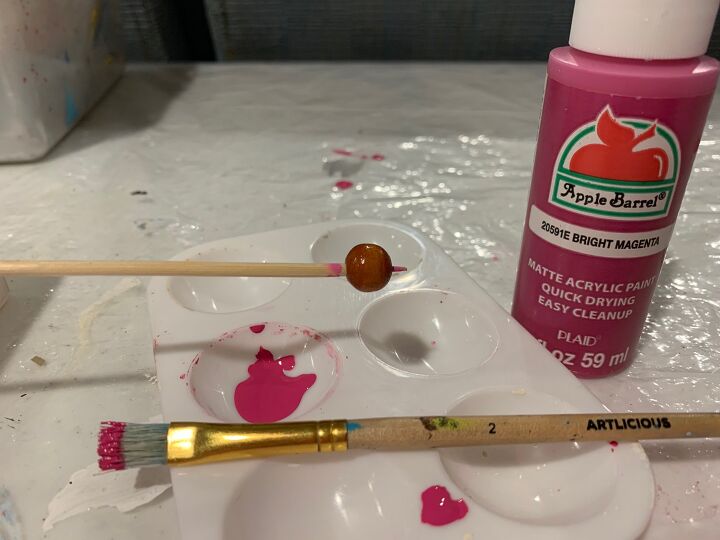
To paint beads, put a bead on the end of a skewer and paint. Put the bottom of the skewer into a block of flower foam to keep it upright while the paint dries.
While those dry, on to the gnomes!
Gnome-making
I will give you the run-down of how I make the gnomes, if you don’t already have a technique of your own.
Supplies for Gnomes- you will be making 2:
-Paper tube (wrapping paper, paper towels, toilet paper)
-Scissors - use really sharp ones! Dull scissors do not cut yarn well.
-Ruler
-Yarn for hat (can use 1 color or many)
-Cotton balls
-Yarn for beard
-Pom Pom making tool/method: official pom-pom makers are awesome; but if you don’t have one, or some other method you use for making them, I will show you my improvised tool and method.
-Wooden beads for nose (already painted, of course!)
-Hot glue
Step 1: Hat
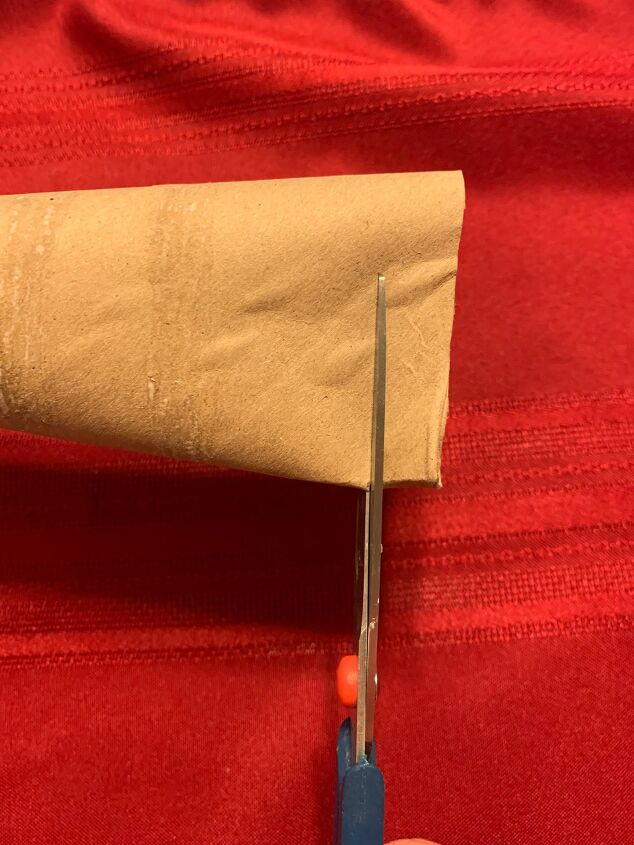
Cut a slice from the paper tube about ½ inch thick; this will be the brim of the hat.
Step 2: Hat
Using the color (or colors) that you want to use for the hat, cut 30-40 strips of yarn; I cut the strips about 10” long. How many you use will be dependent on the circumference of the tube and the weight of the yarn. You can use multiple colors.
Step 3: Hat
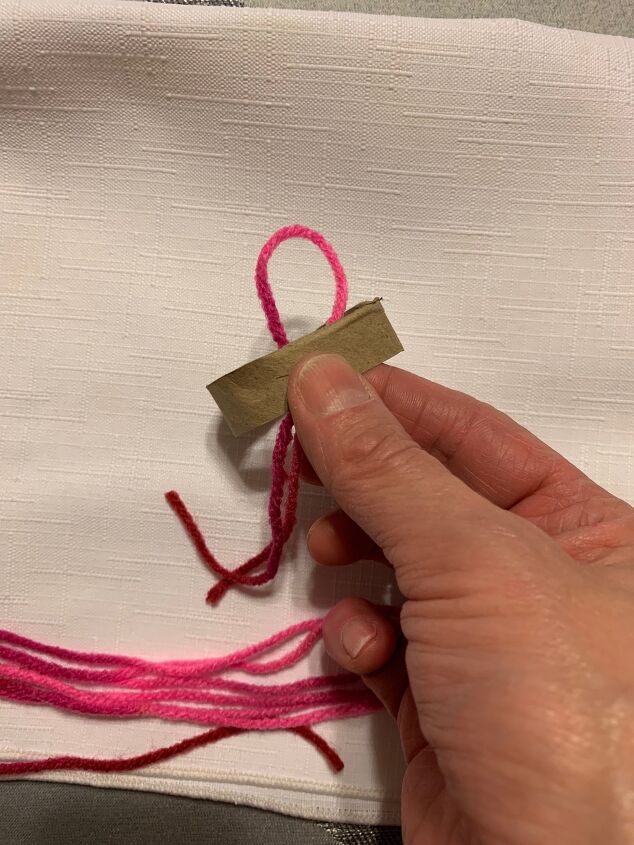
-Take each 10” strip and bend in half, making a loop.
-Slide the loop through the center of the cardboard tube.
Draw the 2 cut ends over the front of the cardboard tube and through the loop.
Tighten. [The same yarn can be used all the way around, or the yarn colors can vary. ]
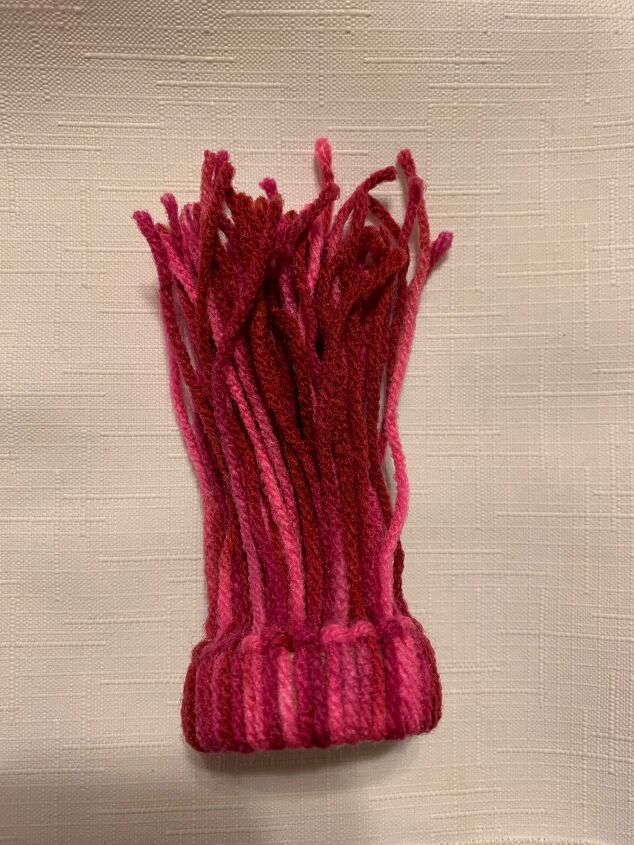
Repeat this all the way around the tube, making sure each one fits snugly next to the previous one.
Step 4: Hat
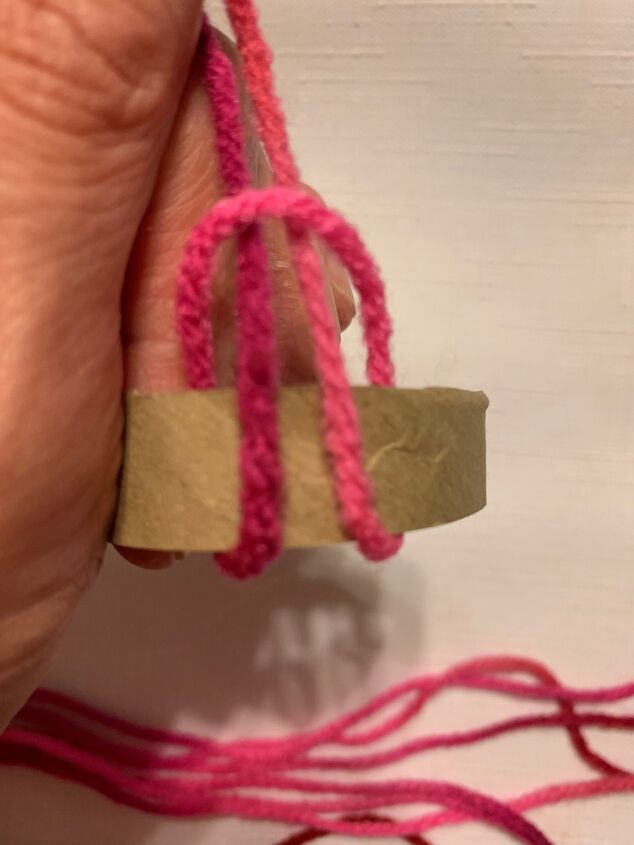
-Once all yarn strings have been knotted around the tube, take all the yarn ends and stuff them through the middle of the tube.
-Pull the yarn ends out the opposite end and straighten out the yarn; you should be able to see the little brim of the hat now.
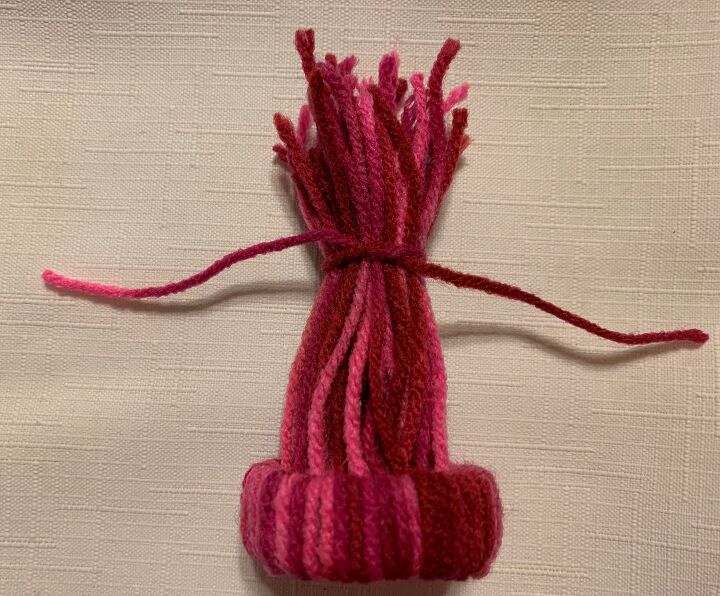
Step 5: Hat - 1 additional piece of yarn needed for this step
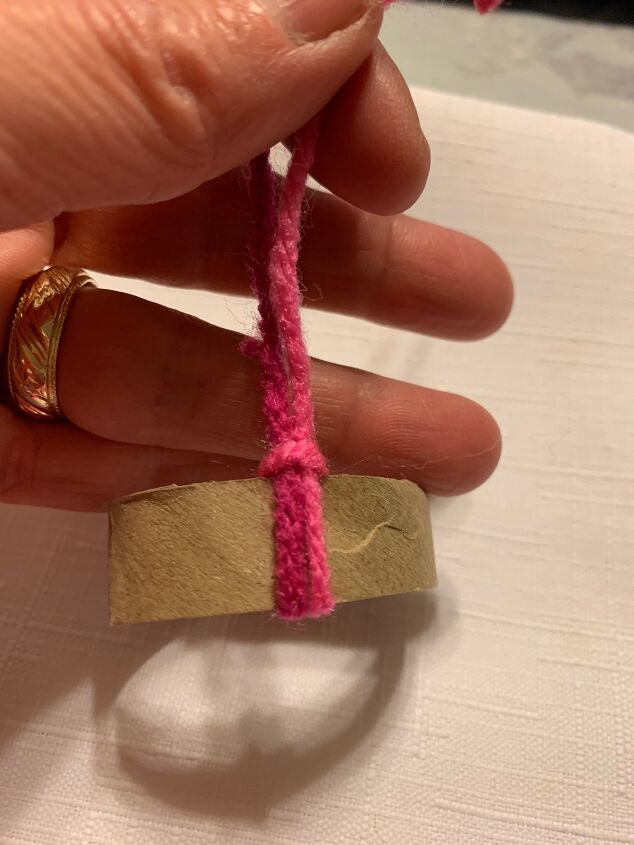
-Once all yarn strings have been straightened, gather all of the yarn strings up into a bunch at the top of the hat; don’t worry that the yarn ends are different lengths. [Try to get the gathering as close to the center of the circle as possible so the hat will sit straight on the gnome’s head. For some reason, I always have to do this several times to get it right.]
-Take the additional piece of yarn and tie it tightly at the top; this will be the pom pom for the hat.

Trim the little hat-topper pom pom. [Cut a little at a time; you can always cut off more if needed.]
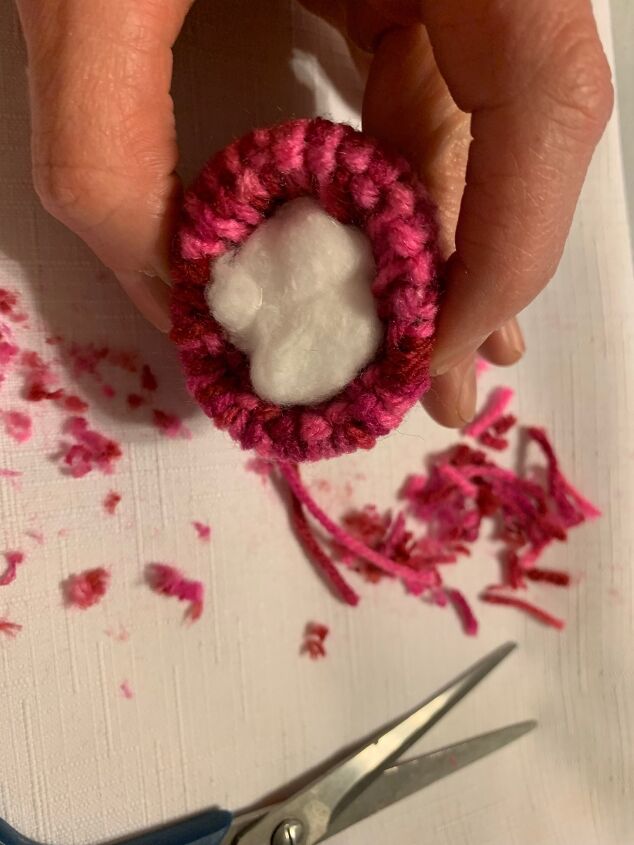
Step 6: Hat
Take 1 or 2 cotton balls and gently stuff them inside the hat so that the hat will keep it’s shape.
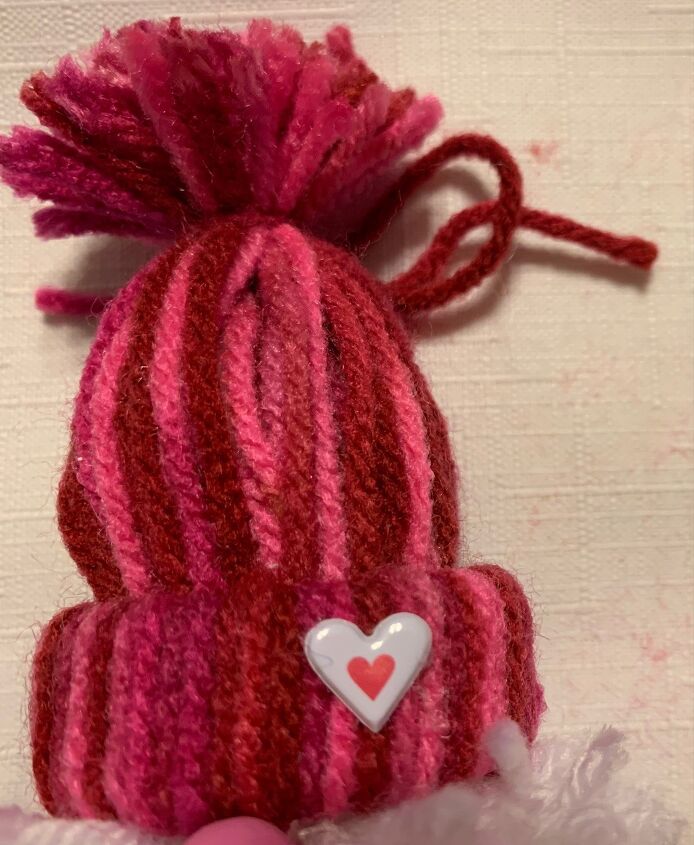
Step 7: Hat - optional
Since this was a Valentine gnome, I added a cute little cut out heart to the hat with a drop of hot glue.
Step 1: Beard
Choose the color you want for the beard. I used white, but they also look cute in gray.
Step 2: Beard
- If you have an “official” pom pom maker tool or some other method that works well for you, fantastic! Aim for about a 3” pompom.
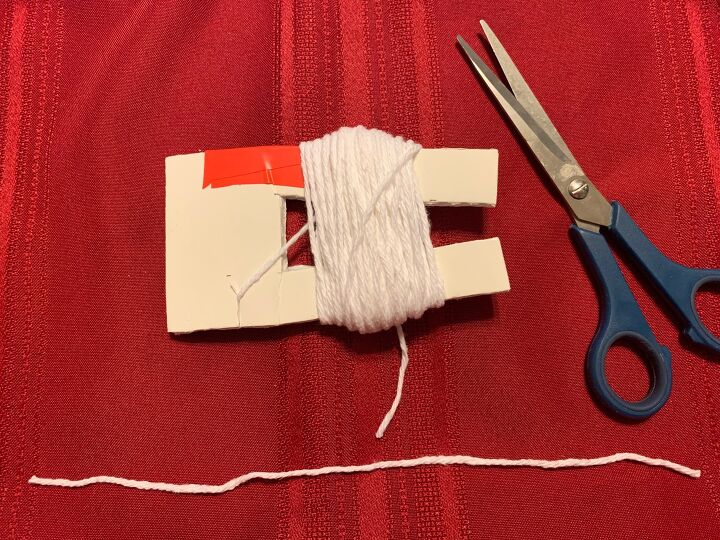
-I did not have a pom pom maker, so I made a tool out of foam board for this project (you can tell it has been used very hard!)
- If you want to make your own, the measurements of mine are 3 “ high, 5 ¼” long.
-You will need to use some sturdy material (like very thick cardboard or foam board) for this because there will be tension on it as you wind the yarn.
-This size tool produces a pom pom about 3” across.
[ Optional: I put a small cut in the bottom to hold the yarn end as I begin winding.]
-[Put the yarn end into the cut] and wind the yarn securely (it does not have to be tight) 70-80 times around the tool. [The more times you wind the yarn, the fuller the pom pom will be.]
Cut the end of the yarn.
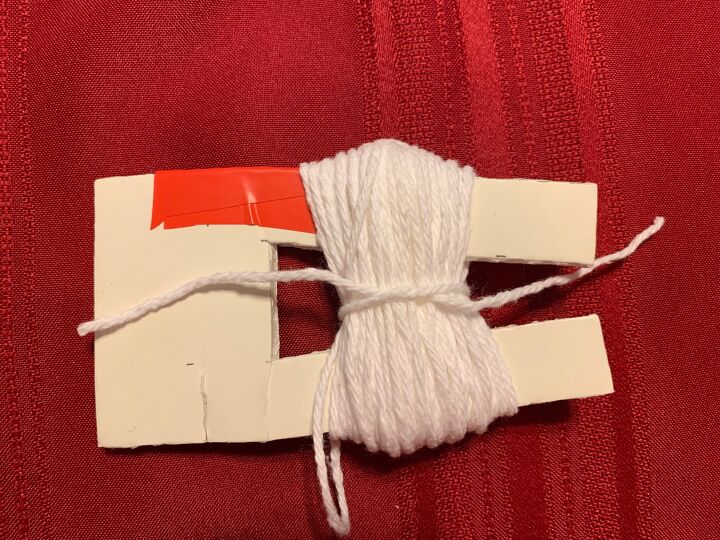
Step 3: Beard - 1 additional piece of yarn (same color as beard) needed for this step
-Wrap additional yarn piece around the middle of the spool of yarn on the tool.
-Tie loosely (do not knot it yet).
Slide the yarn spool from the tool, being sure to keep the tie in the middle.
Tie and knot it TIGHTLY. This will ensure that the pom pom will not fall apart.
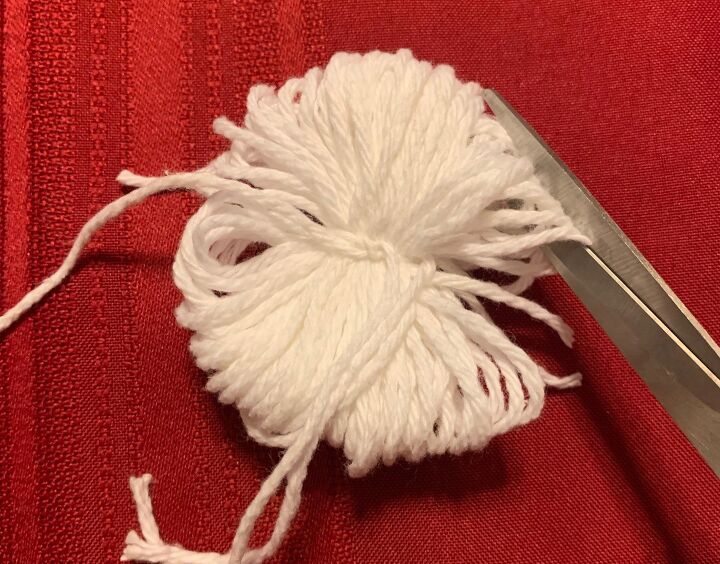
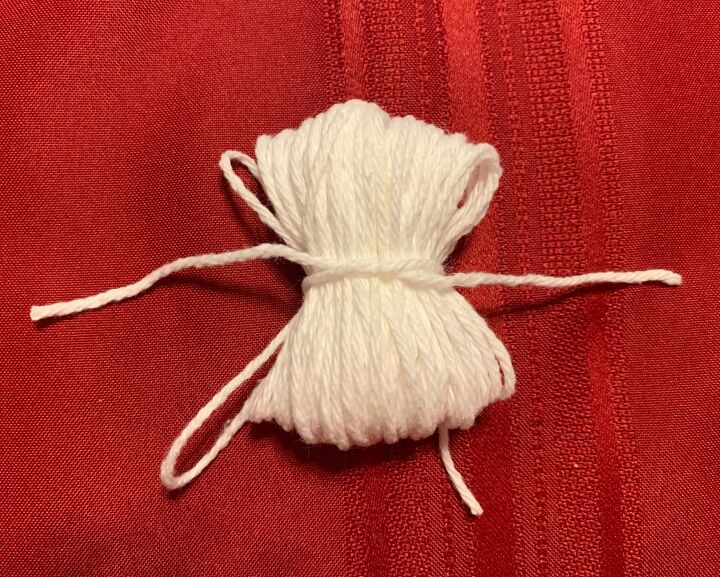
Step 4: Beard
Cut through all of the yarn loops all the way around.
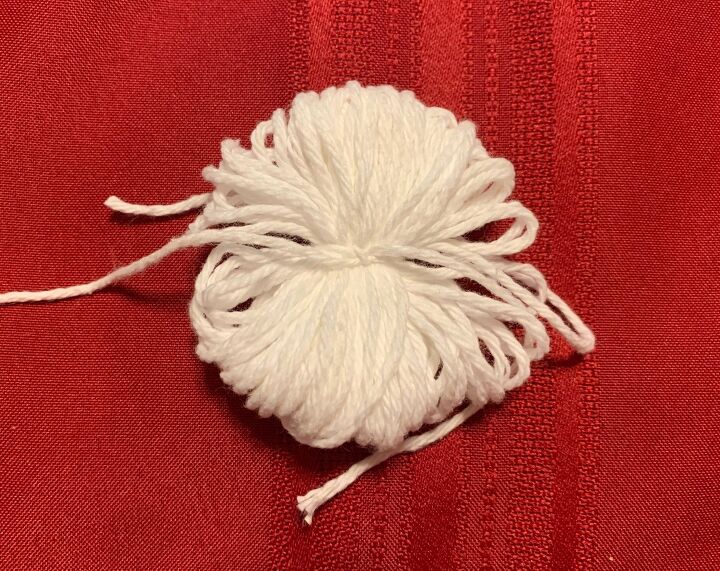
Step 5: Beard
-Shake and fluff the pom pom.
-Trim the yarn ends to get a nice round shape. [Again, trim a little at a time; you can always go back to trim more off if needed.]
Bringin’ it “gnome”! : (A.K.A. Putting the gnome together): Step 1
-Before gluing, I suggest a few tries at putting the hat on the beard and figuring out where you want the front to be. Aim to have the hat centered on the beard. [I actually like to flatten out the pom pom a little on the top to ready it for the hat and glue.]
Bringin’ it “gnome”! : (A.K.A. Putting the gnome together): Step 2 : Hot glue the hat and beard
-Put a ring of hot glue on the very bottom of the hat brim. [Aim for the glue to be more to the inside of the ring than the outside so that glue will not be seen on the outside.]
-You can also put a dab of hot glue on top of the pom pom beard as well.
-Making sure the hat will sit in the middle of the pom pom, adhere the hat to the beard.
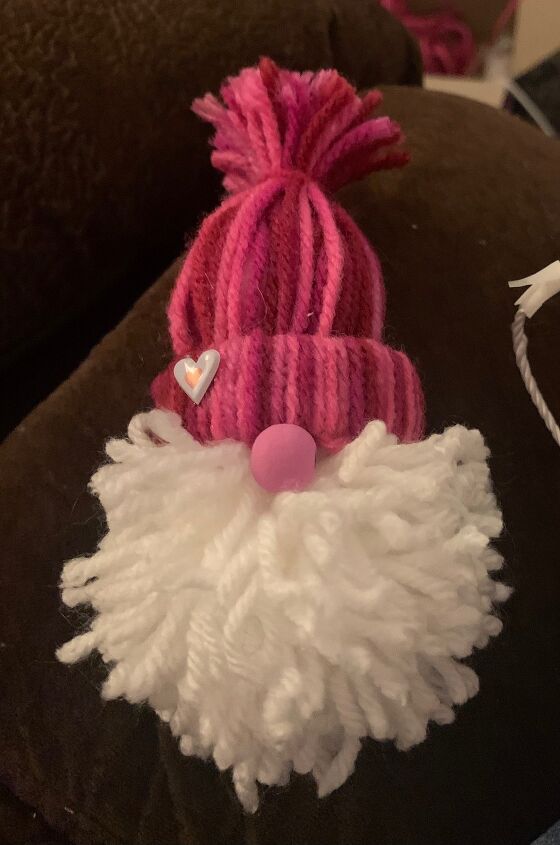
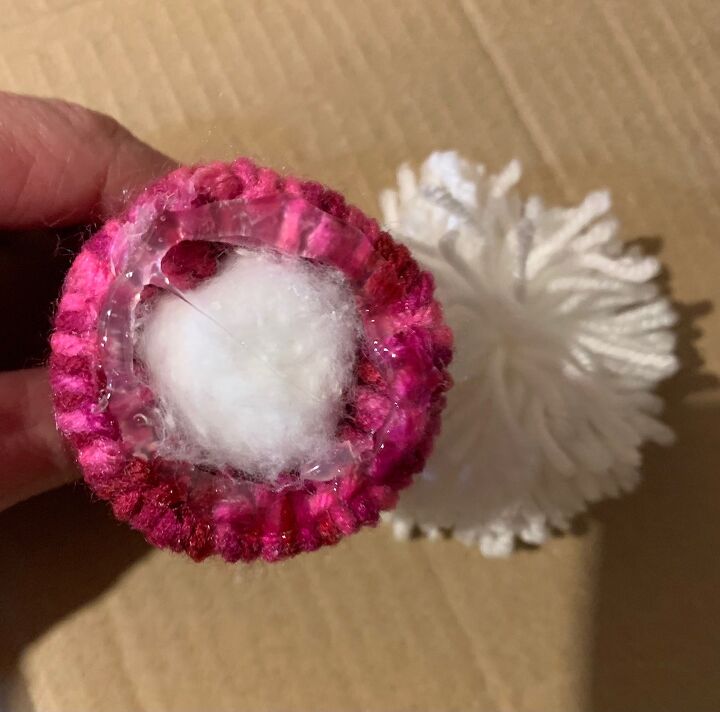
Bringin’ it “gnome”! : (A.K.A. Putting the gnome together): Step 3: Hot glue the nose
-Take the wooden bead and position it so that the holes are on the left/right.
-Place a small drop of glue on the very bottom edge of the hat brim (right where it meets the beard).
Attach the nose. Finished.
**Repeat all steps to make the second gnome.
Fabric Garland
Supplies for Garland
-Pinking shears, scissors, yard stick/ruler
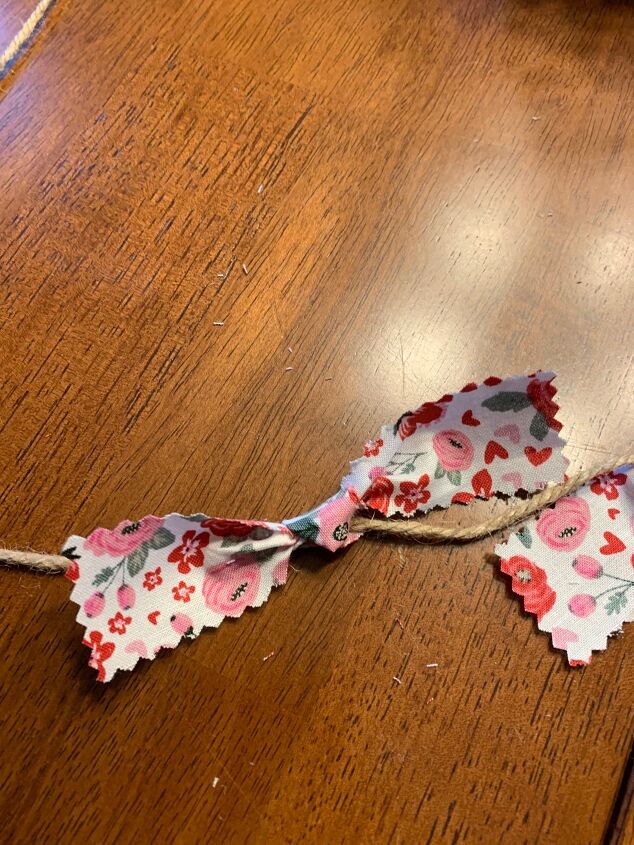
-String/twine cut to the length you want your garland to be. [It may be helpful to tightly tape the ends of the string; this stops fraying and makes it easier to thread through the beads.]
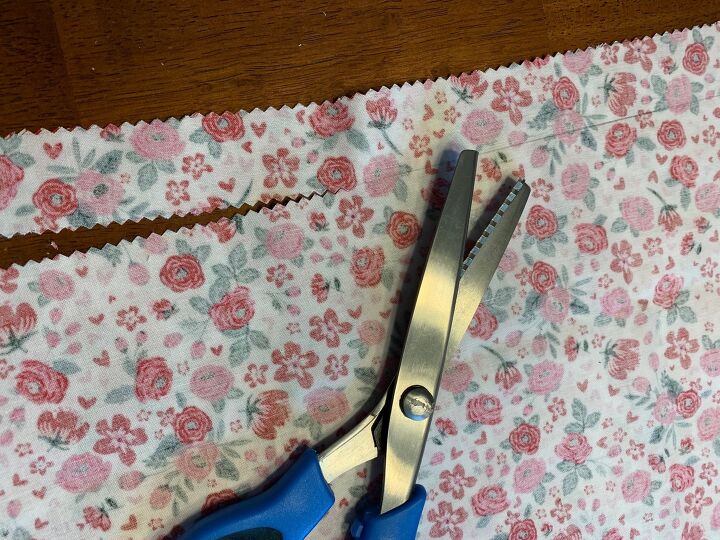
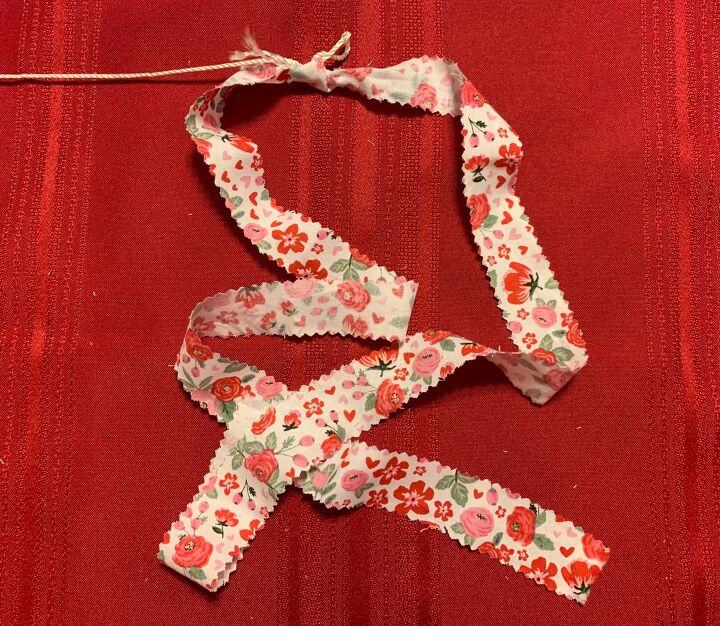
-Fabric strips : cut with pinking shears, 1” wide x 6” long. Figure 3-4 fabric strips per inch. [Using a rotary cutter and mat is much faster and easier; I just don’t have one.]
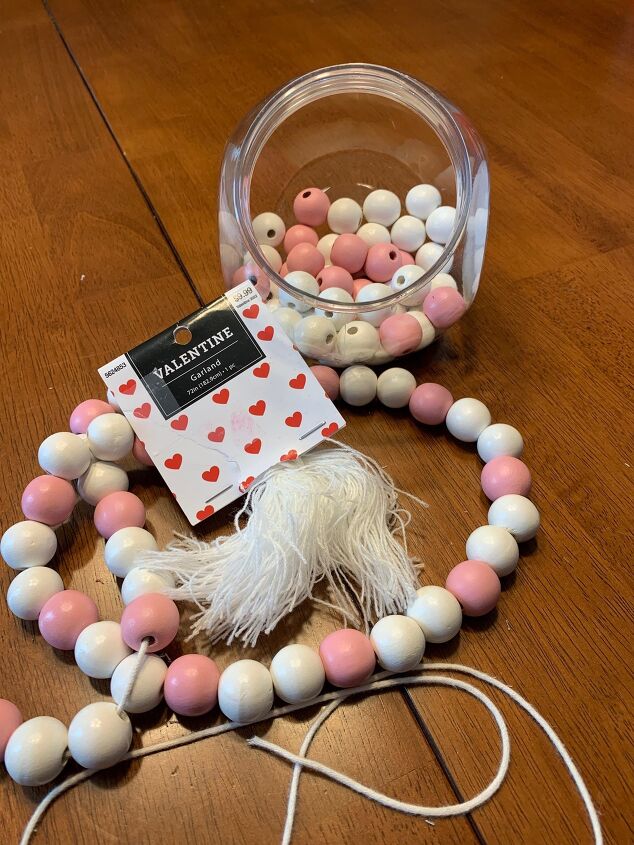
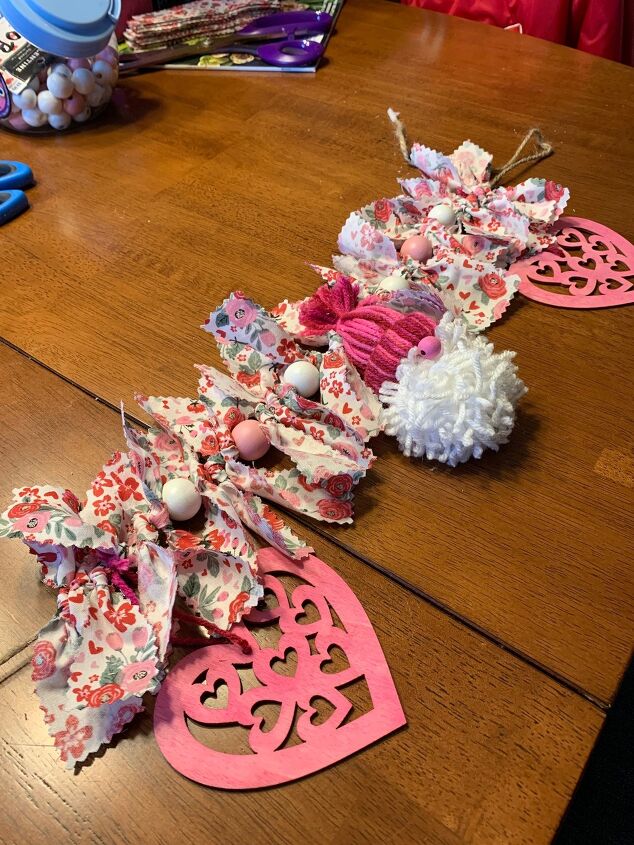
- Wooden beads : ¾” beads in pink and white [These can be purchased unfinished & painted, but I found it more affordable and time efficient to purchase a pre-made bead garland ($4.99 for 90 beads) and take it apart.]
-Gnomes
-Wooden hearts
-Additonal yarn pieces to attach hearts

-Large yarn sewing needle (or toothpick) to attach gnomes to garland.
Step 1: Garland
-Mark the middle of the garland. I like to work from the middle out on both sides.
-Figure out your pattern incorporating the materials.
I used this pattern: starting from the center and proceeding to the right and left:
Center: Heart*, 3 fabric strips, white bead, 3 fabric strips, pink bead, 3 fabric strips, white bead, 3 fabric strips, gnome**, 3 fabric strips, white bead, 3 fabric strips, pink bead, 3 fabric strips, white bead, 3 fabric strips, heart*, 3 fabric strips, white bead, 3 fabric strips, pink bead, 3 fabric strips, white bead, 3 fabric strips
Step 2: Garland
-Begin tying strips of fabric to string, working from center to one side. Just snugly tie each one once; no knots needed. Keep the tied fabric strips close together.
-Follow your pattern, adding fabric/beads/hearts*/gnomes** as needed.
[See below for instructions on adding hearts and gnomes.]
-Repeat on the other side.
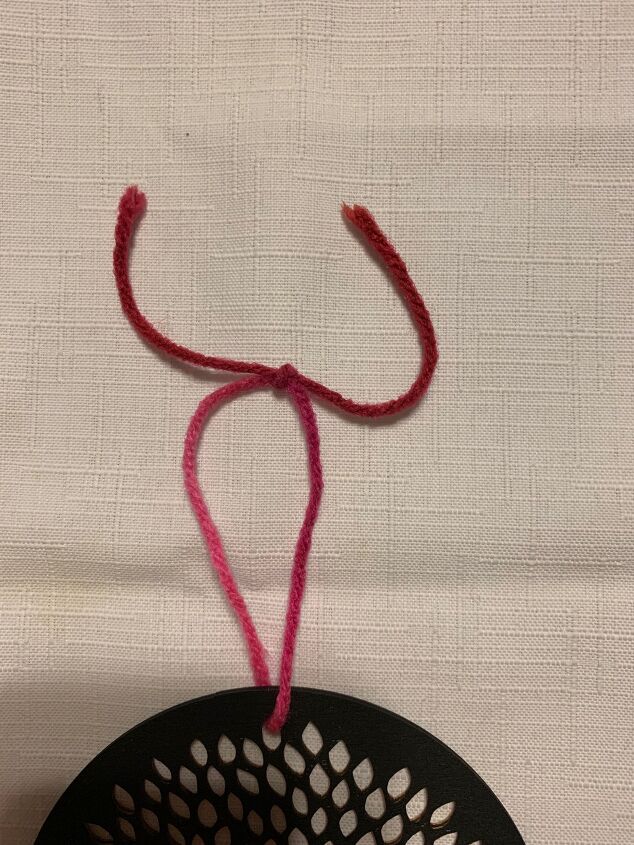
*Step 3: Garland: Adding hearts
-Cut piece of string or yarn (about 12” )
-Thread through the hole in the middle of the heart
-Tie a knot, approximately 3” from the hole in the middle of the heart. [Tie all of the hearts at this time so you can make sure they all are tied at equal lengths so they will hang evenly from the garland.]
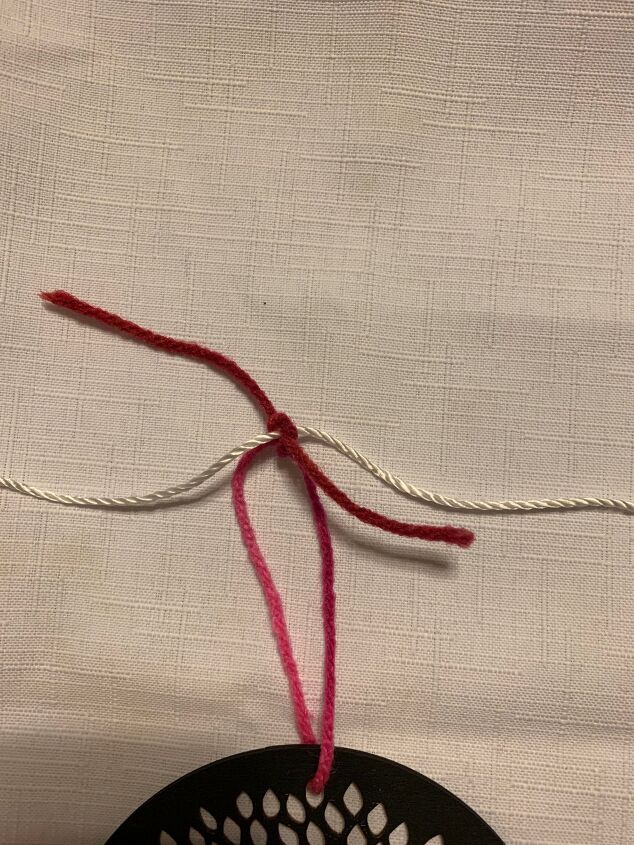
-Secure it to the garland by knotting the strings from the first knot around the garland string (right up to the knot made in the previous step). This will allow the heart to hang from the string and stay in place. Cut excess yarn.
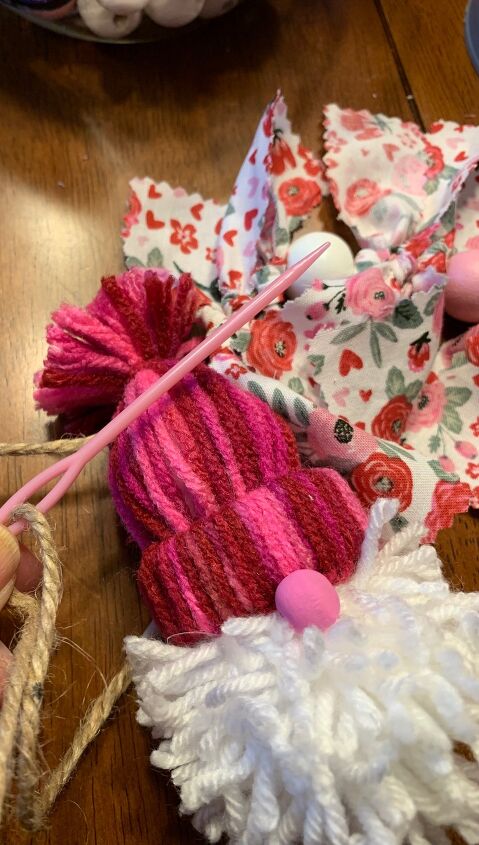
**Step 4: Garland: Adding gnomes to garland
-Thread the garland string through a large yarn sewing needle.
-Thread the needle through the gnome hat from side to side; aim for an area toward the top of the hat in the center; do not thread through the pom pom.
-No large needle? Use a toothpick tightly taped to the end of the garland string.
Step 5: Garland
-Tie a loop on each end of the string for hanging.
-You can also attach a long piece of matching fabric to the loop and use that for hanging (I use this method to secure garlands to the banister).
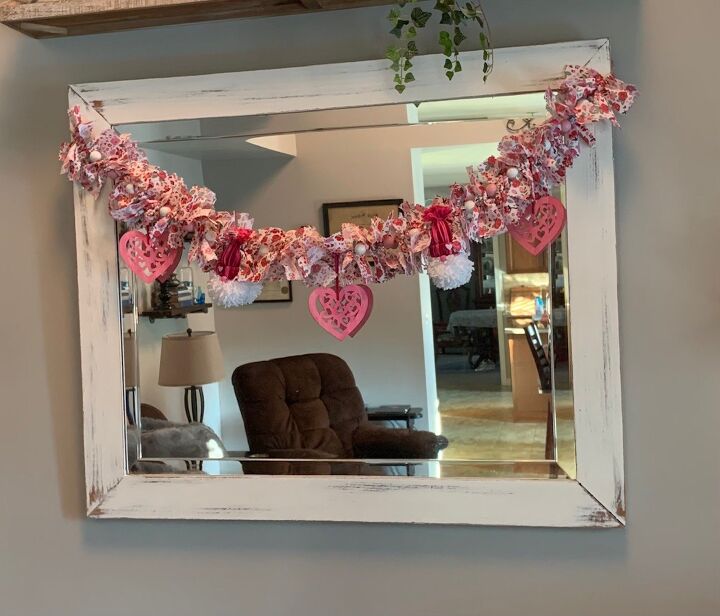
Project complete.
Happy Hearts Day!


Frequently asked questions
Have a question about this project?