


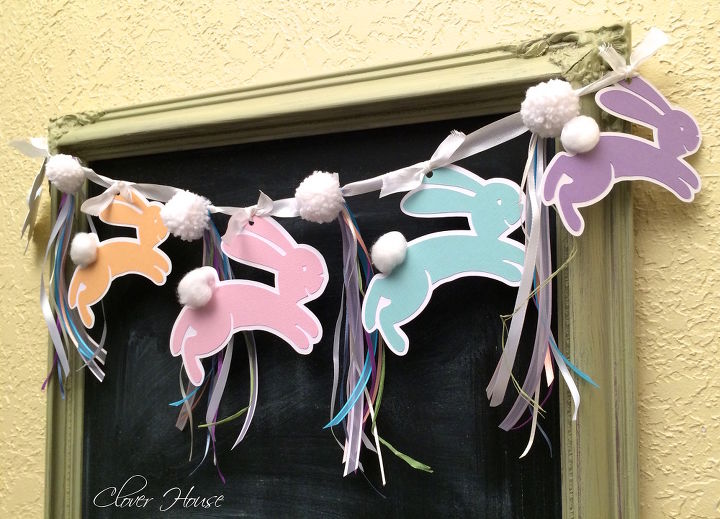
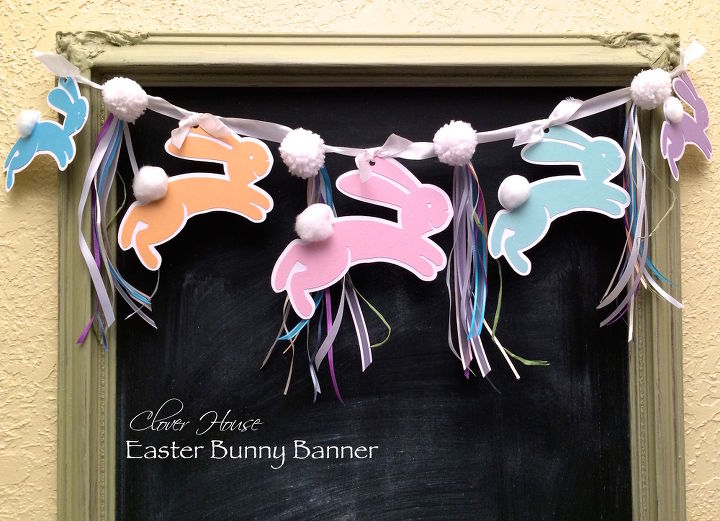
Easter Bunny Banner

by
DeeDee
45 Minutes
Easy
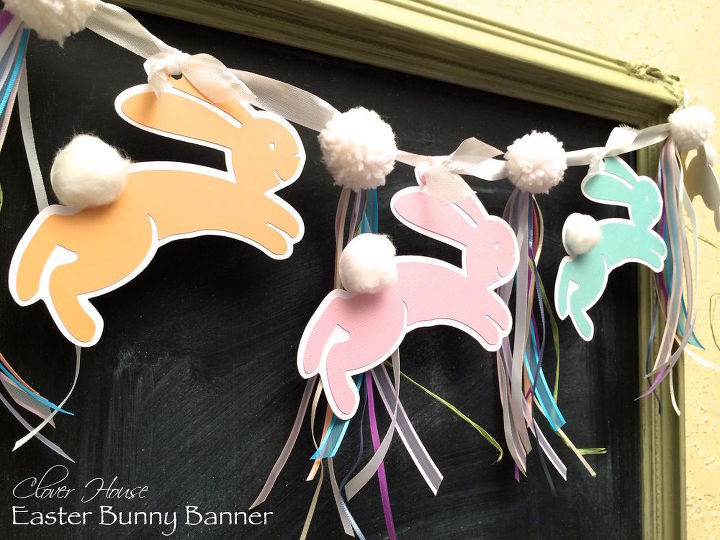
I love Spring and I love I also love to add to my seasonal decor when I can, so I made this bunny banner to adorn my chalkboard. Please visit our blog for complete step step instructions.
This time I'm kickin' it old school and using my Cricut Expressions machine and the Cricut Sampler cartridge. If you don't have these two items, any bunny pattern will do. There are several bunny patterns on Pinterest. All the supplies needed, I had on hand. Just use what you have.
To recreate my bunny banner, you will need:
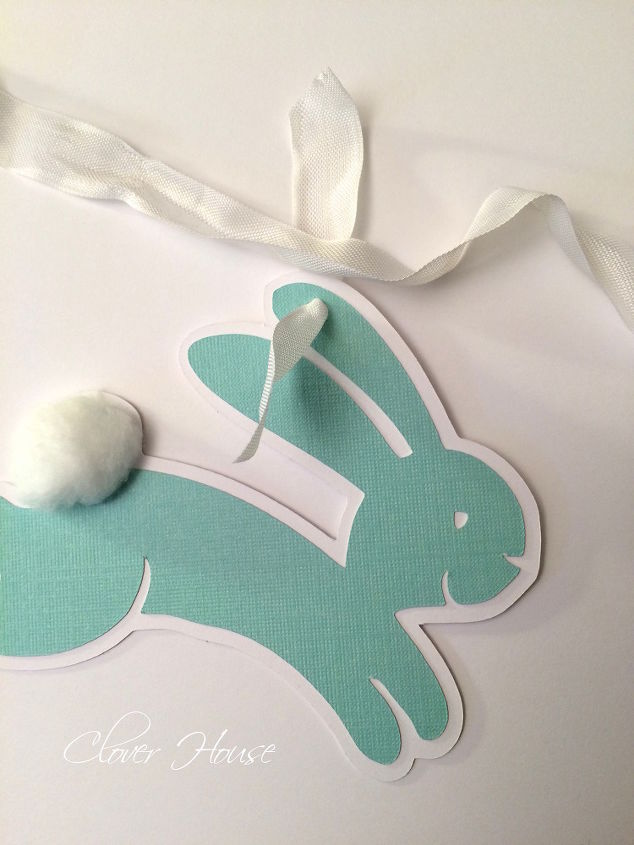
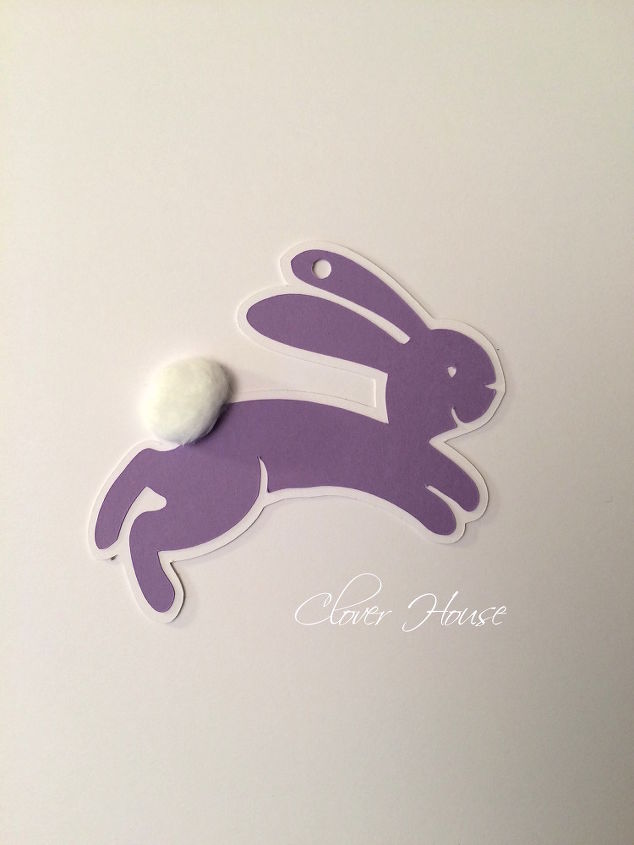
Now for stringing them into a banner. I used some white bias tape and measured out a piece about a yard long. Next cut five smaller pieces to tie the bunnies on to the long piece like you see above. Find the center of your strand and tie on your 4" bunny there. Space the others starting with the 3 1/2" bunnies and then lastly the 3" bunnies according to how you want them to look.
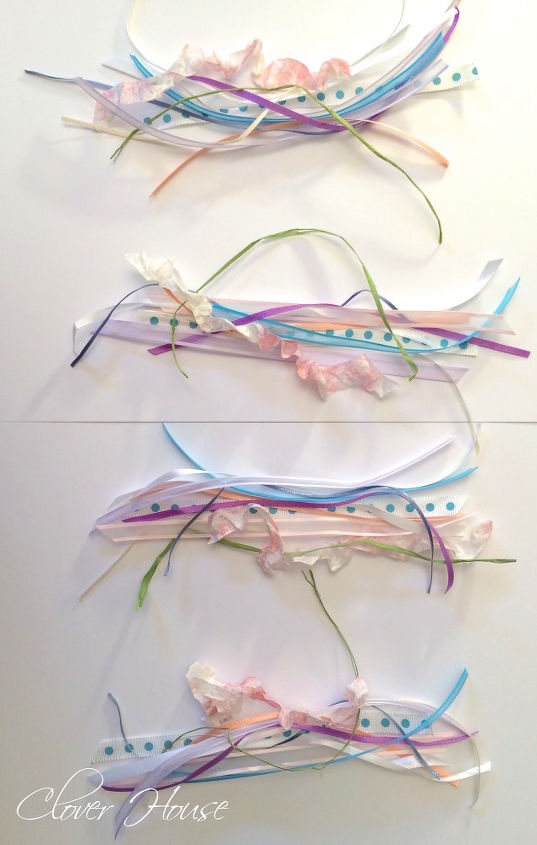
Now for the tassels. I have TONS of ribbon, so I just grabbed some colors matching my bunnies and cut several for each tassel at 6" lengths. Gather them all together and tie one end with another piece of ribbon to hold it all together.

Now tie your tassels and pom-poms on in the middle of each bunny. Space them to your liking, hang and enjoy! My ribbon was long enough I could tie it around my chalkboard and tie into a bow. I think it turned out so sweet!
This would also be adorable hanging on your mantel or a mirror. The possibilities are endless, get creative!
I hope you've enjoyed my tutorial and will be able to try one for yourself. Now I need to get the rest of the house all decorated for Easter!
Want more details about this and other DIY projects? Check out my blog post!


Frequently asked questions
Have a question about this project?