


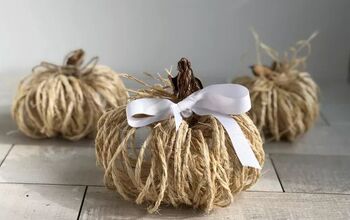
Easy DIY Twine Hearts for Valentine’s Day
Learn how to make DIY Twine Hearts for Valentine’s Day. These decorations are easy to make!
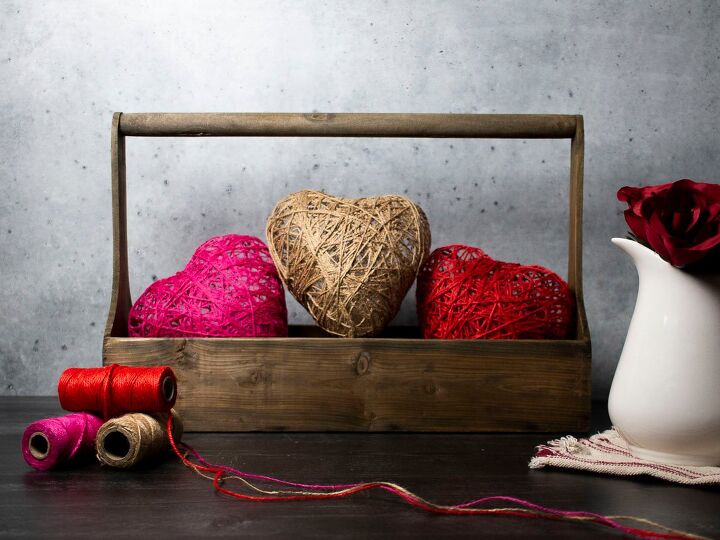
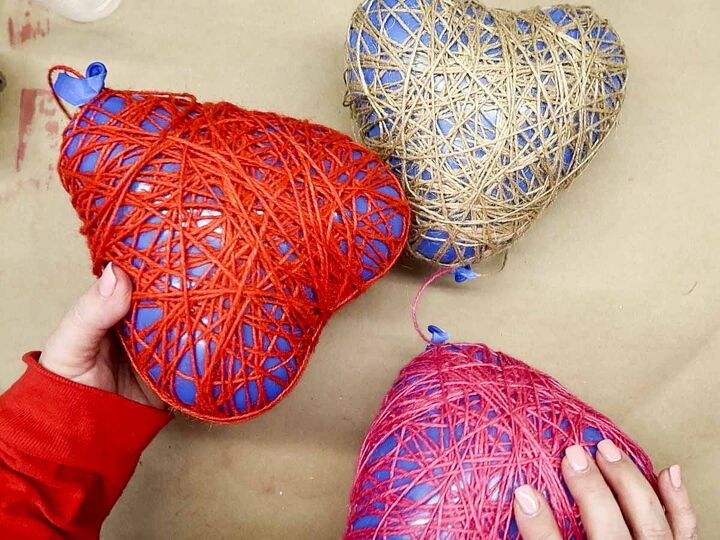
Jute twine, heart-shaped balloons and glue are the building blocks for this project.
DIY Twine Hearts Project Overview
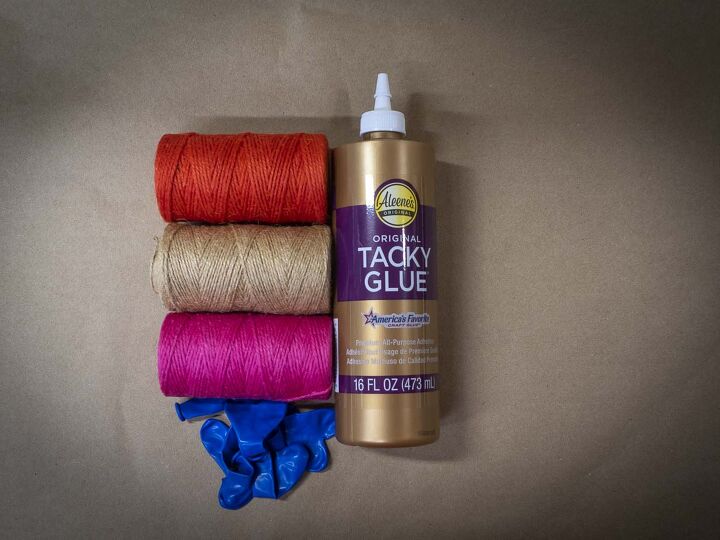
Jute Twine
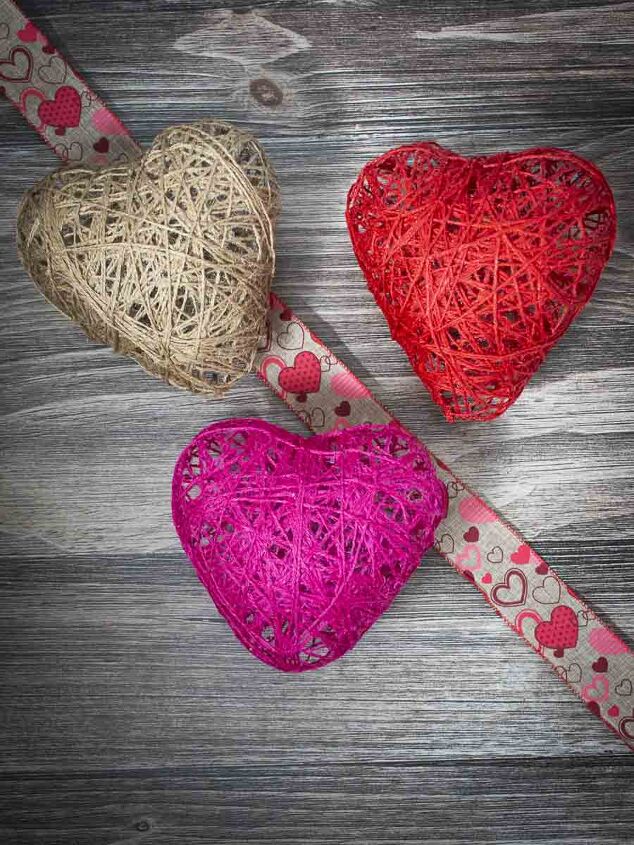
Since I was making Valentine’s Day decorations, I used red, dark pink, and natural brown jute twine.
Heart-Shaped Balloons
Because I wanted the final decorations to be on the smaller-size, I used 6″ heart-shaped balloons that I found on Amazon. They worked great (once I learned the hard way not to over-inflate them). It only took me a few popped balloons to learn when to stop blowing.
Glue
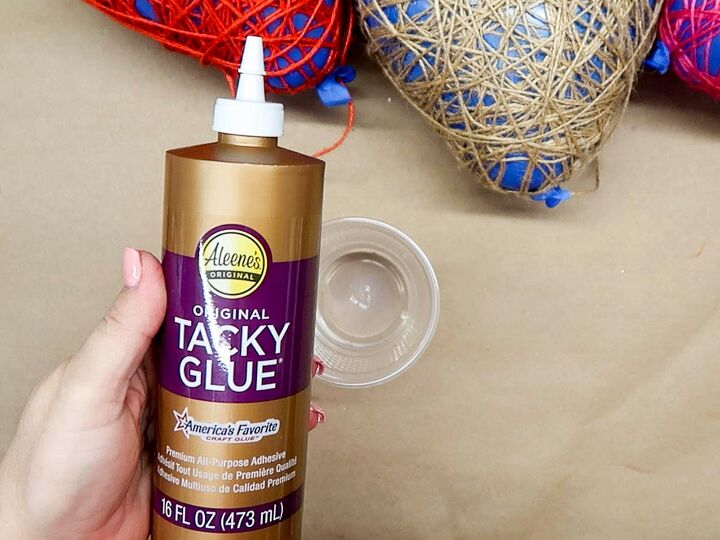
Aleene’s Original Tacky Glue was the last key ingredient. Because this glue is a bit thick, I added a little water to thin it before coating the twine.
Coating Process
I simply coated the twine-wrapped balloons with a lot of glue using a foam brush. While this was a messier process, I wanted to make sure the twine was completely saturated with the glue to make the hearts sturdier.
Instructions for DIY Twine Hearts
Here’s What I Used
Materials
- Jute twine (brown, red, and rose red)
- 6″ heart-shaped balloons
- Aleene’s Original Tacky Glue
- Water
Tools
- Stir stick
- Small container for mixing glue and water
- Foam brush
- Scissors
- Craft tweezers
- Pipe cleaners
- Painters tape
- Gloves (optional)
Project Steps
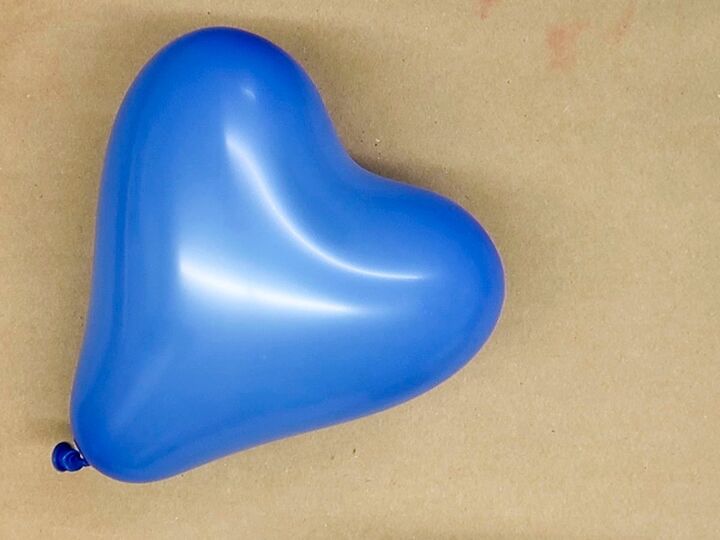
Inflate small heart-shaped balloons
Inflate three 6″ heart-shaped balloons to roughly the same size. Be careful not to over-inflate the balloons since they can pop. Tie off the balloons once filled.
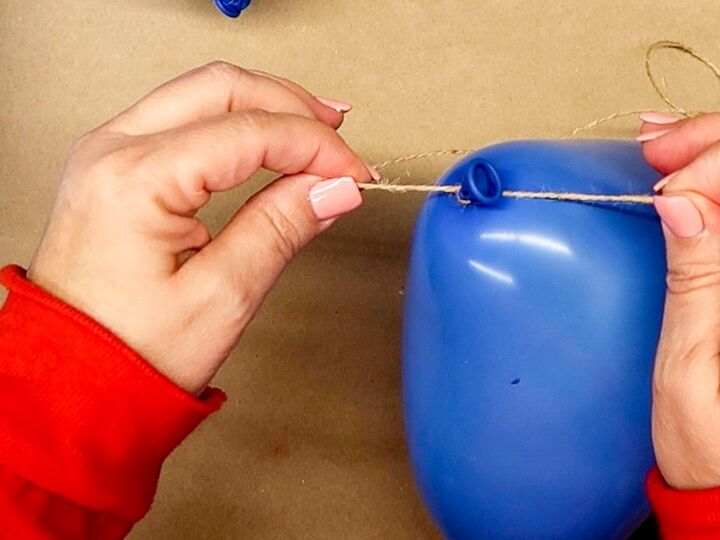
Tie jute twine to balloon neck
Take the end of a roll of twine and tie it to the neck of the balloon above the lip. This is to anchor the string in place when you start wrapping the balloon.
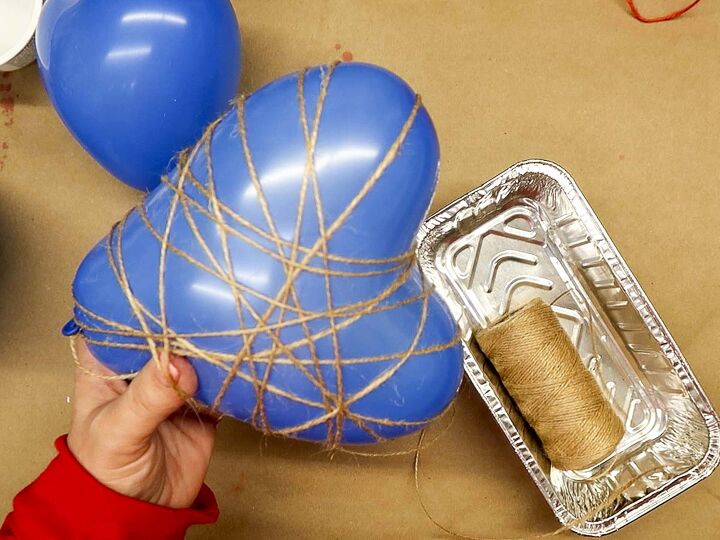
Wrap the twine around the balloon
Using a random pattern, wrap the jute twine around the balloon. Wrap the string around and around, up and down, and diagonally all around the balloon.
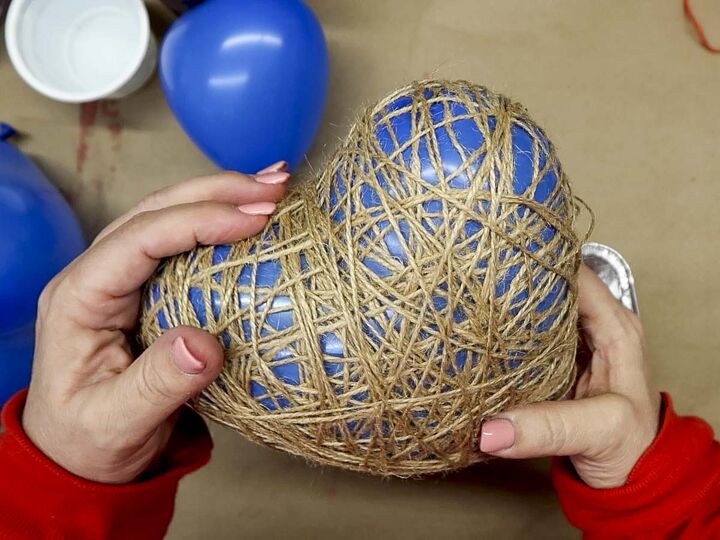
Keep wrapping with more string
Wrap more and more twine around the balloon until it has solid coverage. Look for any exposed area of the balloon and determine whether more string is needed to make the structure stronger.
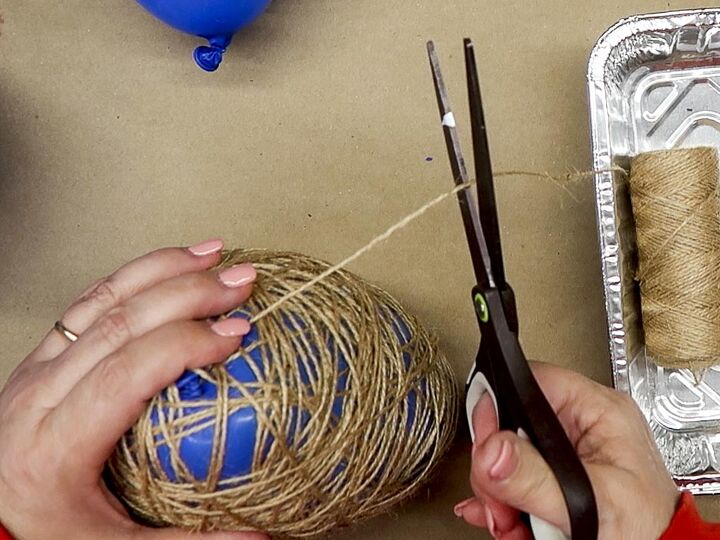
Cut string
After wrapping the balloon, cut the end of the string to separate it from the roll.
Tape end of string to balloon lip
Use a small piece of painter’s tape to attach string to the lip of the balloon. This helps keep the string in place when you add the glue.
Find a mixing container for the glue
Locate a disposable cup or other container for mixing the glue and water.
Pour Aleene’s Original Tacky Glue into container
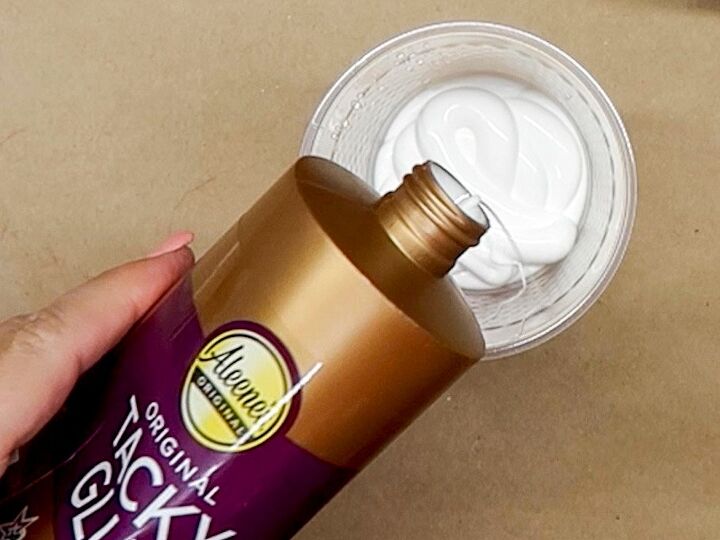
Add Aleene’s Original Tacky Glue to the mixing container. Because the glue is thick, it’s easier to pour if you remove the entire cap. Pour a good amount of glue into the container, especially if you’re making more than one twine heart. However, if you run low, you can always mix up another batch.
Add water to thin glue mixture
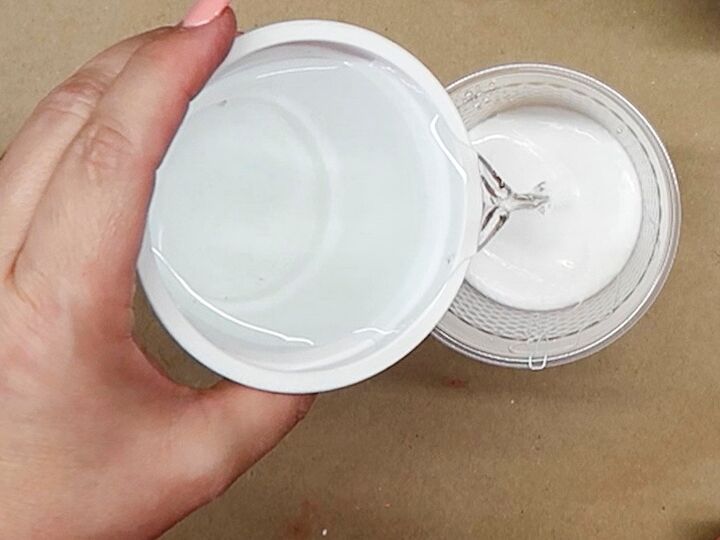
Because Aleene’s Original Tacky Glue is thick, add water to thin the glue. There’s no precise amount of water to add. I added about 1 part water to 5 parts glue. I wanted it to be a bit runny, so that the glue was dripping off the mixing stick.
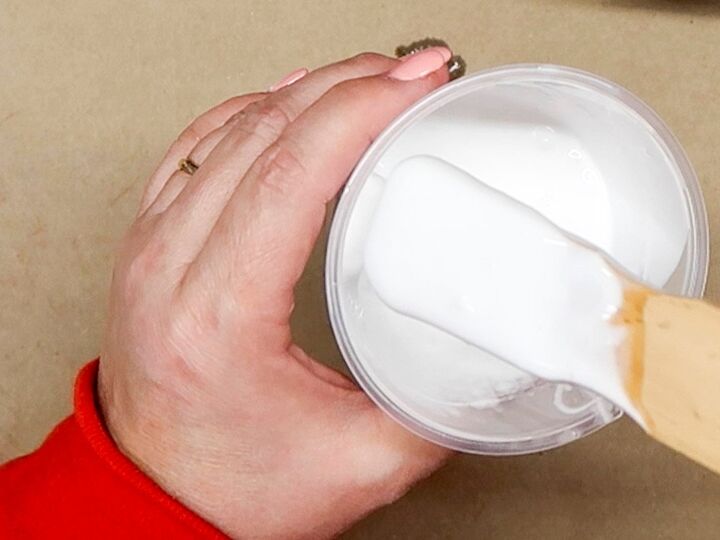
Mix glue and water thoroughly
Use a stir stick to mix the glue and water combination. I used a painter’s stick. Keep stirring until the glue and water are thoroughly mixed.
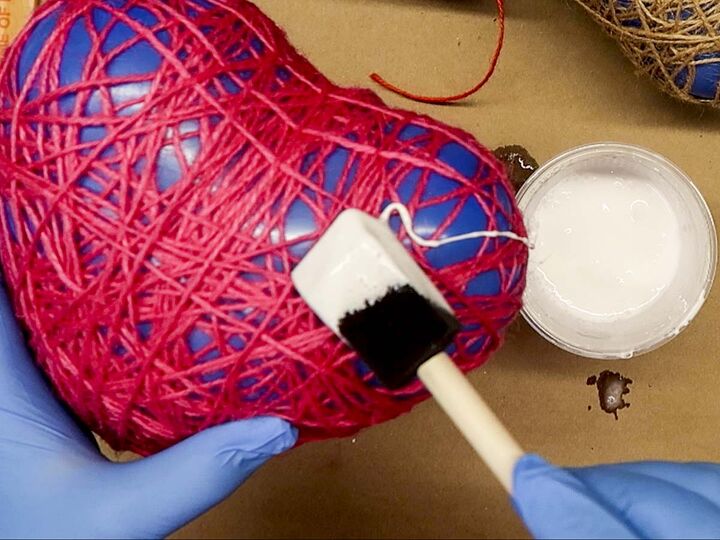
Use foam brush to coat balloon with glue mixture
Dip a foam brush into the glue mixture and then cover the string with glue. This step will get messy, so you may want to cover your workspace and wear gloves.
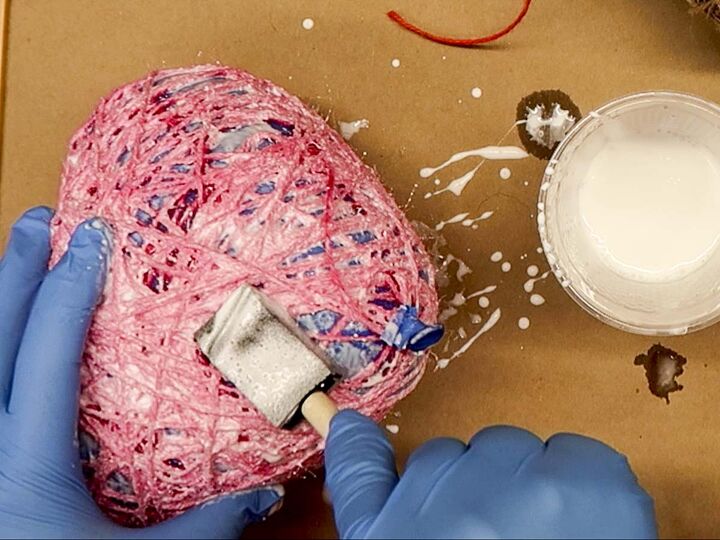
Thoroughly coat string with glue
Saturate the string with the glue mixture. Don’t leave any part of the string dry. Add more glue so that it soaks through to the back side of the string.
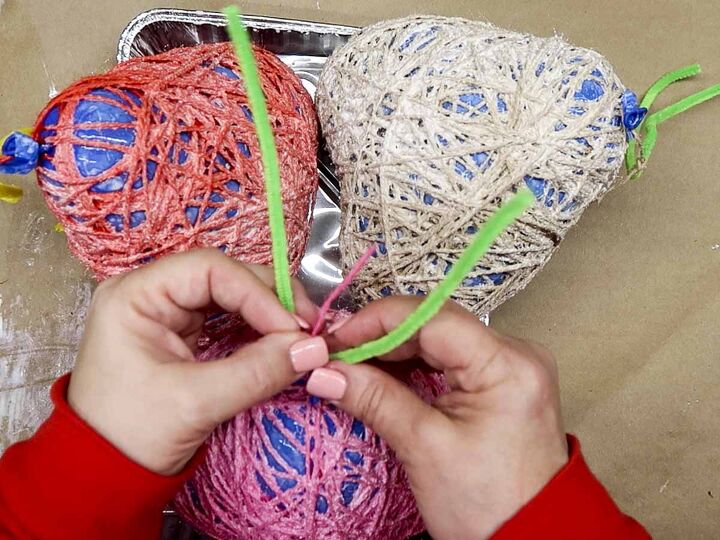
Attach pipe cleaners to string at balloon neck
Tie string to pipe cleaners (also known as chenille stems) at the neck of the balloon. The pipe cleaners make it easier to hang the balloons, which aids in the drying process.

Hang to balloons to dry for about 2 days
Using the pipe cleaners, hang up the balloons to dry. I hung the balloons from a wire wreath form. Other objects would work too, such as a hanger or a stick. If hanging multiple wet balloons, leave space between them.
Because the twine is saturated with glue, it may take a couple days to dry. Mine took two days. After about a day and a half, I flipped the balloons over so they were sitting on top of the wire wreath form. This helped the top part of the heart to dry.
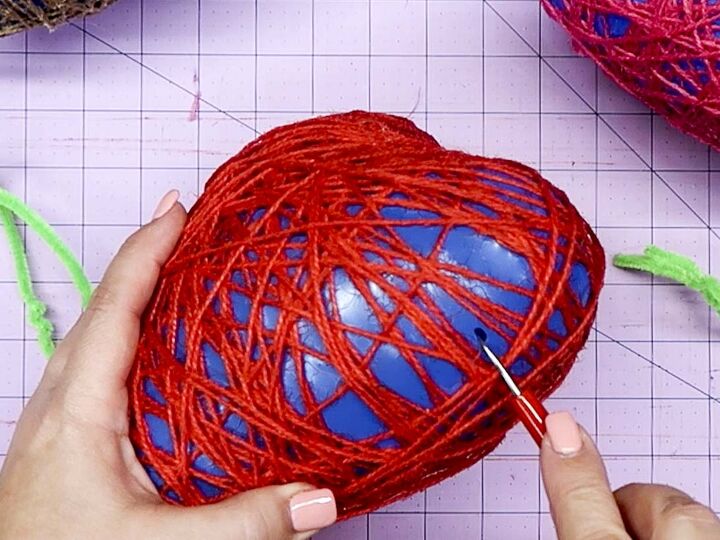
After completely dry, pop balloon
Wait until the twine has dried completely before popping the balloon. If the twine is still wet, the deflating balloon can cause the heart to cave in. This isn’t a problem once the string has thoroughly dried.
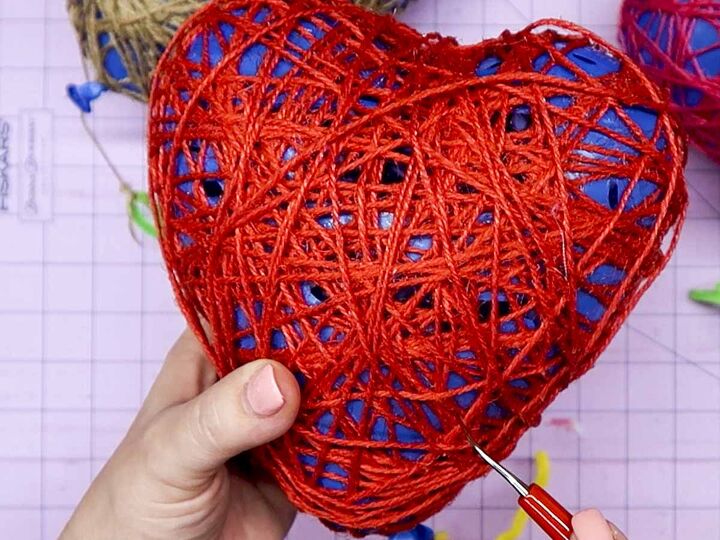
Poke more holes in the balloon
Keep popping more holes in the balloon. Because the balloon is glued to the twine, pieces of latex will remain stuck in place after you pop the holes.
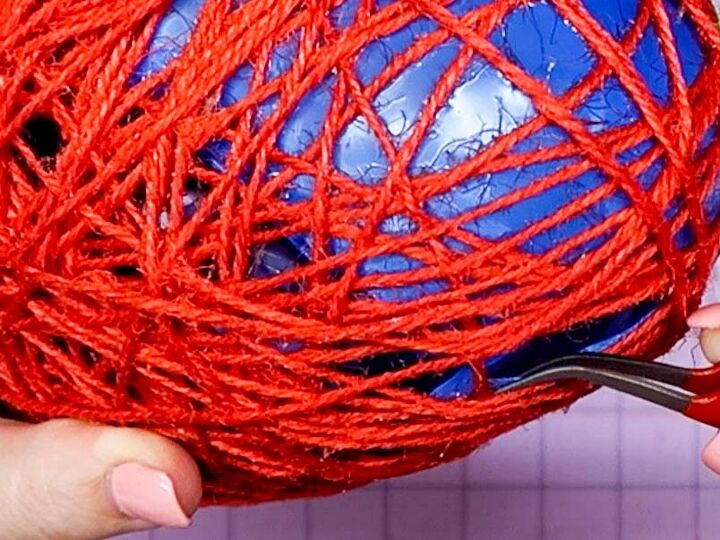
Use tweezer to pick out balloon pieces
This is the tedious step, but it’s not bad. Take a pair of craft tweezers and start removing small pieces of latex. You’ll pluck out lots and lots of small pieces.
Some pieces may be harder to remove. Try pushing them into the center or scrape them off with the sharp end of the tweezers. Don’t give up; the latex eventually comes off. I listened to an audio book to pass the time.
Once you remove the balloon pieces, you’re ready to display your twine heart decorations.
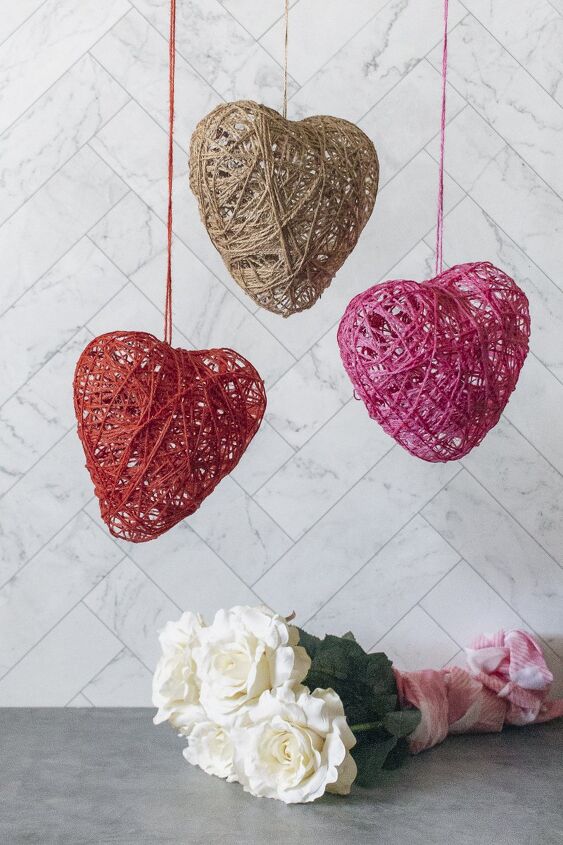
You can hang the hearts too!
Resources for this project:


Comments
Join the conversation
-
I was thinking before you started was that you were going to make a large four-leaf clover out of the balloons after you covered them with the twine. Hook them together in the center and add a stem. Maybe cute as an alternate “wreath.”
-
Anne, please post pictures! I’d love to see how your 4-leaf clover out of hearts turns out! 👏🏻👏🏻👏🏻


Frequently asked questions
Have a question about this project?
Would it be helpful to spray balloons with Pam spray before wrapping? Thx Jan