


Ghosts for Halloween. ..BOO!

by
Marc Erick
6 Materials
$3
30 Minutes
Medium
I work as a chef and I also take care of decorating my restaurant. I love creating things from items I have on hand and I absolutely love Halloween, so I decided to come up with something for our outside display using items already in or used at the restaurant. All of these items you'll probably have at home too. The only item I actually purchased were the lights. The Halloween decoration I made were ghosts made from tin cans, hangers and old table cloths!
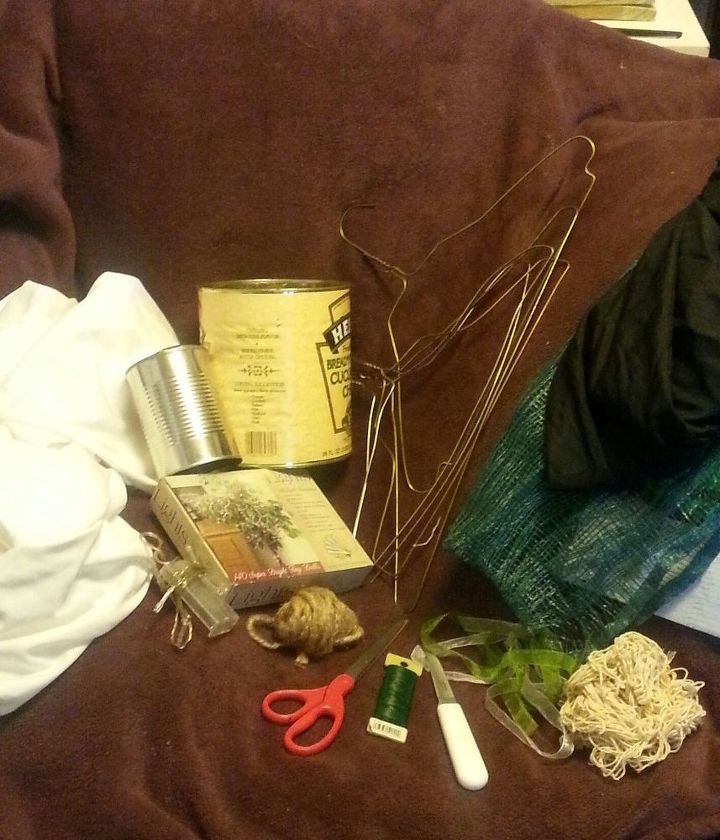
First, gather your materials : tin cans of any size, wire hangers, fabric. .I used old table cloths, twine or juet, lights.. I used battery operated moon lights for some and regular plug in string lights for some as well, floral wire, 'accessories' to decorate the ghost...old fabric, ribbon, mesh, netting, chains, etc.. you'll also want to have scissors and a paring knife .
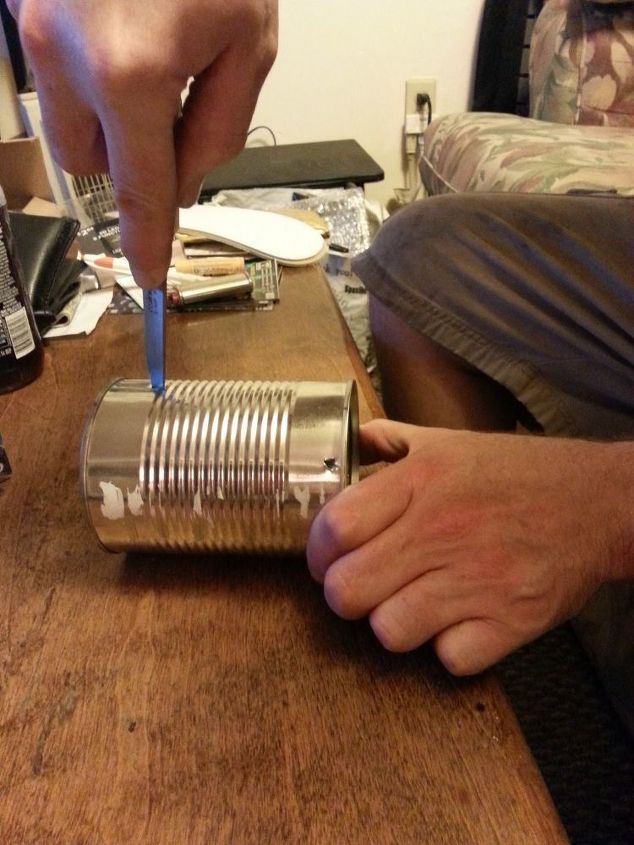
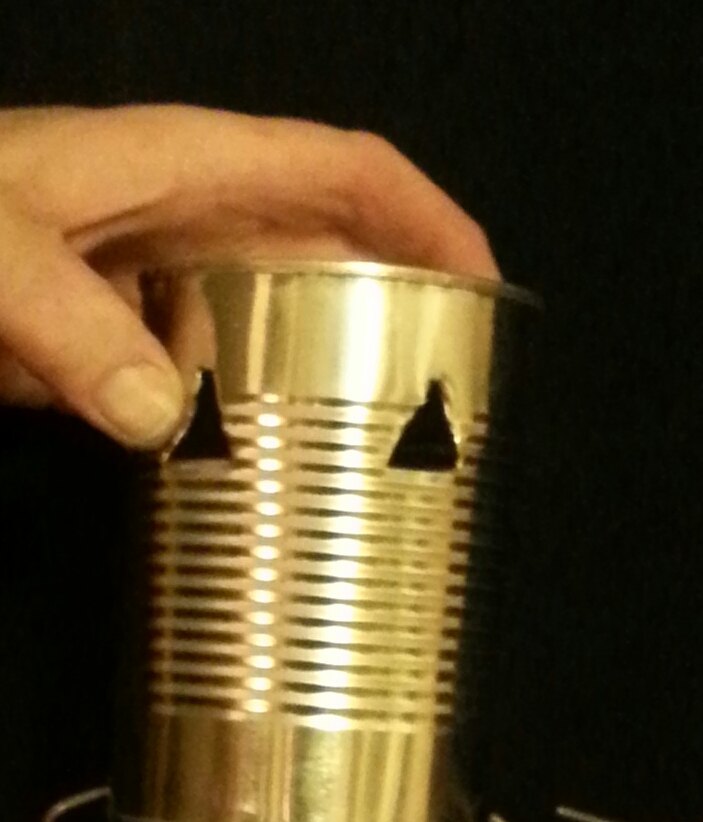
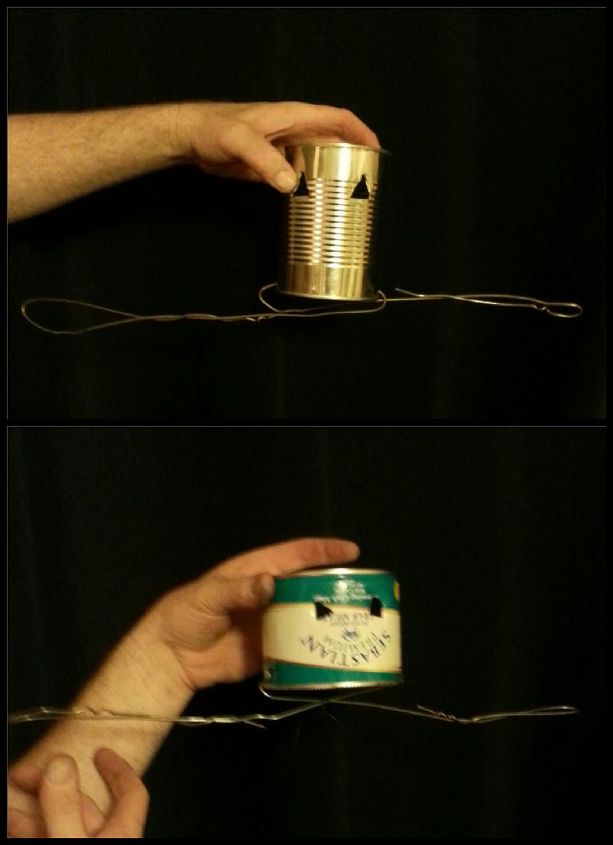
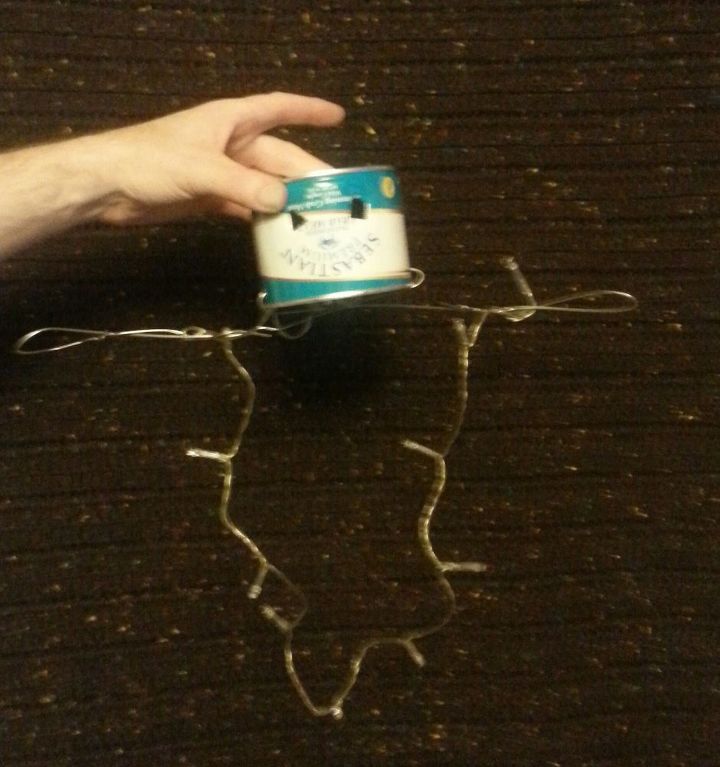
Wash and dry the can. Punch or cut the eyes: I use a dedicated paring knife for all of my can cutting and I would recommend wearing work gloves, although I'm not in this picture (gasp!).. forgive me! Use a sharpie to outline where you going to cut. I used a triangle shape. They don't have to be neat! Punch or cut a small hole on either side of the bottom (open end) of the can.
Next, straighten a wire hanger as best as you can. Feed the hanger through the hole at the bottom of the can. ..all the way through the second hole until it's just about centered. Then fold either side of the hanger in toward the center of the can. This will be the 'shoulders' of the ghost. You can make them as long or short as you'd like.
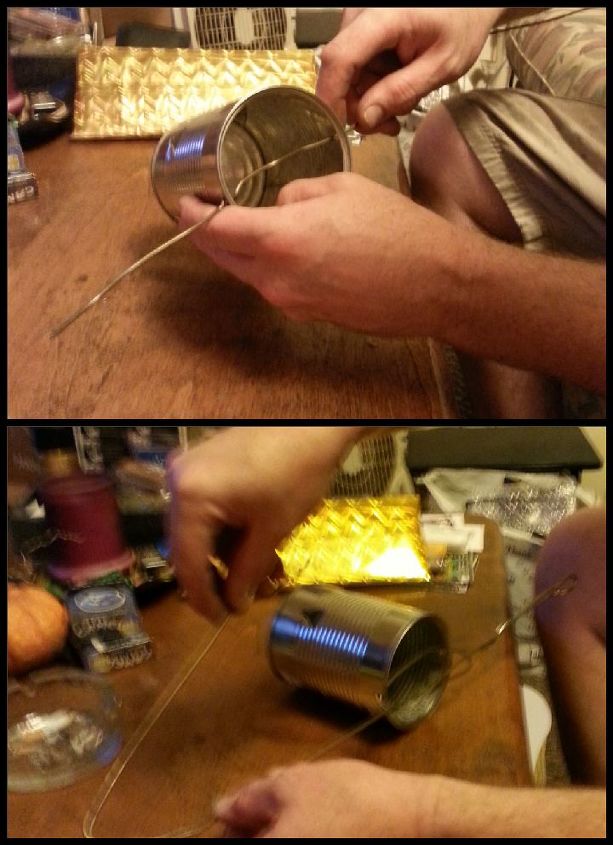
This will be the 'skeleton' of your ghost.
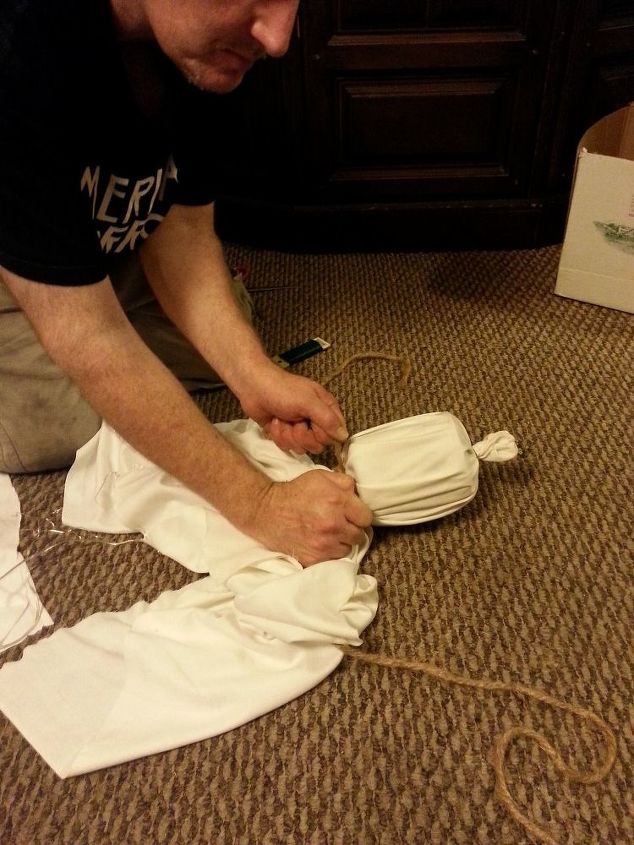
Lay out the fabric and center the can/hanger contraption on its side with the eyes facing up toward you.
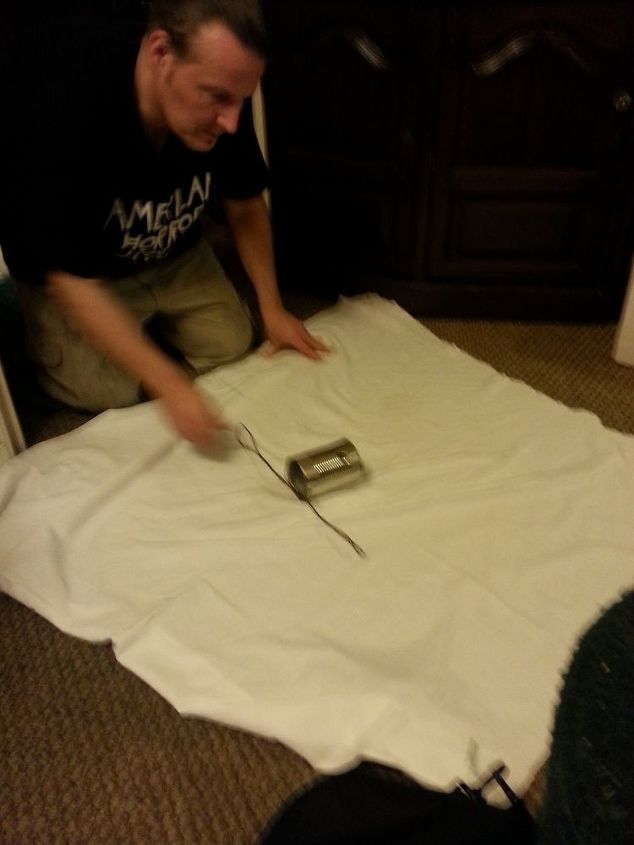
Fold the fabric over the can. Pinch about an inch of the fabric where the top of the can is. Secure with floral wire or twine.
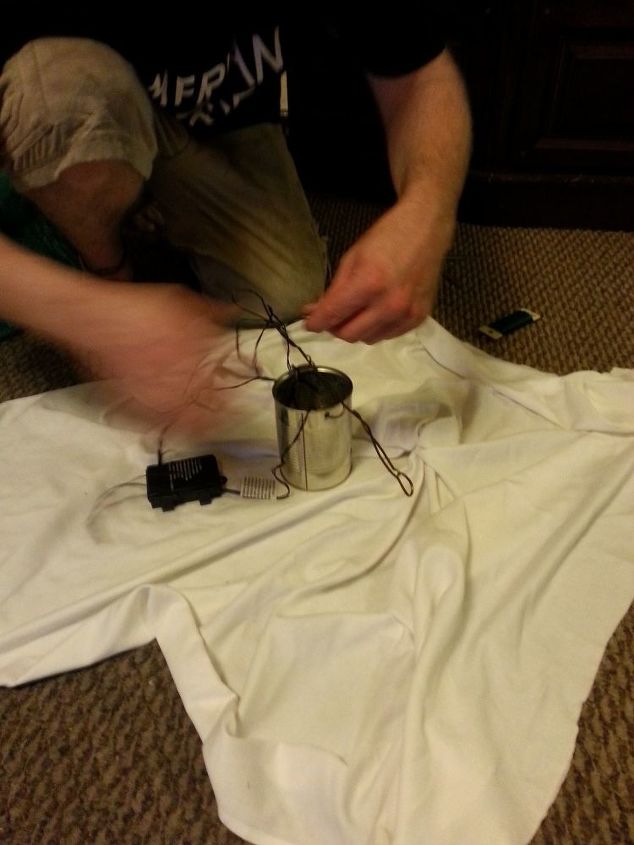
Next, attach the lights: unfold the fabric, using floral wire, attach the end of the light string to one side of the hanger. Leaving a length of lights hanging down, attach the light string to the other side of the hanger (see photo) , literally 'stuff' the rest of the lights up into the can, leaving the plug or battery pack hanging down.
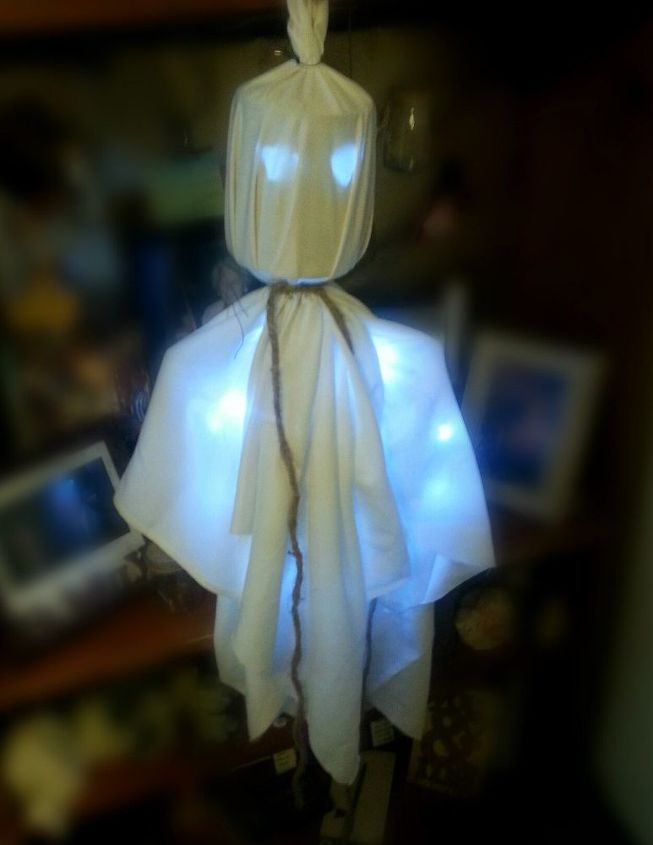
It should look like this. ..
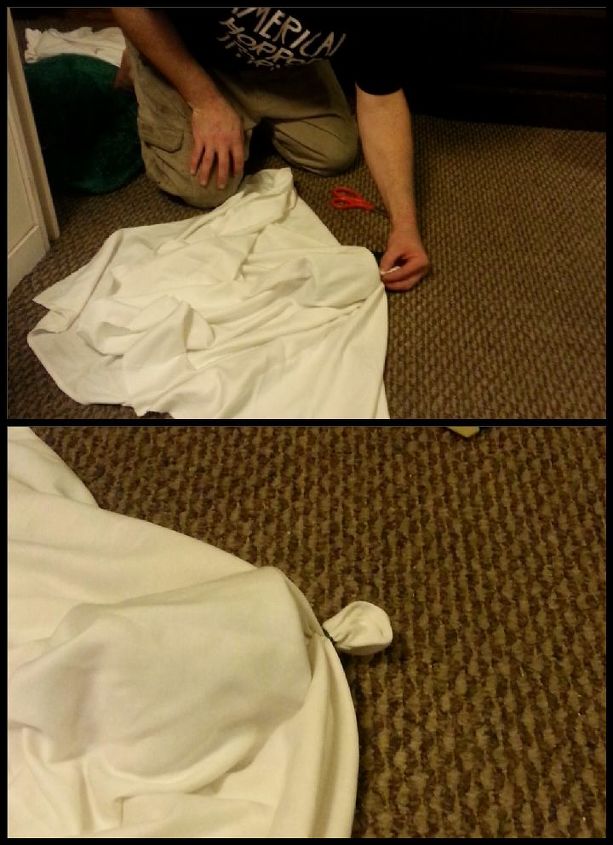
Fold the fabric back over the can making sure the little pinched part is centered at the top. Gather the fabric together under the can but over the hanger and secure with floral wire or twine.
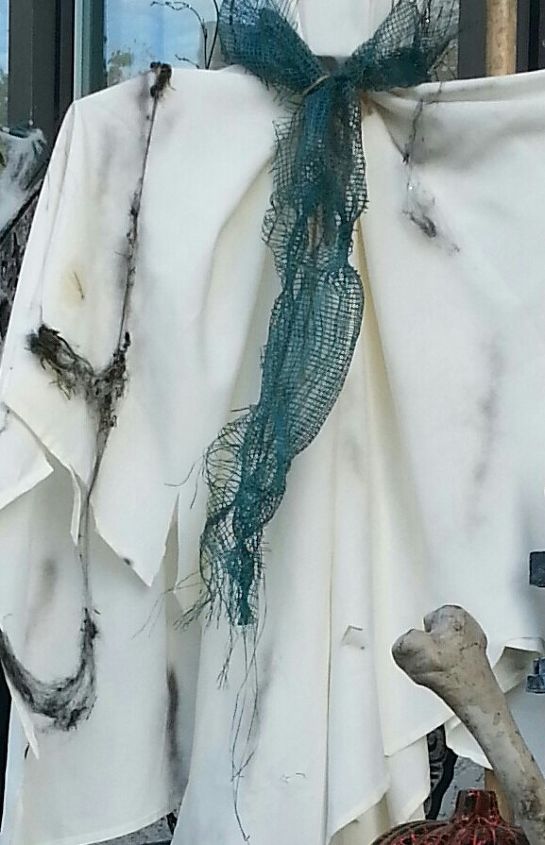
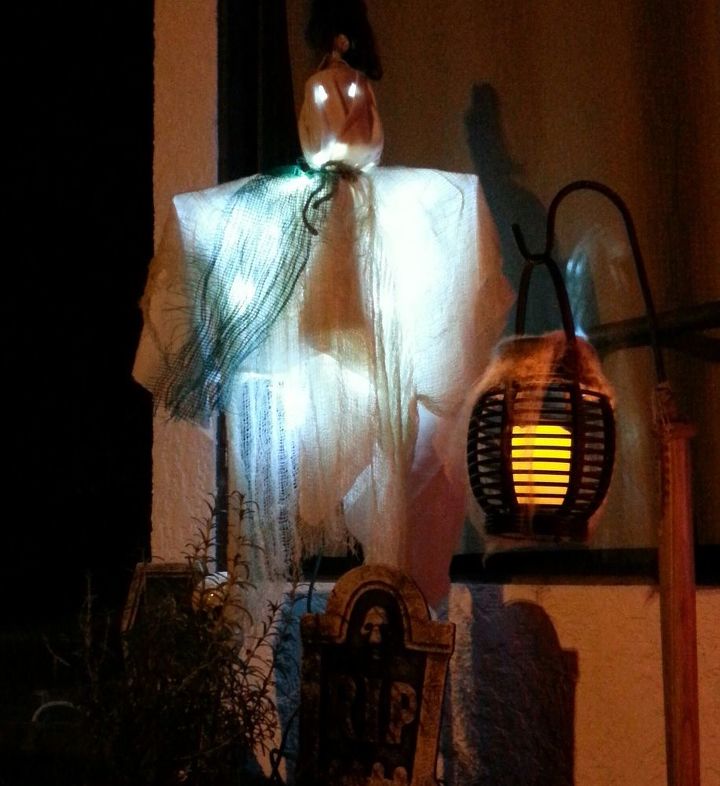
Finally, add accessories to make your ghost even more spooky! I tied juet around the neck, added some scrap fabric. .. I even used the sack our cabbage was packed in for a 'scarf'! Anything goes! Be sure to cut and shred the ghost too! I also 'aged' the fabric on some of them by lightly spray painting in various spots using black and red paint.
I hope you like this easy Halloween decoration. Being a bit new to the community, I am learning how to explain things in an easy to understand way and take better, more detailed pictures. I'll get better, I promise! Until then. ..Happy Halloween Crafting!
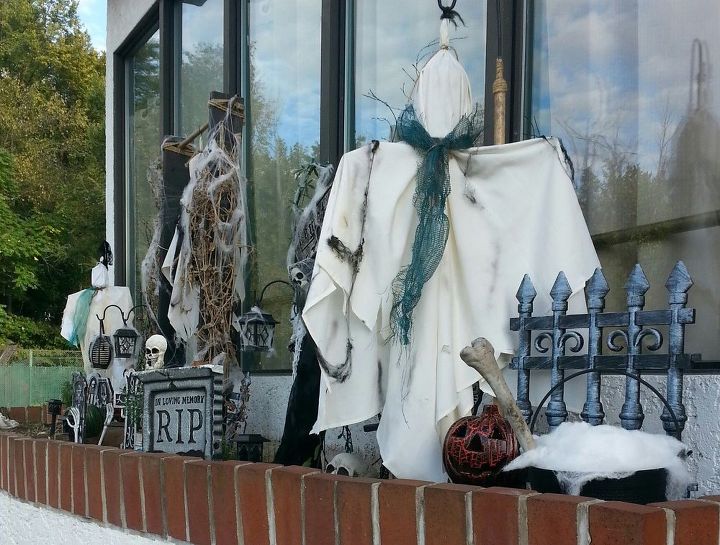
The finished display.
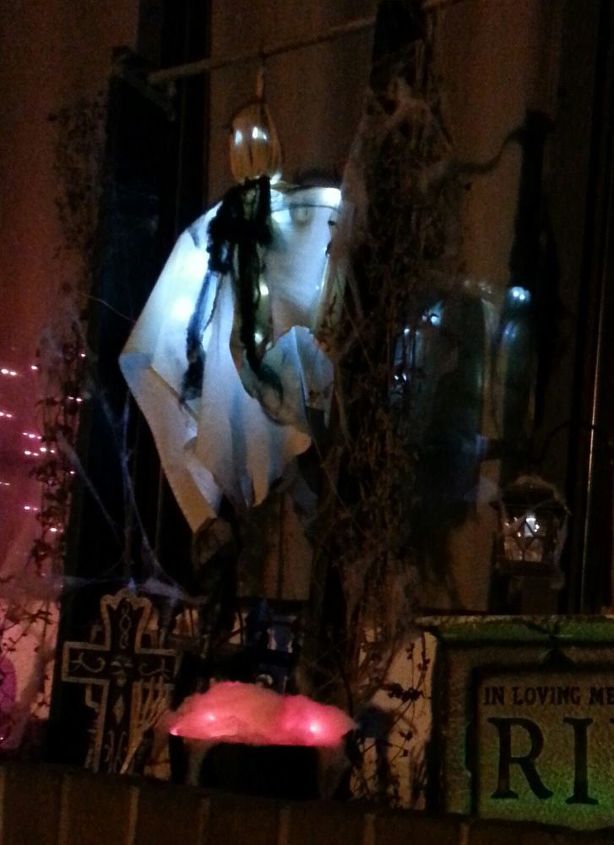
I made these smaller ones for my front porch.
We want to help you DIY, so some of the materials in this post are linked to sellers. Just so you know, Hometalk may collect a small share of sales from the links on this page.


Any price and availability information displayed on [relevant Amazon Site(s), as applicable] at the time of purchase will apply to the purchase of this product.
Hometalk may collect a small share of sales from the links on this page.More info
Comments
Join the conversation
3 of 45 comments
-
It's bootiful!
-
Marc, I'm not going to "trick or treat" at your house...TOO SCARY!!!
What a great idea for decorations! I am still working on my fall wreath!


Frequently asked questions
Have a question about this project?