


Glam DIY Valentine's Day Candle/Centerpiece Holder

You can find a lot of Valentine's Day home decor in stores right now, but I think it is more fun to make your own home decor. I was inspired by an Instagram reel from a crafter influencer, "makeitwithmicah". She posted a beautiful DIY Valentine's day candle holder reel, and I was so inspired and excited to make my own DIY Valentine's Day candle holder! I also thought, "I can use this as part of a floral centerpiece or I can place wineglass centerpieces on top of the DIY Valentine's Day candle holder". This post will show you how to make the DIY Valentine's Day candle holder and how to incorporate it as part of a floral centerpiece. I also posted pictures of this DIY Valentine's Day candle holder with a battery operated candle and 2 wineglasses centerpieces. A candle holder is definitely versatile when it comes to crafting. It can be utilized as a base for other home decor centerpieces.
Check out my Instagram reel on this Valentine's Day DIY Candle Holder: https://www.instagram.com/reel/CYhXGBVq18A/?utm_medium=copy_link
Enjoy and have fun crafting!!! 
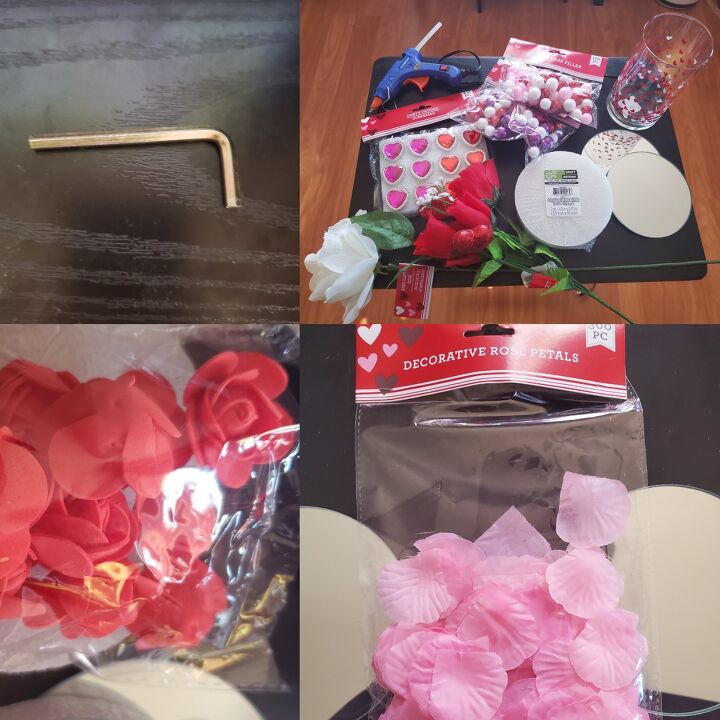
Supplies
- 1 round white floral foam (4.8 in x 0.75 in)
- 2 round glass mirror candle holders (5 in x 5 in)
- 6 mini foam roses
- 6 Valentine's day party favor rings (3 red and 3 pink)
- Cylinder vase with Valentine's day pattern (plain is fine too)
- Artificial Valentine's Day flowers (at least 2-3 bunches)
- L screw driver
- Red, pink, purple white glitter vase fillers
- Hot glue gun and glue sticks
- Wire cutters to cut artificial flowers (not in this picture)
- Battery operated fairy lights (optional) (not in this picture. You can see a picture in my Christmas figurine wineglass centerpiece post)
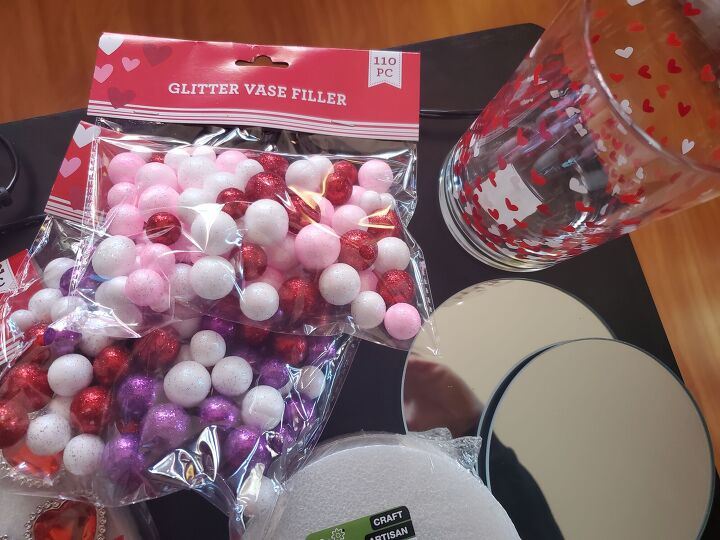
Here is a better photo of the glitter vase fillers.
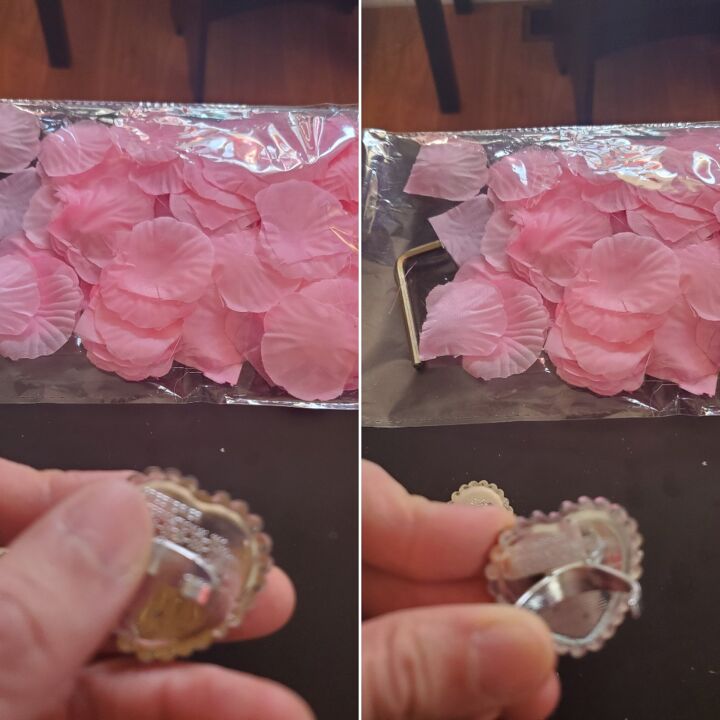
Step 1. Take one of the party favor rings and use both hands to stretch out the ring band to its maximum reach. I stretched out the ring band once. I did not have anyone to take a picture for me, hence why it looks like I only stretched out the ring band with one hand.
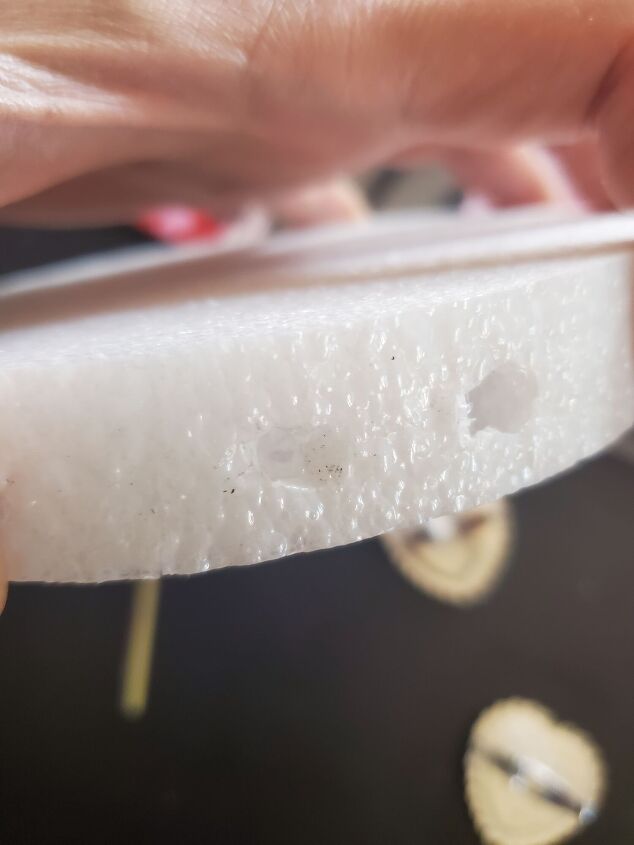
Step 2. Next, take the L screw driver and puncture 2 holes in the white round floral foam. The distance between the 2 holes should be close to the measurement of the stretched out ring band. It does not have to be perfect.
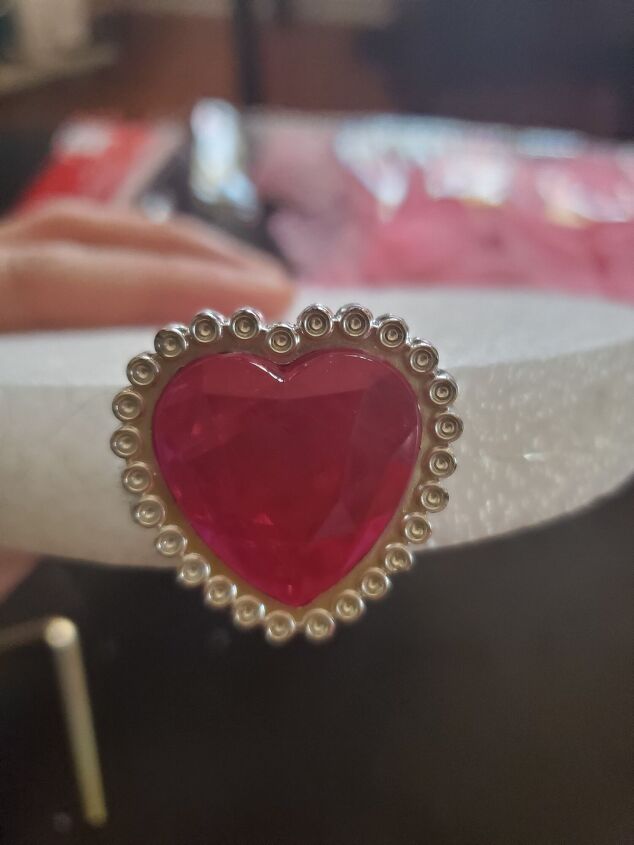
Step 3. Using the hot glue gun, place glue in the 2 holes on the white foam. Then stretch out the ring band and carefully insert the ring into the 2 holes.
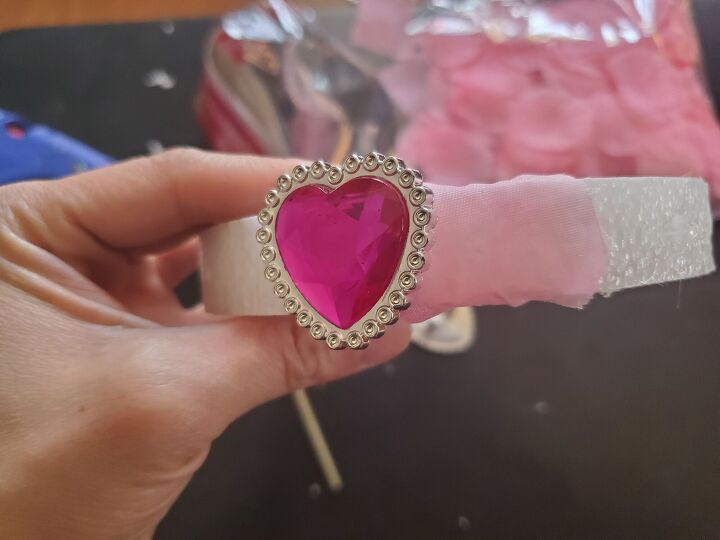
Step 4. The next step is to take a decorative rose petal and glue it next to the ring.
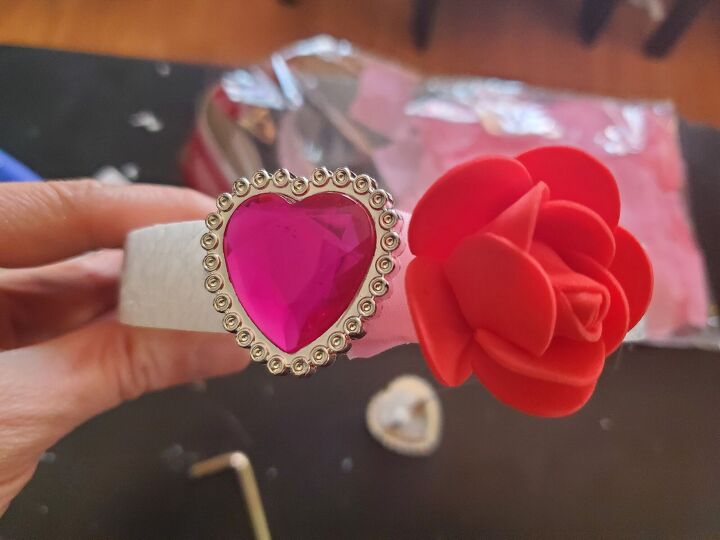
Step 5. Then take 1 foam mini rose and glue it on top of the decorative rose petal.
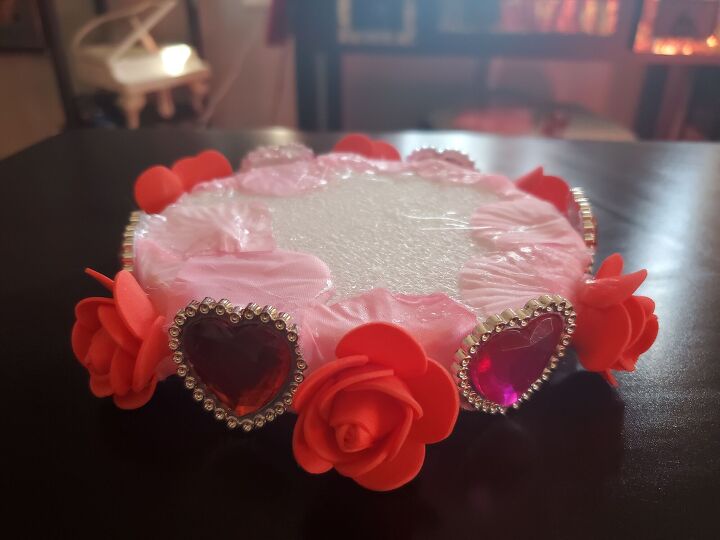
Basically, you are going to repeat steps 1-5 until all the sides of the white round foam are covered with the rings, rose petals and mini foam roses. As you can see in the picture, I alternate the colors of the rings (pink, red, pink, red, etc.). If some parts of the white round foam side are still showing, just glue rose petals on those white foam parts. It is not necessary to completely cover the top and bottom of the white foam with rose petals, because the round glass mirror candle holders will be glued on those areas. Just focus on the side of the white foam.
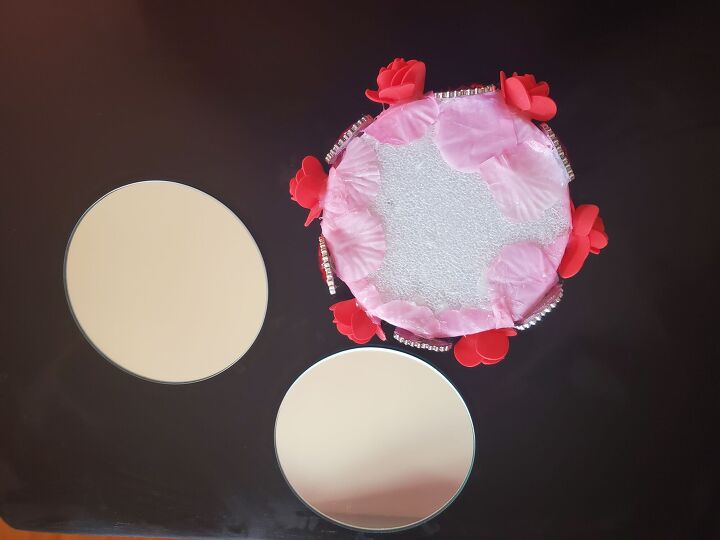
Step 6. Glue the round glass mirror candle holders on the top and bottom parts of the white round foam.
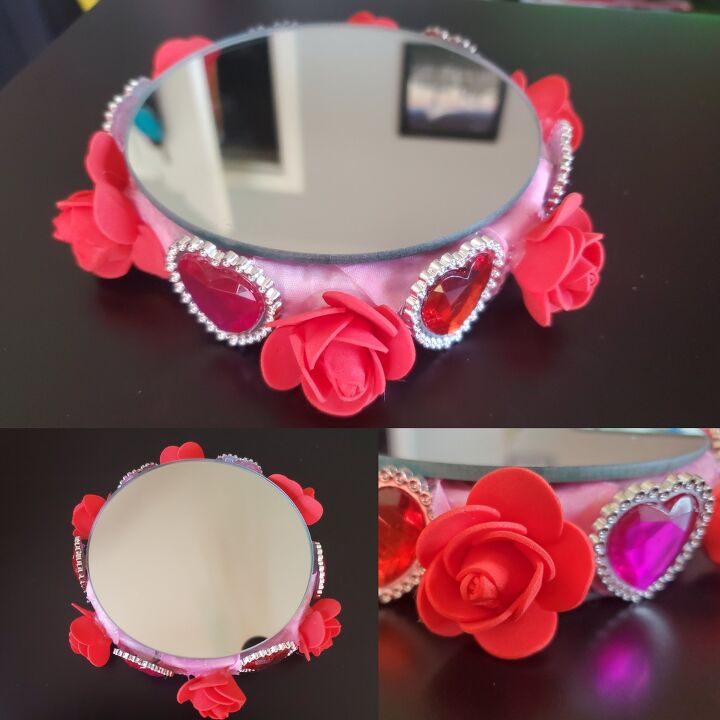
And this is how the Valentine's Day Candle Holder will look after gluing the round mirror candle holders. Follow steps 7-9 to assemble the floral centerpiece.
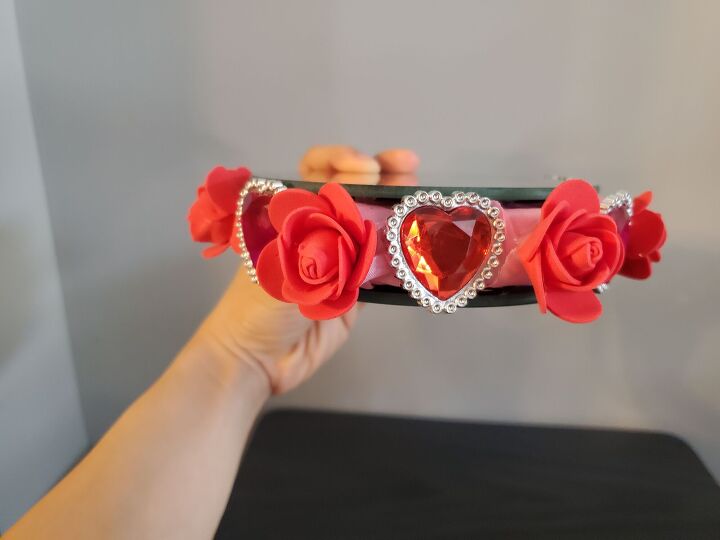
I thought I would include a side view photo of the final Valentine's Day DIY candle holder.
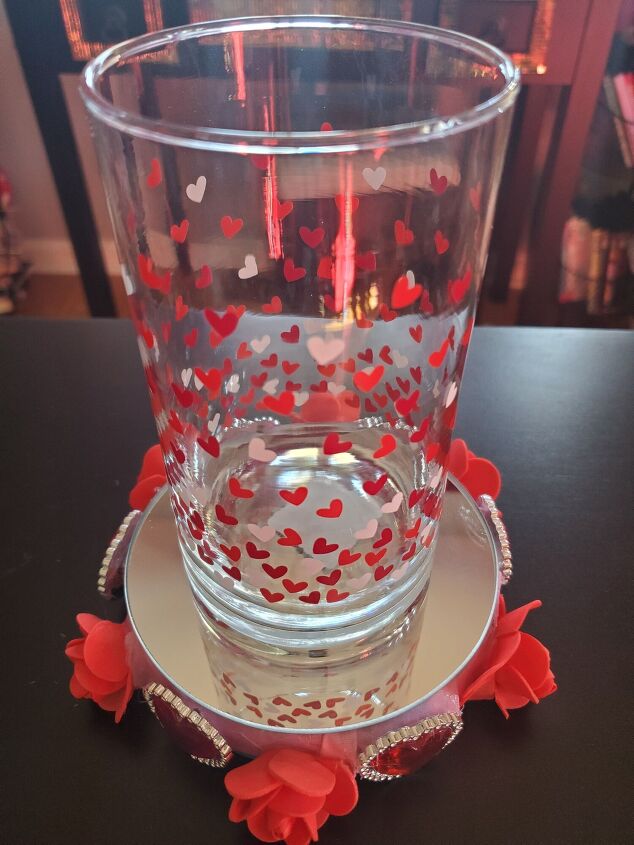
Step 7. To assemble the floral centerpiece, place the cylinder vase on top of the DIY Valentine's Day candle holder.
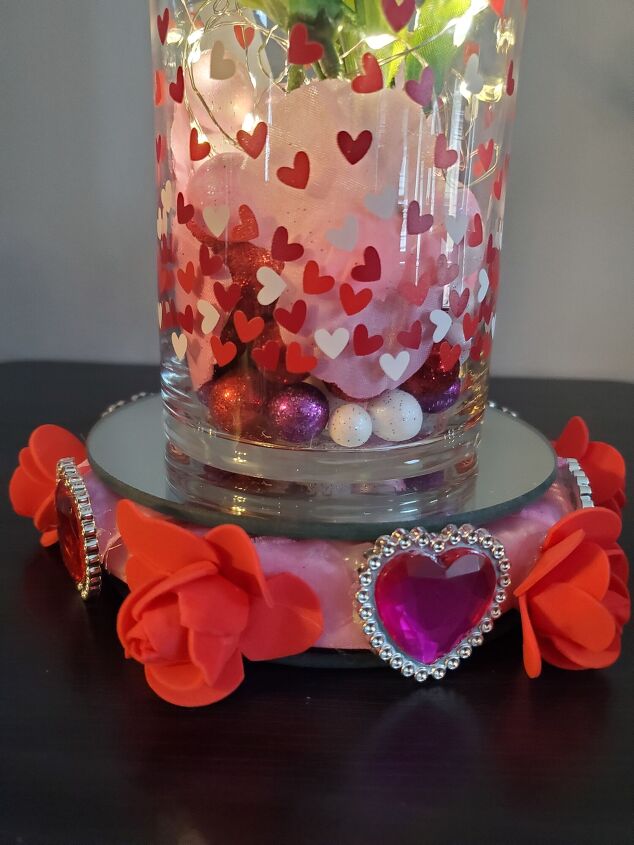
Step 8. Then place the glitter vase fillers and decorative rose petals inside the cylinder vase (just halfway). Do not completely fill the cylinder vase with the vase fillers, because there needs to be room for the artificial flowers. I decided last minute to insert battery operated fairy lights into the cylinder vase after I placed the vase fillers and decorative rose petals.
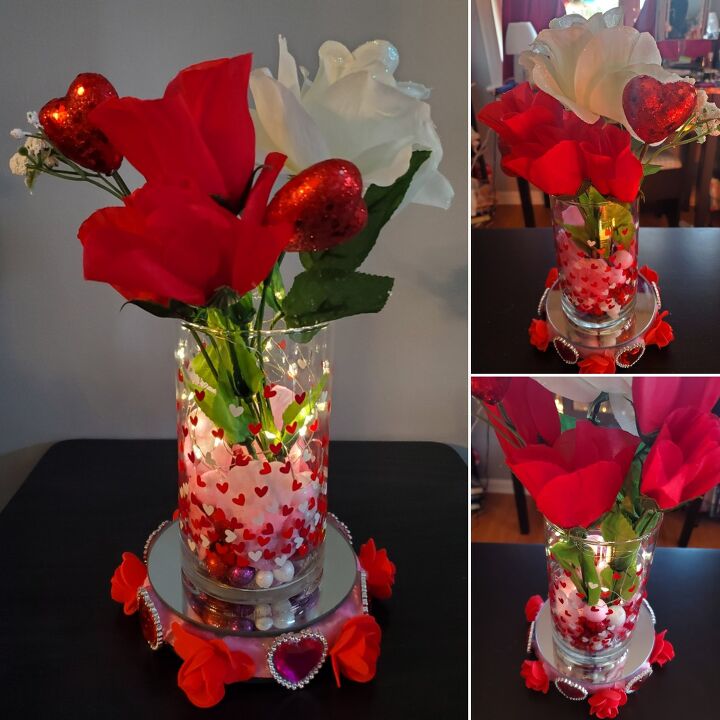
Step 9. Once the vase fillers and/or fairy lights are in place, use the wire cutters to cut the artificial flowers to your preferred length. Then place/arrange the artificial flowers in the cylinder vase according to your preference. And voila! This is the final Valentine's Day DIY candle holder with the floral centerpiece.
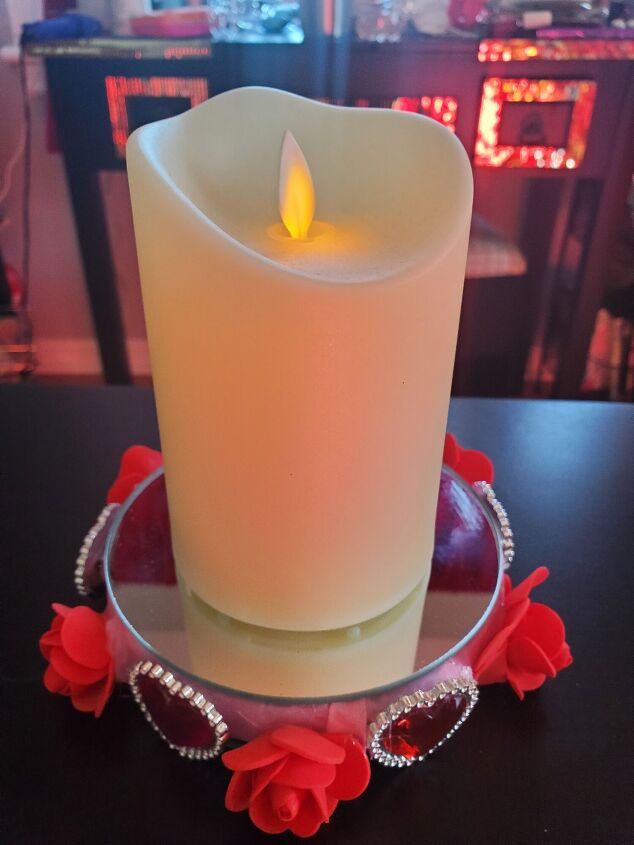
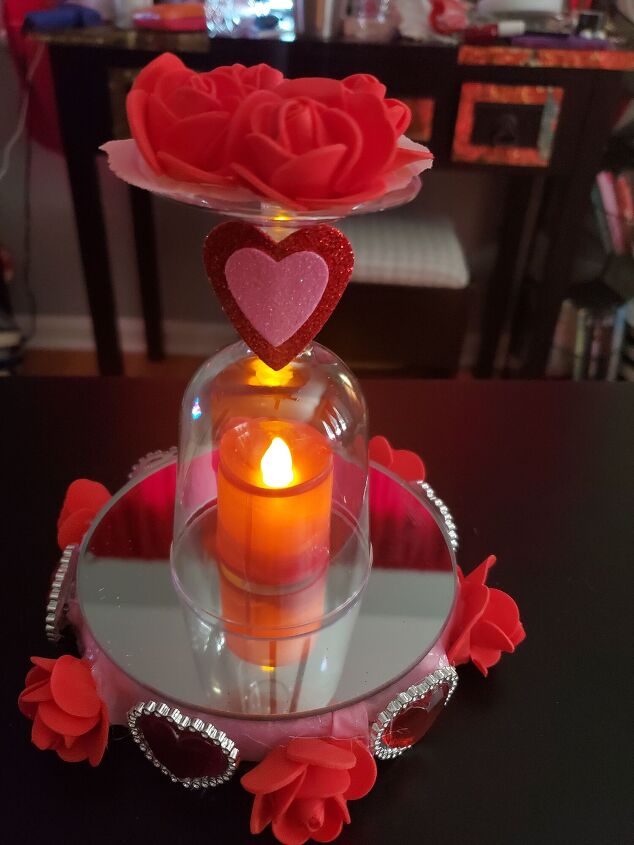
Here is how this DIY Valentine's Day candle holder looks with a battery operated LED candle. You can also place those Bath and Body Works 3
Wick candles (glass containers) or other brands of candles on top of this DIY Valentine's Day candle holder.
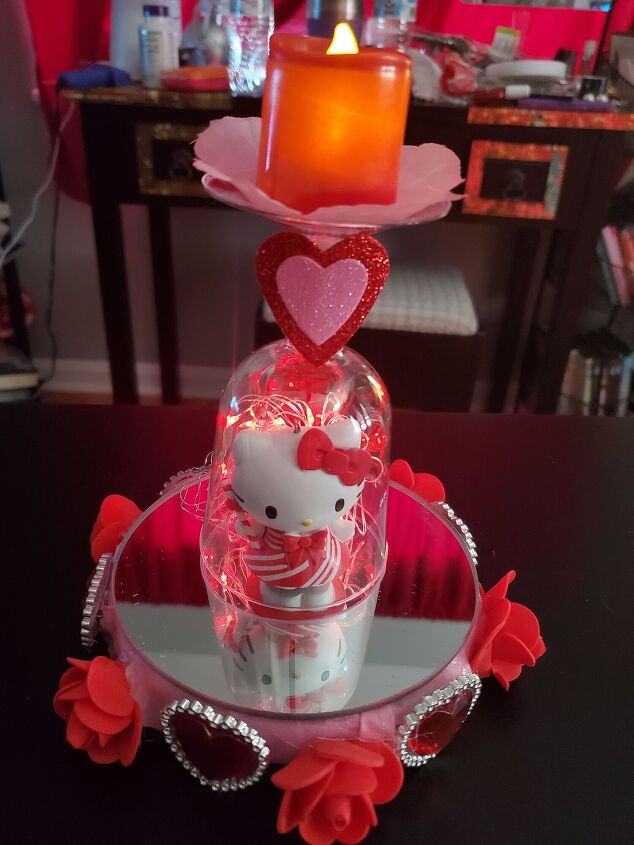
And here is how the DIY Valentine's Day candle holder looks with my Valentine's day themed Hello Kitty wineglass centerpiece. If you refer to my previous post on my Christmas figurine wineglass centerpiece, you will get an idea of how I assembled this Valentine's Day Hello Kitty wineglass centerpiece. For this Valentine's Day Hello Kitty wineglass centerpiece, I just glued a felt heart on the stem of the wine glass and I placed the decorative rose petals on the foot of the wine glass. Then I placed the red battery operated candle on top of the decorative rose petals.
This is another Valentine's Day wineglass centerpiece with the DIY Valentine's Day candle holder. I used a red battery operated candle as the figurine inside the wineglass. I placed the decorative rose petals and the mini foam roses on the foot of the wineglass.


Frequently asked questions
Have a question about this project?