


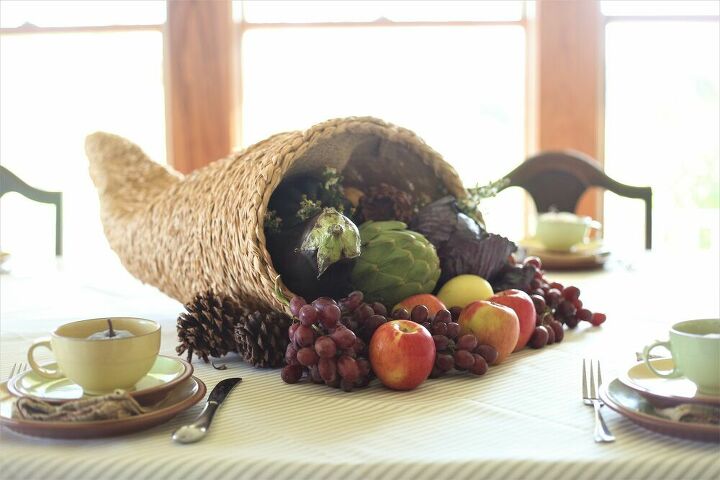
Handmade Cornucopia
In this post I show you how to make your very own custom cornucopia. Using easy to find supplies you can make a dramatic and beautiful Thanksgiving centerpiece.
Step 1: Decide on the size you would like for your cornucopia. My finished size is 27" long 17" wide at the opening and 12" tall at the opening. It is quite massive really! We have a big table. If you need a smaller cornucopia, just cut a smaller piece of chicken wire to work with. Begin rolling it into a cone shape. (Wearing gloves is a good idea). Wrap the wire around itself and just work with it until you have the size and shape you want.
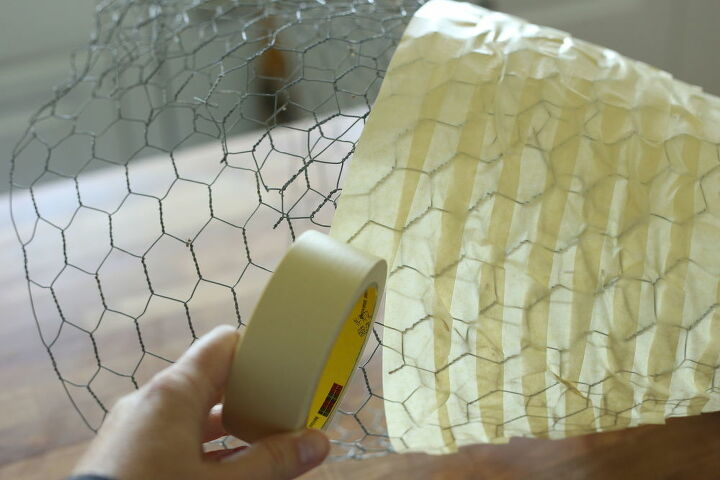
Step2: Next wrap the entire outside of the frame in masking tape
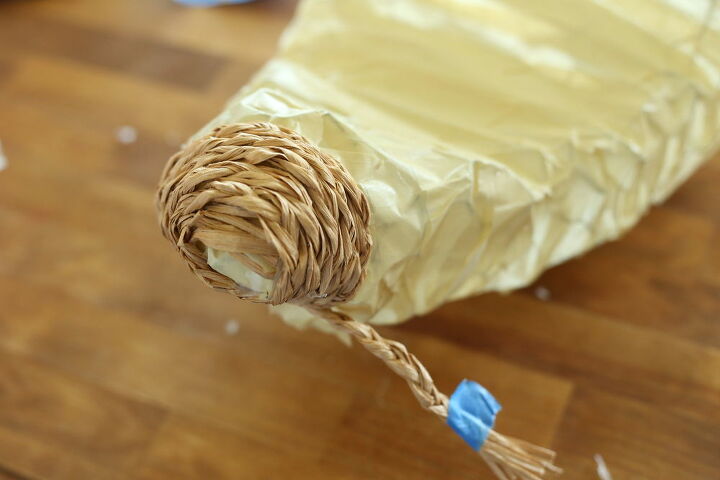
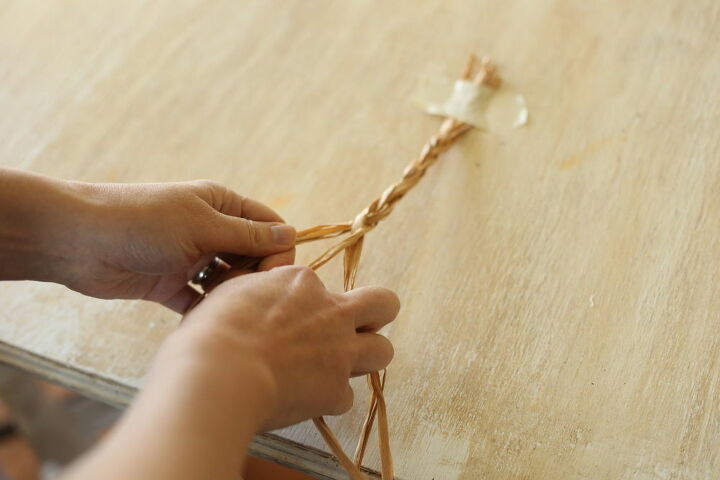
Step 3: Decide what you would like to use to wrap the outside of the cornucopia. I used braided raffia. We used three strands of raffia for each braid strand. Around the opening we did a fatter braid by using 9 strands of raffia for each braid strand. Cut your lengths to manageable sizes, too long and they will get tangled.
Just overlap the strands of each braid as you attach them, cut off any stray pieces.
Next: Use hot glue to attach the raffia to the frame of the cornucopia.
Braiding the raffia is a fairly time consuming project, depending on the size of your cornucopia. Although I think it is worth it for the beautiful results! Other materials that you could use would be twine, or thin rope. I have a laundry basket that is coming apart. I think the material on the outside of it would make a beautiful covering. You may have other ideas.
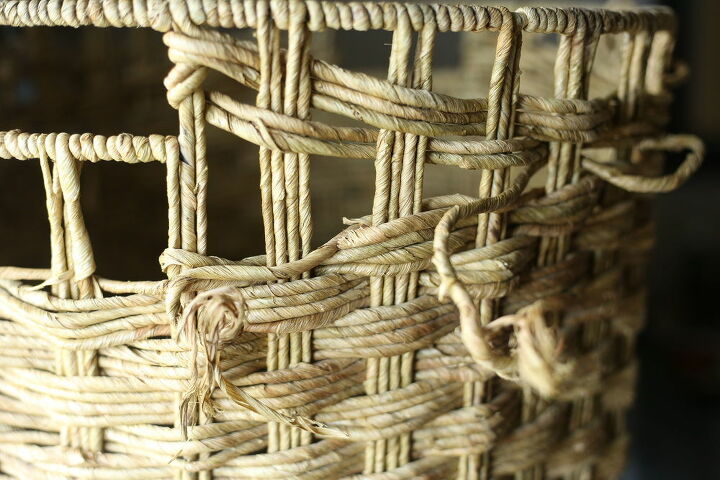
This forlorn laundry basket could be disassembled and used to wrap a cornucopia.
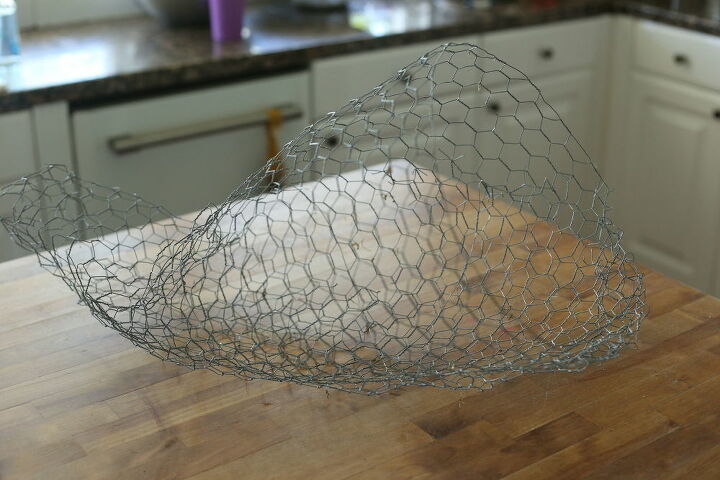
Here is an extra shot of my cornucopia frame before I wrapped it with masking tape. The chicken wire was surprisingly easy to shape and mold.
Step 4: Line the inside of the cornucopia with burlap. Again, just use hot glue to attach the burlap. I simply cut a square of burlap and folded it into a triangle shape. It is fine if sags a bit.
For the opening I used two thicker braids to frame the mouth of the cornucopia. One thick braid on the outside, and one on the inside to hide the edge of the burlap. I squeezed them together with hot glue.

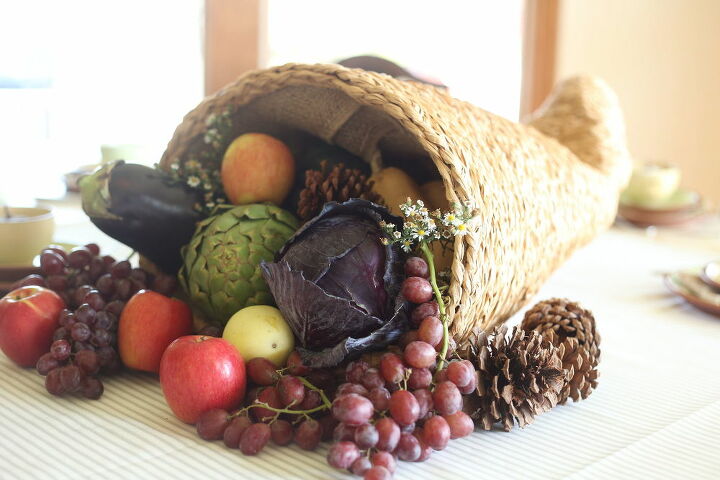
Step 5: Stuff with fresh produce, nuts, or pine cones, and enjoy your beautiful Thanksgiving centerpiece!
Full tutorial and more pictures can be found on my blog The Everyday Farmhouse.
Resources for this project:
See all materials


Comments
Join the conversation
-
Great job!!!
-
This looks like the real deal.......great job!!


Frequently asked questions
Have a question about this project?