


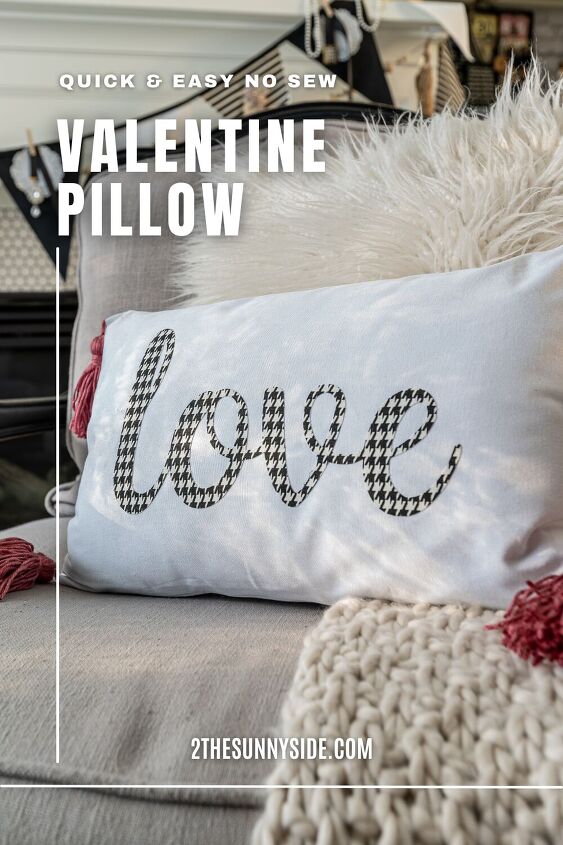
How to Make a No Sew Valentine Pillow Cover
One of my favorite ways to quickly add seasonal decor to my home is with pillow covers.
With all the pillow covers we’ve made and collected over the years, would you believe we don’t have any Valentine pillow covers?
Well, I need to do something about that!
So, we pulled out our fabric scraps and came up with 3 different designs.
Each is quick and easy to make.
In fact in less than 30 minutes you can have a fun Valentine pillow cover.
I think they are perfect for decorating your living room for Valentine’s Day.
In this post
- Valentine Pillow Supplies
- How to Make a No Sew Valentine Pillow
- Prepare Design
- Prepare Fabric
- Cut Design for Valentine Pillow
- Add Design to Valentine Pillow
- How to Make A Tassel
- Attach Tassel to Valentine Pillow
- More Pillow Inspiration
- Shop Valentine Pillows
Valentine Pillow Supplies
You’ll just need a few supplies, that you may already have on hand.
- fabric of choice
- Wonder Under
- pillow cover
You’ll also need a few tools.
- fabric scissors
- iron
- Silhouette or Cricut machine (optional)
This post contains affiliate links for your convenience. As an Amazon Affiliate Associate I earn from qualifying purchases never at any additional cost to you. See our disclosure for details.
How to Make a No Sew Valentine Pillow
Prepare Design
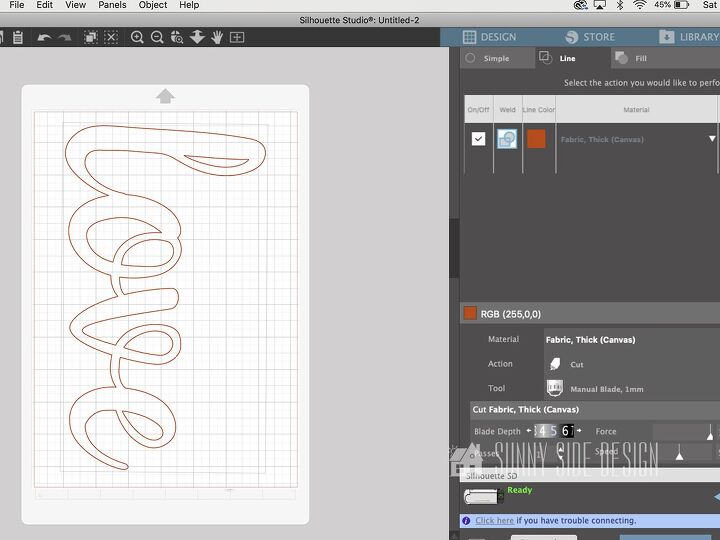
For our Valentine pillows we cut our designs with a Silhouette machine.
This is not necessary however.
You can trace a design onto your fabric and cut it out with scissors.
All of the rest of the steps for making a no sew Valentine pillow are the same.
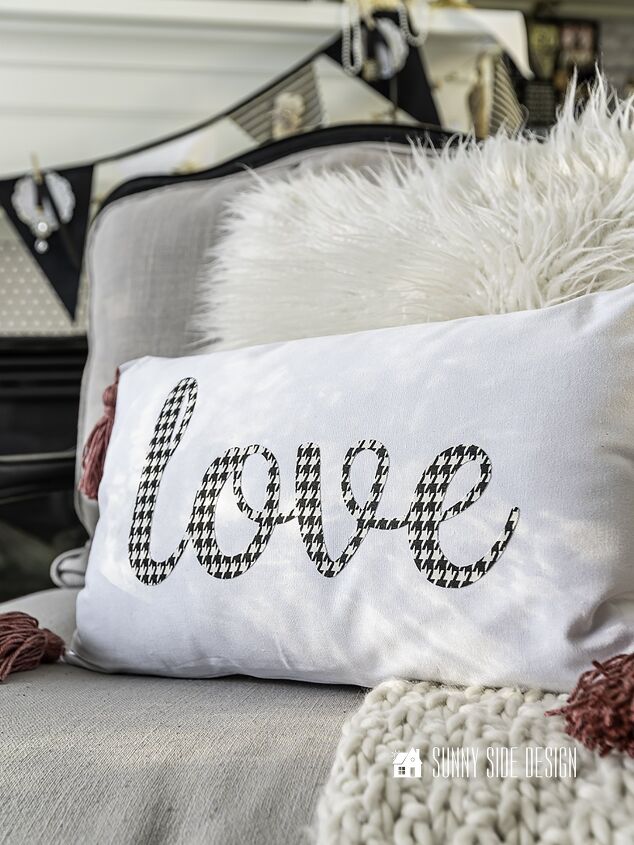
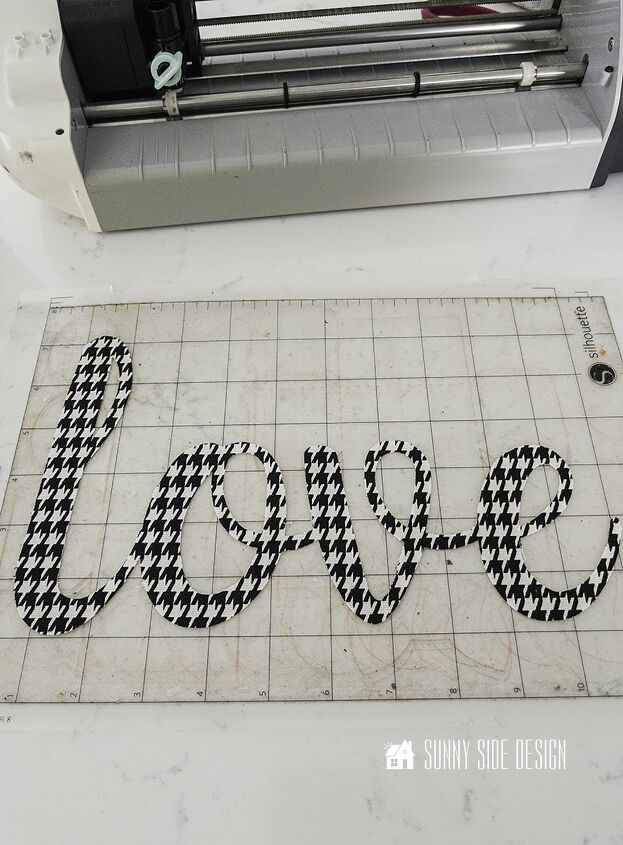
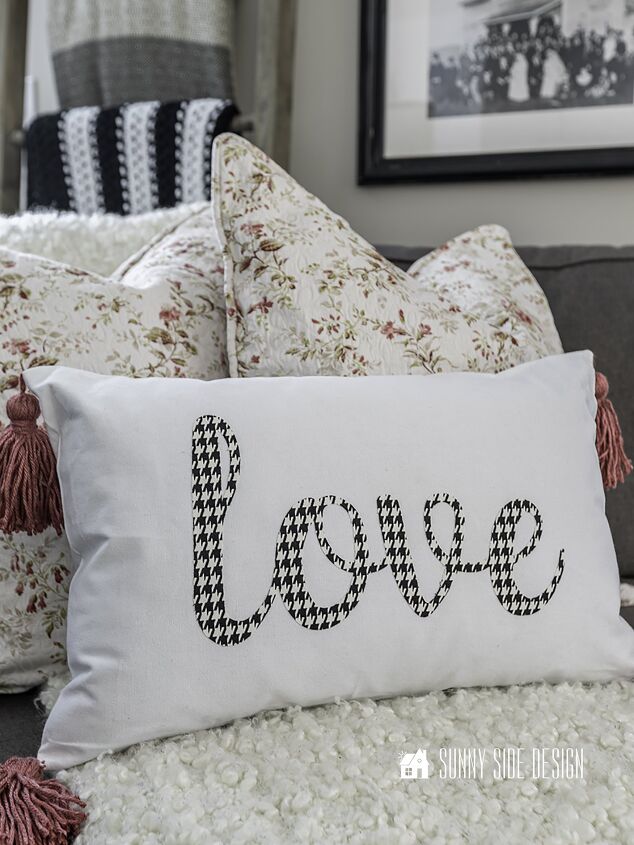
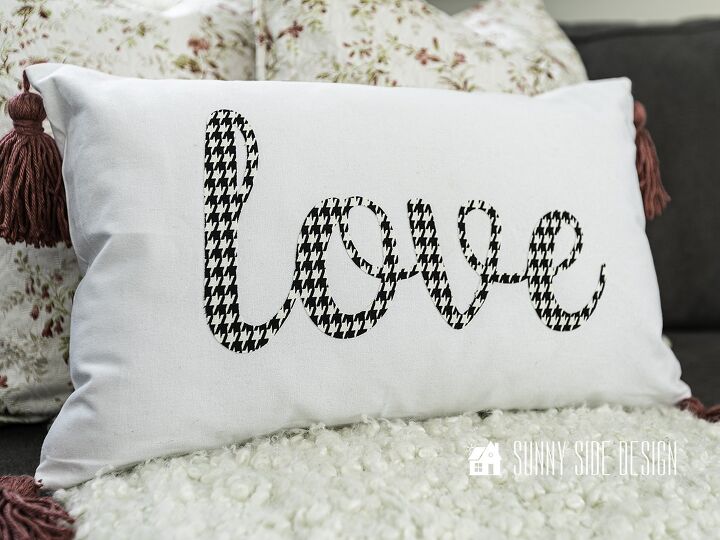
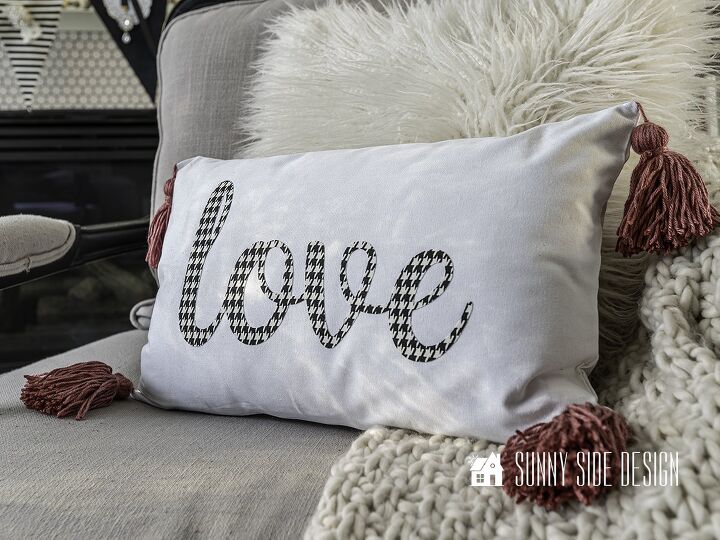
For my pillow I wanted to add text.
I found a remnant of hounds-tooth fabric in my stash and thought if would make a fun Valentine pillow.
I first created my design on my computer using the Silhouette software and enlarged it to fit my pillow.
Prepare Fabric

First, cut a piece of fabric and Wonder Under large enough for your design.
I allowed about an inch of extra fabric around my design size.
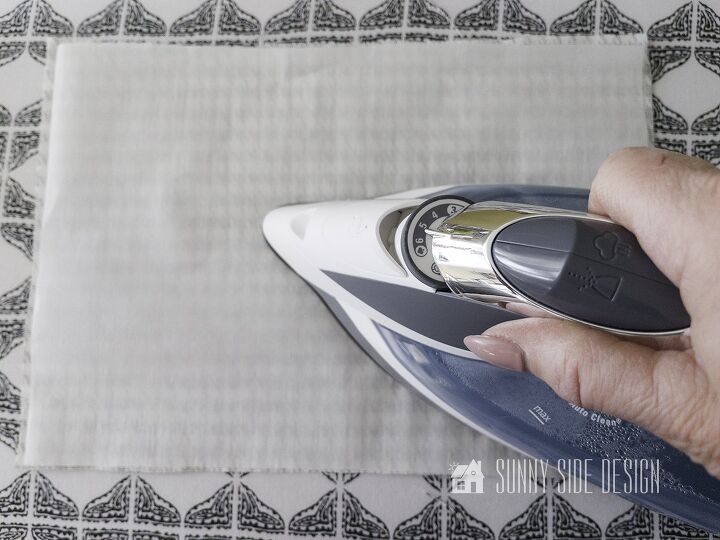
Next you’ll want to fuse the Wonder Under to the back side of your fabric.
Not only will the Wonder Under fuse your design to your pillow cover, but it’s also helpful in stiffening up your fabric when using a digital cutter.
Use a hot dry iron and fuse it to the fabric for about 8 seconds.
Keep the iron moving so you don’t scorch your fabric
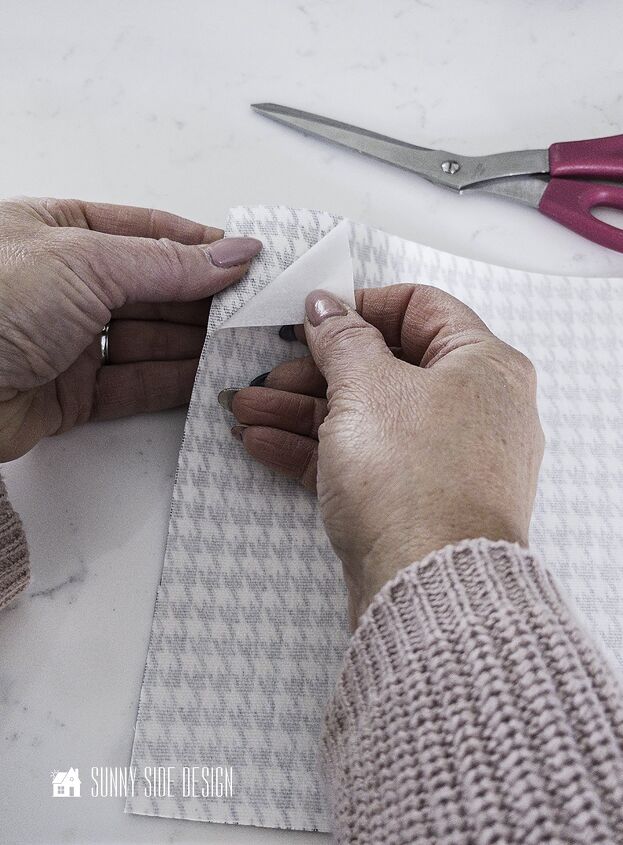
Once it’s cooled down, pull off the paper backing from the Wonder Under.
If you are hand cutting your design, you’ll want to keep the paper backing on and trace your design onto the paper.
Then cut out your design and remove the paper backing.
If you are doing a simple design like Steph’s X & heart design, you can easily just cut it by hand.
It may be more challenging with a word, but it’s doable too.
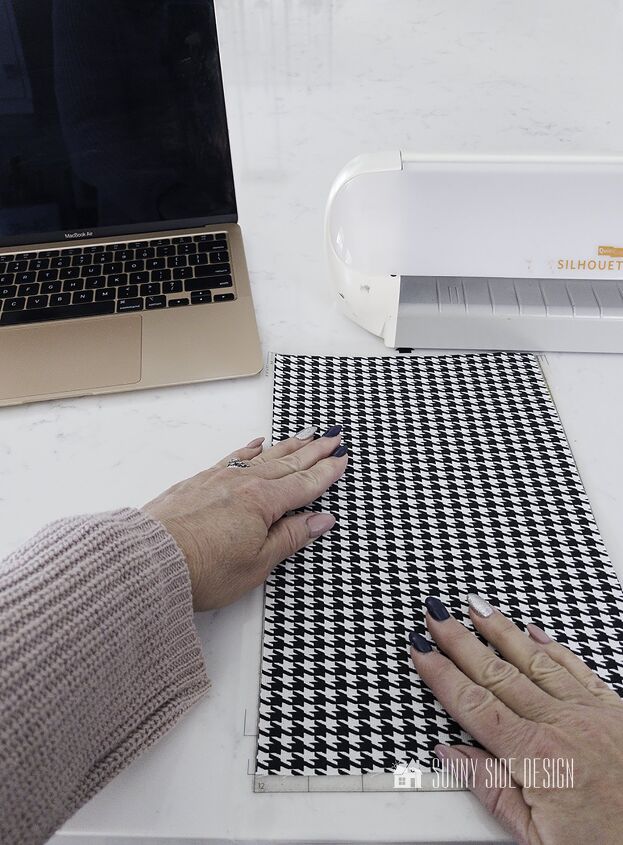
Then press the prepared fabric to your cutting mat with your fingers.
You’ll want to make sure it’s stuck down really well.
Cut Design for Valentine Pillow
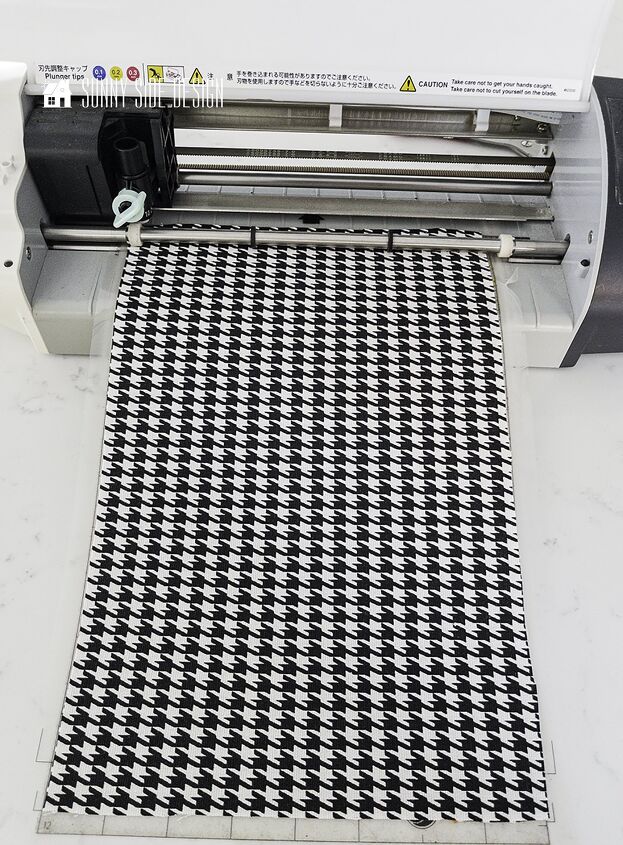
Once the fabric is adhered well to the cut mat, place it into the digital cutter.
You’ll want to choose a fabric blade, or at least a blade that you only use for fabric when cutting fabric with a digital cutter.
Just like you only use your fabric scissors on fabric.
If you’re enjoying this post, Pin It and save it for later.
Sharing is caring!
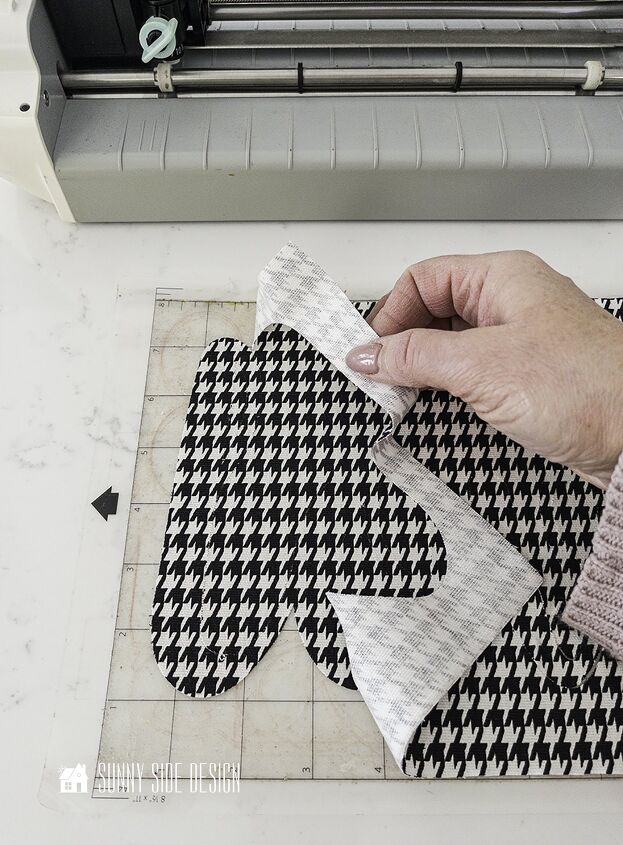
Once your design is cut, weed by removing the excess fabric.
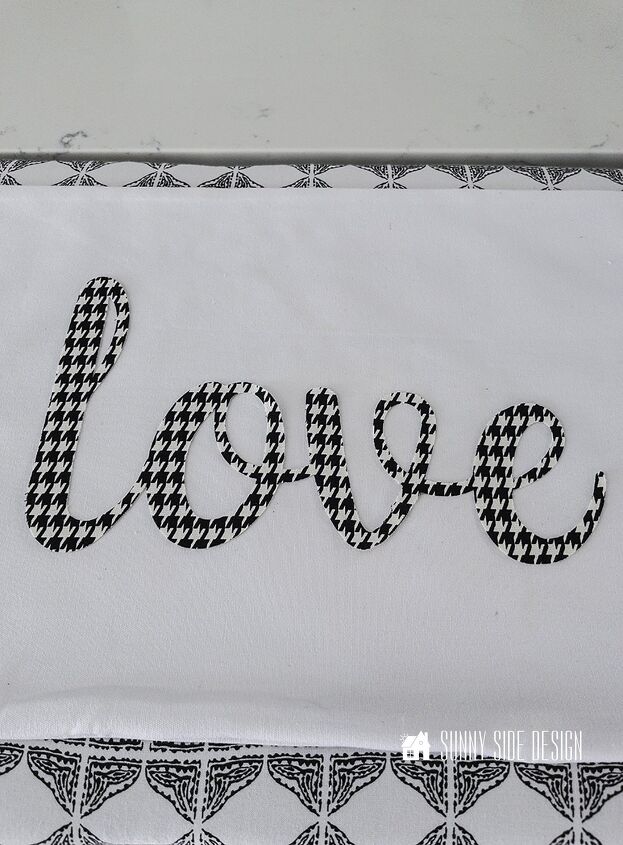
Add Design to Valentine Pillow
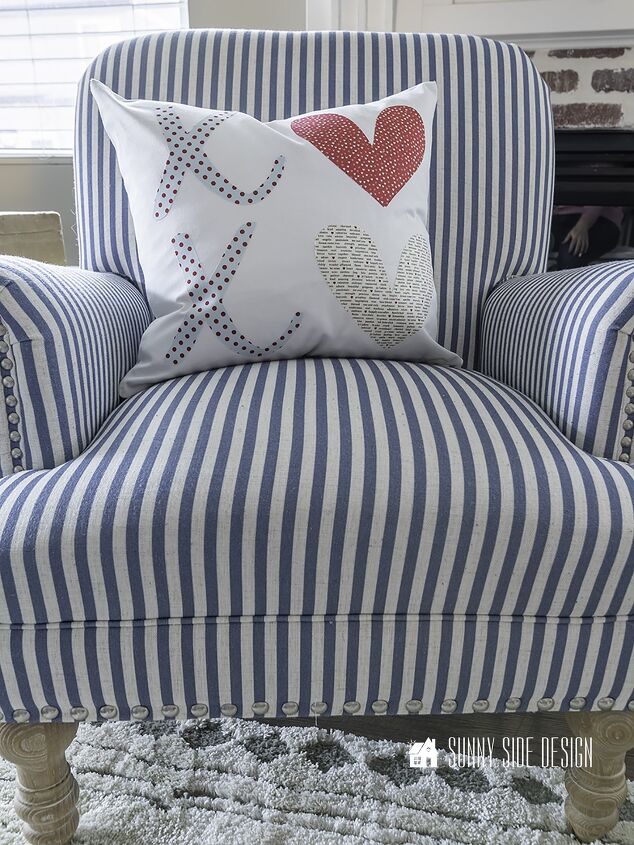
We chose to use plain white pillow covers we purchased on Amazon.
I’ll link the pillow covers we used.
They are well made and really inexpensive. I don’t think you can buy fabric and a zipper for the cost of these pillow covers.
Now you are ready to center your Valentine design on the pillow cover.
Use a measuring tape to make sure it is centered.
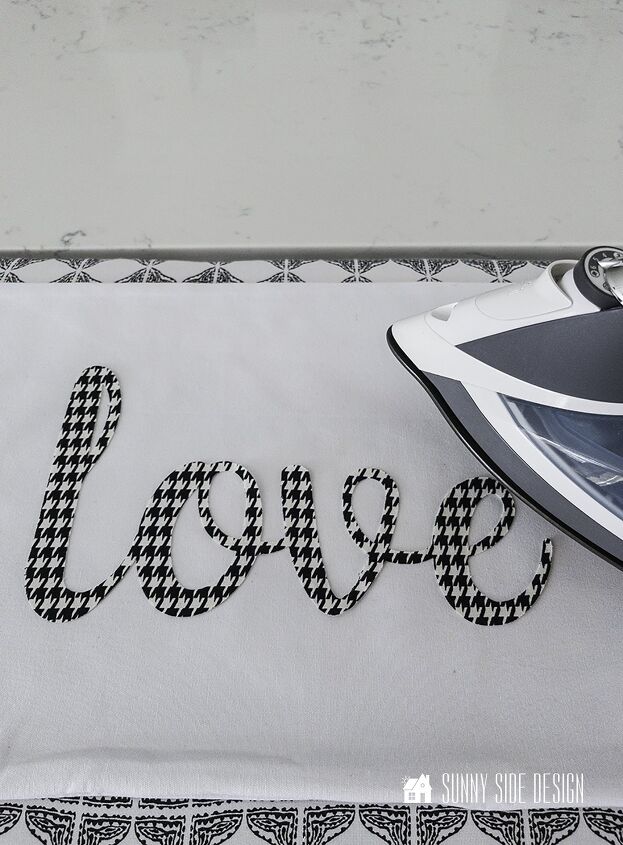
Once you have the Valentine design positioned on the pillow cover, press it with a hot iron.
For this portion you may use steam in your iron if you’d like.
Press again for about 8-10 seconds, keeping the iron moving across the design.
Let’s stay connected! Follow us on social media!
How to Make A Tassel
Once I had my Valentine design on my pillow, I decided it would be fun to add tassels to each corner of the pillow.
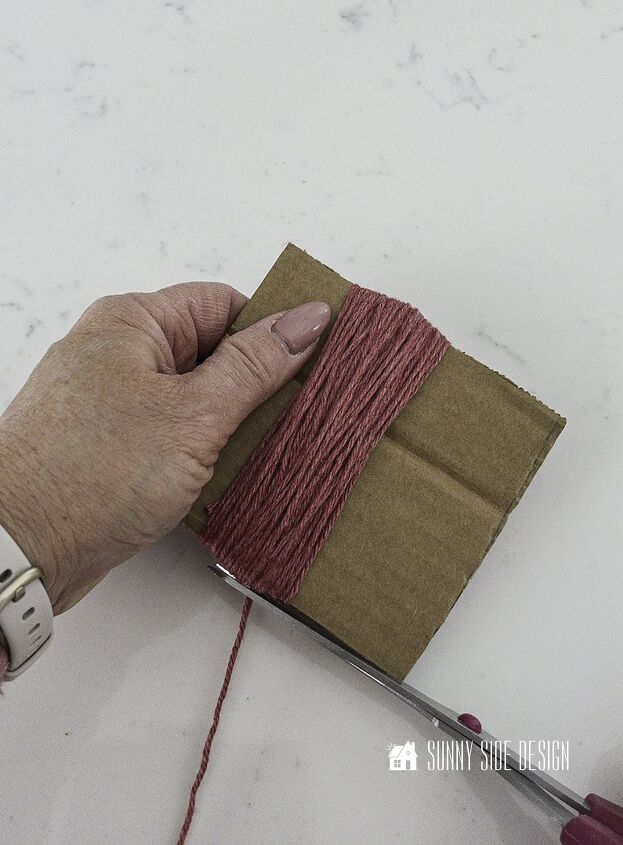
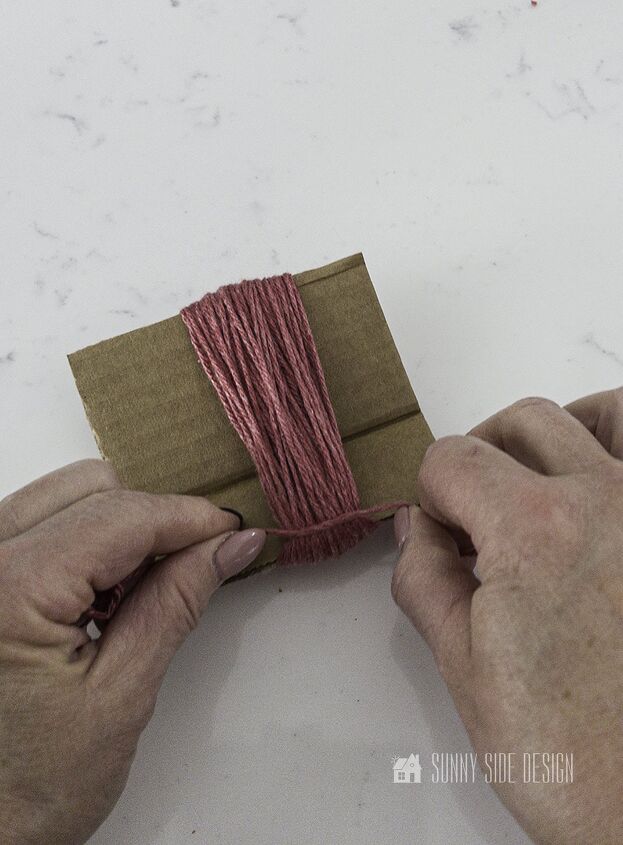
To do this, cut a piece of cardboard the length you’d like your tassel to be.
Then wrap the yarn around to the desired thickness.
I wrapped mine around 100 times.
Finally cut the yarn.
Then cut another piece of yarn about 12″ x 18″ in length.
Tie it in a square knot at the top of the tassel and remove it from the cardboard.
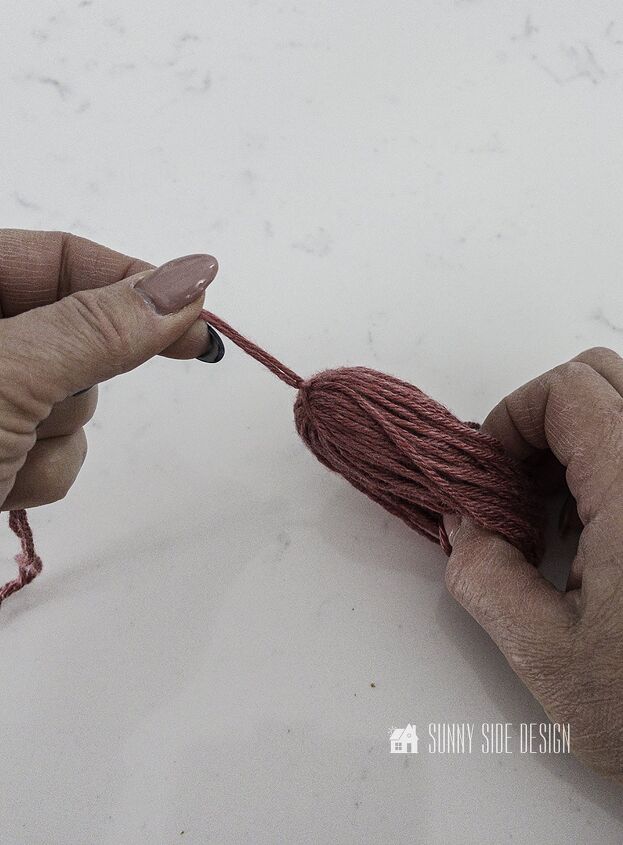
Now pull the piece you just tied away from the wrapped yarn.
You’ll use this piece to secure the tassel to the pillow corners.
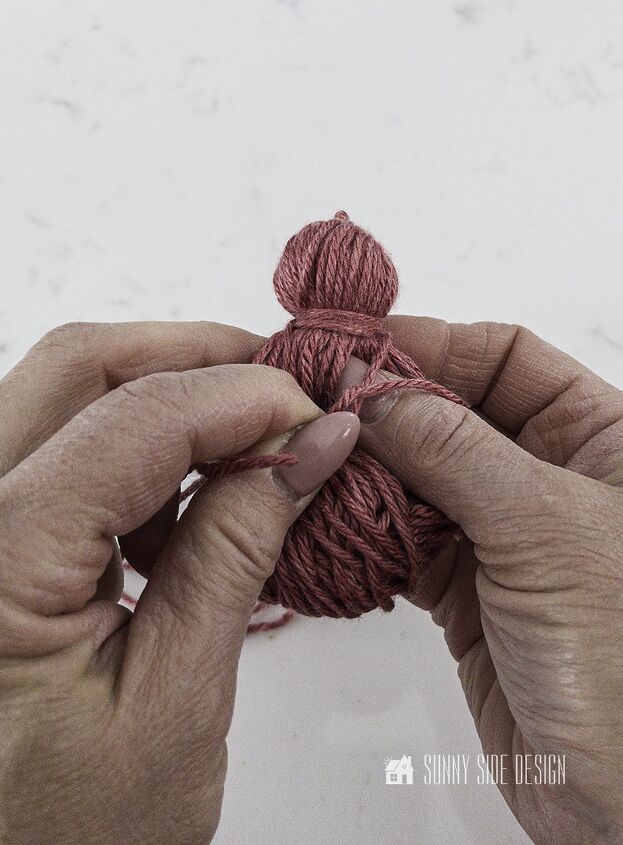
Finally cut another piece of yarn about 12″ long and wrap it around the tassel about 1″ from the tied end.
Tie this piece into a square knot.
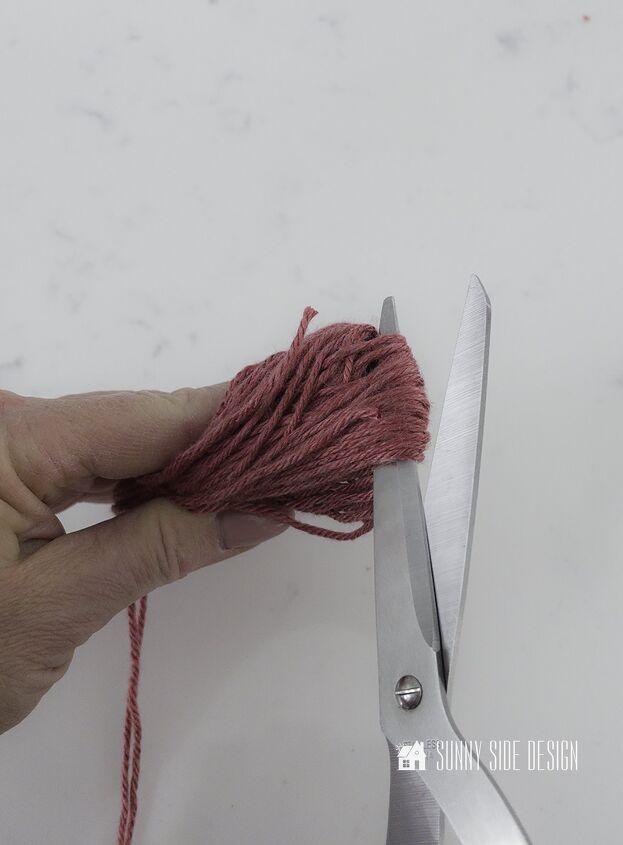
Now trim the looped area of the tassel.
Once all of the loops are cut, trim as necessary to make it even.
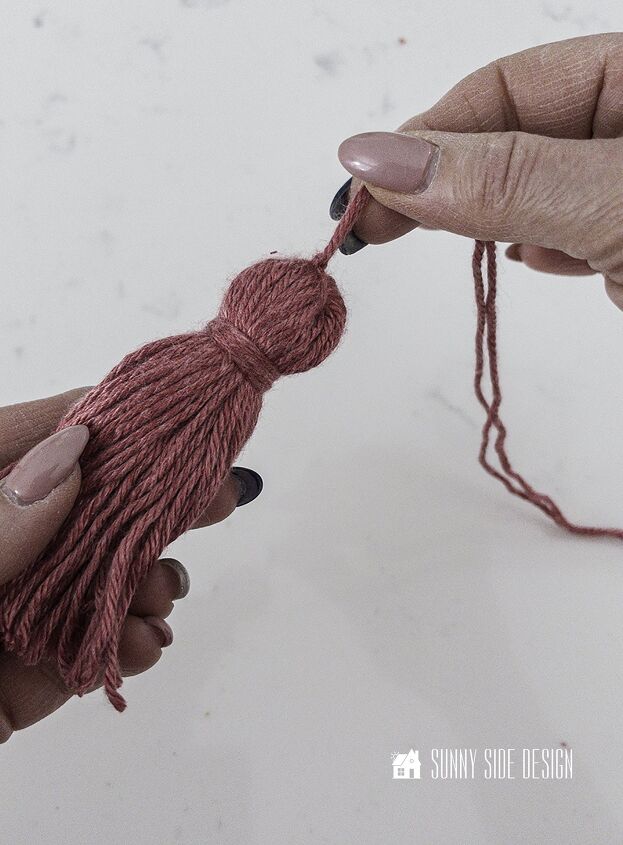
Here’s the finished tassel.
Attach Tassel to Valentine Pillow
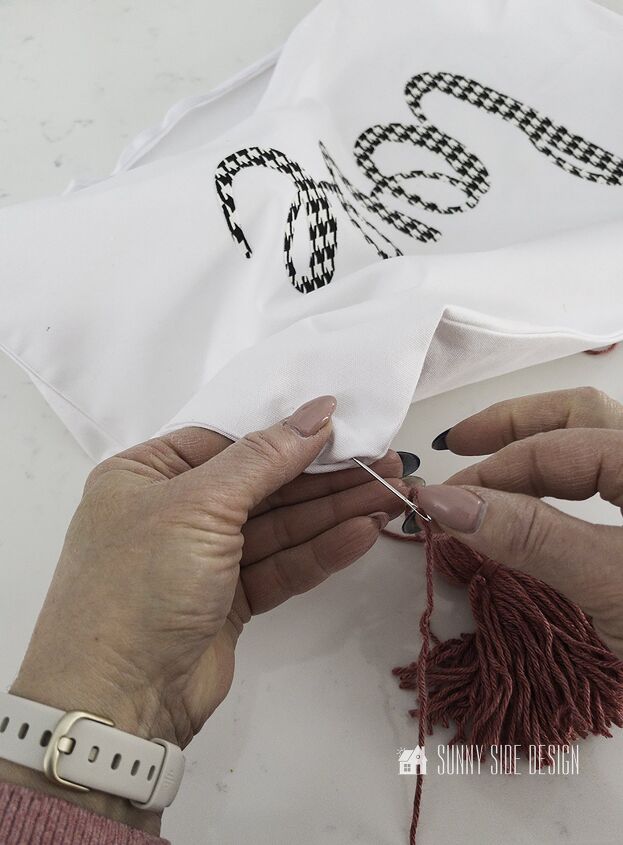
Now it’s time to attach the tassel to the Valentine pillow.
Thread one end of the yarn through a large eyed needle.
And from the right side of the fabric push the needle into the corner of the pillow cover.
Then repeat with the other length of yarn.
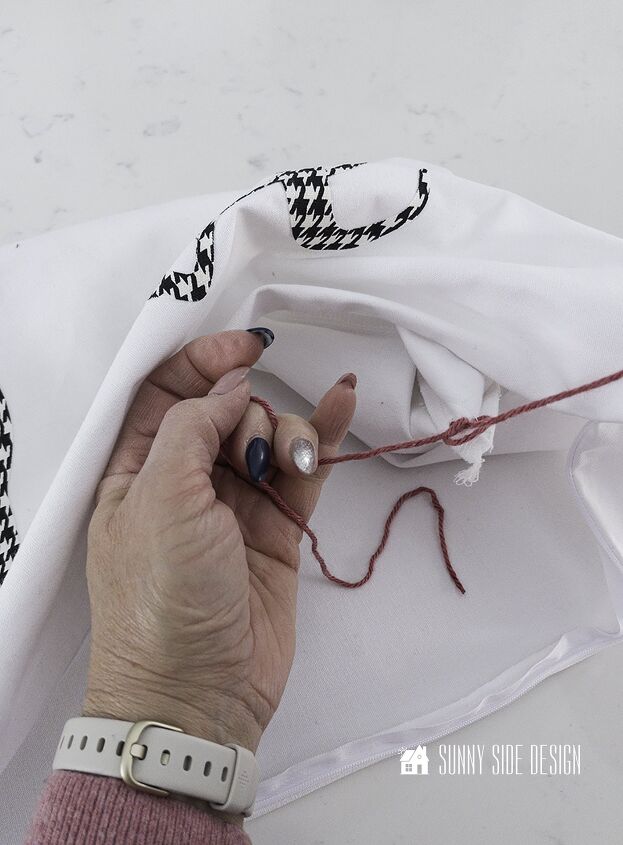
Knot off on the inside of the pillow cover and trim the yarn.
Repeat for each corner of the pillow.
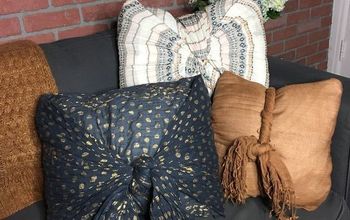
More Pillow Inspiration
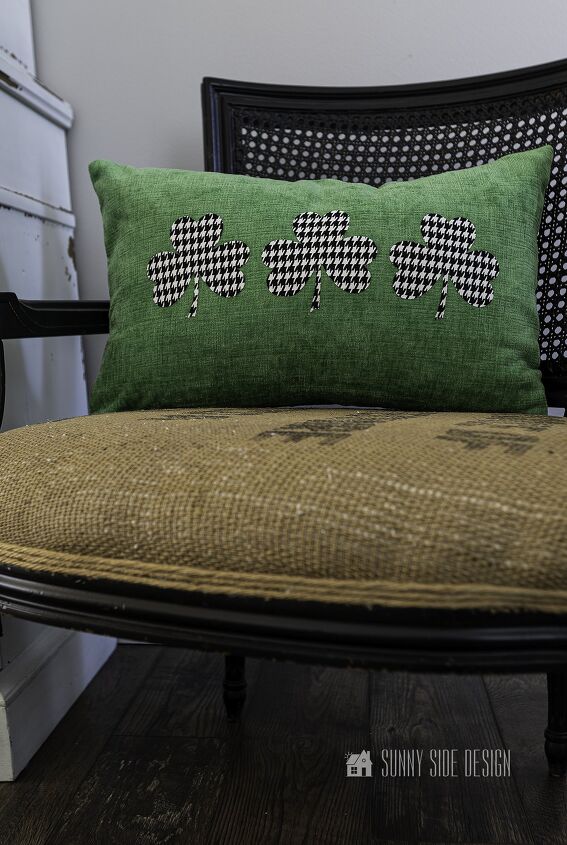
While making the Valentine pillow, I was inspired to make one more pillow for St. Patrick’s Day.
The black and white hounds-tooth print on the green fabric is perfect for this holiday.
Are you enjoying this post? Pin it and save it for later.
Sharing is caring!
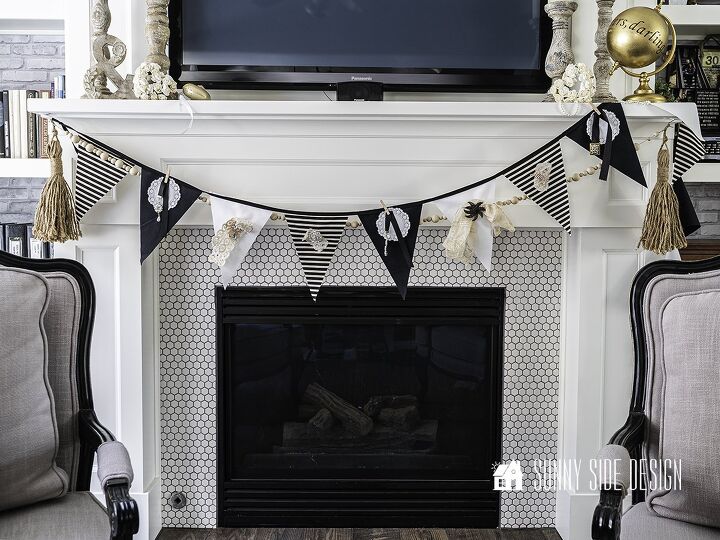
I love the way my new pillow coordinates with my neutral Valentine garland on the mantel.
More Valentine projects can be found on our website!
Would you believe that they are all less then $10 per pillow cover?
Thanks for spending a little time with us today.
We hope you found a little inspiration here today.
Are you anxious to make your own no sew Valentine pillow cover?
What design will you add to your pillow cover?
Please share your thoughts and questions with us.
We love to hear from you!
If you’re new here, WELCOME! We love having new readers and friends!
You can learn more about us here.
Let’s stay connected!
Subscribe to our free newsletter so you don’t miss any inspiration for your home.
Please PIN and save for later, and share with your friends!
Sharing helps grow our following!
Thanks for stopping by and as always here at Sunny Side Design…
WE HOPE TO BRING YOUR HOME TO THE SUNNY SIDE OF THE STREET.
Be sure to follow us on Pinterest for even more home decor and DIY ideas.
To see what we are working on before it’s on our blog, follow us on Instagram.
You will also find our video tutorials on our YouTube channel.
Our Latest Posts . . .
How to Organize Toys in Three Simple Steps
How to Make a No Sew Valentine Pillow Cover
How to Make a Simple Neutral Valentine Garland

30+ Easy DIY Valentine’s Day Decoration Ideas


Frequently asked questions
Have a question about this project?