


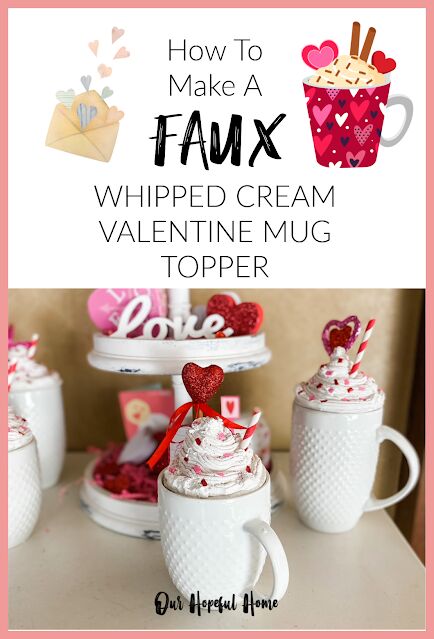
How To Make Faux Whipped Cream Valentine Mug Toppers
Today I'm sharing how to make a faux whipped cream Valentine mug topper.

I'm not known for creating big Valentine decor displays. Frankly, I could skip them altogether. But when I saw this awesome DIY faux whipped cream mug topper craft on social media around Christmas time I absolutely fell in love with it. While I was too busy to try it then, I did have some time to do it for Valentine's Day, so here we go. . . . . .
Supplies For Making Faux Whipped Cream Valentine Mug Topper
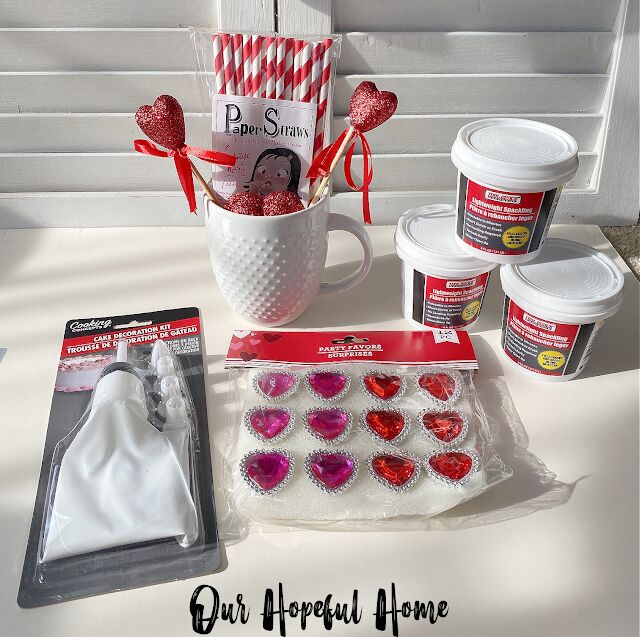
(Photo not representative of all supplies listed below.)
1. mug(s)
2. thick white foam board (needs to be sturdy)
3 lightweight spackle
4. aluminum foil (optional)
5. piping bags and tips set
6. colorful drinking straws
7. small Valentine plastic hearts
8. Valentine heart picks and/or cupcake toppers
9. wax paper
10. colored fine glitter
11. 3 inch white styrofoam balls (optional)
12. white acrylic paint (and/or any other color paint you prefer)
13. non-adhesive glitter foam sheets in assorted colors
14. toilet paper or paper towel roll, cut to fit (optional)
15. scissors
16. tweezers
17. masking tape (optional)
18. disposable mixing bowl(s)
19. disposable spoons for mixing
How To Make Faux Whipped Cream Valentine Mug Topper
1. Place mug face down onto cardboard. Trace around the outside of the mug.
2. Cut out your circle.
NOTE: If you are planning to make more than one topper, be sure to cut out ALL your cardboard circles in advance. You don't want the prepared spackle mixture to dry out while you go back and cut out more circles:)
You also need to have all your decorations prepared in advance as well. For example, you can cut down all your straws and picks to size, as well as make your fake sprinkles so they'll be ready to toss onto each topper as you make them.
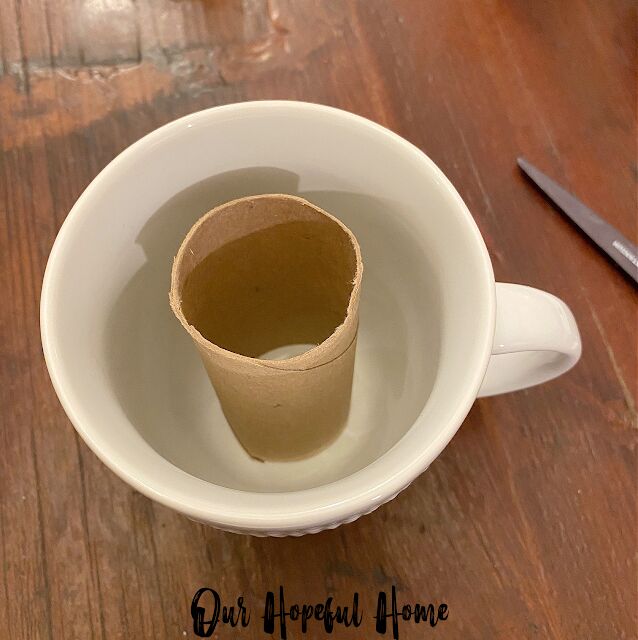
3. (OPTIONAL) Place toilet paper roll, or cut-down-to-size paper towel roll, into the mug as a placeholder for the whipped cream topper. You want the top of the paper roll to reach just under the inside rim of the mug. (These come in handy if you make the cardboard circle a wee bit too small so that it almost falls into the mug. This way you can hopefully prop it up to make it more even with the mug's rim rather than have to cut out another circle.)
NOTE: I used a paper roll inside the mug for the first topper I made, but didn't use one for the next three toppers.

4. Place your circle of cardboard on top of the mug to see how it all fits together. Make sure the topper sits flat and straight across the opening of your mug. If necessary, trim the circle so that it fits comfortably just inside the rim of the mug on top of the paper roll place holder (if you're using one.)
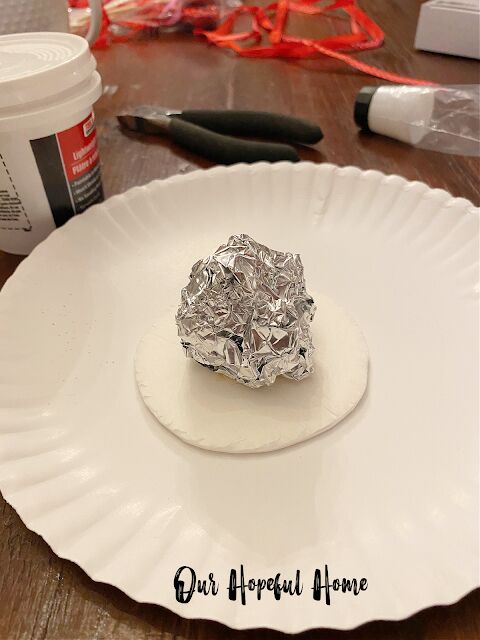
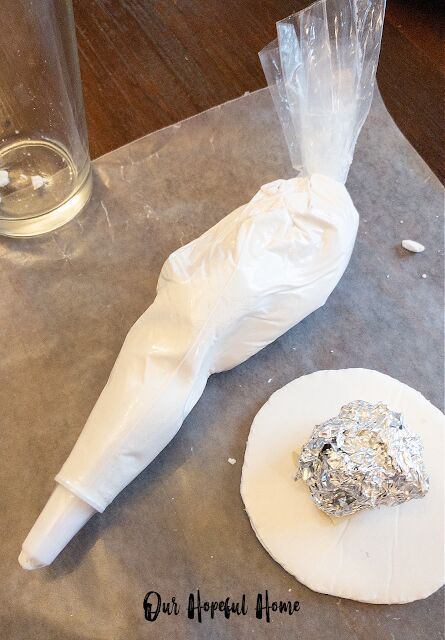
5. FOIL BALL METHOD: When you're happy with the shape and size of your cardboard circle, make an aluminum foil ball that will fit in the middle of your circle. I used a 4" x 5" piece of foil. You want to scrunch it up so that it resembles the shape of a bee hive. I secured it to the cardboard with masking tape, but you can always glue it to the circle before you start piping the spackle around it.
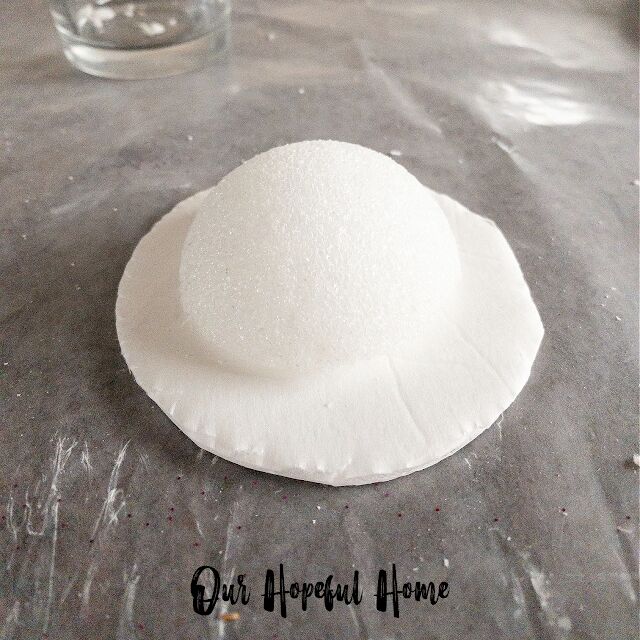
ALTERNATE METHOD: Instead of using foil you can use a styrofoam ball cut in half. (I used a 3 inch ball.) Place the flat side of the halved ball in the middle of the cardboard circle and secure with masking tape or glue.
Regardless of the method you choose, once the topper base is completed, place it on top of a sheet of waxed paper to use as your work surface.
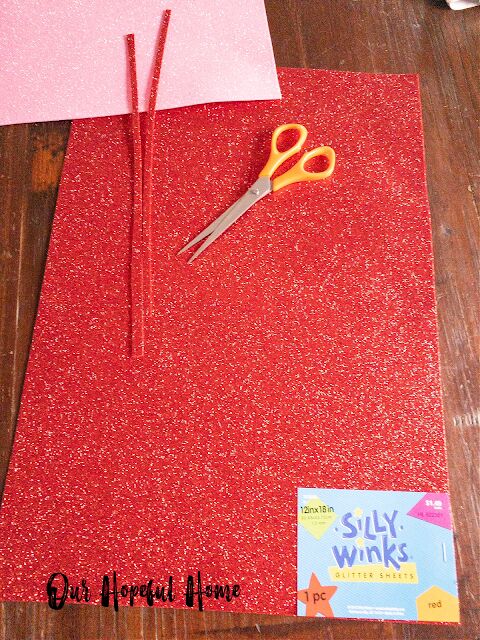
6. Make your fake sprinkles. I did this by cutting two long, very thin strips from a sparkly red foam square.
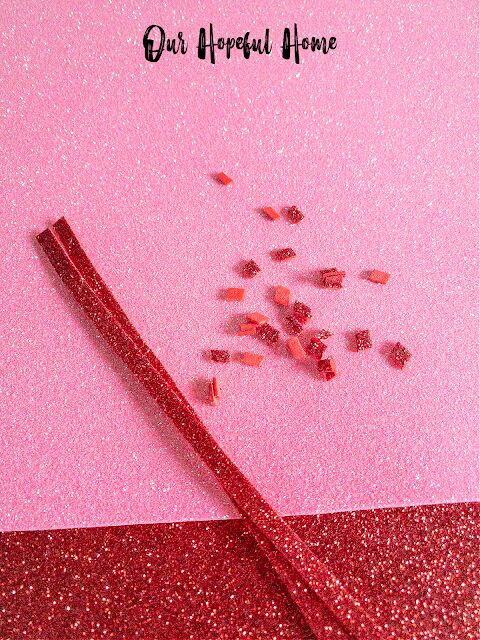
Then I cut those strips into even tinier "strips" to resemble real sprinkles.
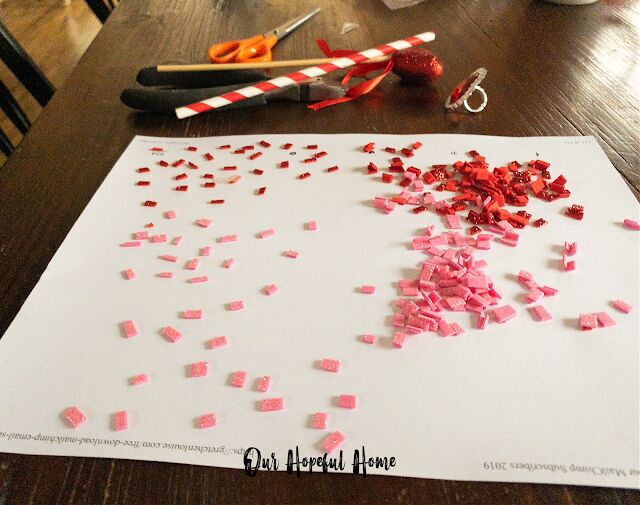
Then I repeated the process with a sparkly pink foam sheet.

7. Pour your spackle into a disposable bowl and mix in 1 tablespoon of acrylic paint (white or any other color you prefer) per every 6 ounces or so of spackle used. I just stirred the concoction with a spoon. Then I added a small amount of water to the spackle mix.
While I didn't measure it exactly, I can tell you that I turned on the kitchen faucet so that it was barely running (with warm water) and let it run into the bowl for 6 seconds. Scientific, I know. Then I stirred some more until I felt the mixture was smooth and thin enough to push through a pastry tip like real icing would.
NOTE: The main goal is to make sure the spackle will be thin and creamy enough to pipe through the pastry tip easily. Without the added paint and water my spackle was too thick and I was unable to force it through the tip despite my best efforts. If you think it's too runny you can always add more spackle.
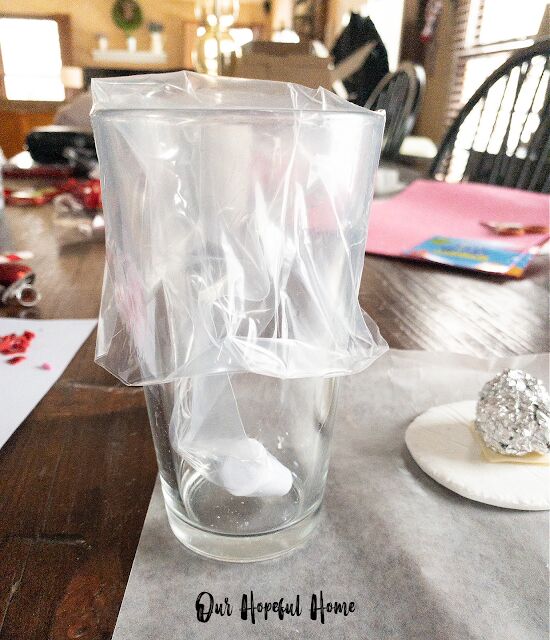
8. Place the icing tip (most people I've seen do this used a 1M tip -- I didn't have a 1M tip, so mine had a bigger opening than that) into the cut-off end of your pastry bag, then place the bag into a tall glass to make it easier to fill with the spackle. Using a spoon, transfer the spackle mix from the bowl into the pastry bag.
9. Gently massage the spackle-filled bag and try to smooth the mixture down toward the tip. Then gently twist the top of the bag closed and you're ready to start piping the spackle out.
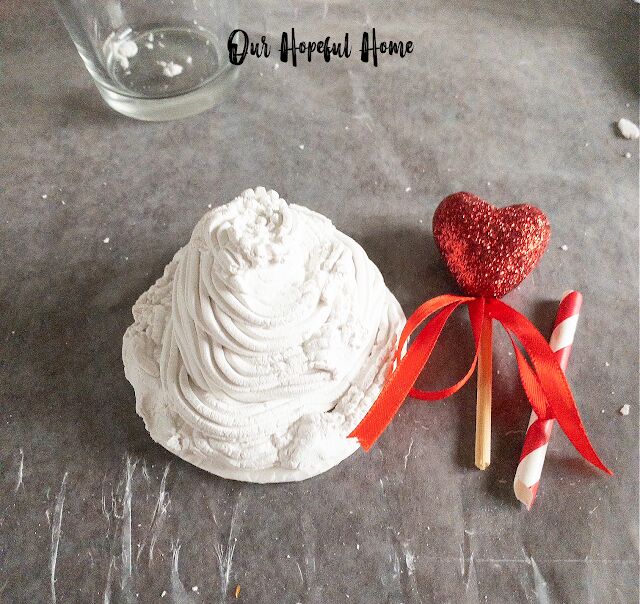
10. Gently squeeze out the spackle onto the cardboard base, starting at the outermost edges of the cardboard and incrementally working your way around in concentric circles and upwards, around the foil ball (or styrofoam), just like you would if you were decorating a mug of hot chocolate with whipped cream from a can!
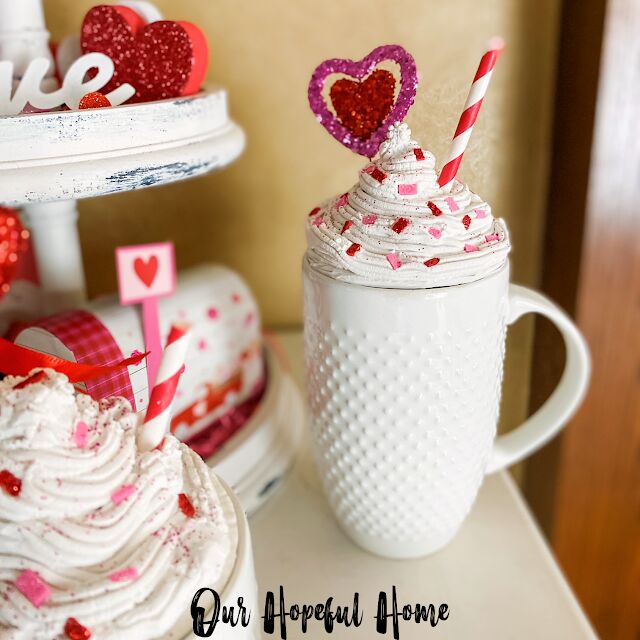
11. Before the spackle starts to dry (you have a bit of time here) be sure to add some colorful fake sprinkles, a straw (cut to size), fine colored glitter and any other fun Valentine decorations your heart desires.
12. After you're satisfied that the topper has completely dried (best to wait 24 hours), place your faux whipped cream topper onto the mug! Some people actually spackle the cardboard to the mug, or hot glue it on. But I love my mugs and want to be able to use them again for other things, like drinking out of them! Instead, I used glue dots to secure the topper. That way I can take the cardboard and "whipped cream" off of my mugs after Valentine's Day.
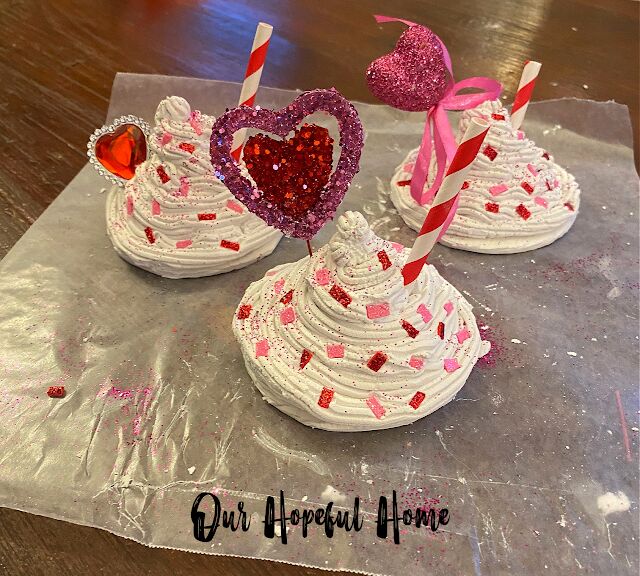
Here are three of the toppers drying on wax paper.

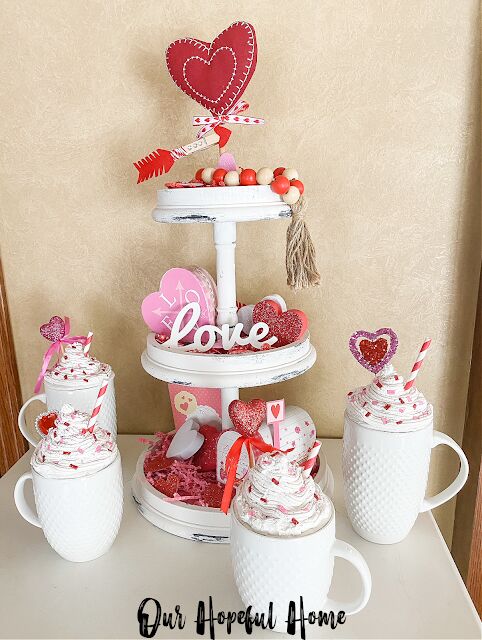
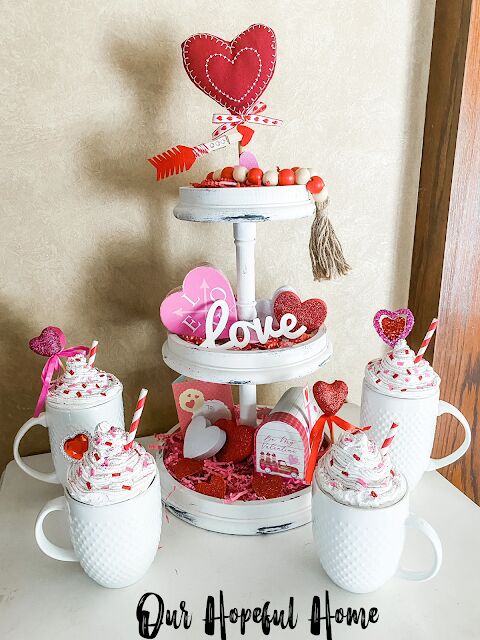
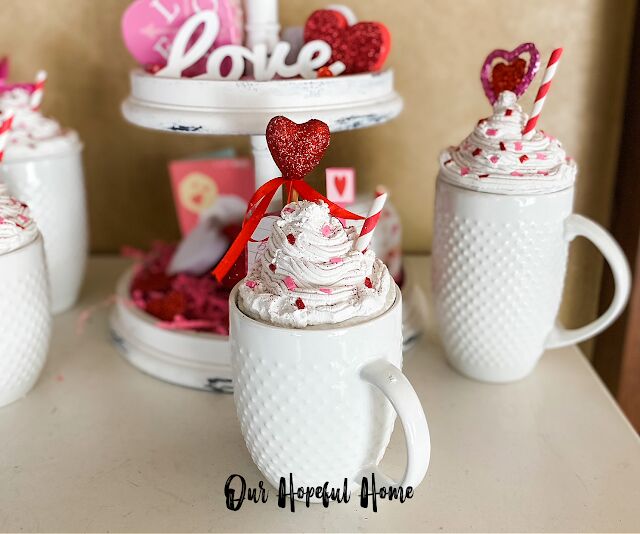
And voila! I've displayed all four of them in front of my three tier tray that I decorated for Valentine's Day. I'll share how I put that together in a separate post!
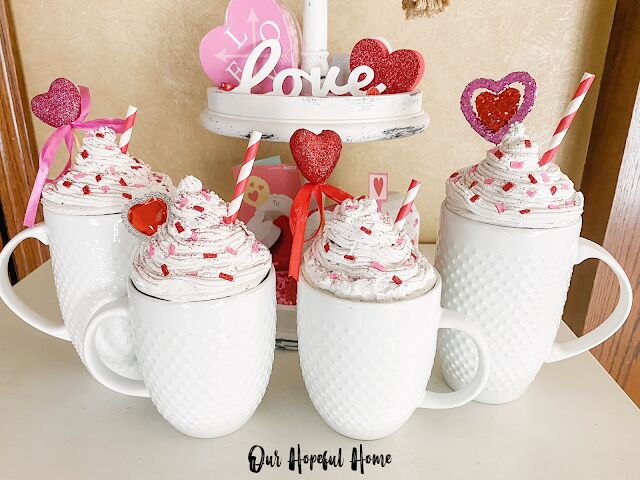
Some toppers are taller than others and they're all shaped a bit differently because that's how it would be in real life. So try not to sweat the small stuff, they don't have to be perfect! Decorations include striped paper straws, pink and red glitter heart picks from Dollar Tree, DIY sprinkles and fine glitter "sugar."
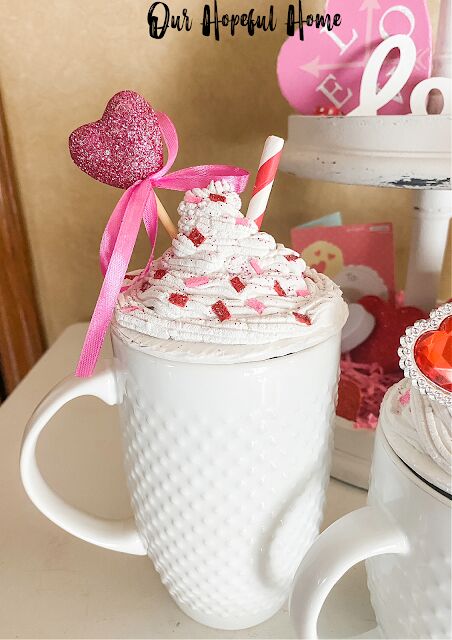
The fine pink glitter really added a nice touch to these toppers, although the photos don't do it justice.
Even though it was not as easy as I thought it would be, I'm glad I made them -- and just seeing them displayed like this makes me smile.
I learned a lot as I stumbled my way through making this craft. Overall, I'm really happy with how cute they look and I think I'm going to be making more this Christmas!
I think they would make great gifts, too, filled with cocoa and marshmallows -- for both Valentine's Day and Christmas!
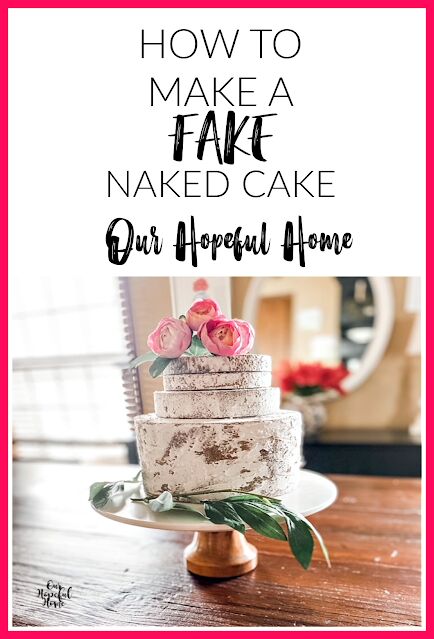
If you like these fake whipped cream Valentine mug toppers you might also enjoy How To Make A Fake Naked Cake. Now I'm definitely on the hunt for more faux food spackle projects!
Be sure to drop by my blog for the full post where I share added tips and tricks to help you with this faux whipped cream project!


![Paper Drinking Straws [200 Pack] 100% Biodegradable - Assorted Colors](https://m.media-amazon.com/images/I/51JJ-IgwsVL._SL75_.jpg?size=80x80&nocrop=1)


Comments
Join the conversation
-
Really nice!! And you explained it so well!! Ty!!
-
Thank you!


Frequently asked questions
Have a question about this project?