


Life-Size Skeleton Bartender for Halloween
I fell in love with a skeleton bartender prop I'd spotted at a retailer but the $500 price tag was out of my budget. So I found a thrift store sports coat and a $10 bag of bones to create my own. He even matches my decor!
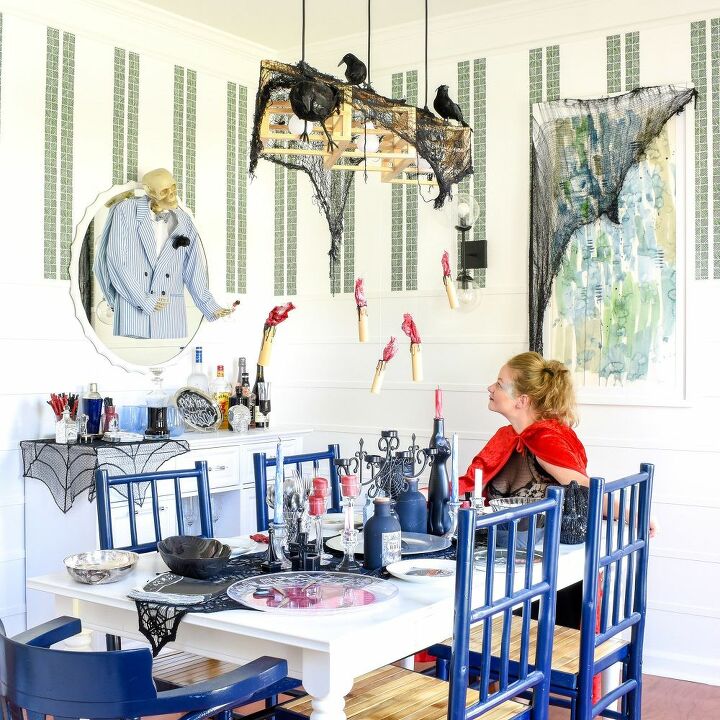
Coming in under $20, my life-size skeleton bartender makes the perfect backdrop for my Halloween party decor!
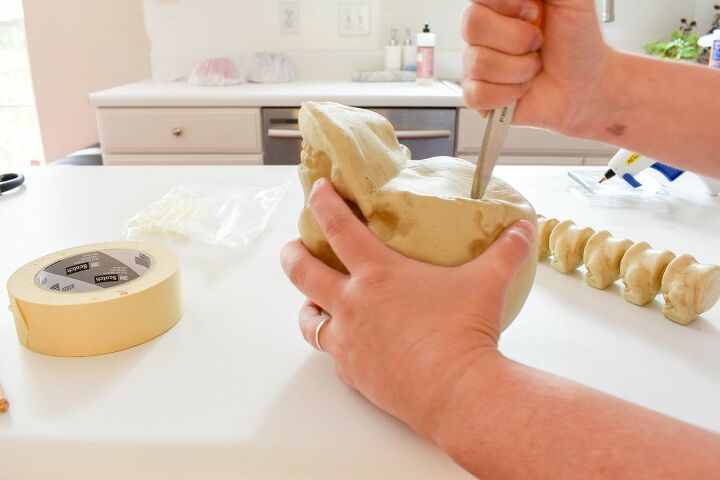
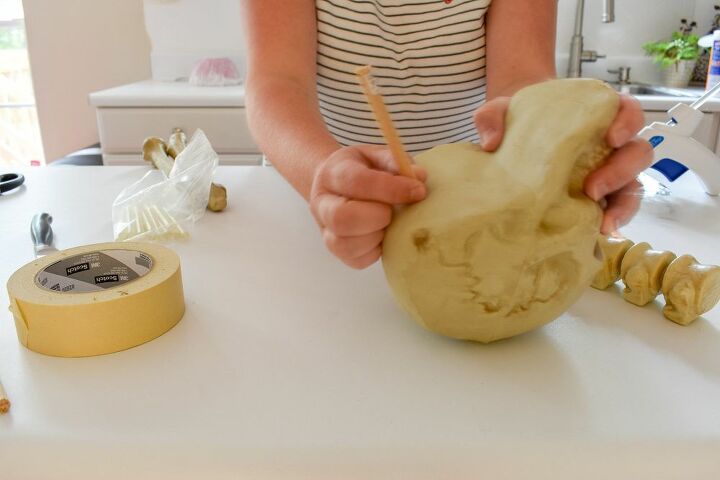
I started by piercing holes in the skull that came with my $10 bag of bones.
Then I used dowel rods and some metal wire to attach the body parts together, forming a base I'd later cover with a shirt and jacket.

Then I made hole in the end of the spine and joined to the skull’s dowel. I used hot glue to secure. Then I repeated these steps with two arms and hands.
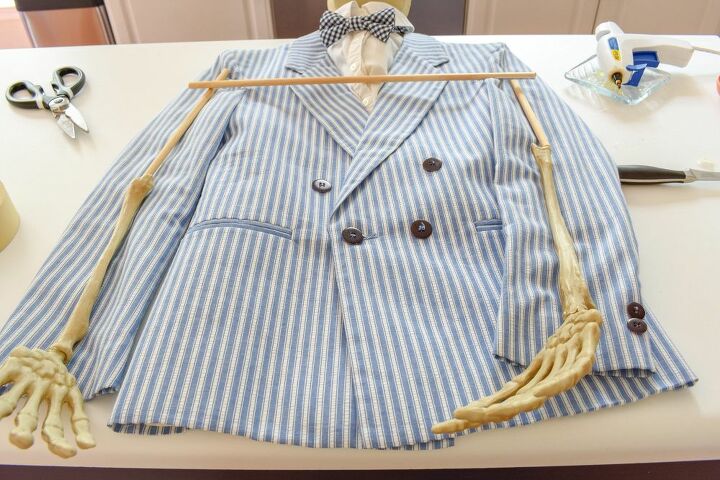
I laid the jacket and dress shirt out to make sure everything would fit once he was fully assembled. I found this jacket for $1 at the local thrift store and used an old dress shirt my daughter no longer fits. The bow tie was mine. It’s a long story. Whatever you use, make sure you have no intentions of ever wearing it again because there will likely be custom alterations required. Don’t worry. I just mean that you’re going to cut it to shreds.
Next, I laid out the skeleton pieces and trimmed the remaining dowel into three sections, one should be slightly longer than the other two.
You’re doing to lay these out to mark where your joints need to be. During this stage, trim any excessive dowel, if necessary, so that the entire stick fits within the clothing.
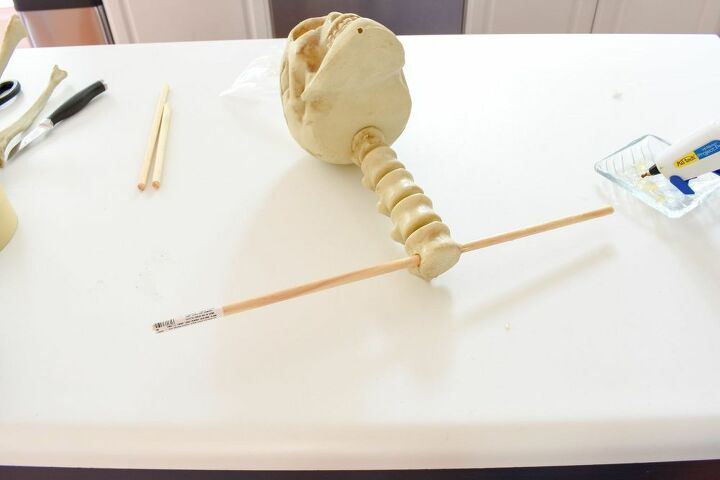
Next, make two small holes in the bottom of the spine bone to run the dowel through. Then secure with hot glue then wrap in masking tape.
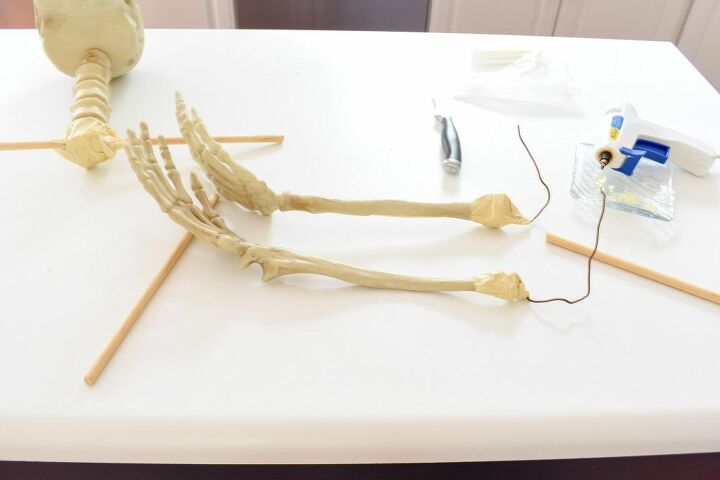
Next, trim two pieces of thick metal wire (or a metal hanger) to about 8” long. Bend at a 45 degree angle and insert inside the arm bone, leaving half exposed. Secure with hot glue and masking tape. Repeat with the second arm.
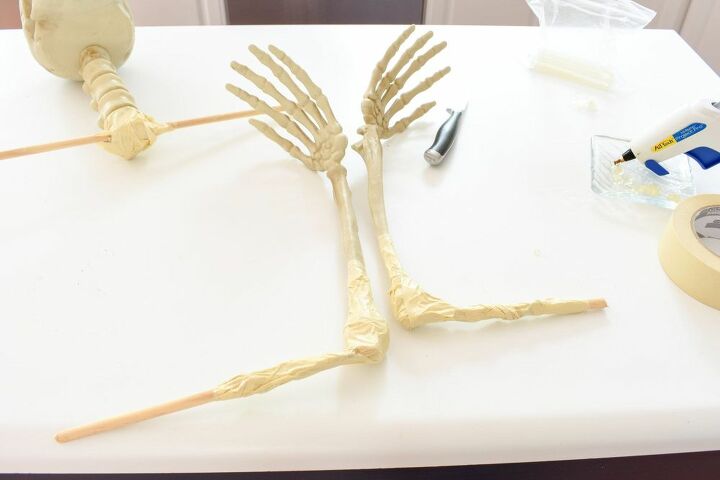
Add a bead of hot glue to one of the remaining dowels, then while still hot, begin wrapping the exposed wire around the dowel to secure at a 45 degree angle. Add more glue. Secure with more masking tape. Repeat with second arm.

Lay the jacket out and insert a strip of chicken wire (I actually used a scrap piece of a cabbie system we had laying around - either will work). Trim to fit, if necessary. Then begin attaching the neck by tying with string. Insert the arms through the jacket and repeat attachment steps.
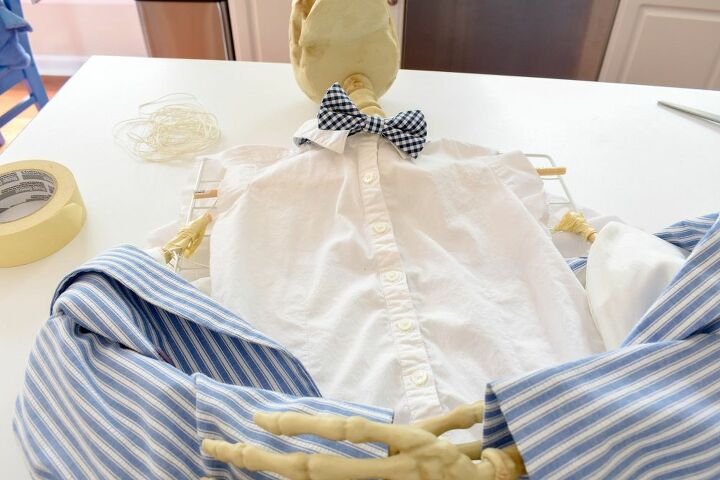
Finish dressing him.
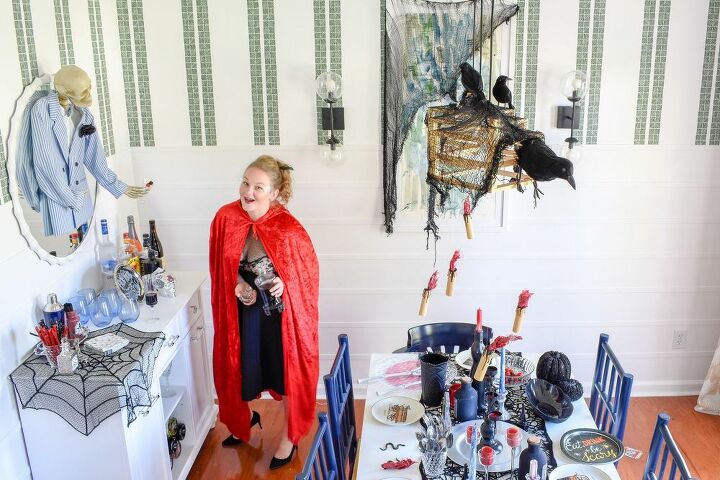
My skeleton bartender costs just a fraction of the original $500 price tag from the store and he's far more charming!
Resources for this project:
See all materials


Comments
Join the conversation
-
I adore your skeleton, bartender. I’m going to make one and call him, Bones. Very original huh. 😂 Halloween 🎃 is my favorite holiday of all. I also love what you did to your chandelier, with the bats. 🕸 🦇 🦇 🦇🕸


Frequently asked questions
Have a question about this project?